2018 MERCEDES-BENZ SL ROADSTER tire type
[x] Cancel search: tire typePage 21 of 322
Technical dataCapacities ...................................... 312
Information .................................... 310
Tires/wheels ................................. 308
Vehicle data ................................... 317
TELEAID
Call priority .................................... 251
Emergency call .............................. 249
General notes ................................ 248
MB info call button ........................2 51
Roadside Assistance button .......... 250
Self-test ......................................... 248
System .......................................... 248
Vehicle Health Check .................... 251
Telephone
Accepting a call (multifunction
steering wheel) .............................. 192
Authorizing a mobile phone (con-
necting) ......................................... 240
Connecting a mobile phone (gen-
eral information) ............................ 239
Display message ............................ 224
Menu (on-board computer) ............ 191
Number from the phone book ........1 92
Redialing ........................................ 192
Rejecting/ending a call ................. 192
see also Digital Operator's Man-
ual ..................................................2 36
Temperature
Coolant .......................................... 186
Coolant (on-board computer,
Mercedes-AMG vehicles) ...............1 97
Engine oil (on-board computer,
Mercedes-AMG vehicles) ...............1 97
Outside temperature ......................1 85
Setting (climate control) ................ 116
Transmission oil (on-board com-
puter, Mercedes-AMG vehicles) ..... 197
Timing (RACETIMER) ......................... 198
Tire pressure
Calling up (on-board computer) ..... 291
Checking manually ........................ 291
Display message ............................ 221
Maximum ....................................... 290
Not reached (TIREFIT) .................... 274
Notes ............................................. 289
Reached (TIREFIT) .......................... 274
Recommended ............................... 288 Tire pressure monitor
Checking the tire pressure elec-
tronically ........................................ 292
Function/notes .............................2 91
Genera
l notes ................................ 291
Important safety notes .................. 291
Radio type approval for the tire
pressure monitor ........................... 294
Restarting ...................................... 293
Warning lamp ................................. 235
Warning message .......................... 293
Tire-change tool kit ........................... 271
TIREFIT kit .......................................... 272
Important safety notes .................. 272
Storage location ............................ 270
Tire pressure not reached .............. 274
Tire pressure reached .................... 274
Tires
Aspect ratio (definition) ................. 303
Average weight of the vehicle
occupants (definition) .................... 302
Bar (definition) ............................... 302
Changing a wheel .......................... 303
Characteristics .............................. 301
Checking ........................................ 285
Curb weight (definition) ................. 303
Definition of terms ......................... 302
Direction of rotation ...................... 304
Display message ............................ 221
Distribution of the vehicle occu-
pants (definition) ............................ 303
DOT (Department of Transporta-
tion) (definition) ............................. 302
DOT, Tire Identification Number
(TIN) ............................................... 301
GAWR (Gross Axle Weight Rating)
(definition) ..................................... 302
GVW (Gross Vehicle Weight) (def-
inition) ........................................... 302
GVWR (Gross Vehicle Weight Rat-
ing) (definition) .............................. 302
Important safety notes .................. 285
Increased vehicle weight due to
optional equipment (definition) ...... 302
Information on driving .................... 285
Kilopascal (kPa) (definition) ........... 302
Labeling (overview) ........................ 298
Load bearing index (definition) ...... 303
Index19
Page 23 of 322
Turn signalsDisplay message ............................ 212
Switching on/off ........................... 107
Two-way radio
Frequencies ................................... 310
Installation ..................................... 310
Transmission output (maximum) .... 310
Type identification plate
see Vehicle identification plate
U
Umbrella holder ................................. 243
Unlocking
Emergency unlocking ....................... 80
From inside the vehicle (central
unlocking button) ............................. 79
Upshift indicator (on-board com-
puter, Mercedes-AMG vehicles) ....... 197
USB devices
Connecting to the Media Inter-
face ...............................................2 41
V
Vehicle
Correct use ...................................... 28
Data acquisition ............................... 29
Display message ............................ 222
Electronics ..................................... 310
Equipment ....................................... 25
Individual settings .......................... 194
Limited Warranty .............................2 9
Loading .......................................... 295
Locking (in an emergency) ............... 80
Locking (SmartKey) .......................... 73
Lowering ........................................ 308
Maintenance .................................... 26
Parking for a long period ................ 144
Pulling away ................................... 124
Raising ........................................... 305
Reporting problems ......................... 28
Securing from rolling away ............ 305
Tow-starting ................................... 280
Towing away .................................. 280
Transporting .................................. 282
Unlocking (in an emergency) ........... 80
Unlocking (SmartKey) ...................... 73
Vehicle data ................................... 317 Vehicle battery
see Battery (vehicle)
Vehicle data ....................................... 317
Vehicle dimensions ........................... 317
Vehicle emergency locking ................ 80
Vehicle identification number
see VIN
Vehicle identification plate .............. 311
Vehicle level
Active Body Control (ABC) (except
Mercedes-AMG vehicles) ............... 163
Active Body Control (ABC)
(Mercedes-AMG vehicles) .............. 165
Display message ............................ 215
Vehicle tool kit .................................. 270
Video
Operating the DVD ......................... 191
see also Digital Operator's Man-
ual .................................................. 236
VIN
Seat ............................................... 312
Type plate ...................................... 311W
Warning and indicator lampsABS ................................................ 229
Active Brake Assist ........................ 234
Brake Assist ................................... 234
Brakes ........................................... 228
Check Engine ................................. 232
Coolant .......................................... 232
Distance Pilot DISTRONIC ............. 234
Distance warning ........................... 234
ESP
®.............................................. 229
ESP®OFF ....................................... 230
Fuel tank ........................................ 232
General notes ................................ 227
Parking brake ................................ 231
PASSENGER AIR BAG ...................... 41
Reserve fuel ................................... 232
Restraint system ............................ 231
Seat belt ........................................ 227
SPORT handling mode ................... 231
Tire pressure monitor .................... 235
Warning triangle ................................ 269
Warranty .............................................. 25
Index21
Page 67 of 322
As a result, the Adaptive Brake Assist may not
intervene in all critical conditions. There is a
risk of an accident.
Always pay careful attention to the traffic sit-uation and be ready to brake.
Always adapt your speed to suit the prevailing
road and traffic conditions.
Due to the nature of the system, particularly
complicated but non-critical driving conditions
may also cause Brake Assist to intervene.
If adaptive Brake Assist is not available due to a
malfunction in the radar sensor system, the
brake system remains available with full brake
boosting effect and BAS.
Adaptive brake lights
i
Observe the "Important safety notes" sec-
tion (Ypage 60).
If you brake sharply from a speed of more than
50 km/h or if braking is assisted by BAS or
Brake Assist with Cross-Traffic Assist, the brake
lamps flash rapidly. In this way, traffic traveling
behind you is warned in an even more noticeable
manner.
If you brake sharply from a speed of more than
70 km/h to a standstill, the hazard warning
lamps are activated automatically. If the brakes
are applied again, the brake lamps light up con-
tinuously. The hazard warning lamps switch off
automatically if you travel faster than 10 km/h.
You can also switch off the hazard warning
lamps using the hazard warning button
(
Ypage 108).
ESP®(Electronic Stability Program)
General notes
iObserve the "Important safety notes" sec-
tion (Ypage 60).
ESP
®monitors driving stability and traction, i.e.
power transmission between the tires and the
road surface.
If ESP
®detects that the vehicle is deviating from
the direction desired by the driver, one or more
wheels are braked to stabilize the vehicle. The
engine output is also modified to keep the vehi-
cle on the desired course within physical limits. ESP
®assists the driver when pulling away on
wet or slippery roads. ESP®can also stabilize
the vehicle during braking.
ETS (Electronic Traction System)
iObserve the "Important safety notes" sec-
tion (Ypage 60).
ETS traction control is part of ESP
®.
ETS brakes the drive wheels individually if they
spin. This enables you to pull away and acceler-
ate on slippery surfaces, for example if the road
surface is slippery on one side. In addition, more
drive torque is transferred to the wheel or
wheels with traction.
ETS remains active when you deactivate ESP
®.
iMercedes-AMG vehicles: your vehicle may
be equipped with 20-inch tires on the rear
axle. After changing to 19 inch wheels, ETS
may intervene noticeably earlier during the
first few kilometers. After approximately
10 km ETS will function as usual again. Infor-
mation on the dimensions and types of
wheels and tires for your vehicle can be found
in the "Wheel/tire combinations" section
(
Ypage 308).
Important safety notes
GWARNING
If ESP
®is malfunctioning it will not provide
any vehicle stabilization. There is an increased
risk of skidding or of an accident.
Exercise caution when continuing to drive.
Have ESP
®checked at a qualified specialist
workshop.
When towing the vehicle with the rear axle
raised, observe the notes on ESP
®
(Ypage 282).
If the å ESP®OFF warning lamp lights up
continuously, then ESP®is deactivated.
If the ÷ ESP®warning lamp and the å
ESP®OFF warning lamp are lit continuously,
ESP®is not available due to a malfunction.
Observe the information on warning lamps
(
Ypage 229) and display messages which may
be shown in the instrument cluster
(
Ypage 201).
Driving safety systems65
Safety
Z
Page 143 of 322
=Tire pressure table
?Instruction label for fuel type to be refueled
XSwitch the engine off.
XRemove the SmartKey from the ignition lock.
XPress the fuel filler flap in the direction of
arrow:.
The fuel filler flap swings up.
XTurn the fuel filler cap counterclockwise and
remove it.
XInsert the fuel filler cap into the holder
bracket on the inside of fuel filler flap ;.
XCompletely insert the filler neck of the fuel
pump nozzle into the tank, hook in place and
refuel.
XOnly fill the tank until the pump nozzle
switches off.
iDo not add any more fuel after the pump
stops filling for the first time. Otherwise, fuel
may leak out.
Closing the fuel filler flap
XReplace the cap on the filler neck and turn
clockwise until it engages audibly.
XClose the fuel filler flap.
iClose the fuel filler flap before locking the
vehicle.
iIf you are driving with the fuel filler cap open,
the 8 reserve fuel warning lamp flashes.
The ; Check Engine warning lamp may
also light up. A message appears in the mul-
tifunction display (
Ypage 215).
For further information on warning and indi-
cator lamps in the instrument cluster, see
(
Ypage 232).
Problems with fuel and the fuel tank
ProblemPossible causes/consequences and MSolutions
Fuel is leaking from the
vehicle.The fuel line or the fuel tank is faulty.
GWARNING
Risk of explosion or fire.
XTurn the SmartKey immediately to position uin the ignition lock
(Ypage 122) and remove it.
XDo not restart the engine under any circumstances.
XConsult a qualified specialist workshop.
The fuel filler flap cannot
be opened.The fuel filler flap is not unlocked.
XUnlock the vehicle (Ypage 73).
The SmartKey battery is discharged or nearly discharged.
XUnlock the vehicle using the mechanical key (Ypage 75).
The fuel filler flap is unlocked, but the opening mechanism is jammed.
XConsult a qualified specialist workshop.
Refueling141
Driving and parking
Z
Page 237 of 322
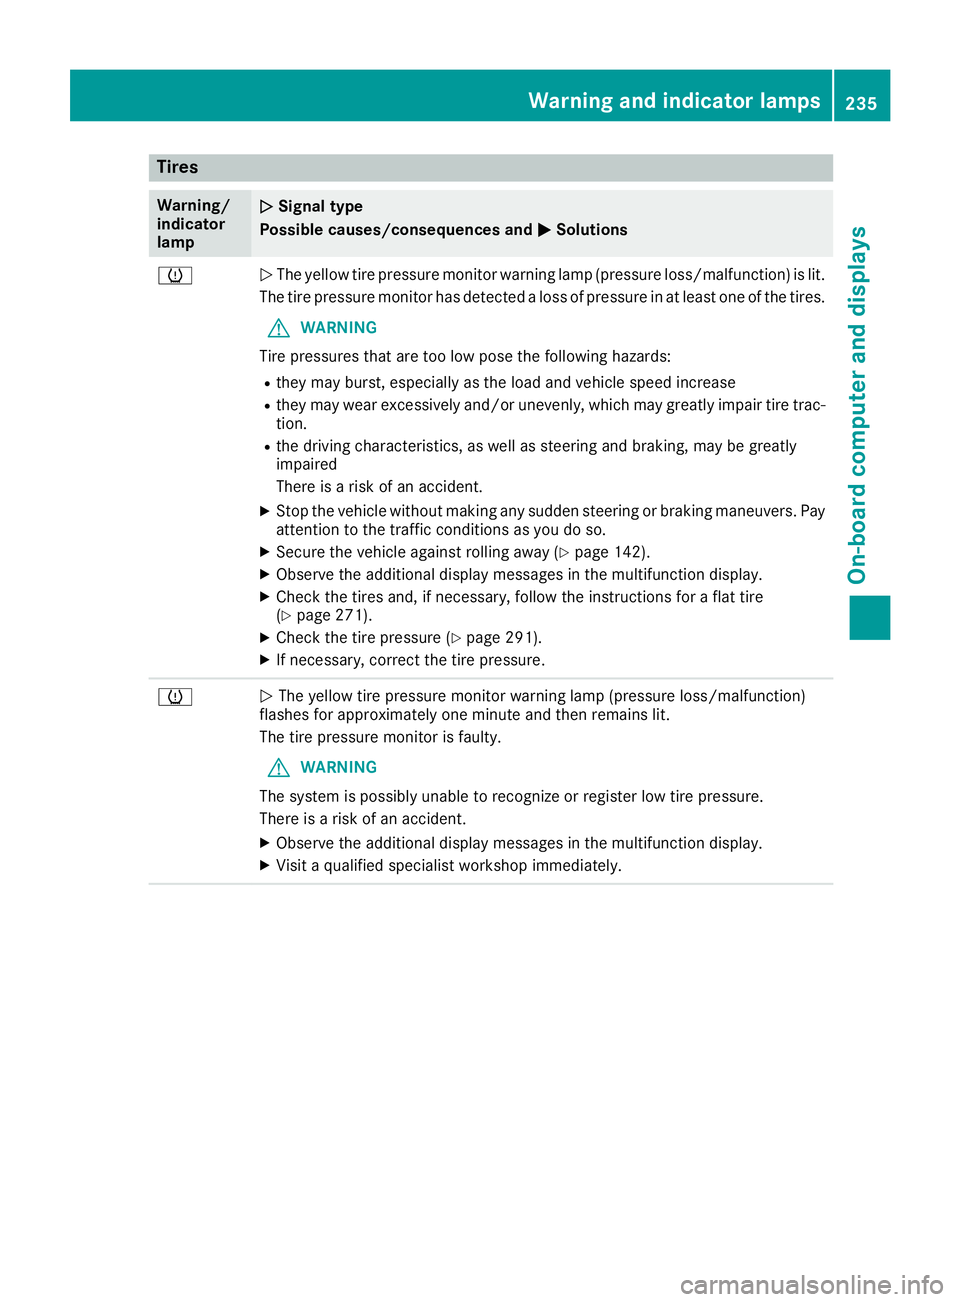
Tires
Warning/
indicator
lampNSignal type
Possible causes/consequences and M
Solutions
hNThe yellow tire pressure monitor warning lamp (pressure loss/malfunction) is lit.
The tire pressure monitor has detected a loss of pressure in at least one of the tires.
GWARNING
Tire pressures that are too low pose the following hazards:
Rthey may burst, especially as the load and vehicle speed increase
Rthey may wear excessively and/or unevenly, which may greatly impair tire trac-
tion.
Rthe driving characteristics, as well as steering and braking, may be greatly
impaired
There is a risk of an accident.
XStop the vehicle without making any sudden steering or braking maneuvers. Pay
attention to the traffic conditions as you do so.
XSecure the vehicle against rolling away (Ypage 142).
XObserve the additional display messages in the multifunction display.
XCheck the tires and, if necessary, follow the instructions for a flat tire
(Ypage 271).
XCheck the tire pressure (Ypage 291).
XIf necessary, correct the tire pressure.
hN The yellow tire pressure monitor warning lamp (pressure loss/malfunction)
flashes for approximately one minute and then remains lit.
The tire pressure monitor is faulty.
GWARNING
The system is possibly unable to recognize or register low tire pressure.
There is a risk of an accident.
XObserve the additional display messages in the multifunction display.
XVisit a qualified specialist workshop immediately.
Warning and indicator lamps235
On-board computer and displays
Z
Page 266 of 322
!Make sure that:
Rthe side windows and the roof are com-
pletely closed
Rthe climate control blower is switched off
Rthe windshield wiper switch is at position0
The vehicle could otherwise be damaged.
You can clean the vehicle at an automatic car
wash from the very start.
Preferably clean the vehicle at automatic car
washes that use textile washing elements with-
out brushes. This prevents fine scratches from
forming on the paintwork and film.
If the vehicle is very dirty, pre-wash it before
cleaning it in an automatic car wash.
After using an automatic car wash, wipe off wax
from the windshield and the wiper blades. This
will prevent smears and reduce wiping noises
caused by residue on the windshield.
iVehicles with decorative film: select a wash
program without hot wax at the automatic car
wash.
Washing by hand
In some countries, washing by hand is only
allowed at specially equipped washing bays.
Observe the legal requirements in each country.
XDo not use hot water and do not wash the
vehicle in direct sunlight.
XUse a soft sponge to clean.
XUse a mild cleaning agent, such as a car
shampoo approved by Mercedes-Benz.
XThoroughly hose down the vehicle with a gen-
tle jet of water.
XDo not point the water jet directly towards the
air inlet or the edges of decorative foils.
XUse plenty of water and rinse out the sponge
frequently.
XRinse the vehicle with clean water and dry
thoroughly with a chamois.
XDo not let the cleaning agent dry on the paint- work or the decorative foils.
Carefully remove all deposits of road salt as
soon as possible when driving in winter.
Power washers
GWARNING
The water jet from a circular jet nozzle (dirt
blasters) can cause invisible exterior damage
to the tires or chassis components. Compo-
nents damaged in this way may fail unexpect-
edly. There is a risk of an accident.
Do not use power washers with circular jet
nozzles to clean the vehicle. Have damaged
tires or chassis components replaced imme-
diately.
!Vehicles with decorative foil: parts of your
vehicle are covered with decorative foil. Main-
tain a distance of at least 27.5 in (70 cm)
between the foil-wrapped parts of the vehicle
and the nozzle of the high pressure cleaner.
Information about the correct distance is
available from the equipment manufacturer.
Move the power washer nozzle around when
cleaning your vehicle.
The water temperature of the high-pressure
cleaner must not exceed 140 °F (60 °C).
!Always maintain a distance of at least
11.8 in (30 cm) between the vehicle and the
power washer nozzle. Information about the
correct distance is available from the equip-
ment manufacturer.
Move the power washer nozzle around when
cleaning your vehicle.
Do not aim directly at any of the following:
Rtires
Rdoor gaps, roof gaps, joints, etc.
Relectrical components
Rbattery
Rplug-type couplings
Rlights
Rseals
Rtrim
Rventilation slots
Damaged seals or electrical components can
lead to leaks or failures.
264Care
Maintenance and care
Page 274 of 322
If a pressure loss warning message appears
in the multifunction display:
Robserve the instructions in the display mes-
sages (Ypage 221)
Rcheck the tire for damage
Rif driving on, observe the following notes
The driving distance possible in run-flat mode is
approximately 50 miles (80 km) when the vehi-
cle is partially laden and approximately 19 miles
(30 km) when the vehicle is fully laden.
In addition to the vehicle load, the driving dis-
tance possible depends upon:
Rvehicle speed
Rroad condition
Routside temperature
The driving distance possible in run-flat mode
may be reduced by extreme driving conditions
or maneuvers, or it can be increased through a
moderate style of driving.
The driving distance possible in run-flat mode is
counted from the moment the tire pressure loss
warning appears in the multifunction display.
You must not exceed a maximum design speed
of 50 mph (80 km/h).
When replacing one or all tires, please observe
the following specifications for your vehicle's
tires:
Rsize
Rtype and
Rthe "MOExtended" mark
If a tire has gone flat and cannot be replaced
with a MOExtended tire, a standard tire may be
used as a temporary measure. Make sure that
you use the proper size and type (summer or
winter tire).
Vehicles equipped with MOExtended tires are
not equipped with a TIREFIT kit at the factory. It
is therefore recommended that you additionally
equip your vehicle with a TIREFIT kit if you mount
tires that do not feature run-flat characteristics,
e.g. winter t
ires. A TIREFIT kit can be obtained
from a qualified specialist workshop, for exam-
ple.
Important safety notes
GWARNING
When driving in emergency mode, the driving
characteristics deteriorate, e.g. when corner-
ing, accelerating quickly and when braking.
There is a risk of an accident.
Do not exceed the stated maximum speed.
Avoid abrupt steering and driving maneuvers, and driving over obstacles (curbs, potholes,
off-road). This applies in particular to a laden
vehicle.
Stop driving in emergency mode if:
Ryou hear banging noises.
Rthe vehicle starts to shake.
Ryou see smoke and smell rubber.
RESP®is intervening constantly.
Rthere are tears in the sidewalls of the tire.
After driving in emergency mode, have the
wheel rims checked at a qualified specialist
workshop with regard to their further use. The
defective tire must be replaced in every case.
TIREFIT kit
Important safety notes
TIREFIT is a tire sealant.
You can use TIREFIT to seal punctures of up to
0.16 in (4 mm), particularly those in the tire
tread. You can use TIREFIT at outside tempera-
tures down to Ò4 ‡ (Ò20 †).
GWARNING
In the following situations, the tire sealant is
unable to provide sufficient breakdown assis-
tance, as it is unable to seal the tire properly:
Rthere are cuts or punctures in the tire larger
than those mentioned above.
Rthe wheel rim is damaged.
Ryou have driven at very low tire pressures or on a flat tire.
There is a risk of an accident.
Do not drive the vehicle. Contact a qualified
specialist workshop.
GWARNING
The tire sealant is harmful and causes irrita-
tion. It must not come into contact with your
skin, eyes or clothing or be swallowed. Do not
272Flat tire
Breakdown assistance
Page 282 of 322
XStart the engine of the donor vehicle and run it at idling speed.
XConnect negative terminal?of donor battery Bto ground point Aof your vehicle using the
jumper cable, connecting the jumper cable to battery of other vehicle Bfirst.
XStart the engine.
XBefore disconnecting the jumper cables, let the engine run for several minutes.
XFirst, remove the jumper cables from ground point Aand negative terminal ?, then from pos-
itive terminal ;and positive terminal =. Begin each time at the contacts on your own vehicle
first.
XAfter the jumper cable is removed, return cover :of positive terminal ;to the original position.
Positive terminal ;is covered up and thus insulated again.
XHave the battery checked at a qualified specialist workshop.
Jump-starting is not considered to be a normal operating condition.
iJumper cables and further information regarding jump-starting can be obtained at any qualified
specialist workshop.
Towing and tow-starting
Important safety notes
GWARNING
When towing or tow-starting another vehicle
and its weight is greater than the permissible
gross weight of your vehicle, the:
Rthe towing eye could detach itself
Rthe vehicle/trailer combination could roll-
over.
There is a risk of an accident.
When towing or tow-starting another vehicle,
its weight should not be greater than the per- missible gross weight of your vehicle.
Details on the permissible gross vehicle weight
of your vehicle can be found on the vehicle iden-
tification plate (
Ypage 311).
!When Active Brake Assist, Distance Pilot
DISTRONIC or the HOLD function is activated,
the vehicle brakes automatically in certain
situations.
To avoid damage to the vehicle, deactivate
these systems in the following or similar sit-
uations:
Rwhen towing the vehicle
Rin the car wash
!Only secure the tow rope or tow bar at the
towing eyes. Otherwise, the vehicle could be
damaged.
!Do not use the towing eye for recovery, this
could damage the vehicle. If in doubt, recover
the vehicle with a crane.
!When towing, pull away slowly and
smoothly. If the tractive power is too high, the
vehicles could be damaged.
!Do not tow with sling-type equipment. This
could damage the vehicle.
!When towing away vehicles with KEYLESS-
GO, us e the key instead of the Start/Stop
button. The automatic transmission may oth- erwise shift to position jwhen you open the
driver's or front-passenger door, which could
damage the transmission.
!Make sure that the electric parking brake is
released. If the electric parking brake is faulty,
visit a qualified specialist workshop.
!The vehicle can be towed a maximum of
30 miles (50km). The towing speed of 30 mph
(50 km/h) must not be exceeded.
If the vehicle has to be towed more than
30 miles (50km), the entire vehicle must be
raised and transported.
!If you tow or tow-start another vehicle, its
weight must not exceed the maximum per-
missible gross vehicle weight of your vehicle.
It is better to have the vehicle transported than
to have it towed away.
The automatic transmission must be in position
i when the vehicle is being towed away.
280Towing and tow-starting
Breakdown assistance