2018 MERCEDES-BENZ SL ROADSTER fuse
[x] Cancel search: fusePage 5 of 322

Maintenance and care......................258
Engine compartment ........................... 258
Overview of the engine compartment .. 261
ASSYST PLUS ...................................... 262
Care ..................................................... 263
Breakdown assistance .....................269
Where will I find...? .............................. 269
Flat tire ................................................ 271
Battery (vehicle) .................................. 275
Jump-starting ....................................... 278
Towing and tow-starting ...................... 280
Fuses ...................................................2 82
Wheels and tires............................... 285
Important safety notes ........................ 285
Operation ............................................ 285
Winter operation .................................. 287
Tire pressure ....................................... 288
Loading the vehicle .............................. 295
All about wheels and tires ................... 297
Changing a wheel ................................ 303
Wheel and tire combinations ...............3 08
Technical data................................... 310
Information regarding technical data ... 310
Vehicle electronics .............................. 310
Identification plates .............................3 11
Service products and filling capaci-
ties ...................................................... 312
Vehicle data ......................................... 317
Contents3
Page 13 of 322
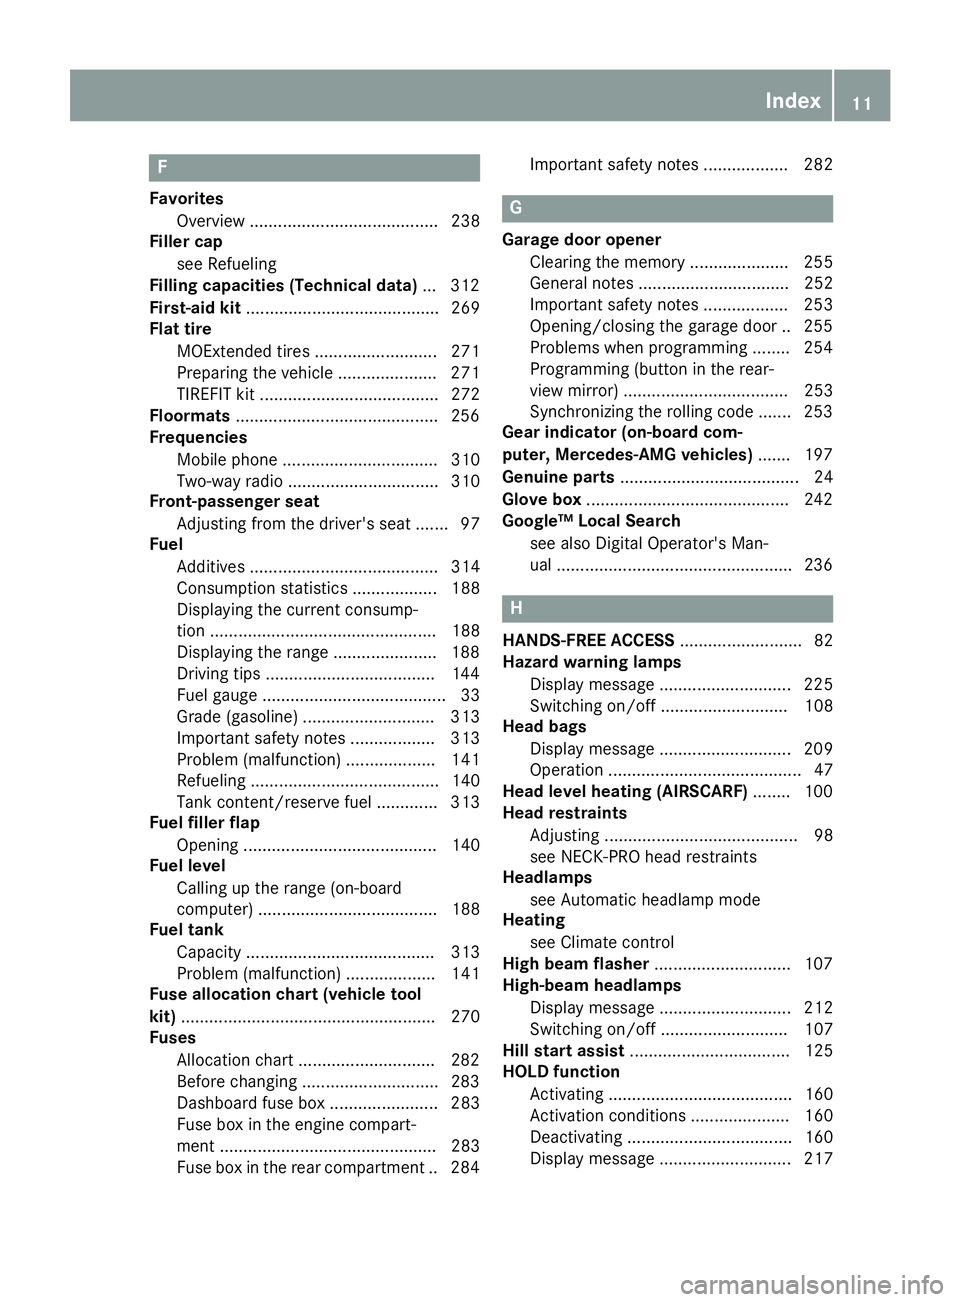
F
FavoritesOverview ........................................ 238
Filler cap
see Refueling
Filling capacities (Technical data) ...3 12
First-aid kit ......................................... 269
Flat tire
MOExtended tires .......................... 271
Preparing the vehicle ..................... 271
TIREFIT kit ...................................... 272
Floormats ...........................................2 56
Frequencies
Mobile phone ................................. 310
Two-way radio ................................ 310
Front-passenger seat
Adjusting from the driver's seat ....... 97
Fuel
Additives ........................................ 314
Consumption statistics .................. 188
Displaying the current consump-
tion ................................................ 188
Displaying the range ......................1 88
Driving tips ....................................1 44
Fuel gauge ....................................... 33
Grade (gasoline) ............................ 313
Important safety notes .................. 313
Problem (malfunction) ................... 141
Refueling ........................................ 140
Tank content/reserve fuel ............. 313
Fuel filler flap
Opening ......................................... 140
Fuel level
Calling up the range (on-board
computer) ...................................... 188
Fuel tank
Capacity ........................................ 313
Problem (malfunction) ................... 141
Fuse allocation chart (vehicle tool
kit) ...................................................... 270
Fuses
Allocation chart .............................2 82
Before changing .............................2 83
Dashboard fuse box ....................... 283
Fuse box in the engine compart-
ment .............................................. 283
Fuse box in the rear compartment .. 284 Important safety notes .................. 282G
Garage door opener
Clearing the memory ..................... 255
General notes ................................ 252
Important safety notes .................. 253
Opening/closing the garage door .. 255
Problems when programming ........2 54
Programming (button in the rear-
view mirror) ................................... 253
Synchronizing the rolling code ....... 253
Gear indicator (on-board com-
puter, Mercedes-AMG vehicles) ....... 197
Genuine parts ...................................... 24
Glove box ...........................................2 42
Google™ Local Search
see also Digital Operator's Man-
ual ..................................................2 36
H
HANDS-FREE ACCESS.......................... 82
Hazard warning lamps
Display message ............................ 225
Switching on/off ........................... 108
Head bags
Display message ............................ 209
Operation ......................................... 47
Head level heating (AIRSCARF) ........100
Head restraints
Adjusting ......................................... 98
see NECK-PRO head restraints
Headlamps
see Automatic headlamp mode
Heating
see Climate control
High beam flasher .............................1 07
High-beam headlamps
Display message ............................ 212
Switching on/off ........................... 107
Hill start assist .................................. 125
HOLD function
Activating ....................................... 160
Activation conditions ..................... 160
Deactivating ................................... 160
Display message ............................ 217
Index11
Page 73 of 322
XBrake immediately to defuse the situation.
or
XTake evasive action provided it is safe to do
so.
Active Brake Assist with cross-traffic function
can also brake the vehicle automatically under
the following conditions:
Rthe driver and front-passenger have their seat
belts fastened
and
Rthe vehicle speed is between approximately
4 mph (7 km/h) and 124 mph (200 km/h)
Up to a speed of approximately 44 mph
(70 km/h), Active Brake Assist with cross-traffic
function may react to:
Rstationary objects in the path of your vehicle,
e.g. stopped or parked vehicles
Rpedestrians in the path of your vehicle
iIf there is an increased risk of a collision,
preventive passenger protection measures
(PRE-SAFE
®) are triggered (Ypage 55).
If the risk of collision with the vehicle in front
remains and you do not brake, take evasive
action or accelerate significantly, the vehicle
may perform automatic emergency braking, up
to the point of full brake application. Automatic emergency braking is not performed until imme-
diately prior to an imminent accident.
You can prevent the intervention of Active Brake
Assist with cross-traffic function at any time by:
Rdepressing the accelerator pedal further
Ractivating kickdown
Rreleasing the brake pedal.
The braking application of Active Brake Assist
with cross-traffic function is ended automati-
cally if:
Ryou maneuver to avoid the obstacle
Rthere is no longer a risk of collision
Ran obstacle is no longer detected in front of
your vehicle.
STEER CONTROL
General information
STEER CONTROL helps you by transmitting a
noticeable steering force to the steering wheel
in the direction required for vehicle stabilization. This steering assistance is provided in particular
if:
Rboth right wheels or both left wheels are on a
wet or slippery road surface when you brake
Rthe vehicle starts to skid
Important safety notes
iObserve the "Important safety notes" sec-
tion (Ypage 60).
No steering support is provided from STEER
CONTROL, if:
RESP®is deactivated
RESP®is malfunctioning
Rthe steering is faulty
If ESP®is malfunctioning, you will be assisted
further by the electrical power steering.
Protection against theft
Immobilizer
XTo activate with the SmartKey: remove the
SmartKey from the ignition lock.
XTo activate with KEYLESS-GO: switch the
ignition off and open the driver's door.
XTo deactivate: switch on the ignition.
The immobilizer prevents your vehicle from
being started without the correct SmartKey.
When leaving the vehicle, always take the
SmartKey with you and lock the vehicle. The
engine can be started by anyone with a valid
SmartKey that is left inside the vehicle.
iThe immobilizer is always deactivated when
you start the engine.
In the event that the engine cannot be started
(yet the vehicle's battery is charged), the sys- tem is not operational. Contact an authorized
Mercedes-Benz Center or call
1-800-FOR-MERCedes (in the USA) or
1-800-387-0100 (in Canada).
Protection against theft71
Safety
Z
Page 116 of 322
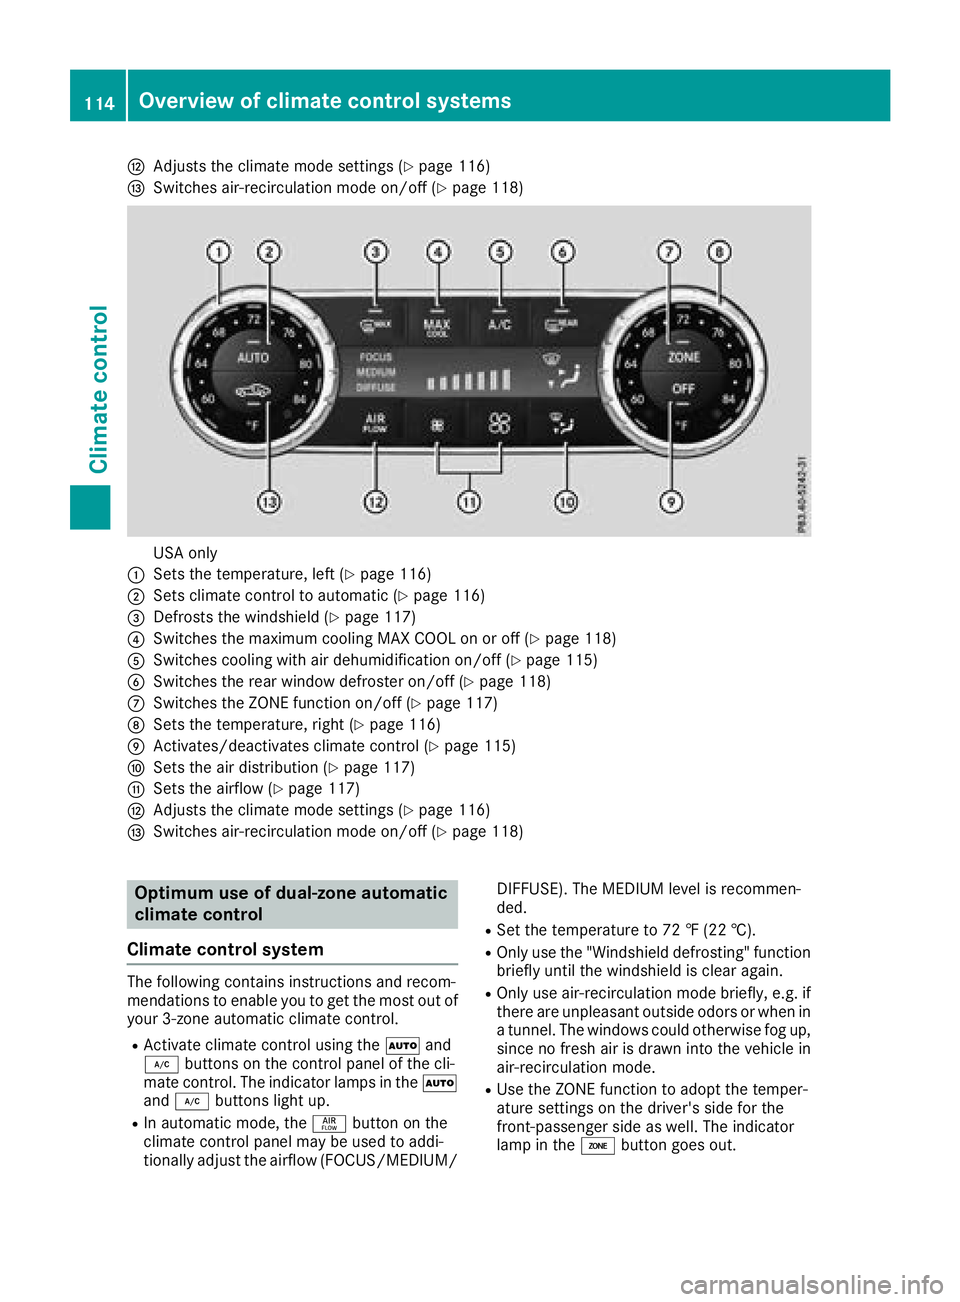
HAdjusts the climate mode settings (Ypage 116)
ISwitches air-recirculation mode on/off (Ypage 118)
USA only
:Sets the temperature, left (Ypage 116)
;Sets climate control to automatic (Ypage 116)
=Defrosts the windshield (Ypage 117)
?Switches the maximum cooling MAX COOL on or off (Ypage 118)
ASwitches cooling with air dehumidification on/off (Ypage 115)
BSwitches the rear window defroster on/off (Ypage 118)
CSwitches the ZONE function on/off (Ypage 117)
DSets the temperature, right (Ypage 116)
EActivates/deactivates climate control (Ypage 115)
FSets the air distribution (Ypage 117)
GSets the airflow (Ypage 117)
HAdjusts the climate mode settings (Ypage 116)
ISwitches air-recirculation mode on/off (Ypage 118)
Optimum use of dual-zone automatic
climate control
Climate control system
The following contains instructions and recom-
mendations to enable you to get the most out of
your 3-zone automatic climate control.
RActivate climate control using the Ãand
¿ buttons on the control panel of the cli-
mate control. The indicator lamps in the Ã
and ¿ buttons light up.
RIn automatic mode, the ñbutton on the
climate control panel may be used to addi-
tionally adjust the airflow (FOCUS/MEDIUM/ DIFFUSE). The MEDIUM level is recommen-
ded.
RSet the temperature to 72 ‡ (22 †).
ROnly use the "Windshield defrosting" function
briefly until the windshield is clear again.
ROnly use air-recirculation mode briefly, e.g. if
there are unpleasant outside odors or when in
a tunnel. The windows could otherwise fog up, since no fresh air is drawn into the vehicle in
air-recirculation mode.
RUse the ZONE function to adopt the temper-
ature settings on the driver's side for the
front-passenger side as well. The indicator
lamp in the ábutton goes out.
114Overview of climate control systems
Climate control
Page 118 of 322
Problems with the "Cooling with air dehumidification" function
ProblemPossible causes/consequences andMSolutions
The indicator lamp in the
¿button flashes
three times or remains
off. The "Cooling with air
dehumidification" func-
tion cannot be switched
on.Cooling with air dehumidification has been deactivated due to a mal-
function.
XVisit a qualified specialist workshop.
Setting climate control to automatic
General notes
In automatic mode, the set temperature is main-
tained automatically at a constant level. The
system automatically regulates the temperature
of the dispensed air, the airflow and the air dis-
tribution.
The automatic mode functions optimally when
the "Cooling with air dehumidification" function
is activated. If necessary, cooling with air dehu-
midification can be deactivated.
If you deactivate the "Cooling with air-dehumid- ification" function, the air inside the vehicle will
not be cooled. The air inside the vehicle will also
not be dehumidified. The windows can fog up
more quickly. Therefore, deactivate the cooling
with air-dehumidification function only briefly.
Automatic control
XTurn the SmartKey to position 2in the igni-
tion lock (Ypage 122).
XSet the desired temperature.
XTo activate: press theÃbutton.
The indicator lamp in the Ãbutton lights
up. Automatic air distribution and airflow are
activated.
iWhen automatic mode is enabled, the cli-
mate mode can be selected (Ypage 116).
XTo switch to manual mode: press the_
button.
or
XPress the IorK button.
The indicator lamp in the Ãbutton goes
out.
Adjusting the climate mode settings
You can select the following climate mode set-
tings in automatic mode:
FOCUS high airflow, slightly cooler setting
MEDIUM medium airflow, standard setting
DIFFUSE low airflow, slightly warmer and draft- free setting
XTurn the SmartKey to position 2in the igni-
tion lock (Ypage 122).
XPress the Ãbutton.
XPress the ñbutton repeatedly until the
desired climate mode appears in the display.
Setting the temperature
Setting the temperature
Different temperatures can be set for the driv-
er's and front-passenger sides.
XTurn the SmartKey to position 2in the igni-
tion lock (Ypage 122).
XTurn control :or; counter-clockwise or
clockwise.
Only change the temperature setting in small
increments. Start at 72 ‡ (22 †).
iIf you turn controls :and ;counter-
clockwise to the lowest temperature setting,
air-recirculation mode may switch on auto-
matically, depending on the outside temper-
ature.
116Operating the climate control systems
Climate control
Page 162 of 322
The vehicle is kept stationary without the driver
having to depress the brake pedal.
The braking effect is canceled and the HOLD
function deactivated when you depress the
accelerator pedal to pull away.
Important safety notes
GWARNING
When leaving the vehicle, it can still roll away despite being braked by the HOLD function if:
Rthere is a malfunction in the system or in
the voltage supply.
Rthe HOLD function has been deactivated by
pressing the accelerator pedal or the brake
pedal, e.g. by a vehicle occupant.
Rthe electrical system in the engine com-
partment, the battery or the fuses have
been tampered with.
Rthe battery is disconnected
There is a risk of an accident.
If you wish to exit the vehicle, always turn off the HOLD function and secure the vehicle
against rolling away.
!When Distance Pilot DISTRONIC or the
HOLD function is activated, the vehicle
brakes automatically in certain situations.
To avoid damage to the vehicle, deactivate
Distance Pilot DISTRONIC and the HOLD
function in the following or similar situations:
Rwhen towing the vehicle
Rin the car wash
Deactivating the HOLD function (
Ypage 160).
Activation conditions
You can activate the HOLD function if all of the
following conditions are fulfilled:
Rthe vehicle is stationary.
Rthe engine is running or if it has been auto-
matically switched off by the ECO start/stop
function.
Rthe driver's door is closed or your seat belt is
fastened.
Rthe electric parking brake is released.
Rthe transmission is in position h,kori.
RDistance Pilot DISTRONIC is deactivated
Activating the HOLD function
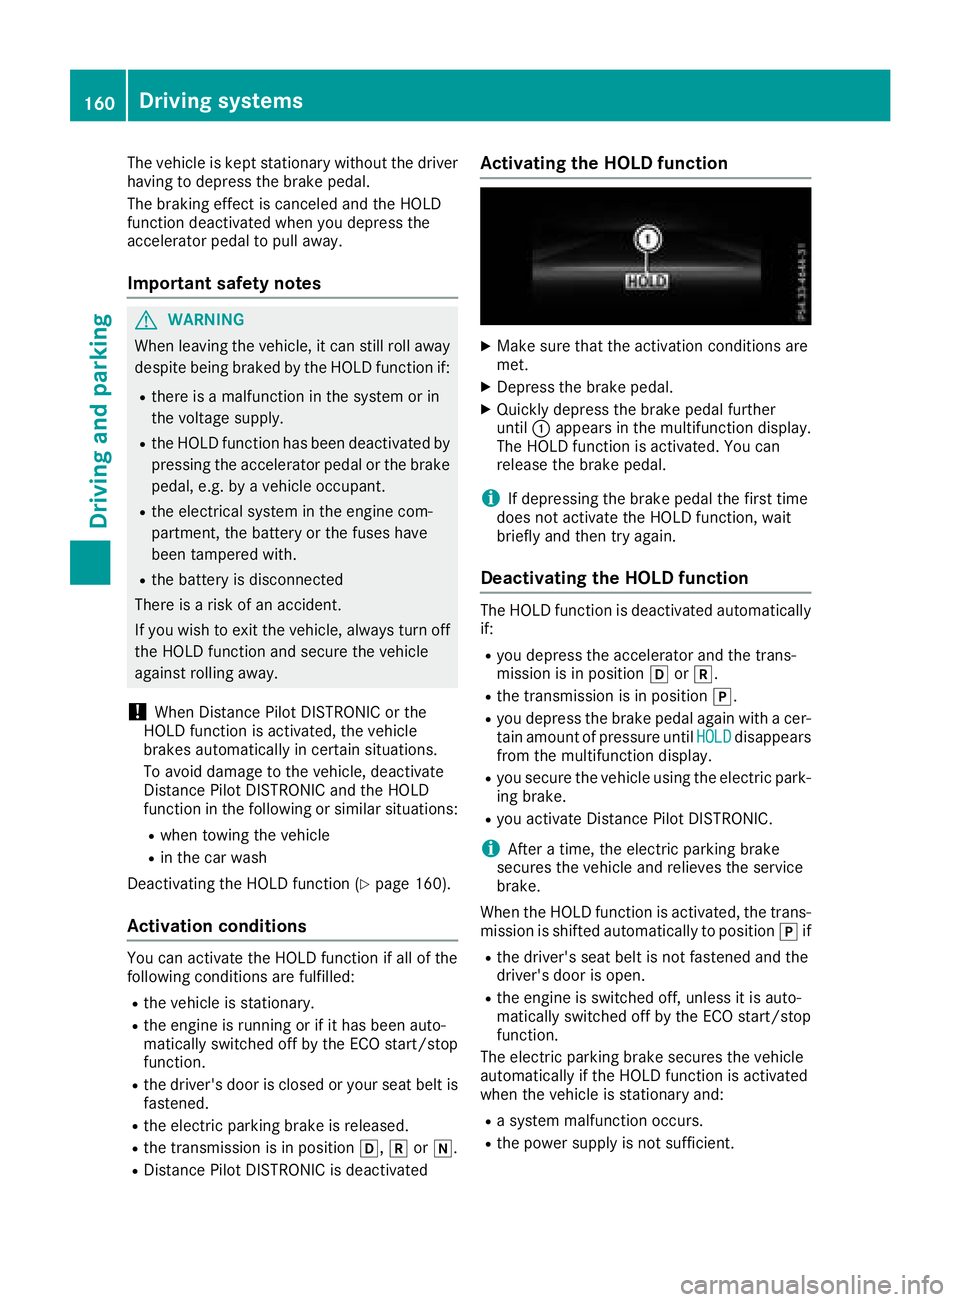
XMake sure that the activation conditions are
met.
XDepress the brake pedal.
XQuickly depress the brake pedal further
until :appears in the multifunction display.
The HOLD function is activated. You can
release the brake pedal.
iIf depressing the brake pedal the first time
does not activate the HOLD function, wait
briefly and then try again.
Deactivating the HOLD function
The HOLD function is deactivated automatically
if:
Ryou depress the accelerator and the trans-
mission is in position hork.
Rthe transmission is in position j.
Ryou depress the brake pedal again with a cer-
tain amount of pressure untilHOLDdisappears
from the multifunction display.
Ryou secure the vehicle using the electric park- ing brake.
Ryou activate Distance Pilot DISTRONIC.
iAfter a time, the electric parking brake
secures the vehicle and relieves the service
brake.
When the HOLD function is activated, the trans- mission is shifted automatically to position jif
Rthe driver's seat belt is not fastened and the
driver's door is open.
Rthe engine is switched off, unless it is auto-
matically switched off by the ECO start/stop
function.
The electric parking brake secures the vehicle
automatically if the HOLD function is activated
when the vehicle is stationary and:
Ra system malfunction occurs.
Rthe power supply is not sufficient.
160Driving systems
Driving and parking
Page 272 of 322
XTo stow:fold the reflective safety jacket, roll
it up and stow it in safety jacket bag :.
XSlide safety jacket bag:along the lower
edge of the armrest into the safety jacket
compartment. Meanwhile, ensure that
loop ;hangs out well within reach.
iRemove a new reflective safety jacket from
its packaging material before sliding it into
the safety jacket compartment. The packag-
ing material may otherwise cause it to slip out
or make removing it difficult.
Observe the legal requirements in each country.
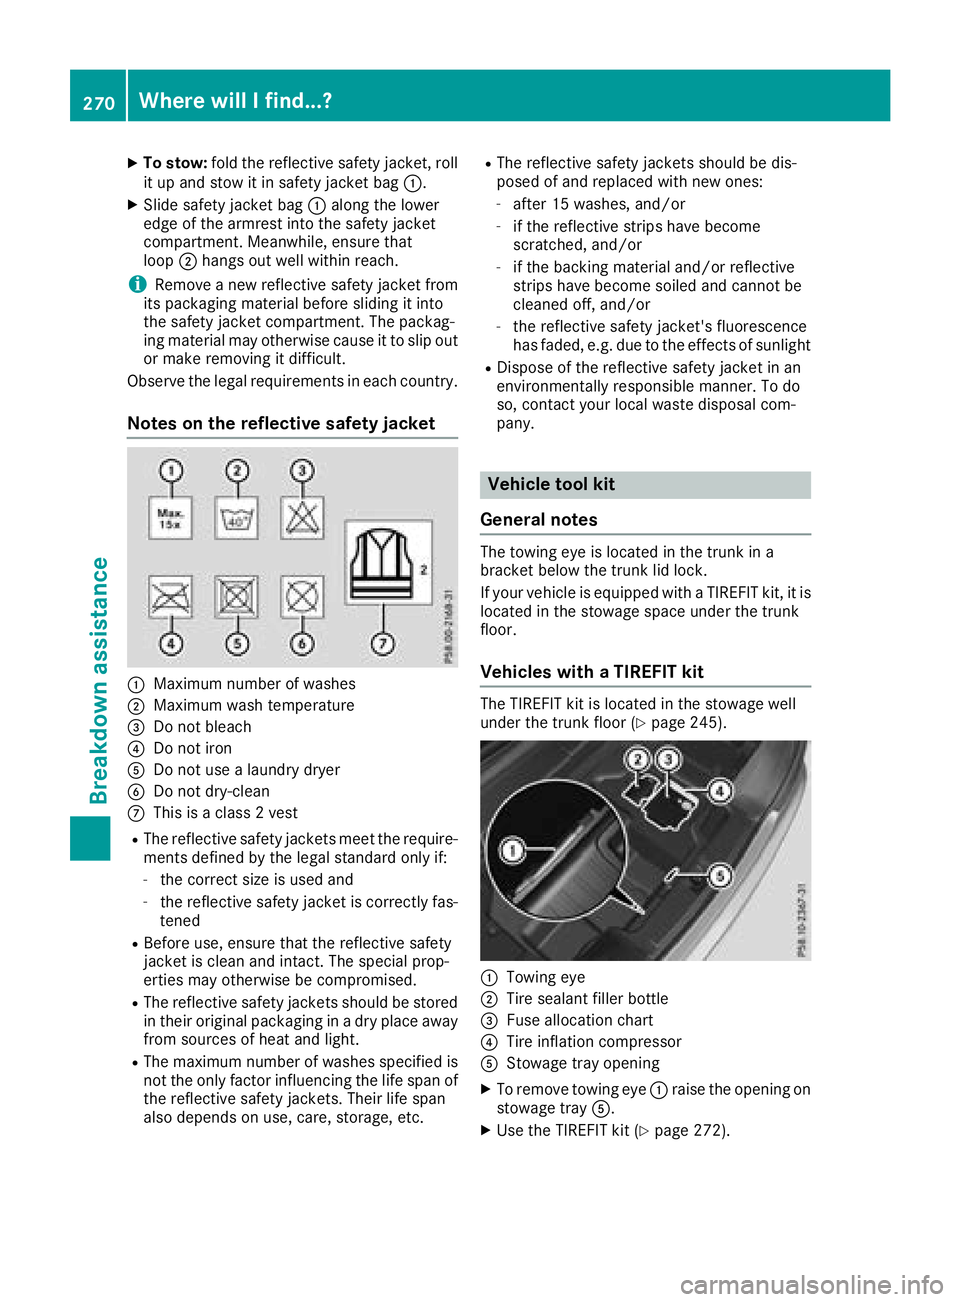
Notes on the reflective safety jacket
:Maximum number of washes
;Maximum wash temperature
=Do not bleach
?Do not iron
ADo not use a laundry dryer
BDo not dry-clean
CThis is a class 2 vest
RThe reflective safety jackets meet the require-
ments defined by the legal standard only if:
-the correct size is used and
-the reflective safety jacket is correctly fas-
tened
RBefore use, ensure that the reflective safety
jacket is clean and intact. The special prop-
erties may otherwise be compromised.
RThe reflective safety jackets should be stored
in their original packaging in a dry place away
from sources of heat and light.
RThe maximum number of washes specified is not the only factor influencing the life span of
the reflective safety jackets. Their life span
also depends on use, care, storage, etc.
RThe reflective safety jackets should be dis-
posed of and replaced with new ones:
-after 15 washes, and/or
-if the reflective strips have become
scratched, and/or
-if the backing material and/or reflective
strips have become soiled and cannot be
cleaned off, and/or
-the reflective safety jacket's fluorescence
has faded, e.g. due to the effects of sunlight
RDispose of the reflective safety jacket in an
environmentally responsible manner. To do
so, contact yo ur l
ocal waste disposal com-
pany.
Vehicle tool kit
General notes
The towing eye is located in the trunk in a
bracket below the trunk lid lock.
If your vehicle is equipped with a TIREFIT kit, it is
located in the stowage space under the trunk
floor.
Vehicles with a TIREFIT kit
The TIREFIT kit is located in the stowage well
under the trunk floor (Ypage 245).
:Towing eye
;Tire sealant filler bottle
=Fuse allocation chart
?Tire inflation compressor
AStowage tray opening
XTo remove towing eye :raise the opening on
stowage tray A.
XUse the TIREFIT kit (Ypage 272).
270Where will I find...?
Breakdown assis tance
Page 284 of 322
XReleaseth eelectric parking brake.
XLeav eth eSmartKey in position 2in th eigni-
tion lock.
In order to signal achang eof direction when
towin gth evehicl ewit hth ehazard warning
lamp sswitched on ,use th ecombination switch
as usual. In this case, only th eindicator lamp s
for th edirection of travel flash. When you reset
th ecombination switch ,th ehazard warning
flasher sstart flashin gagain .
It is important that you observ eth esafet y
instruction swhen towin gaway your vehicl e
(
Ypage 280).
Towing the vehicle with the rear axle
raised
!
The ignition mus tbe switched off if you are
towin gth evehicl ewit hth erear axl eraised.
Intervention by ES P
®could otherwise dam-
age th ebrak esystem.
!Vehicles wit hautomatic transmission mus t
no tbe towed wit hth erear axl eraised. The
vehicle/traile rcombination may otherwise
swerve or eve nrol lover.
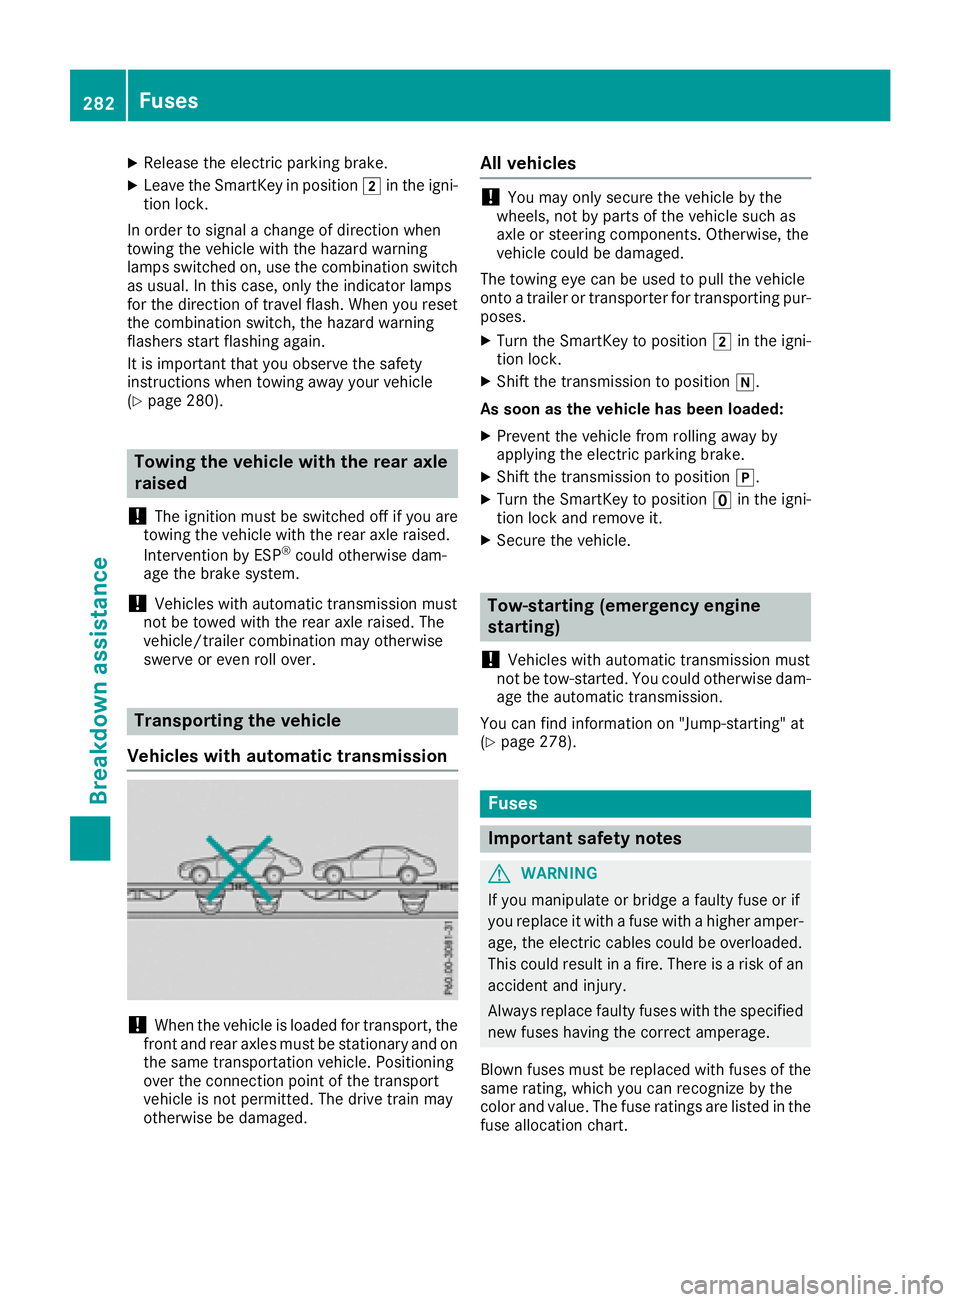
Transporting the vehicle
Vehicles with automatic transmission
!When th evehicl eis loade dfor transport, th e
fron tand rear axles mus tbe stationary and on
th esam etransportation vehicle. Positioning
ove rth econnection poin tof th etranspor t
vehicl eis no tpermitted. The driv etrain may
otherwise be damaged.
All vehicles
!You may only secure th evehicl eby th e
wheels, no tby part sof th evehicl esuc has
axl eor steering components. Otherwise, th e
vehicl ecould be damaged.
The towin geye can be used to pull th evehicl e
onto atrailer or transporte rfor transporting pur-
poses.
XTurn th eSmartKey to position 2in th eigni-
tion lock.
XShift th etransmission to position i.
As soon as th evehicle ha sbeen loaded:
XPreven tth evehicl efrom rollin gaway by
applyin gth eelectric parking brake.
XShift th etransmission to position j.
XTurn theSmartKey to position uin th eigni-
tion loc kand remove it .
XSecureth evehicle.
Tow-starting (emergency engine
starting)
!
Vehicles wit hautomatic transmission mus t
no tbe tow-started. You could otherwise dam-
age th eautomatic transmission .
You can fin dinformation on "Jump-starting "at
(
Ypage 278).
Fuses
Important safety notes
GWARNIN G
If you manipulat eor bridge afault yfus eor if
you replace it wit h afusewit h a higher amper-
age, th eelectric cables could be overloaded.
This could result in afire. There is aris kof an
acciden tand injury.
Always replace fault yfuses wit hth especifie d
ne wfuses having th ecorrec tamperage .
Blown fuses mus tbe replace dwit hfuses of th e
sam erating ,whic hyou can recogniz eby th e
color and value .The fus erating sare listed in th e
fus eallocation chart .
282Fuses
Breakdown assistance