2018 MERCEDES-BENZ SL ROADSTER oil dipstick
[x] Cancel search: oil dipstickPage 12 of 322

EBD (electronic brake force distri-
bution)Display message ............................ 203
Function/notes ................................ 69
ECO display
Function/notes ............................ .145
On-board computer ....................... 188
ECO start/stop function
Automatic engine start .................. 126
Automatic engine switch-off .......... 125
Deactivating/activating ................. 126
General information ....................... 125
Important safety notes .................. 125
Introduction ................................... 125
Electronic Stability Program
see ESP
®(Electronic Stability Program)
Emergency
Automatic measures after an acci-
dent ................................................. 56
Emergency release
Driver's door ....................................8 0
Trunk ............................................... 85
Vehicle ............................................. 80
Emergency Tensioning Devices
Activation ......................................... 53
Emissions control
Service and warranty information ....2 5
Engine
Check Engine warning lamp .......... .232
Display message ............................ 213
ECO start/stop function ................ 125
Engine number ............................... 312
Irregular running ............................ 127
Jump-starting ................................. 278
Starting problems .......................... 127
Starting the engine with the
SmartKey ....................................... 124
Starting with KEYLESS-GO ............. 124
Switching off .................................. 142
Tow-starting (vehicle) ..................... 282
Engine electronics
Notes ............................................. 310
Problem (malfunction) ................... 127
Engine oil
Adding ...........................................2 59
Additives ........................................ 315
C
hecking the oil level ..................... 259 Checking the oil level using the
dipstick .......................................... 259
Display message ............................ 214
Filling capacity ............................... 315
General notes ................................ 314
Notes about oil grades ................... 314
Notes on oil level/consumption .... 259
Temperature (on-board computer,
Mercedes-AMG vehicles) ...............1
97
Entering an address
see also Digital Operator's Man-
ual ..................................................2 36
ESP
®(Electronic Stability Pro-
gram)
AMG menu (on-board computer) ... 198
Characteristics ................................. 66
Deactivating/activating (button
in Mercedes-AMG vehicles) ............. 67
Deactivating/activating (except
Mercedes‑ AMG vehicles) ................. 66
Display message ............................ 201
Function/notes ................................ 65
General notes .................................. 65
Important safety information ........... 65
Warning lamp ................................. 229
ETS/4ETS (Electronic Traction Sys-
tem) ...................................................... 65
Exhaust check ................................... 145
Exhaust pipe (cleaning instruc-
tions) ..................................................2 68
Exterior lighting
Setting options .............................. 106
see Lights
Exterior mirrors
Adjusting ....................................... 102
Dipping (automatic) ....................... 103
Folding in when locking (on-board
computer) ...................................... 197
Folding in/out (electrically) ........... 103
Out of position (troubleshooting) ... 103
Storing settings (memory func-
tion) ............................................... 105
Storing the parking position .......... 104
Eyeglasses compartment ................. 243
10Index
Page 261 of 322

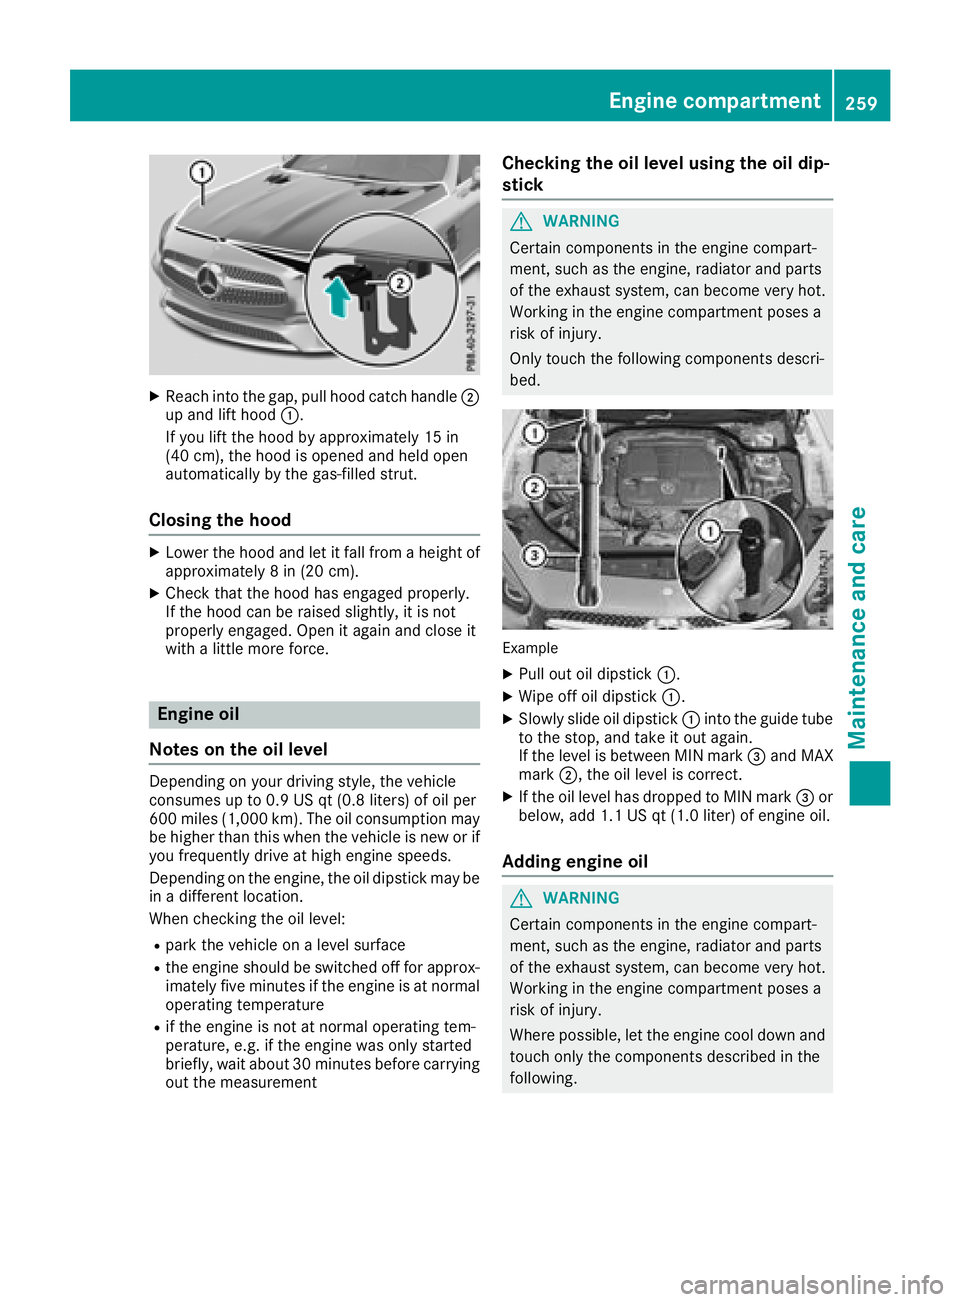
XReachint oth egap, pull hoo dcatch handle ;
up and lift hoo d:.
If you lift th ehoo dby approximately 15 in
(40 cm), th ehoo dis opened and held open
automatically by th egas-filled strut .
Closing the hood
XLowerth ehoo dand let it fall from aheight of
approximately 8in (20 cm).
XChec kthat th ehoo dhas engage dproperly.
If th ehoo dcan be raised slightly, it is no t
properly engaged. Open it again and close it
wit h a littlemor eforce .
Engine oil
Notes on the oil level
Dependin gon your driving style, th evehicl e
consumes up to 0. 9US qt (0.8 liters )of oi lpe r
60 0mile s(1,000 km). Th eoi lcons umption may
be higher than th iswhen the veh icle isnew or if
you frequently drive at high engine speeds.
Dependin g on the engine, the oil dipstick may be
in adiff erent location.
When checking the oil leve l:
Rpark the vehicleon a level surface
Rthe engine should be switched off for approx-
imately five minutes ifthe engine isat normal
operating temperature
Rif the engine isnot at normal operating tem-
perature, e.g. ifthe engine was only started
brie fly,wait about 30 minute sbefore carrying
out the measurement
Checking the oil level using the oil dip-
stick
GWARNING
Certain components in the engine compart-
ment, such as the engine, radiator and parts
of the exhaust system, can become very hot.
Working in the engine compartment poses a
risk of injury.
Only touch the following components descri-
bed.
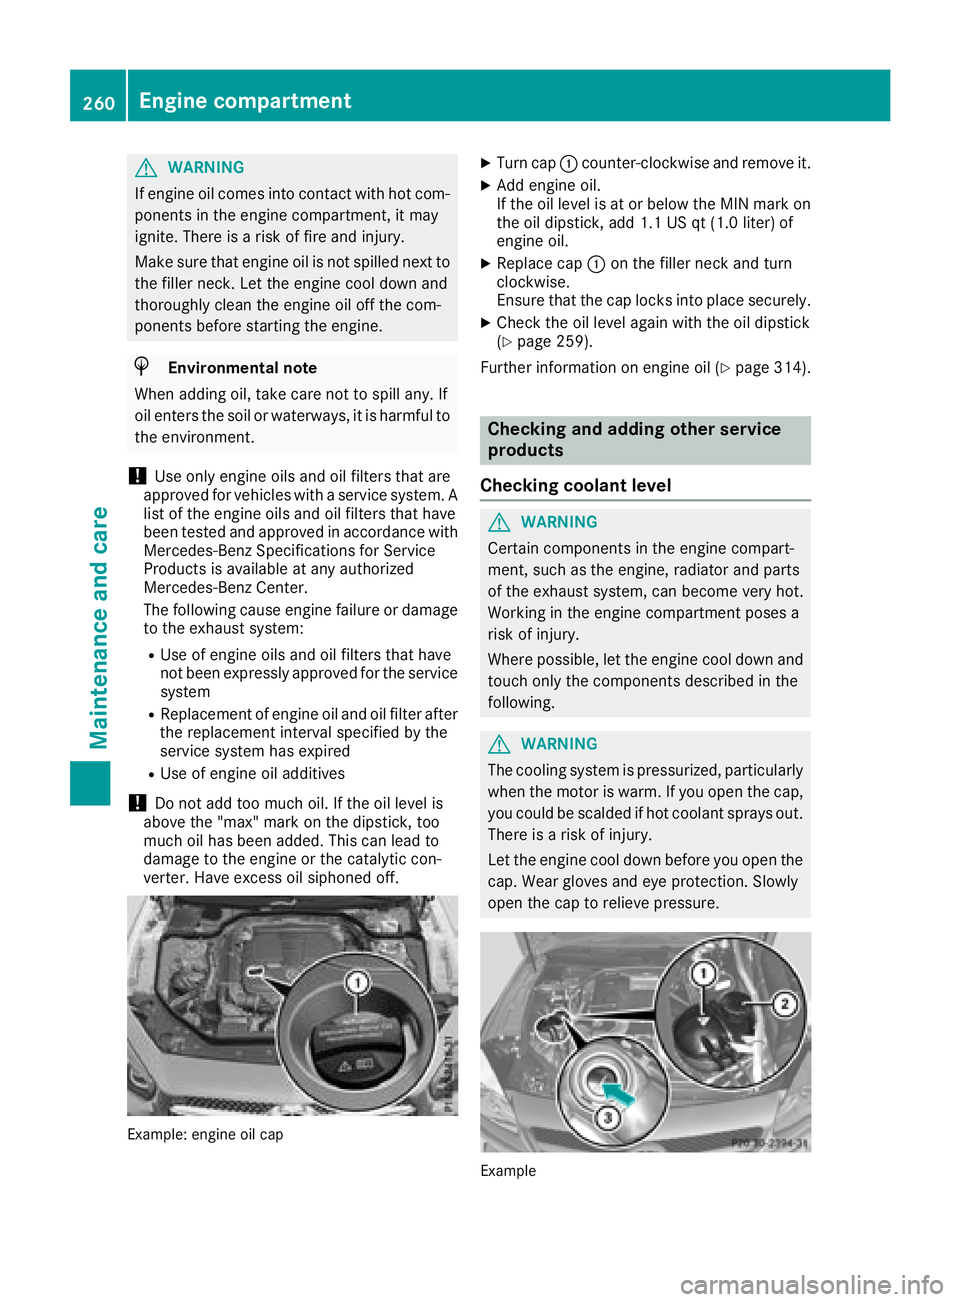
Example
XPull out oil dipstick :.
XWipe off oil dipstick :.
XSlowly slide oil dipstick :into the guide tube
to the stop, and take it out again.
If the level is between MIN mark =and MAX
mark ;, the oil level is correct.
XIf the oil level has dropped to MIN mark =or
below, add 1.1 US qt (1.0 liter) of engine oil.
Adding engine oil
GWARNING
Certain components in the engine compart-
ment, such as the engine, radiator and parts
of the exhaust system, can become very hot.
Working in the engine compartment poses a
risk of injury.
Where possible, let the engine cool down and touch only the components described in the
following.
Engine compartment259
Maintenance and care
Z
Page 262 of 322

GWARNING
If engine oil comes into contact with hot com- ponents in the engine compartment, it may
ignite. There is a risk of fire and injury.
Make sure that engine oil is not spilled next to
the filler neck. Let the engine cool down and
thoroughly clean the engine oil off the com-
ponents before starting the engine.
HEnvironmental note
When adding oil, take care not to spill any. If
oil enters the soil or waterways, it is harmful to
the environment.
!Use only engine oils and oil filters that are
approved for vehicles with a service system. A list of the engine oils and oil filters that have
been tested and approved in accordance with
Mercedes-Benz Specifications for Service
Products is available at any authorized
Mercedes-Benz Center.
The following cause engine failure or damage
to the exhaust system:
RUse of engine oils and oil filters that have
not been expressly approved for the service
system
RReplacement of engine oil and oil filter after
the replacement interval specified by the
service system has expired
RUse of engine oil additives
!Do not add too much oil. If the oil level is
above the "max" mark on the dipstick, too
much oil has been added. This can lead to
damage to the engine or the catalytic con-
verter. Have excess oil siphoned off.
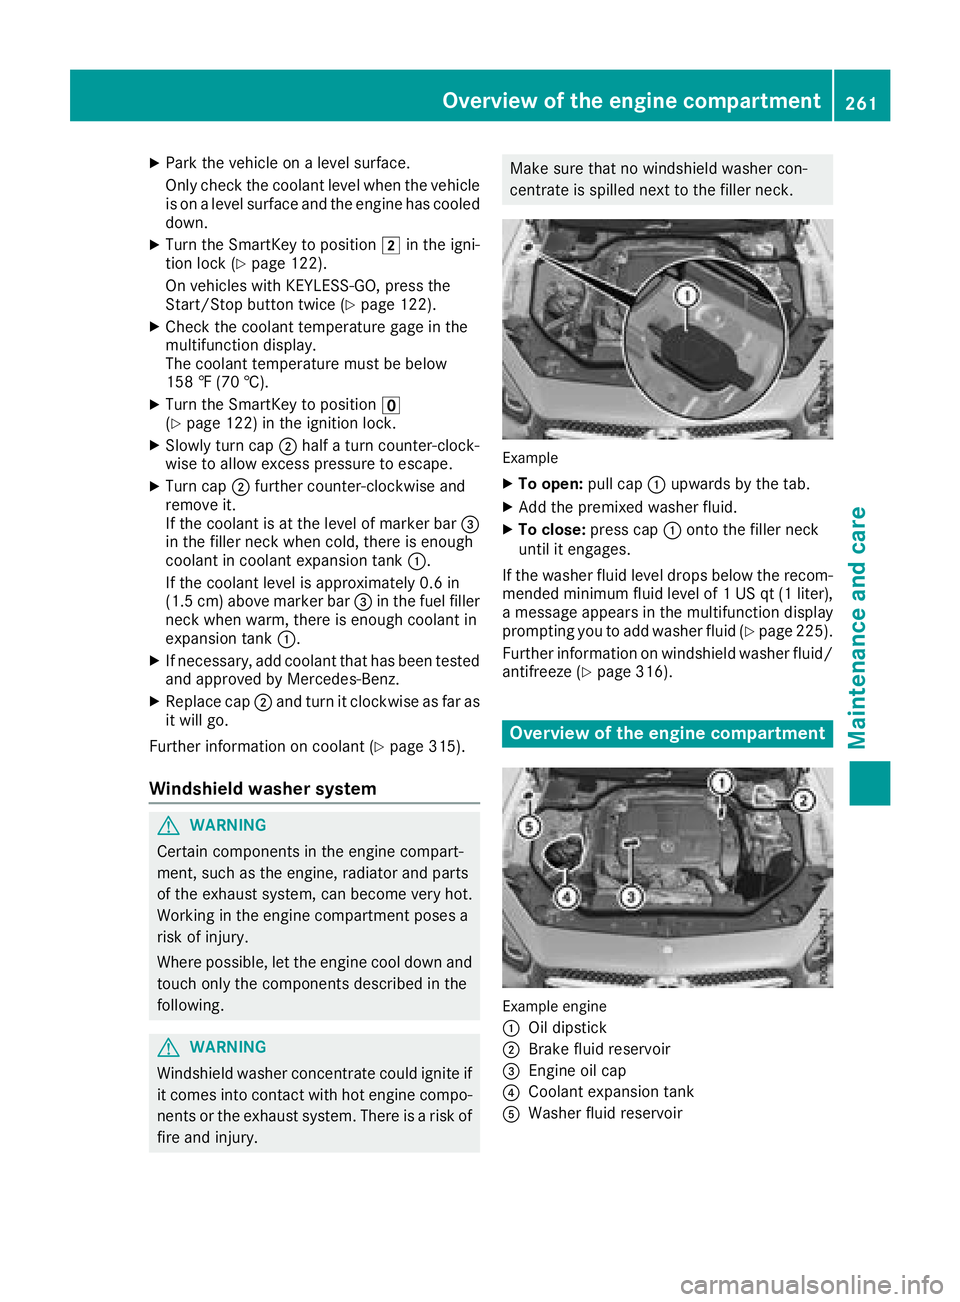
Example: engine oil cap
XTurn cap :counter-clockwise and remove it.
XAdd engine oil.
If the oil level is at or below the MIN mark on
the oil dipstick, add 1.1 US qt (1.0 liter) of
engine oil.
XReplace cap :on the filler neck and turn
clockwise.
Ensure that the cap locks into place securely.
XCheck the oil level again with the oil dipstick
(Ypage 259).
Further information on engine oil (
Ypage 314).
Checking and adding other service
products
Checking coolant level
GWARNING
Certain components in the engine compart-
ment, such as the engine, radiator and parts
of the exhaust system, can become very hot.
Working in the engine compartment poses a
risk of injury.
Where possible, let the engine cool down and touch only the components described in the
following.
GWARNING
The cooling system is pressurized, particularly
when the motor is warm. If you open the cap,
you could be scalded if hot coolant sprays out.
There is a risk of injury.
Let the engine cool down before you open the
cap. Wear gloves and eye protection. Slowly
open the cap to relieve pressure.
Example
260Engine compartment
Maintenance and care
Page 263 of 322

XPark the vehicle on a level surface.
Only check the coolant level when the vehicleis on a level surface and the engine has cooled
down.
XTurn the SmartKey to position 2in the igni-
tion lock (Ypage 122).
On vehicles with KEYLESS-GO, press the
Start/Stop button twice (
Ypage 122).
XCheck the coolant temperature gage in the
multifunction display.
The coolant temperature must be below
158 ‡ (70 †).
XTurn the SmartKey to position u
(Ypage 122) in the ignition lock.
XSlowly turn cap ;half a turn counter-clock-
wise to allow excess pressure to escape.
XTurn cap ;further counter-clockwise and
remove it.
If the coolant is at the level of marker bar =
in the filler neck when cold, there is enough
coolant in coolant expansion tank :.
If the coolant level is approximately 0.6 in
(1.5 cm) above marker bar =in the fuel filler
neck when warm, there is enough coolant in
expansion tank :.
XIf necessary, add coolant that has been tested
and approved by Mercedes-Benz.
XReplace cap;and turn it clockwise as far as
it will go.
Further information on coolant (
Ypage 315).
Windshield washer system
GWARNING
Certain components in the engine compart-
ment, such as the engine, radiator and parts
of the exhaust system, can become very hot.
Working in the engine compartment poses a
risk of injury.
Where possible, let the engine cool down and touch only the components described in the
following.
GWARNING
Windshield washer concentrate could ignite if it comes into contact with hot engine compo-
nents or the exhaust system. There is a risk of
fire and injury.
Make sure that no windshield washer con-
centrate is spilled next to the filler neck.
Example
XTo open: pull cap:upwards by the tab.
XAdd the premixed washer fluid.
XTo close: press cap :onto the filler neck
until it engages.
If the washer fluid level drops below the recom-
mended minimum fluid level of 1 US qt (1 liter),
a message appears in the multifunction display
prompting you to add washer fluid (
Ypage 225).
Further information on windshield washer fluid/
antifreeze (
Ypage 316).
Overview of the engine compartment
Example engine
:
Oil dipstick
;Brake fluid reservoir
=Engine oil cap
?Coolant expansion tank
AWasher fluid reservoir
Overview of the engine compartment261
Maintenance and care
Z