2018 MERCEDES-BENZ SL ROADSTER warning light
[x] Cancel search: warning lightPage 143 of 322
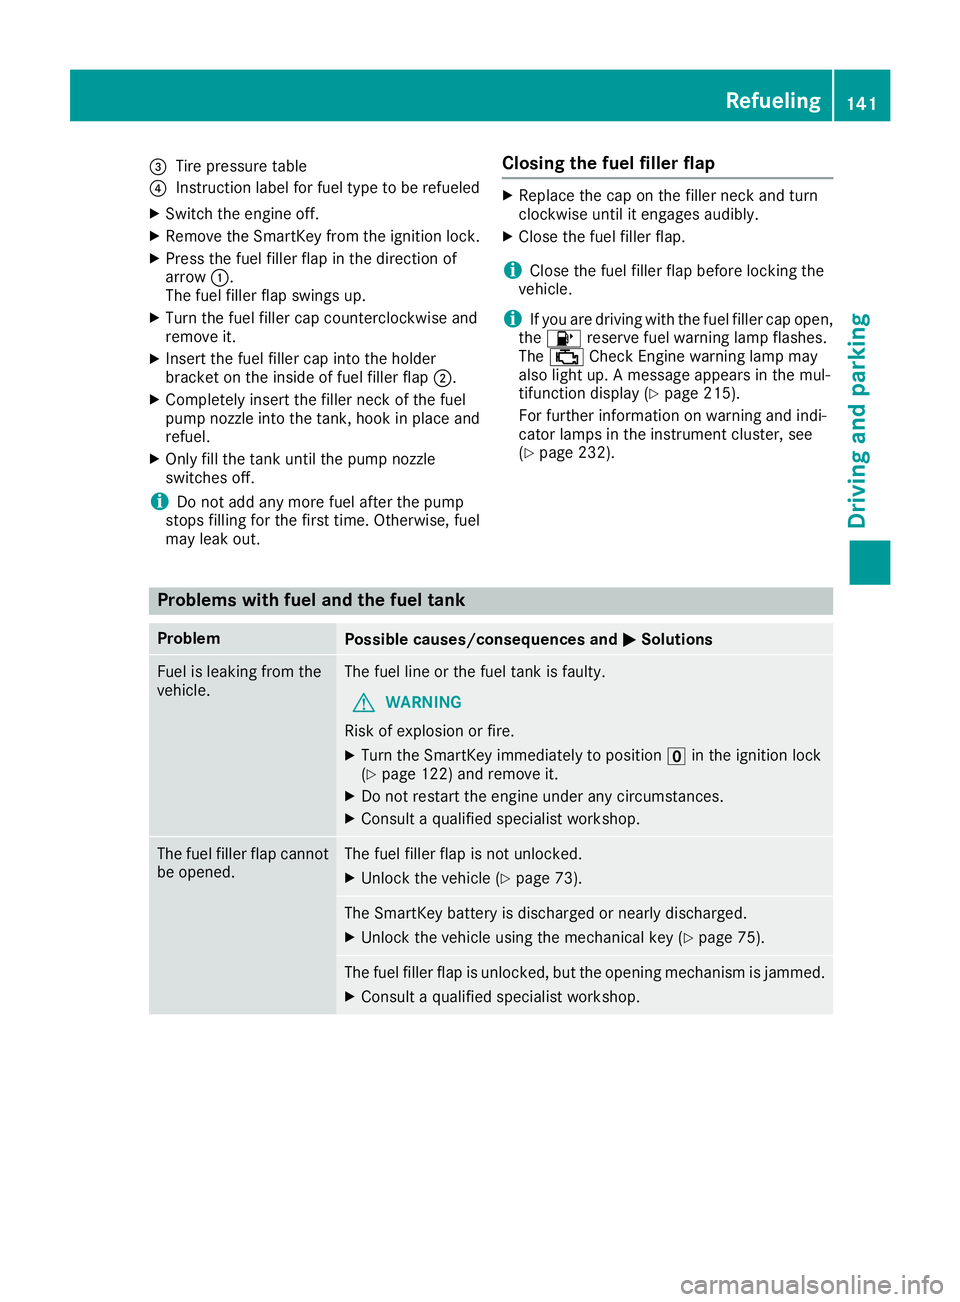
=Tire pressure table
?Instruction label for fuel type to be refueled
XSwitch the engine off.
XRemove the SmartKey from the ignition lock.
XPress the fuel filler flap in the direction of
arrow:.
The fuel filler flap swings up.
XTurn the fuel filler cap counterclockwise and
remove it.
XInsert the fuel filler cap into the holder
bracket on the inside of fuel filler flap ;.
XCompletely insert the filler neck of the fuel
pump nozzle into the tank, hook in place and
refuel.
XOnly fill the tank until the pump nozzle
switches off.
iDo not add any more fuel after the pump
stops filling for the first time. Otherwise, fuel
may leak out.
Closing the fuel filler flap
XReplace the cap on the filler neck and turn
clockwise until it engages audibly.
XClose the fuel filler flap.
iClose the fuel filler flap before locking the
vehicle.
iIf you are driving with the fuel filler cap open,
the 8 reserve fuel warning lamp flashes.
The ; Check Engine warning lamp may
also light up. A message appears in the mul-
tifunction display (
Ypage 215).
For further information on warning and indi-
cator lamps in the instrument cluster, see
(
Ypage 232).
Problems with fuel and the fuel tank
ProblemPossible causes/consequences and MSolutions
Fuel is leaking from the
vehicle.The fuel line or the fuel tank is faulty.
GWARNING
Risk of explosion or fire.
XTurn the SmartKey immediately to position uin the ignition lock
(Ypage 122) and remove it.
XDo not restart the engine under any circumstances.
XConsult a qualified specialist workshop.
The fuel filler flap cannot
be opened.The fuel filler flap is not unlocked.
XUnlock the vehicle (Ypage 73).
The SmartKey battery is discharged or nearly discharged.
XUnlock the vehicle using the mechanical key (Ypage 75).
The fuel filler flap is unlocked, but the opening mechanism is jammed.
XConsult a qualified specialist workshop.
Refueling141
Driving and parking
Z
Page 147 of 322
play. Have all the maintenance work carried in
accordance with Daimler AG regulations.
Fuel consumption also increases when driving in
cold weather, in stop-start traffic and in hilly ter-
rain.
Drinking and driving
GWARNING
Drinking and driving and/or taking drugs and driving are very dangerous combinations.
Even a small amount of alcohol or drugs can
affect your reflexes, perceptions and judg-
ment.
The possibility of a serious or even fatal acci-
dent is greatly increased when you drink or
take drugs and drive.
Do not drink or take drugs and drive or allow
anyone to drive who has been drinking or tak-
ing drugs.
Emission control
GWARNING
Combustion engines emit poisonous exhaust
gases such as carbon monoxide. Inhaling
these exhaust gases leads to poisoning. There
is a risk of fatal injury. Therefore never leave
the engine running in enclosed spaces with-
out sufficient ventilation.
Certain engine systems are designed to keep
the level of poisonous components in exhaust
fumes within legal limits.
These systems only work at peak efficiency if
they are serviced exactly in accordance with the
manufacturer's specifications. Always have
work on the engine carried out at a qualified
specialist workshop. Mercedes-Benz recom-
mends that you use an authorized Mercedes-
Benz Center for this purpose. In particular, work
relevant to safety or on safety-related systems
must be carried out at a qualified specialist
workshop.
The engine settings must not be changed under any circumstances. Furthermore, all specific
service work must be carried out at regular
intervals and in accordance with the Mercedes-
Benz service requirements. Details can be found in the Maintenance Booklet.
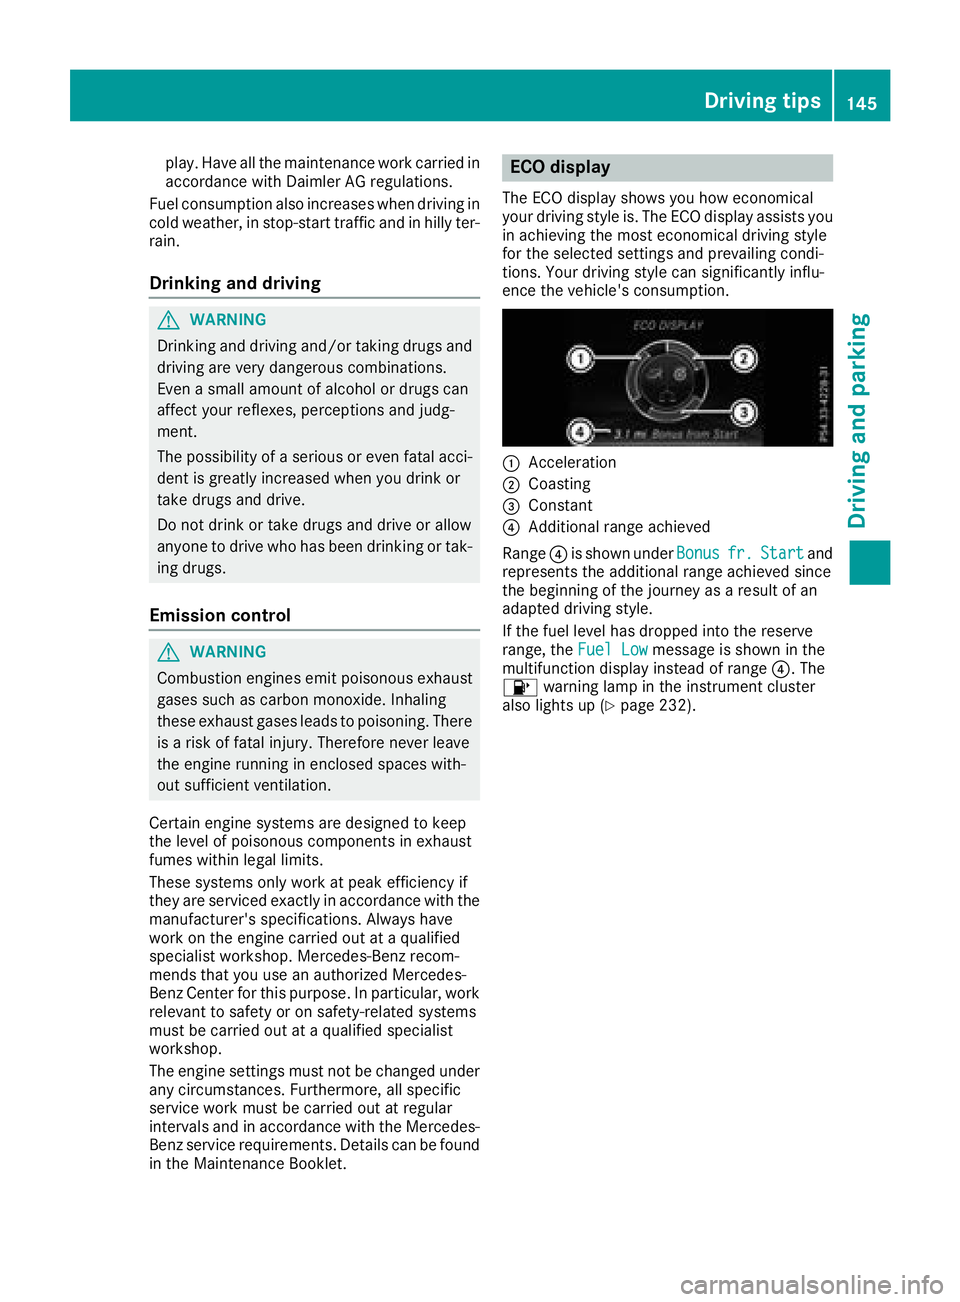
ECO display
The ECO display shows you how economical
your driving style is. The ECO display assists you
in achieving the most economical driving style
for the selected settings and prevailing condi-
tions. Your driving style can significantly influ-
ence the vehicle's consumption.
:Acceleration
;Coasting
=Constant
?Additional range achieved
Range ?is shown under Bonus
fr.Startand
represents the additional range achieved since
the beginning of the journey as a result of an
adapted driving style.
If the fuel level has dropped into the reserve
range, the Fuel Low
message is shown in the
multifunction display instead of range ?. The
8 warning lamp in the instrument cluster
also lights up (
Ypage 232).
Driving tips145
Driving and parking
Z
Page 148 of 322
The ECO display consists of three sections, with
an inner and outer area. The sections corre-
spond to the following three categories:
:Acceleration(evaluation of all accel-
eration processes):
Rthe outer area fills up and the inner area lights up green: moderate
acceleration, especially at higher
speeds
Rthe outer area empties and the
inner area is gray: sporty acceler-
ation
;Coasting (evaluation of all decelera-
tion processes):
Rthe outer area fills up and the inner area lights up green: anticipatory
driving, keeping your distance and
early release of the accelerator.
The vehicle can coast without use
of the brakes.
Rthe outer area empties and the
inner area is gray: frequent heavy
braking
=Constant (continuous evaluation
over the entire journey):
Rthe outer area fills up and the inner area lights up green: constant
speed and avoidance of unneces-
sary acceleration and deceleration
Rthe outer area empties and the
inner area is gray: fluctuations in
speed
The three inner areas display the current driving
style and light up green as a result of a particu-
larly economical driving style. Depending on thedriving situation, up to two areas may light up
simultaneously.
At the beginning of the journey, the three outer
areas are empty and fill up as a result of eco-
nomical driving. A higher level indicates a more
economical driving style. If the three outer areas
are completely filled at the same time, the driver
has adopted the most economical driving style
for the selected settings and prevailing condi-
tions. The ECO display border lights up.
The ECO display does not indicate the actual fuel consumption. The additionally achieved range
displayed under Bonus fr. start
does not
indicate a fixed consumption reduction. In addition to driving style, the actual consump-
tion is affected by other factors, such as:
Rload
Rtire pressure
Rcold start
Rchoice of route
Ractive electrical consumers
These factors are not included in the ECO dis-
play.
An economical driving style specially requires
driving at moderate engine speeds.
Achieving a higher value in the categories
"Acceleration" and "Constant":
Robserve the gearshift recommendations.
Rdrive the vehicle in drive program Cor E.
In urban traffic and stop-start traffic, drive pro-
gram Cis recommended.
On long journeys at a constant speed, e.g. on the
highway, only the outer area for "constant" will
change.
The ECO display summarizes the driving style
from the start of the journey to its completion.
Therefore, there are more marked changes in
the outer areas at the start of a journey. On lon- ger journeys, there are fewer changes. For more
marked changes, perform a manual rest
(
Ypage 189).
Further information on the ECO display
(
Ypage 188).
Braking
Important safety notes
GWARNING
If you shift down on a slippery road surface in an attempt to increase the engine's braking
effect, the drive wheels could lose their grip.
There is an increased danger of skidding and
accidents.
Do not shift down for additional engine brak-
ing on a slippery road surface.
Downhill gradients
!On long, steep gradients, you must reduce
the load on the brakes. To use engine braking,
shift to a lower gear in good time. This helps
146Driving tips
Driving and parking
Page 151 of 322
window on the side of the vehicle that is not
facing into the wind.
Have your vehicle winter-proofed at a qualified
specialist workshop at the onset of winter.
Drive particularly carefully on slippery road sur-
faces. Avoid sudden acceleration, steering and
braking maneuvers. Do not use cruise control.
If the vehicle threatens to skid or cannot be
stopped when moving at low speed:
XShift the transmission to position i.
The outside temperature indicator is not
designed to serve as an ice-warning device and is therefore unsuitable for that purpose.
Changes in the outside temperature are dis-
played after a short delay.
Indicated temperatures just above the freezing
point do not guarantee that the road surface is
free of ice. The road may still be icy, especially in
wooded areas or on bridges. The vehicle could
skid if you fail to adapt your driving style. Always
adapt your driving style and drive at a speed to
suit the prevailing weather conditions.
You should pay special attention to road condi-
tions when temperatures are around freezing
point.
For more information on driving with snow
chains, see (
Ypage 287).
For more information on driving with summer
tires, see (
Ypage 287).
Observe the notes in the "Winter operation" sec-
tion (
Ypage 287).
Driving systems
Cruise control
General notes
Cruise control maintains a constant road speed
for you. It brakes automatically in order to avoid
exceeding the set speed. On long and steep
downhill gradients, especially if the vehicle is
laden, you must select a lower gear in good time.
By doing so, you will make use of the braking
effect of the engine. This relieves the load on the
brake system and prevents the brakes from
overheating and wearing too quickly.
Use cruise control only if road and traffic con-
ditions make it appropriate to maintain a steady speed for a prolonged period. You can store any
road speed above 20 mph (30 km/h).
Important safety notes
If you fail to adapt your driving style, cruise con-
trol can neither reduce the risk of an accident
nor override the laws of physics. Cruise control
cannot take into account the road, traffic and
weather conditions. Cruise control is only an
aid. You are responsible for the distance to the
vehicle in front, for vehicle speed, for braking in
good time and for staying in lane.
Do not use cruise control:
Rin road and traffic conditions which do not
allow you to maintain a constant speed e.g. in
heavy traffic or on winding roads
Ron slippery road surfaces. Braking or accel-
erating could cause the drive wheels to lose
traction and the vehicle could then skid
Rwhen there is poor visibility, e.g. due to fog,
heavy rain or snow
If there is a change of drivers, advise the new
driver of the speed stored.
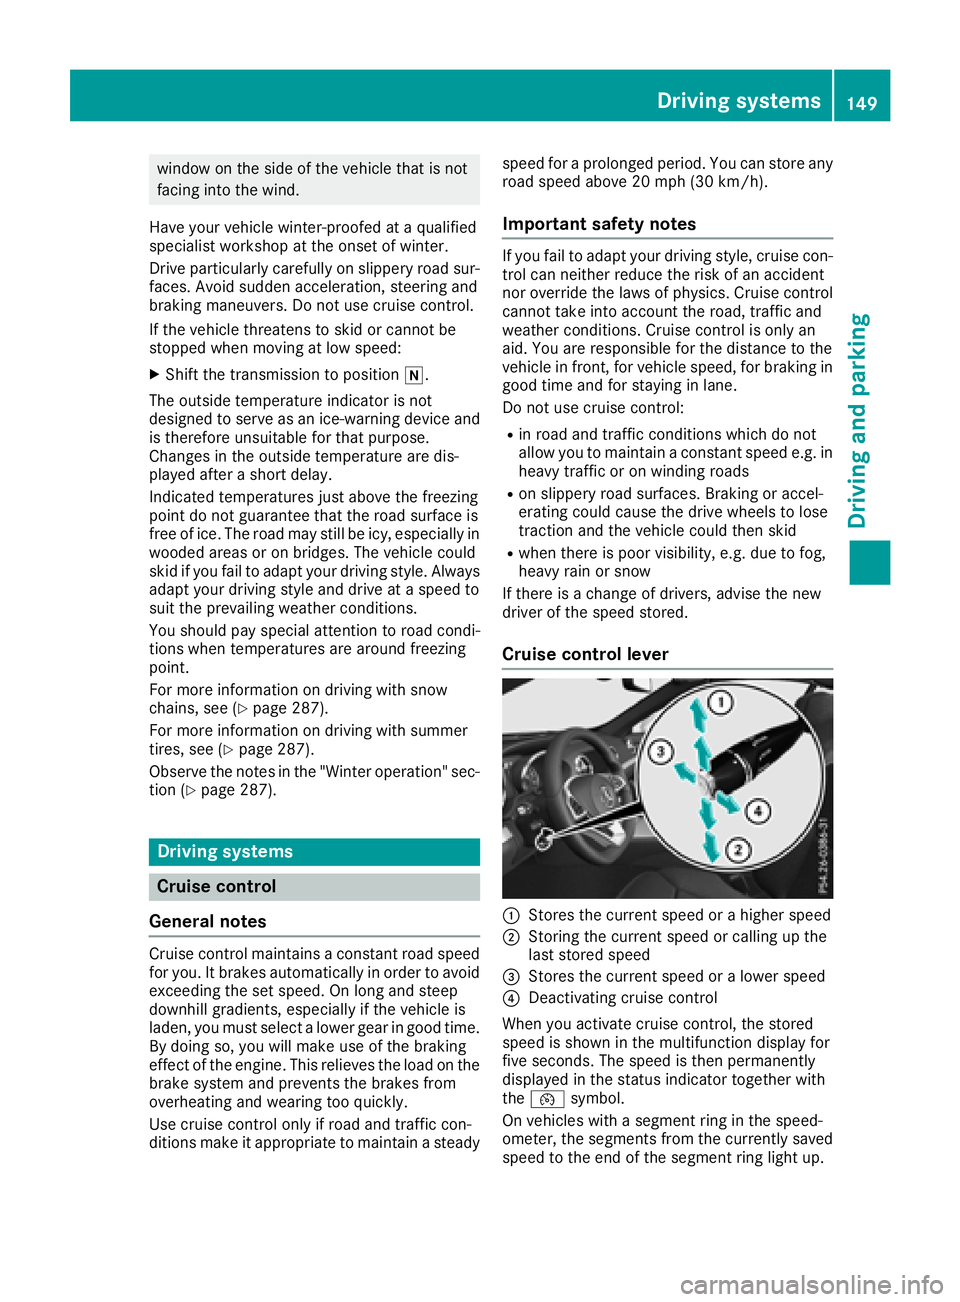
Cruise control lever
:Stores the current speed or a higher speed
;Storing the current speed or calling up the
last stored speed
=Stores the current speed or a lower speed
?Deactivating cruise control
When you activate cruise control, the stored
speed is shown in the multifunction display for
five seconds. The speed is then permanently
displayed in the status indicator together with
the ¯ symbol.
On vehicles with a segment ring in the speed-
ometer, the segments from the currently saved speed to the end of the segment ring light up.
Driving systems149
Driving and parking
Z
Page 152 of 322
Storing, maintaining and calling up a
speed
Storing and maintaining a speed
XAccelerate the vehicle to the desired speed.
XBriefly press the cruise control lever up:or
down ?.
XRemove your foot from the accelerator pedal.
Cruise control is activated. The vehicle auto-
matically maintains the stored speed.
You can store the current speed if you are driv-
ing faster than 20 mph (30 km/h).
iCruise control may be unable to maintain
the stored speed on uphill gradients. The
stored speed is resumed when the gradient
evens out. Cruise control maintains the
stored speed on downhill gradients by auto-
matically applying the brakes.
Storing or calling up a speed
GWARNING
If you call up the stored speed and it differs
from the current speed, the vehicle acceler-
ates or decelerates. If you do not know the
stored speed, the vehicle could accelerate or brake unexpectedly. There is a risk of an acci-
dent.
Pay attention to the road and traffic condi-
tions before calling up the stored speed. If you
do not know the stored speed, store the
desired speed again.
XBriefly pull the cruise control lever towards
you =.
XRemove your foot from the accelerator pedal.
The first time cruise control is activated, it
stores the current speed or regulates the
speed of the vehicle to the previously stored
speed.
Setting a speed
GWARNING
Keep in mind that it may take a brief moment until the vehicle has made the necessary
adjustments.
Increase or decrease the set vehicle speed to
a value that the prevailing road conditions and
legal speed limits permit. Otherwise, sudden
and unexpected acceleration or deceleration
of the vehicle could cause an accident and/orserious injury to you and others.
XTo adjust the set speed in 1 mph incre-
ments (1 km/h increments): briefly press
the cruise control lever up :to the pressure
point for a higher speed, or down ?for a
lower speed.
Every time the cruise control lever is pressed
up or down, the last speed stored is increased
or reduced.
XTo adjust the set speed in 5 mph incre-
ments (10 km/h increments): briefly press
the cruise control lever up :past the pres-
sure point for a higher speed, or down ?for
a lower speed.
Every time the cruise control lever is pressed
up or down, the last speed stored is increased or reduced.
iThe speed indicated in the speedometer
may differ slightly from the speed stored.
iCruise control is not deactivated if you
depress the accelerator pedal. For example, if you accelerate briefly to overtake, cruise con-
trol adjusts the vehicle's speed to the last
speed stored after you have finished overtak-
ing.
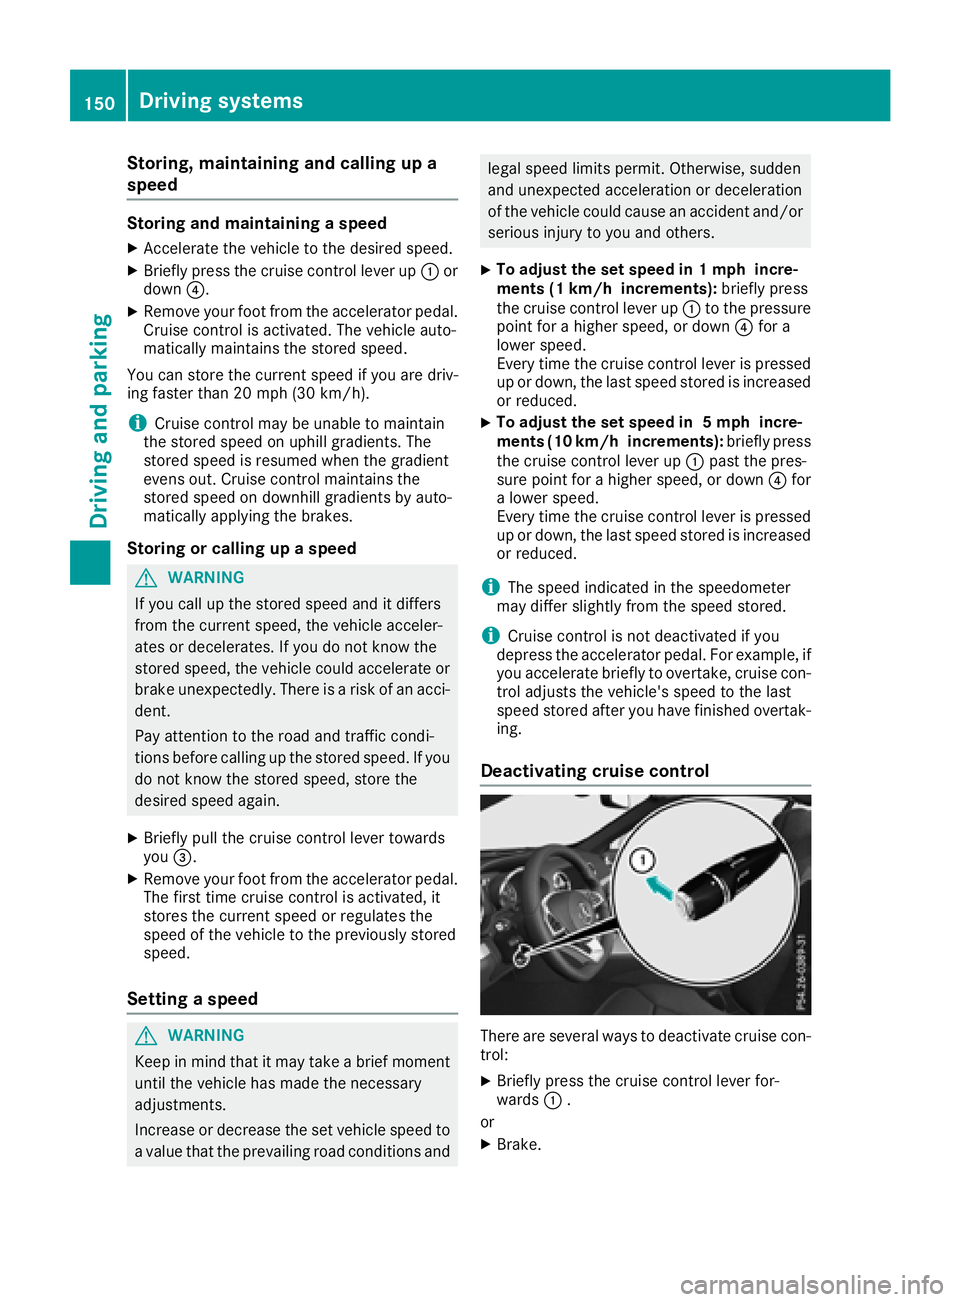
Deactivating cruise control
There are several ways to deactivate cruise con-
trol:
XBriefly press the cruise control lever for-
wards :.
or
XBrake.
150Driving systems
Driving and parking
Page 153 of 322
Cruise controlisautomatically deactivated if:
Ryou engage the electr icparking brake
Ryou are driving at less than 20 mph (30 km/h)
RESP®intervenes or you deactivate ESP®
RBrake Assist intervenes
Ryou move out of transmission position h
If cruise control isdeactivate d,you willhear a
warning tone. You willsee the Cruise Con‐
trol Offmessage inthe multifunction display
for approximate lyfive seconds.
iWhen you switch off the engine, the last
speed stored iscleared.
Distance Pilot DISTRONIC
General notes
Distance Pilot DI STRONIC regulates the speed
and automatically helps you maintain the dis-
tance to the veh icledetected infront. Vehicle s
are detected with the aid of the radar sensor
system. Distance Pilot DI STRONIC brakes auto-
matically to avoid excee ding the set speed or to
maintain the designated distance from the veh i-
cle infront.
You must select a lower gear ingood time on
long and steep downhillgradients, especially if
the veh icle isladen. By doing so, you willmake
use of the braking effect of the engine. This
relieves the load on the brake system and pre-
vents the brakes from overheating and wearing
too quic kly.
If Distance Pilot DI STRONIC detects that there is
a risk of a co llision, you will be warned visually
and acoustically. Without your intervention, Dis-
tance Pilot DI STRONIC cannot prevent a co lli-
sion. An intermittent warning tone willthen
sound and the distance warning lamp willlight
up inthe instrument cluster. Brake immediately
in order to increase the distance from the veh i-
cle infront, or take evasive action, pro videdit is
safe to doso.
For Distance Pilot DI STRONIC to assist you
when driving, the radar sensor system must be
operational.
Distance Pilot DI STRONIC operates inthe range
between 0 mph (0 km/h) an
d 120 mph
(200 km/h).
Do not u
se Distance Pilot DISTRONIC while driv-
ing on roads with steep gradients. Since Distance Pilot DISTRONIC transmits radar
waves, it can resemble the radar detectors of
the responsible authorities. You can refer to the
relevant chapter in the Operator's Manual if
questions are asked about this.
iUSA only:
This device has been approved by the FCC as
a "Vehicular Radar System". The radar sensor
is intended for use in an automotive radar
system only. Removing, tampering with, or
altering the device will void any warranties,
and is not permitted by the FCC. Do not tam-
per with, alter, or use in any non-approved
way.
Any unauthorized modification to this device
could void the user’s authority to operate the
equipment.
iCanada only: This device complies with
RSS-210 of Industry Canada. Operation is
subject to the following two conditions:
1. This device may not cause interference,
and
2. This device must accept any interference
received, including interference that may
cause undesired operation of the device.
Removal, tampering, or altering of the device
will void any warranties, and is not permitted.
Do not tamper with, alter, or use in any non-
approved way.
Any unauthorized modification to this device
could void the user's authority to operate the equipment.
Important safety notes
GWARNING
Distance Pilot DISTRONIC does not react to:
Rpeople or animals
Rstationary objects on the road, e.g. stopped
or parked vehicles
Roncoming vehicles and crossing traffic
As a result, Distance Pilot DISTRONIC may
neither give warnings nor intervene in such
situations. There is a risk of an accident.
Always pay careful attention to the traffic sit- uation and be ready to brake.
Driving systems151
Driving and parking
Z
Page 165 of 322
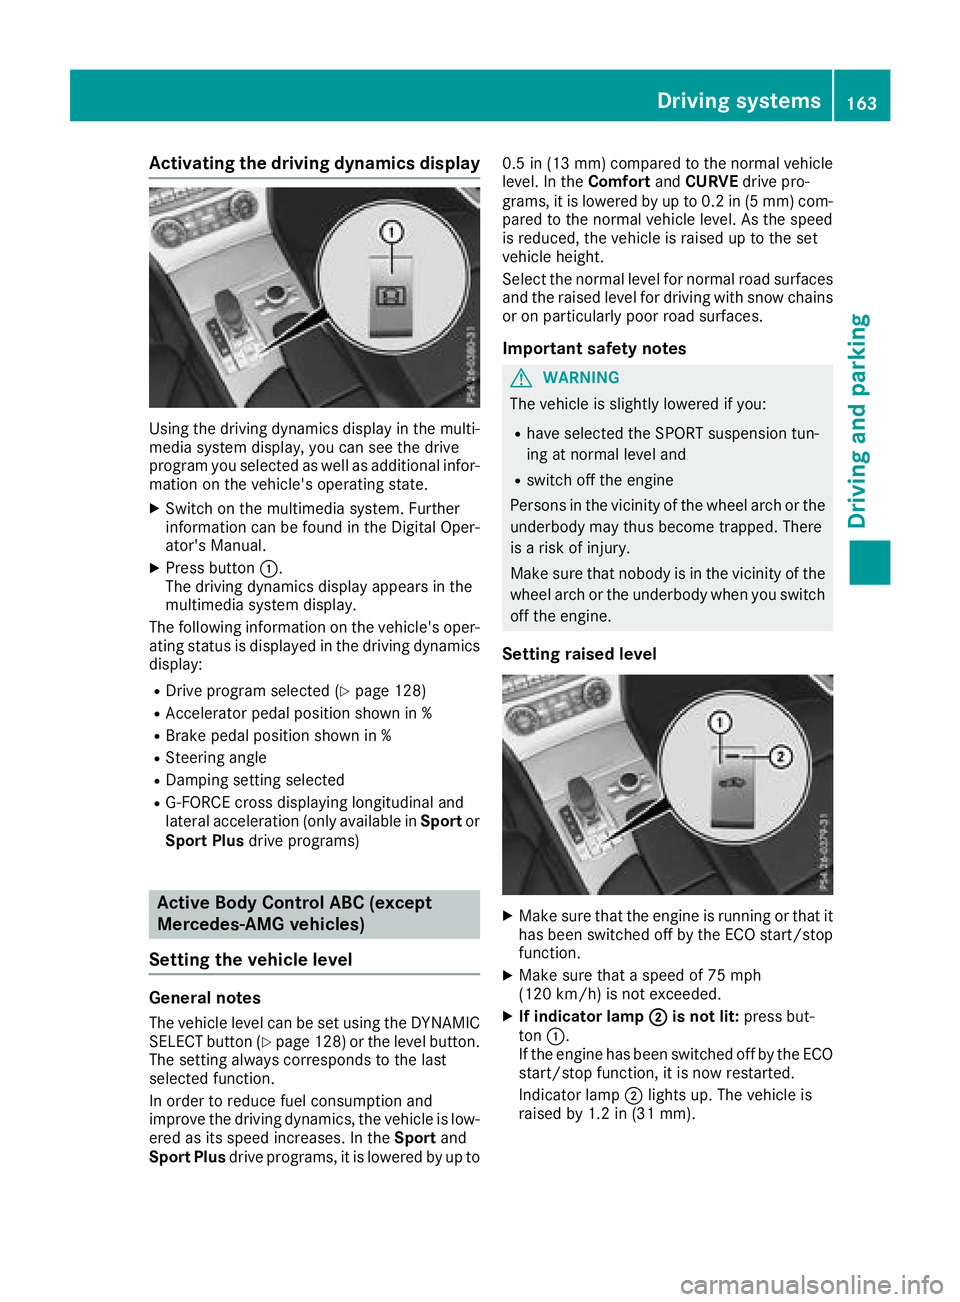
Activating the driving dynamics display
Using thedrivin gdynamic sdisplay in th emulti-
media system display, you can see th edrive
program you selected as well as additional infor-
mation on th evehicle's operating state .
XSwitchon th emultimedia system. Further
information can be foun din th eDigital Oper -
ator' sManual.
XPress butto n:.
The drivin gdynamic sdisplay appear sin th e
multimedia system display.
The followin ginformation on th evehicle's oper -
ating status is displayed in th edrivin gdynamic s
display:
RDrive program selected (Ypage 128)
RAcceleratorpedal position shown in %
RBrake pedal position shown in %
RSteering angle
RDampingsetting selected
RG-FORCE cross displayin glongitudinal and
lateral acceleration (only available in Sportor
Sport Plu sdrive programs)
Active Body Control ABC (except
Mercedes-AMG vehicles)
Setting the vehicle level
Genera lnotes
The vehicl elevel can be set usin gth eDYNAMIC
SELECT butto n (Ypage 128) or th elevel button.
The setting always correspond sto th elast
selected function .
In order to reduce fuel consumption and
improve th edrivin gdynamics, th evehicl eis low-
ere das it sspee dincreases. In th eSport and
Sport Plu sdrive programs, it is lowered by up to 0.
5in (13 mm )compared to th enormal vehicl e
level. In th eComfor tand CURVE drive pro -
grams, it is lowered by up to 0. 2in (5 mm )com-
pare dto the norm al vehicle level. As the speed
is reduced, the vehicle is raised up to the set
vehicle height.
Select the normal level for normal road surfaces
and the raised level for driving with snow chains
or on particularly poor road surfaces.
Important safety notes
GWARNING
The vehicle is slightly lowered if you:
Rhave selected the SPORT suspension tun-
ing at normal level and
Rswitch off the engine
Persons in the vicinity of the wheel arch or the underbody may thus become trapped. There
is a risk of injury.
Make sure that nobody is in the vicinity of the
wheel arch or the underbody when you switch
off the engine.
Setting raised level
XMake sure that the engine is running or that ithas been switched off by the ECO start/stop
function.
XMake sure that a speed of 75 mph
(12 0km/ h)is not exceeded.
XIf indicator lamp ;is not lit:press but-
ton :.
If the engine has been switched off by the ECO
start/stop function, it is now restarted.
Indicator lamp ;lights up. The vehicle is
raised by 1.2 in (31 mm).
Driving systems163
Driving and parking
Z
Page 167 of 322
The system may be impaired or may not function
if:
Ryou are driving more slowly than 9 mph
(15 km/h)or faster than 112 mph
(180 km/h) .
Rthe vehicle is fully laden.
Ryou drive with very high lateral acceleration.
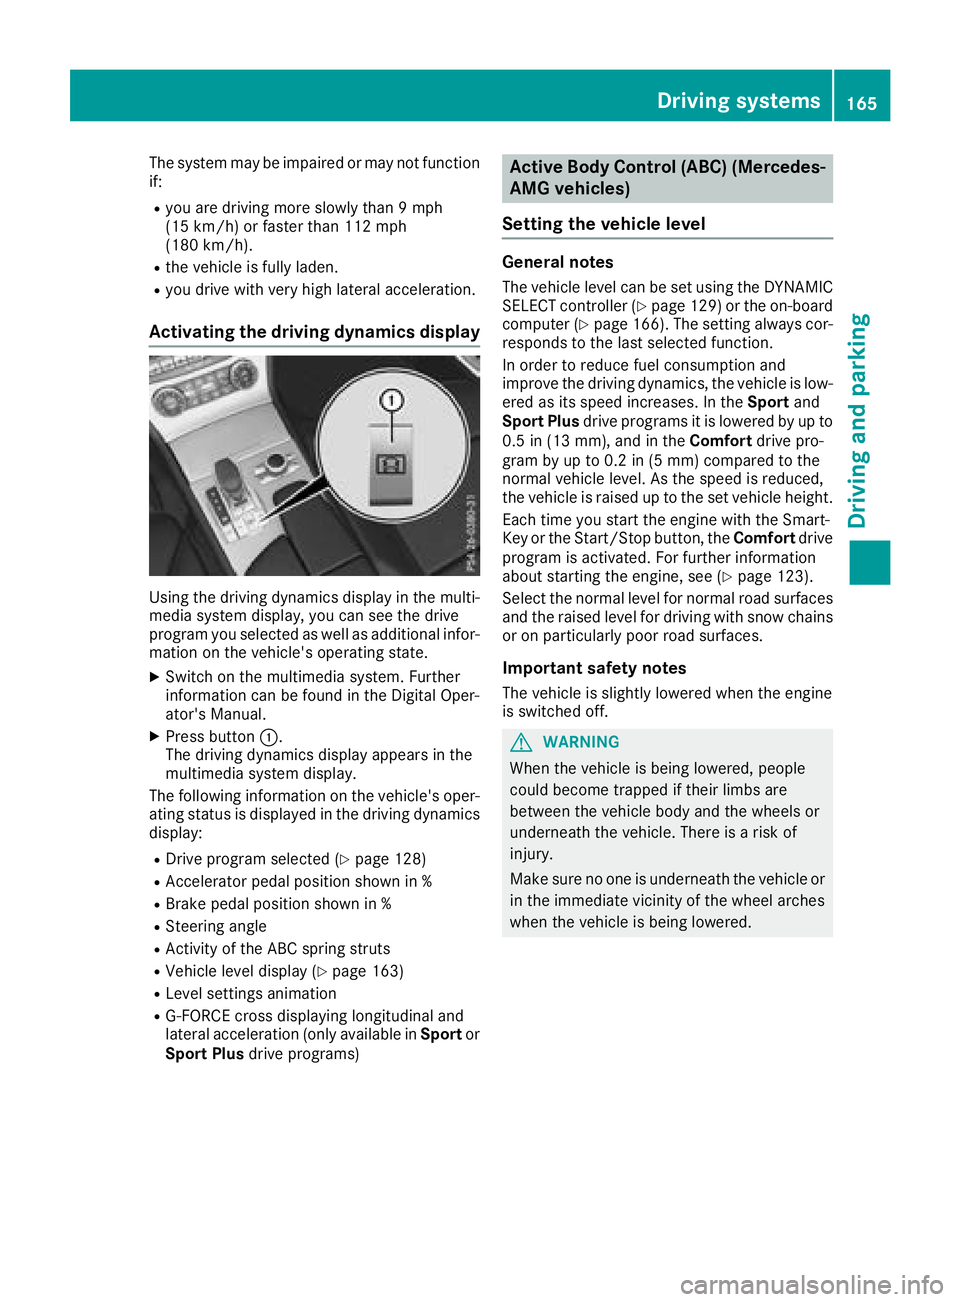
Activating the driving dynamics display
Using the driving dynamics display in the multi-
media system display, you can see the drive
program you selected as well as additional infor-
mation on the vehicle's operating state.
XSwitch on the multimedia system. Further
information can be found in the Digital Oper-
ator's Manual.
XPress button :.
The driving dynamics display appears in the
multimedia system display.
The following information on the vehicle's oper-
ating status is displayed in the driving dynamics
display:
RDrive program selected (Ypage 128)
RAccelerator pedal position shown in %
RBrake pedal position shown in %
RSteering angle
RActivity of the ABC spring struts
RVehicle level display (Ypage 163)
RLevel settings animation
RG-FORCE cross displaying longitudinal and
lateral acceleration (only available in Sportor
Sport Plus drive programs)
Active Body Control (ABC) (Mercedes-
AMG vehicles)
Setting the vehicle level
General notes
The vehicle level can be set using the DYNAMIC SELECT controller (Ypage 129 )or the on-board
computer (Ypage 166). The setting always cor-
responds to the last selected function.
In order to reduce fuel consumption and
improve the driving dynamics, the vehicle is low-
ered as its speed increases. In the Sportand
Sport Plus drive programs it is lowered by up to
0.5 in (13 mm), and in the Comfortdrive pro-
gram by up to 0.2 in (5 mm) compared to the
normal vehicle level. As the speed is reduced,
the vehicle is raised up to the set vehicle height.
Each time you start the engine with the Smart-
Key or the Start/Stop button, the Comfortdrive
program is activated. For further information
about starting the engine, see (
Ypage 123).
Select the normal level for normal road surfaces
and the raised level for driving with snow chains
or on particularly poor road surfaces.
Important safety notes
The vehicle is slightly lowered when the engine
is switched off.
GWARNING
When the vehicle is being lowered, people
could become trapped if their limbs are
between the vehicle body and the wheels or
underneath the vehicle. There is a risk of
injury.
Make sure no one is underneath the vehicle or
in the immediate vicinity of the wheel arches
when the vehicle is being lowered.
Driving systems165
Driving and parking
Z