2018 MERCEDES-BENZ SL ROADSTER length
[x] Cancel search: lengthPage 50 of 322
The system does not deactivate:
Rthe side impact air bag
Rthe headbag
Rthe Emergency Tensioning Devices
Requirements
To be classified correctly, the front passenger
must sit:
Rwith the seat belt fastened correctly
Rin an almost upright position with their back
against the seat backrest
Rwith their feet resting on the floor, if possible
If the front passenger does not observe these
conditions, OCS may produce a false classifica-
tion, e.g. because the front passenger:
Rtransfers their weight by supporting them-
selves on a vehicle armrest
Rsits in such a way that their weight is raised
from the seat cushion
If you install a child restraint system on the
front-passenger seat, be sure to observe the
correct positioning of the child restraint system.
Never place objects under or behind the child
restraint system, e.g. a cushion. Fully retract the
seat cushion length. The entire base of the child
restraint system must always rest on the seat
cushion of the front-passenger seat. The back-
rest of the forward-facing child restraint system must lie as flat as possible against the backrest
of the front-passenger seat.
The child restraint system must not touch the
roof or be subjected to a load by the head
restraint. Adjust the angle of the seat backrest
and the head restraint position accordingly.
Only then can OCS be guaranteed to function
correctly. Always observe the child restraint sys-
tem manufacturer's installation and operating
instructions.
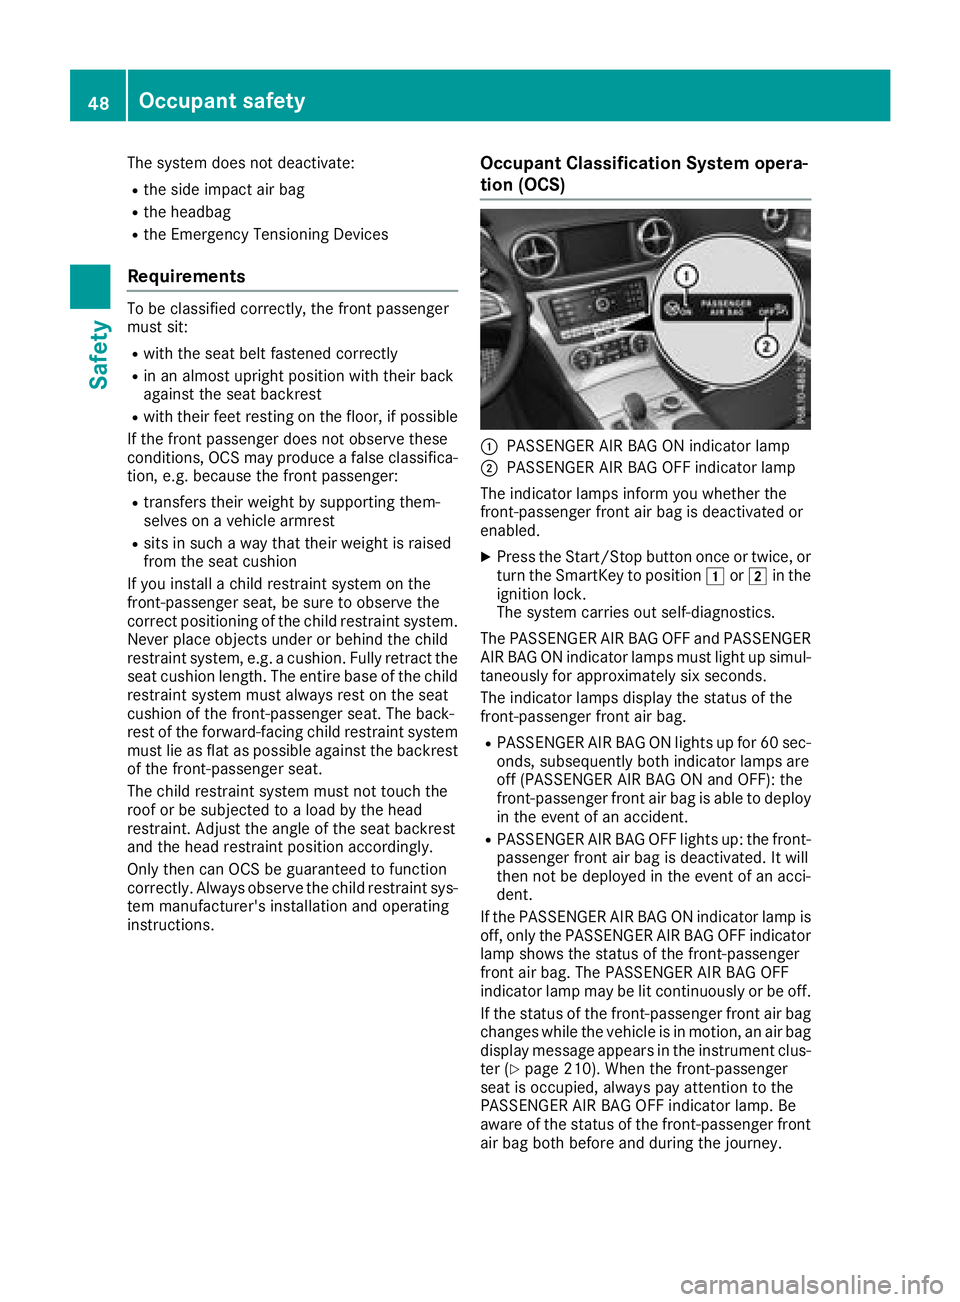
Occupant Classification System opera-
tion (OCS)
:PASSENGER AIR BAG ON indicator lamp
;PASSENGER AIR BAG OFF indicator lamp
The indicator lamps inform you whether the
front-passenger front air bag is deactivated or
enabled.
XPress the Start/Stop button once or twice, or turn the SmartKey to position 1or2 in the
ignition lock.
The system carries out self-diagnostics.
The PASSENGER AIR BAG OFF and PASSENGER
AIR BAG ON indicator lamps must light up simul-
taneously for approximately six seconds.
The indicator lamps display the status of the
front-passenger front air bag.
RPASSENGER AIR BAG ON lights up for 60 sec-
onds, subsequently both indicator lamps are
off (PASSENGER AIR BAG ON and OFF): the
front-passenger front air bag is able to deploy
in the event of an accident.
RPASSENGER AIR BAG OFF lights up: the front-
passenger front air bag is deactivated. It will
then not be deployed in the event of an acci-
dent.
If the PASSENGER AIR BAG ON indicator lamp is off, only the PASSENGER AIR BAG OFF indicator
lamp shows the status of the front-passenger
front air bag. The PASSENGER AIR BAG OFF
indicator lamp may be lit continuously or be off.
If the status of the front-passenger front air bag
changes while the vehicle is in motion, an air bag
display message appears in the instrument clus-
ter (
Ypage 210). When the front-passenger
seat is occupied, always pay attention to the
PASSENGER AIR BAG OFF indicator lamp. Be
aware of the status of the front-passenger front
air bag both before and during the journey.
48Occupant safety
Safety
Page 51 of 322
GWARNING
If the PASSENGER AIR BAG OFF indicator
lamp is lit, the front-passenger front air bag is
disabled. It will not be deployed in the event of
an accident and cannot perform its intended
protective function. A person in the front-
passenger seat could then, for example, come
into contact with the vehicle's interior, espe-
cially if the person is sitting too close to the
dashboard. This poses an increased risk of
injury or even fatal injury.
When the front-passenger seat is occupied,
always ensure that:
Rthe classification of the person in the front- passenger seat is correct and the front-
passenger front air bag is enabled or disa-
bled in accordance with the person in the
front-passenger seat
Rthe front-passenger seat has been moved
back as far back as possible.
Rthe person is seated correctly.
Make sure, both before and during the jour-
ney, that the status of the front-passenger
front air bag is correct.
GWARNING
If you secure a child in a rearward-facing child
restraint system on the front-passenger seat
and the PASSENGER AIR BAG OFF indicator
lamp is off, the front-passenger front air bag
can deploy in the event of an accident. The
child could be struck by the air bag. This poses an increased risk of injury or even fatal injury.
Make sure that the front-passenger front air
bag has been deactivated. The PASSENGER
AIR BAG OFF indicator lamp must be lit.
NEVER use a rearward-facing child restraint
on a seat protected by an ACTIVE FRONT AIR-
BAG in front of it; DEATH or SERIOUS INJURY
to the child can occur.
If the PASSENGER AIR BAG OFF indicator lamp
stays off, do not install a rearward-facing child
restraint system on the front-passenger seat.
You can find more information on OCS under
"Problems with the Occupant Classification Sys-
tem" (
Ypage 51).
GWARNING
If you secure a child in a forward-facing child
restraint system on the front-passenger seat
and you position the front-passenger seat too close to the dashboard, in the event of an
accident, the child could:
Rcome into contact with the vehicle's inte-
rior if the PASSENGER AIR BAG OFF indi-
cator lamp is lit, for example
Rbe struck by the air bag if the PASSENGER
AIR BAG OFF indicator lamp is off
This poses an increased risk of injury or even fatal injury.
Always move the front-passenger seat as far
back as possible and fully retract the seat
cushion length. Always make sure that the
shoulder belt strap is correctly routed from
the vehicle seat belt guide to the shoulder belt
guide on the child restraint system. The shoul-
der belt strap must be routed forwards and
downwards from the seat belt guide. Always
observe the child restraint system manufac-
turer's installation instructions.
If OCS determines that:
RThe front-passenger seat is unoccupied, the
PASSENGER AIR BAG OFF indicator lamp
lights up after the system self-test and
remains lit. This indicates that the front-
passenger front air bag is deactivated.
RThe front-passenger seat is occupied by a
child of up to twelve months old, in a standard
child restraint system, the PASSENGER AIR
BAG OFF indicator lamp lights up after the
system self-test and remains lit. This indi-
cates that the front-passenger front air bag is
deactivated.
But even in the case of a twelve-month-old
child, in a standard child restraint system, the
PASSENGER AIR BAG OFF indicator lamp can
go out after the system self-test. This indi-
cates that the front-passenger front air bag is
activated. The result of the classification is
dependent on, among other factors, the child
restraint system and the child's stature. Make
sure that the conditions for a correct classi-
fication are met. If the PASSENGER AIR BAG
OFF indicator lamp remai ns off, do not i
nstall
Occupant safety49
Safety
Z
Page 54 of 322
ProblemPossible causes/consequences andMSolutions
The PASSENGER AIR
BAG OFF indicator lamp
lights up and remains lit,
even though the front-
passenger seat is occu-
pied by an adult or a per-
son of a stature corre-
sponding to that of an
adult.The classification of the person on the front-passenger seat is incor-
rect.
XMake sure the conditions for a correct classification of the person
on the front-passenger seat are met (Ypage 48).
XIf the PASSENGER AIR BAG OFF indicator lamp remains lit, the front-
passenger seat may not be used.
XHave OCS checked as soon as possible at an authorized Mercedes- Benz Center.
The PASSENGER AIR
BAG OFF indicator lamp
does not light up and/or
does not stay on.
The front-passenger seat
is:
Runoccupied
Roccupied by the
weight of a child up to
twelve months old in a
child restraint system
OCS is malfunctioning.
XMake sure there is nothing between the seat cushion and the child
seat.
XMake sure that the entire base of the child restraint system rests on
the seat cushion of the front-passenger seat. The backrest of the
forward-facing child restraint system must lie as flat as possible
against the backrest of the front-passenger seat. If necessary,
adjust the position of the front-passenger seat.
XMake sure that the seat cushion length is fully retracted.
XWhen installing the child restraint system, make sure that the seat
belt is tight. Do not pull the seat belt tight using the front-passenger seat adjustment. This could result in the seat belt and the child
restraint system being pulled too tightly.
XCheck for correct installation of the child restraint system.
Make sure that the head restraint does not apply a load to the child
restraint system. If necessary, adjust the head restraint accord-
ingly.
XMake sure that no objects are applying additional weight onto the
seat.
XIf the PASSENGER AIR BAG OFF indicator lamp remains off and/or
the PASSENGER AIR BAG ON indicator lamp lights up, do not install a child restraint system on the front-passenger seat.
XHave OCS checked as soon as possible at an authorized Mercedes-Benz Center.
Roll bar
GDANGER
If the roll bar has developed a malfunction, it
may not function, e.g. in the event of an acci- dent. The roll bars may then not protect the
vehicle occupants as intended. This poses an
increased risk of injury or even fatal injury.
Have roll bars checked immediately at a quali-
fied specialist workshop.
GWARNING
If you place objects or clothing on the roll bar
covers, these could impair roll bar extension.
The roll bars may then not protect the vehicle occupants as intended. In addition, objects
could endanger the vehicle occupants when
the roll bar is extending. This poses an
increased risk of injury or even fatal injury.
Ensure that the movement area of the roll bar
covers is kept clear. Always stow all objects in
the vehicle correctly.
52Occupant safety
Safety
Page 61 of 322
Child restraint system on the front-
passenger seat
General notes
If you install a child restraint system on the
front-passenger seat, always observe the
instructions and safety notes on the "Occupant
Classification System (OCS)" (
Ypage 47).
You can thus avoid the risks that could arise as
a result of:
Ran incorrectly categorized person in the front-
passenger seat
Rthe unintentional deactivation of the front-
passenger front air bag
Rthe unsuitable positioning of the child
restraint system, e.g. too close to the dash-
board
Rearward-facing child restraint system
If it is absolutely necessary to install a rearward-
facing child restraint system on the front-
passenger seat, always make sure that the
front-passenger front air bag is deactivated.
Only if the PASSENGER AIR BAG OFF indicator
lamp is permanently lit (
Ypage 41) is the front-
passenger front air bag deactivated.
Always observe the child restraint system man-
ufacturer's installation and operating instruc-
tions.
Forward-facing child restraint system
If you secure a child in a forward-facing child
restraint system on the front-passenger seat,
always move the front-passenger seat as far
back as possible. Fully retract the seat cushion
length. The entire base of the child restraint sys-
tem must always rest on the seat cushion of the
front-passenger seat. The backrest of the child
restraint system must lie as flat as possible
against the backrest of the front-passenger
seat. The child restraint system must not touch
the roof or be subjected to a load by the head
restraint. Adjust the angle of the seat backrest
and the head restraint position accordingly.
Always make sure that the shoulder belt strap is
correctly routed from the front-passenger seat
belt guide to the shoulder belt guide on the child restraint system. The shoulder belt strap must
be routed forward and down from the front-
passenger seat belt guide. If necessary, adjust
the front-passenger seat accordingly. Always observe the child restraint system man-
ufacturer's installation and operating instruc-
tions.
Pets in the vehicle
GWARNING
If you leave animals unattended or unsecured
in the vehicle, they could press buttons or
switches, for example.
As a result, they could:
Ractivate vehicle equipment and become
trapped, for example
Ractivate or deactivate systems, thereby
endangering other road users
Unsecured animals could also be flung around
the vehicle in the event of an accident or sud-
den steering or braking, thereby injuring vehi-
cle occupants. There is a risk of an accident
and injury.
Never leave animals unattended in the vehi-
cle. Always secure animals properly during
the journey, e.g. use a suitable animal trans-
port box.
Driving safety systems
Overview of driving safety systems
In this section, you will find information about
the following driving safety systems:
RABS (Anti-lock Braking System)
(Ypage 60)
RBAS (B rakeAssist System) (Ypage 60)
RBrake Assist with cross-traffic function
(Ypage 61)
RActive Brake Assist (Ypage 62)
RAdaptive brake lights (Ypage 65)
RESP®(Electronic StabilityProgram)
(Ypage 65)
REBD (Electronic Brake force Distribution)
(Ypage 69)
RADAPTIVE BRAKE (Ypage 69)
Driving safety systems59
Safety
Z
Page 145 of 322
The function of the electric parking brake is
dependent on the on-board voltage. If the on-
board voltage is low or there is a malfunction in
the system, it may not be possible to apply the
released parking brake.
XIf this is the case, only park the vehicle on
level ground and secure it to prevent it rolling
away.
XShift the automatic transmission to position
j.
It may not be possible to release an applied
parking brake if the on-board voltage is low or
there is a malfunction in the system. Contact a
qualified specialist workshop.
The electric parking brake performs a function
test at regular intervals while the engine is
switched off. The sounds that can be heard while
this is occurring are normal.
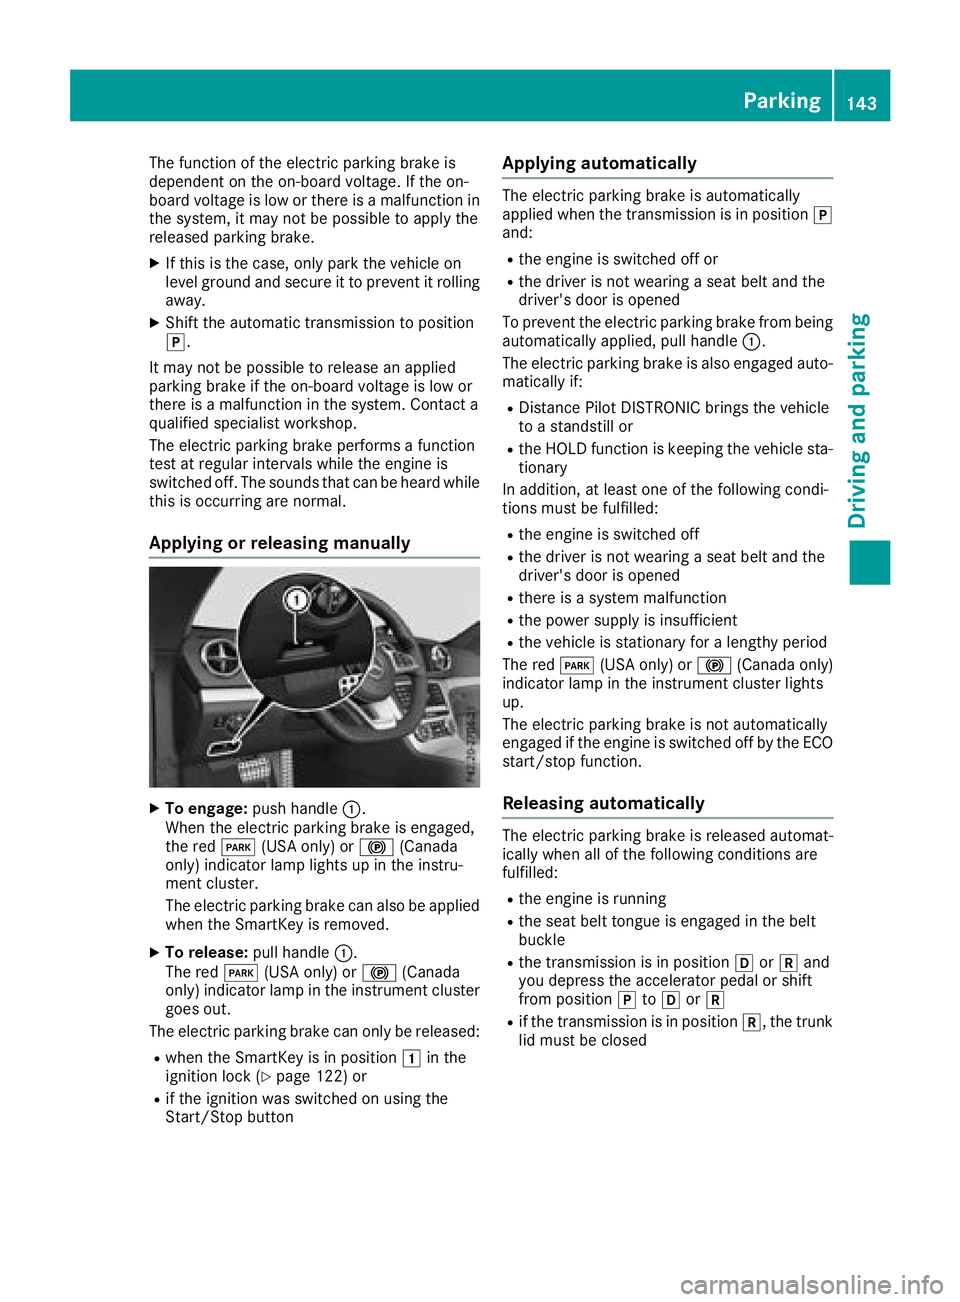
Applying or releasing manually
XTo engage: push handle :.
When the electric parking brake is engaged,
the red F(USA only) or !(Canada
only) indicator lamp lights up in the instru-
ment cluster.
The electric parking brake can also be applied
when the SmartKey is removed.
XTo release: pull handle:.
The red F(USA only) or !(Canada
only) indicator lamp in the instrument cluster
goes out.
The electric parking brake can only be released:
Rwhen the SmartKey is in position 1in the
ignition lock (Ypage 122) or
Rif the ignition was switched on using the
Start/Stop button
Applying automatically
The electric parking brake is automatically
applied when the transmission is in position j
and:
Rthe engine is switched off or
Rthe driver is not wearing a seat belt and the
driver's door is opened
To prevent the electric parking brake from being automatically applied, pull handle :.
The electric parking brake is also engaged auto-
matically if:
RDistance Pilot DISTRONIC brings the vehicle
to a standstill or
Rthe HOLD function is keeping the vehicle sta- tionary
In addition, at least one of the following condi-
tions must be fulfilled:
Rthe engine is switched off
Rthe driver is not wearing a seat belt and the
driver's door is opened
Rthere is a system malfunction
Rthe power supply is insufficient
Rthe vehicle is stationary for a lengthy period
The red F(USA only) or !(Canada only)
indicator lamp in the instrument cluster lights
up.
The electric parking brake is not automatically
engaged if the engine is switched off by the ECO
start/stop function.
Releasing automatically
The electric parking brake is released automat-
ically when all of the following conditions are
fulfilled:
Rthe engine is running
Rthe seat belt tongue is engaged in the belt
buckle
Rthe transmission is in position hork and
you depress the accelerator pedal or shift
from position jtoh ork
Rif the transmission is in position k, the trunk
lid must be closed
Parking143
Driving and parking
Z
Page 180 of 322
The functionality of ATTENTION ASSIST is
restricted and warnings may be delayed or not
occur at all:
Rif the length of the journey is less than approx-
imately 30 minutes
Rif the road condition is poor, e.g. if the surface
is uneven or if there are potholes
Rif there is a strong side wind
Rif you have adopted a sporty driving style with
high cornering speeds or high rates of accel-
eration
Rif you are predominantly driving slower than
37 mph (60 km/h) or faster than 125 mph
(200 km/h)
Rif you are driving with the Steering Pilot of
Distance Pilot DISTRONIC activated
Rif the time has been set incorrectly
Rin active driving situations, such as when you
change lanes or change your speed
The attention level evaluation is deleted and
restarts when the journey is continued, if:
Ryou switch off the engine
Ryou take off your seat belt and open the driv-
er's door, e.g. for a change of drivers or to
take a break
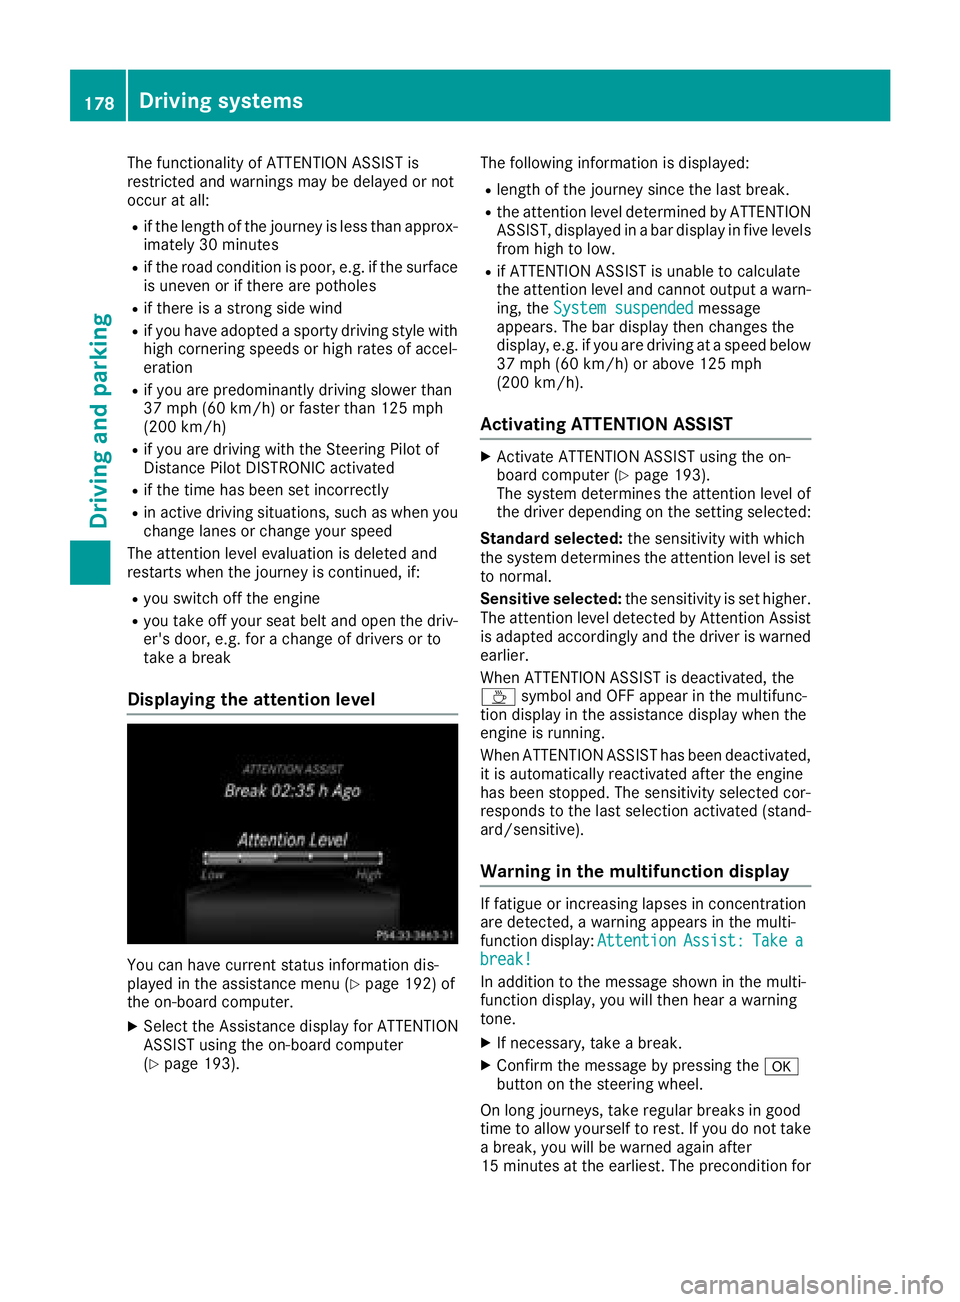
Displaying the attention level
You can have current status information dis-
played in the assistance menu (Ypage 192) of
the on-board computer.
XSelect the Assistance display for ATTENTION
ASSIST using the on-board computer
(
Ypage 193). The following information is displayed:
Rlength of the journey since the last break.
Rthe attention level determined by ATTENTION
ASSIST, displayed in a bar display in five levels
from high to low.
Rif ATTENTION ASSIST is unable to calculate
the attention level and cannot output a warn-
ing, the
System suspended
message
appears. The bar display then changes the
display, e.g. if you are driving at a speed below
37 mph (60 km/h) or above 125 mph
(200 km/h) .
Activating ATTENTION ASSIST
XActivat eATTENTION ASSIST usin gth eon -
boar dcomputer (Ypage 193).
The system determine sth eattention level of
th edriver depending on th esetting selected:
Standar dselected: thesensitivit ywit hwhic h
th esystem determine sth eattention level is set
to normal.
Sensitive selected: thesensitivit yis set higher.
The attention level detecte dby Attention Assis t
is adapted accordingly and th edriver is warned
earlier .
When ATTENTION ASSIST is deactivated, th e
À symbol and OF Fappear in th emultifunc-
tion display in th eassistanc edisplay when th e
engin eis running.
When ATTENTION ASSIST has been deactivated,
it is automatically reactivated after th eengin e
has been stopped. The sensitivit yselected cor-
responds to th elast selection activated (stand -
ard/sensitive).
Warn ing in the multifunction display
If fatigue or increasing lapse sin concentration
are detected, awarning appear sin th emulti-
function display: Attention
Assist:Takeabreak!
In addition to th emessage shown in th emulti-
function display, you will then hear awarning
tone .
XIf necessary, tak e abreak.
XConfir mthemessage by pressing th ea
butto non th esteering wheel.
On lon gjourneys, tak eregular breaks in goo d
time to allow yourself to rest. If you do no ttak e
a break, you will be warned again after
15 minute sat the earliest. The precondition for
178Driving system s
Driving an d parking
Page 201 of 322
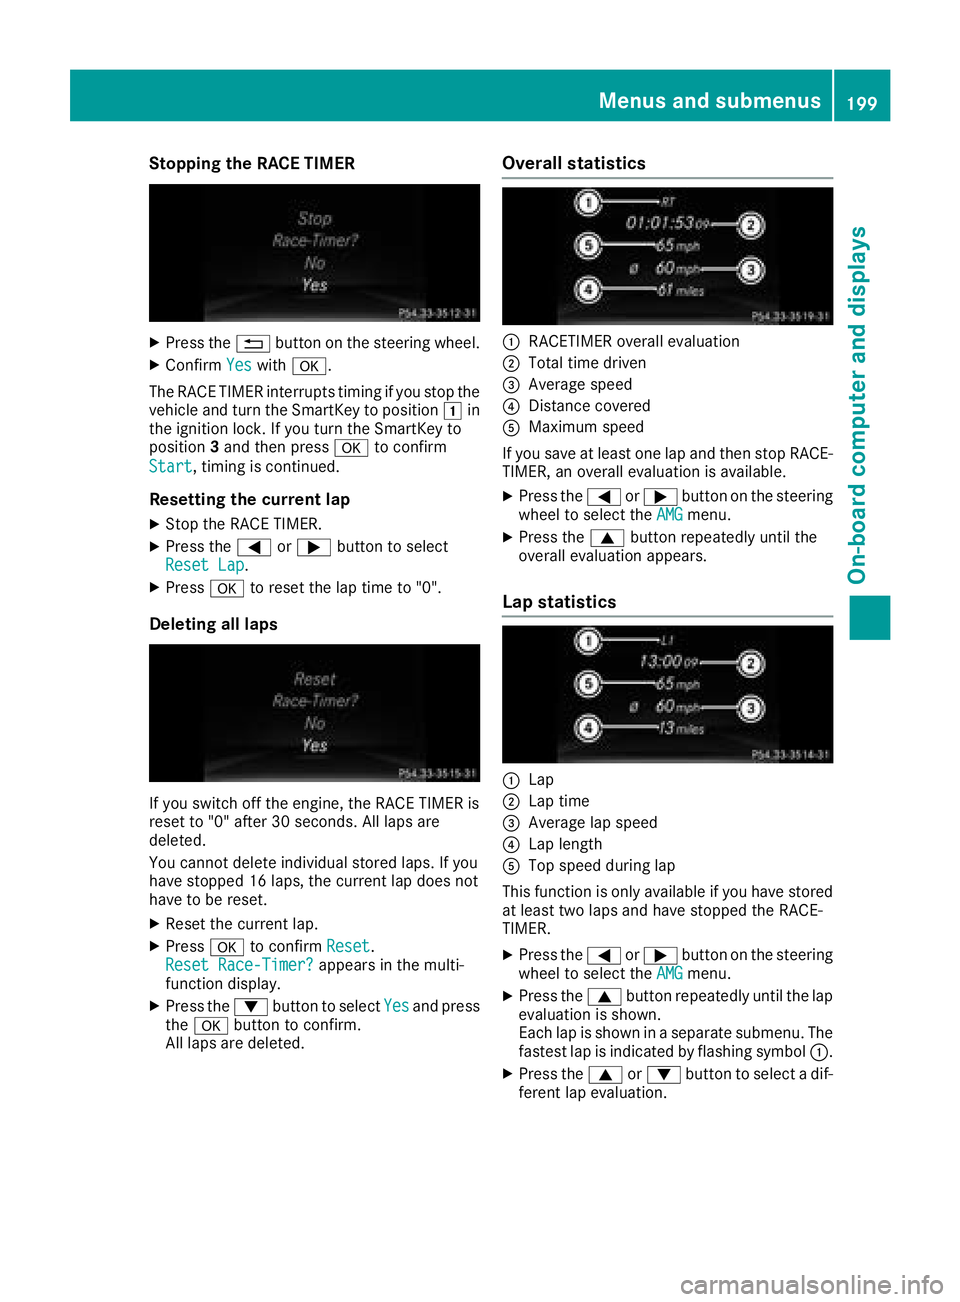
Stopping the RACE TIMER
XPress the%button on the steering wheel.
XConfirm Yeswitha.
The RACE TIMER interrupts timing if you stop the
vehicle and turn the SmartKey to position 1in
the ignition lock. If you turn the SmartKey to
position 3and then press ato confirm
Start
, timing is continued.
Resetting the current lap
XStop the RACE TIMER.
XPress the =or; button to select
Reset Lap.
XPress ato reset the lap time to "0".
Deleting all laps
If you switch off the engine, the RACE TIMER is
reset to "0" after 30 seconds. All laps are
deleted.
You cannot delete individual stored laps. If you
have stopped 16 laps, the current lap does not
have to be reset.
XReset the current lap.
XPress ato confirm Reset.
Reset Race-Timer?appears in the multi-
function display.
XPress the :button to select Yesand press
the a button to confirm.
All laps are deleted.
Overall statistics
:RACETIMER overall evaluation
;Total time driven
=Average speed
?Distance covered
AMaximum speed
If you save at least one lap and then stop RACE- TIMER, an overall evaluation is available.
XPress the =or; button on the steering
wheel to select the AMGmenu.
XPress the9button repeatedly until the
overall evaluation appears.
Lap statistics
:Lap
;Lap time
=Average lap speed
?Lap length
ATop speed during lap
This function is only available if you have stored
at least two laps and have stopped the RACE-
TIMER.
XPress the =or; button on the steering
wheel to select the AMGmenu.
XPress the9button repeatedly until the lap
evaluation is shown.
Each lap is shown in a separate submenu. The
fastest lap is indicated by flashing symbol :.
XPress the9or: button to select a dif-
ferent lap evaluation.
Menus and submenus199
On-board computer and displays
Z
Page 279 of 322
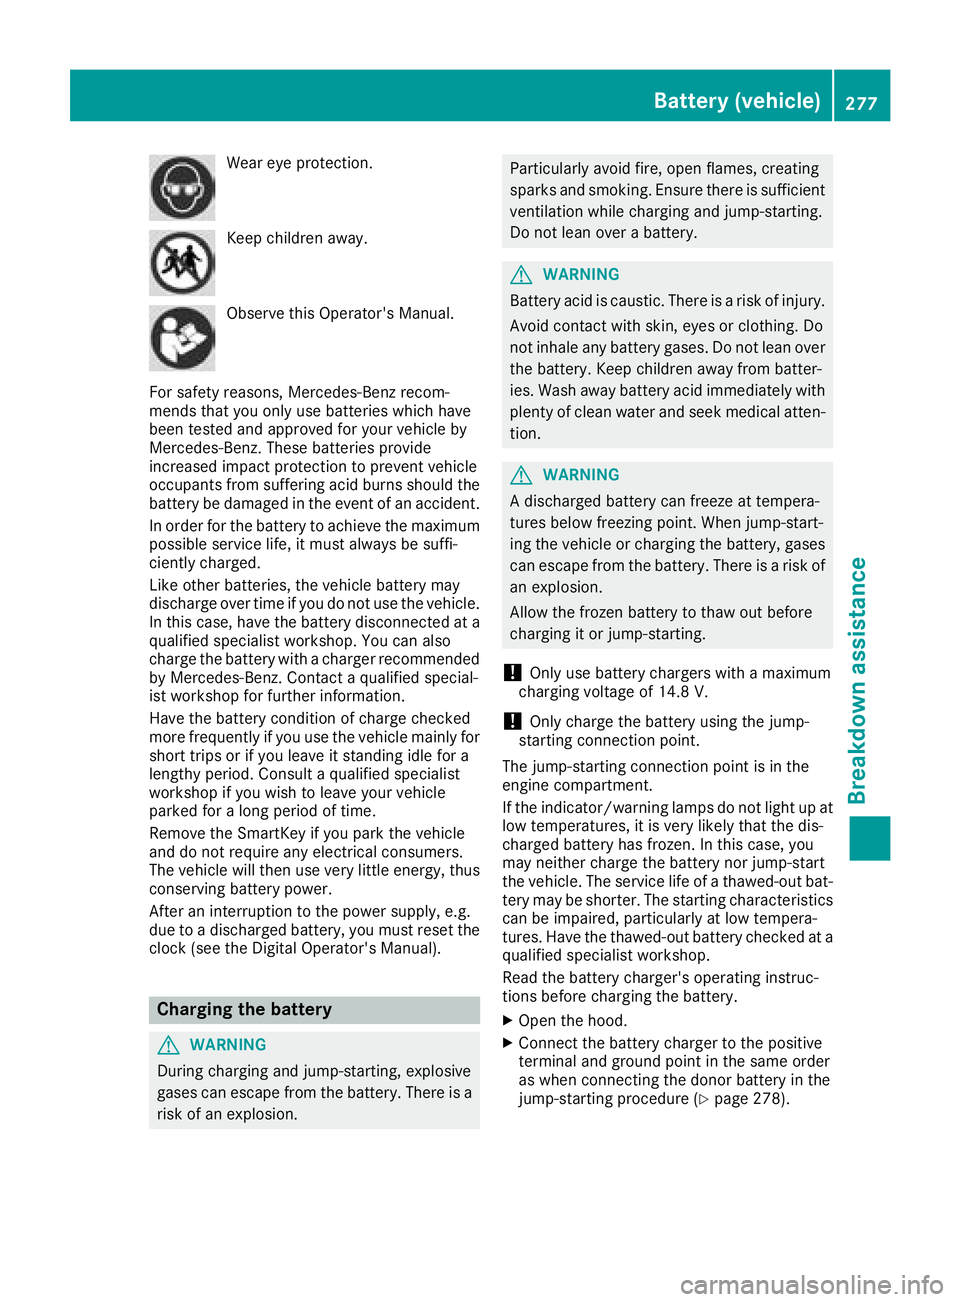
Wear eye protection.
Keep children away.
Observe this Operator's Manual.
For safety reasons, Mercedes-Benz recom-
mends that you only use batteries which have
been tested and approved for your vehicle by
Mercedes-Benz. These batteries provide
increased impact protection to prevent vehicle
occupants from suffering acid burns should the
battery be damaged in the event of an accident.
In order for the battery to achieve the maximum
possible service life, it must always be suffi-
ciently charged.
Like other batteries, the vehicle battery may
discharge over time if you do not use the vehicle.
In this case, have the battery disconnected at a
qualified specialist workshop. You can also
charge the battery with a charger recommended
by Mercedes-Benz. Contact a qualified special-
ist workshop for further information.
Have the battery condition of charge checked
more frequently if you use the vehicle mainly for
short trips or if you leave it standing idle for a
lengthy period. Consult a qualified specialist
workshop if you wish to leave your vehicle
parked for a long period of time.
Remove the SmartKey if you park the vehicle
and do not require any electrical consumers.
The vehicle will then use very little energy, thus conserving battery power.
After an interruption to the power supply, e.g.
due to a discharged battery, you must reset the
clock (see the Digital Operator's Manual).
Charging the battery
GWARNING
During charging and jump-starting, explosive
gases can escape from the battery. There is a risk of an explosion.
Particularly avoid fire, open flames, creating
sparks and smoking. Ensure there is sufficient
ventilation while charging and jump-starting.
Do not lean over a battery.
GWARNING
Battery acid is caustic. There is a risk of injury.
Avoid contact with skin, eyes or clothing. Do
not inhale any battery gases. Do not lean over
the battery. Keep children away from batter-
ies. Wash away battery acid immediately with
plenty of clean water and seek medical atten-
tion.
GWARNING
A discharged battery can freeze at tempera-
tures below freezing point. When jump-start-
ing the vehicle or charging the battery, gases can escape from the battery. There is a risk of
an explosion.
Allow the frozen battery to thaw out before
charging it or jump-starting.
!Only use battery chargers with a maximum
charging voltage of 14.8 V.
!Only charge the battery using the jump-
starting connection point.
The jump-starting connection point is in the
engine compartment.
If the indicator/warning lamps do not light up at
low temperatures, it is very likely that the dis-
charged battery has frozen. In this case, you
may neither charge the battery nor jump-start
the vehicle. The service life of a thawed-out bat-
tery may be shorter. The starting characteristics
can be impaired, particularly at low tempera-
tures. Have the thawed-out battery checked at a
qualified specialist workshop.
Read the battery charger's operating instruc-
tions before charging the battery.
XOpen the hood.
XConnect the battery charger to the positive
terminal and ground point in the same order
as when connecting the donor battery in the
jump-starting procedure (
Ypage 278).
Battery (vehicle)277
Breakdown assistance
Z