Page 145 of 318

drive over obstacles, have the front
passenger direct you.
iWe recommend that you additionally carry a
shovel and a recovery rope with shackle in the
vehicle.
REnsure that loads and items of luggage are
securely stowed or lashed down
(
Ypage 244).
RBefore driving off-road, stop the vehicle and
shift to a low gear.
RIf the surface requires, temporarily deactivate
ESP®when pulling away (Ypage 66).
ROnly drive off-road with the engine running
and a gear engaged.
RDrive slowly and smoothly. Walking pace is
necessary in many situations.
RAvoid spinning the drive wheels.
RMake sure that the wheels always remain in
contact with the ground.
RDrive with extreme care over unknown terrain
where you can only see for a short distance.
As a precaution, get out of the vehicle to take
a look at the route to be taken in advance.
RCheck the water depth before fording.
RWatch out for obstacles (e.g. rocks, holes,
tree stumps and ruts).
RAvoid edges where the surface could crumble
or break away.
Checklist after driving off-road
!If you detect damage to the vehicle after
driving off-road, have the vehicle checked
immediately at a qualified specialist work-
shop.
Off-road driving places a higher demand on your
vehicle than normal road operation. Check your
vehicle after driving on rough terrain. By doing
so you will notice any damage in good time and
reduce the risk of an accident for yourself and
other road users. Clean your vehicle thoroughly
before driving on public roads.
Observe the following points after driving off-
road, on construction sites and before driving on
public roads:
XActivate ESP®(Ypage 66).
XClean the headlamps and tail lamps and
check them for damage.
XClean the front and rear license plates.
XClean the windshield, windows and exterior
mirrors.
XClean the steps, door sills and grab handles.
This increases safety of footing.
XClean the wheels/tires, wheel housings and
the underbody of the vehicle with a water jet. This increases road grip, especially on wet
road surfaces.
XCheck the wheels/tires and wheel housings
for trapped foreign objects and remove them.
Trapped foreign objects can damage the
wheels/tires and may be flung out from the
vehicle when you continue driving.
XCheck the underbody for trapped branches or
other parts of plants and remove them.
Trapped branches or other parts of plants
increase the risk of fire and can cause dam-
age to fuel lines, brake hoses and the rubber
bellows of axle joints and drive shafts.
XClean the brake disks, brake pads and axle
joints, particularly after operation in sand,
mud, grit/gravel, water or similarly dirty con-
ditions.
XCheck the entire floor assembly, the tires,
wheels, bodywork structure, brakes, steering,
chassis and exhaust system for any damage.
XCheck the service brake for operating safety,
e.g. carry out a brake test.
XIf you notice strong vibrations after driving off-
road, check the wheels and drive train for for- eign objects again. Remove any foreign
objects which can lead to imbalances and
thus cause vibrations.
Driving in mountainous areas
When driving in mountainous areas, note that
the power output of the engine, and with it its
gradient climbing capability, decrease with
increasing altitude. Please take note of this par-
ticularly when driving with a trailer in mountain-ous areas.
The maximum permissible trailer loads are valid
for journeys at altitudes up to 1100 yds
(1000 m) above sea level with gradients up to
12%.
Information on maximum permissible trailer
loads can be found in your vehicle registration
papers and on the vehicle identification plate
(
Ypage 305) or under "Trailer loads"
(Ypage 316).
Driving tips143
Driving and parking
Z
Page 146 of 318

above sea level, the ECO start/stop function is
no longer available.
Notes on braking on downhill gradients can be
found in the \"Braking\" section")
When driving at altitudes of 2700 yds (2500m)
above sea level, the ECO start/stop function is
no longer available.
Notes on braking on downhill gradients can be
found in the "Braking" section (
Ypage 139).
Driving systems
Cruise control
General notes
Cruise control maintains the speed of the vehi-
cle for you. It brakes automatically in order to
avoid exceeding the set speed.
Use cruise control if road and traffic conditions
make it appropriate to maintain a steady speed
for a prolonged period. You can set any speed
from 30 km/h upwards in increments of 1 km/h
and 10 km/h.
If you have set Miles
as the unit for the digital
speedometer, you can set any speed above
20 mph in increments of 1 mph and 5 mph.
Changing the display unit for the digital speed-
ometer and the distance:
Ron vehicles without steering wheel buttons
(Ypage 177)
Ron vehicles with steering wheel buttons
(Ypage 188)
Cruise control should not be activated when
driving off-road or on construction sites.
Cruise control may be unable to maintain the
stored speed on uphill gradients. The stored
speed is resumed if the uphill gradient evens out
and the vehicle's speed does not fall below
20 mph (30 km/ h). Cruise control maintains the
stored speed on downhill gradients by automat-
ically applying the brakes. Observe the addi-
tional driving tips (
Ypage 139).
Important safety notes
Observe the notes on braking (Ypage 139).
If you fail to adapt your driving style or if you are inattentive, cruise control can neither reduce
the risk of an accident nor override the laws of
physics. Cruise control cannot take road,
weather and traffic conditions into account.
Cruise control is only an aid. You are responsible
for the distance to the vehicle in front, for vehi-
cle speed, for braking in good time and for stay-
ing in lane. If you change wheel size, make sure they corre-
spond to the correct wheel size category
(
Ypage 279). If the category is changed without
recoding the control units in the vehicle, the
functioning of cruise control may be impaired.
Do not use cruise control:
Rin traffic conditions that are unsuitable for
driving at a constant speed, e.g. in heavy traf-
fic, on winding roads or off-road.
Ron slippery roads. Braking or accelerating
may cause the drive wheels to lose traction
and the vehicle could then skid.
Rwhen there is poor visibility, e.g. due to fog,
heavy rain or snow.
If there is a change of drivers, make sure that
you inform the new driver about the set cruise
speed.
Cruise control lever and display
:To activate and store the current speed or a
higher speed
;To activate at the last stored speed
=To activate and store the current speed or a
lower speed
?To deactivate cruise control
The cruise control lever is the lower lever on the
left of the steering column.
When you activate cruise control, the display
briefly shows the Cruise Control
message
and the stored speed.
The display also shows the Vsymbol and the
stored speed:
Rin the header on vehicles without steering
wheel buttons (Ypage 173)
Rin the status area on vehicles with steering
wheel buttons (Ypage 179)
144Driving systems
Driving and parking
Page 147 of 318
 or J(only Canada) indicator
lamp i")
Activationconditions
To activat ecruise control ,all of th efollowin g
activation condition smus tbe fulfilled :
Rtheparking brak emus tbe released. The F
(only USA) or J(only Canada) indicator
lamp in th einstrumen tcluste rgoe sout
RES P®mus tbe switched on ,but no tcurrentl y
intervening or performin g acontrol action
Ryou are drivin gfaste rthan 20 mph (30 km/h)
Rthe brake pedal is not depressed
Storing and maintaining the current
speed
XAccelerate the vehicle to the desired speed
above 20 mph (30 km/h).
XBriefly push the cruise control lever up :or
down =.
XRelease the accelerator pedal.
Cruise control is activated. The current speed
is stored and shown briefly in the display's
text field.
The display also shows the Vsymbol and
the stored speed:
Rin the header on vehicles without steering
wheel buttons (Ypage 173)
Rin the status area on vehicles with steering
wheel buttons (Ypage 179)
Resuming the stored speed
GWARNING
If you call up the stored speed and it differs
from the current speed, the vehicle acceler-
ates or decelerates. If you do not know the
stored speed, the vehicle could accelerate or brake unexpectedly. There is a risk of an acci-
dent.
Pay attention to the road and traffic condi-
tions before calling up the stored speed. If you
do not know the stored speed, store the
desired speed again.
XBriefly pull the cruise control lever towards
you ;.
XRelease the accelerator pedal.
Cruise control is activated and resumes the
vehicle's speed to the last speed stored. The stored speed is shown briefly in the dis-
play.
The display also shows the
Vsymbol and
the stored speed:
Rin the header on vehicles without steering
wheel buttons (Ypage 173)
Rin the status area on vehicles with steering
wheel buttons (Ypage 179)
iWhen you pull the cruise control lever
towards you for the first time after starting the
engine, cruise control adopts the current
speed.
Setting the speed
It may be a moment before the vehicle starts to
accelerate or brake to the set speed. Take this
delay into account when setting the speed.
XPress the cruise control lever up :to
increase the speed or down =to reduce the
speed.
The vehicle will accelerate or decelerate. The
speed is shown in the display.
XRelease the cruise control lever once the
desired speed is reached.
The displayed speed is stored.
or
XBriefly press the cruise control lever as far as
the 1st pressure point up :or down =.
The last speed stored is increased/reduced in
increments of 1 mph (1 km/h).
or
XBriefly press the cruise control lever beyond
the pressure point up :or down =.
The last speed stored is increased/reduced in
increments of 5 mph (10 km/h).
iCruise control is not deactivated if you
depress the accelerator pedal. If you acceler-
ate briefly to overtake, for example, cruise
control resumes the vehicle’s speed to the
last speed stored after you have finished over-
taking.
Deactivating cruise control
There are various ways to deactivate cruise con- trol:
XBriefly press the cruise control lever for-
wards ?.
or
XApply the brakes.
Driving system s145
Driving an d parking
Z
Page 148 of 318

The last speed set remains stored. The last
speed stored is deleted when you switch off the
engine.
Cruise control is deactivated automatically
when:
Ryou apply the brakes
Ryou apply the parking brake and theF
(only USA) or J(only Canada) indicator
lamp in the instrument cluster lights up
Ryou are driving slower than 20 mph (30 km/h)
Ryou shift to neutral iwhile th evehicl eis in
motion
RES P®intervenes or you deactivat eES P®
Rthere is amalfunction in th eES P®or AB Ssys-
te m
If cruise control automatically deactivates, a
warnin gtone sounds and th eCruise
Contro lOffmessage appears briefl yin th edisplay.
The V symbol and th edisplay of th estore d
speed in th eheader or in th estatu sarea of th e
display are then no tshown.
Problems with cruise contro l
The speed cannotbe set when cruise control is
activated.
The display is showin g amessage of high priority
and canno ttherefor esho w a chang ein speed.
XProceed as instructe dby th emessage in th e
display.
COLLISION PREVENTION ASSIST
Gene ral notes
COLLISION PREVENTION ASSIST help syou:
Rto minimiz eth eris kof afront-en dcollision
wit h a detecte dobstacle in th epat hof your
vehicl e
Rto reduce th econsequence sof acollision
wit hth evehicl ein fron t
The system uses rada rsensor sto detec tvehi-
cle sin front.
COLLISION PREVENTION ASSIST consist sof th e
distanc ewarnin gfunction and Adaptive Brake
Assist.
If COLLISION PREVENTION ASSIST is malfunc -
tioning, th edisplay shows acorrespondin gmes -
sage (
Ypage 216).
Distance warning function
Important safety notes
GWARNIN G
The distanc ewarnin gfunction does no treact:
Rto people or animals
Rto oncomin gvehicles
Rto crossin gtraffic
Rwhen cornering
Thus ,th edistanc ewarnin gfunction canno t
provid e awarnin gin all critica lsituations.
There is aris kof an accident.
Always pay careful attention to th etraffic sit -
uation and be read yto brake.
GWARNIN G
The distanc ewarnin gfunction canno talways
clearly identify objects and complex traffic
situations.
In suc hcases, th edistanc ewarnin gfunction
may:
Rgiv ean unnecessary warnin g
Rnotgiv e a warnin g
There is aris kof an accident.
Always pay careful attention to th etraffic sit -
uation and do no trel ysolely on th edistanc e
warnin gfunction .
In particular, th edetection of obstacles can be
impaire din th ecas eof:
Rdir ton th esensor sor anythin gelse coverin g
th esensor s
Rsnow or heav yrain
Rinterferenc efrom other rada rsource s
Rstrongrada rreflections, for example, in park -
in g garages
Ranarrow vehicl etravelin gin front, e.g. a
motorbik e
Ravehicl etravelin gin fron ton adifferen tlin e
Due to th enature of th esystem, particularly
complicate dbut non-critica ldrivin gcondition s
may also caus eth esystem to display awarning.
If you fail to adapt your drivin gstyle, th edis-
tance warnin gfunction can neither reduce th e
ris kof an acciden tno roverride th elaws of phys -
ics .The distanc ewarnin gfunction canno ttak e
146Driving systems
Driving and parking
Page 149 of 318

into account road, weather or traffic conditions.
The distance warning function is only an aid. You
are responsible for the distance to the vehicle in
front, for vehicle speed, braking in good time
and for staying in your lane.
Following damage to the front end of the vehicle,
have the configuration and operation of the
radar sensor checked at a qualified specialist
workshop. This also applies to collisions at slow
speeds where there is no visible damage to the
front of the vehicle.
If you change wheel size, make sure they corre- spond to the correct wheel size category
(
Ypage 279). If the category is changed without
recoding the control units in the vehicle, the
functioning of the distance warning feature may
be impaired. COLLISION PREVENTION ASSIST
may then detect a malfunction and switch itself
off.
Operation
XTo activate/deactivate: activate or deacti-
vate the distance warning function in the on-
board computer (
Ypage 187).
If the distance warning function of COLLISION
PREVENTION ASSIST is activated, the display
shows the Äsymbol:
Rin the header
Rin the Status Overviewof the Assist.menu (Ypage 186)
At speeds up to approx 20 mph (30 km/h) the
display in vehicles with Active Parking Assist
first shows the ístatus indicator. Only up to
a speed of about 20 mph (30 km/h) does the display show the Äsymbol instead of the
í status indicator.
The distance warning function can help you to
minimize the risk of a front-end collision with a
vehicle ahead or reduce the effects of such a
collision. With the help of the radar sensor sys-
tem, the distance warning function can detect
obstacles that are in the path of your vehicle for
an extended period of time. If the distance warn-
ing function detects that there is a risk of a col-
lision, you will be warned visually and, where
necessary, acoustically. Without your interven-
tion, the distance warning function cannot pre-
vent a collision.
The distance warning function issues a warning
at speeds:
Rfrom about 4 mph (7 km/h) if you approach a
vehicle traveling in front or a stationary vehi-
cle too quickly. The ·warning lamp in the instrument cluster then lights up and an inter-
mittent warning tone also sounds.
At speeds up to about 45 mph (70 km/h), the
system also detects stationary obstacles, for
example stopped or parked vehicles.
XBrake immediately until the distance from the
obstacle increases and the risk of a front-end
collision passes.
or
XTake evasive action, provided it is safe to do
so.
Adaptive Brake Assist
General notes
Adaptive Brake Assist evaluates the traffic sit-
uation with the help of the radar sensor system and can detect obstacles which have been in
your vehicle's path for an extended period of
time. From speeds above 4 mph (7 km/h), Adap-
tive Brake Assist aids you in braking during haz-
ardous situations.
Up to a speed of approximately 125 mph
(200 km/h), Adaptive Brake Assist is capable of
reacting to moving obstacles that have already
been detected as such at least once over the
period of observation.
Important safety notes
GWARNING
Adaptive Brake Assist does not react:
Rto people or animals
Rto oncoming vehicles
Rto crossing traffic
Rto stationary obstacles
Rwhen cornering
As a result, the Adaptive Brake Assist may not
intervene in all critical conditions. There is a
risk of an accident.
Always pay careful attention to the traffic sit- uation and be ready to brake.
GWARNING
Adaptive Brake Assist cannot always clearly
identify objects and complex traffic situa-
tions.
Driving systems147
Driving and parking
Z
Page 150 of 318

In such cases, Adaptive Brake Assist can:
Rintervene unnecessarily
Rnot intervene
There is a risk of an accident.
Always pay careful attention to the traffic sit- uation and be ready to brake. Terminate the
intervention in a non-critical driving situation.
In particular, the detection of obstacles can be
impaired in the case of:
Rdirt on the sensors or anything else covering
the sensors
Rsnow or heavy rain
Rinterference from other radar sources
Rstrong radar reflections, for example, in park-
ing garages
Ra narrow vehicle traveling in front, e.g. a
motorbike
Ra vehicle traveling in front on a different line
Due to the nature of the system, particularly
complicated but non-critical driving conditions
may also cause Adaptive Brake Assist to inter-
vene.
If you fail to adapt your driving style, Adaptive
Brake Assist can neither reduce the risk of acci-
dent nor override the laws of physics. Adaptive
Brake Assist cannot take into account road,
weather or traffic conditions. Adaptive Brake
Assist is only an aid. You are responsible for the
distance to the vehicle in front, for vehicle
speed, braking in good time and for staying in
your lane.
Following damage to the front end of the vehicle,
have the configuration and operation of the
radar sensor checked at a qualified specialist
workshop. This also applies to collisions at slow
speeds where there is no visible damage to the
front of the vehicle.
If you change wheel size, make sure they corre- spond to the correct wheel size category
(
Ypage 279). If the category is changed without
recoding the control units in the vehicle, the
functioning of Adaptive Brake Assist may be
impaired. COLLISION PREVENTION ASSIST may
then detect a malfunction and switch itself off.
If Adaptive Brake Assist is not available due to a
malfunction in the radar sensor system, the
brake system remains available with full brake
boosting effect and BAS.
Operation
With the help of the radar sensor system, Adap-
tive Brake Assist can detect obstacles that have been in the path of your vehicle for an extended
period of time. Ada
ptive Brake Assist does not
react to stationary obstacles. If Adaptive Brake
Assist detects a risk of collision with a vehicle
traveling in front or with a stationary obstacle,
the system calculates the braking force neces-
sary to avoid this collision. If you apply the
brakes forcefully, Adaptive Brake Assist will
automatically increase the braking force to a
level suitable for the traffic conditions.
XBrake until the distance to the obstacle
increases and the risk of a collision passes.
ABS prevents the wheels from locking.
The brakes function as usual again if:
Ryou release the brake pedal
Rthere is no longer any danger of a collision
Rno obstacle is detected in front of your vehicle
Braking assistance is then ended.
Blind Spot Assist
General notes
Blind Spot Assist monitors the areas on either
side of the vehicle that are not visible to the
driver with two lateral, rear-facing radar sensors
in the bumper. It supports you from speeds of
approximately 20 mph (30 km/h). A warning
display in the exterior mirrors draws your atten-
tion to vehicles detected in the monitored area.
If you then switch on the corresponding turn
signal to change lane, you will also receive an
optical and audible collision warning.
Important safety notes
GWARNING
Blind Spot Assist does not react to:
Rvehicles overtaken too closely on the side,
placing them in the blind spot area
Rvehicles which approach with a large speed
differential and overtake your vehicle
As a result, Blind Spot Assist may not give
warnings in such situations. There is a risk of
an accident.
148Driving systems
Driving and parking
Page 151 of 318

Always observe the traffic conditions care-
fully, and maintain a safe lateral distance.
Blind Spot Assist is only an aid. It may fail to
detect some vehicles and is no substitute for
attentive driving. Always ensure that there is
sufficient distance to the side for other road
users and obstacles.
In particular, the detection of obstacles can be
impaired in the case of:
Rdirt on the sensors or anything else covering
the sensors
Rfog, heavy rain or snow
Rnarrow vehicles, e.g. motorcycles or bicycles
Rvery wide lanes
Rnarrow lanes
Rvehicles not driving in the middle of their lane
Rbarriers or other road boundaries
Vehicles in the monitoring range are then not
indicated.
iUSA only:
This device has been approved by the FCC as
a "Vehicular Radar System". The radar sensor
is intended for use in an automotive radar
system only. Removal, tampering, or altering
of the device will void any warranties, and is
not permitted by the FCC. Do not tamper with,
alter, or use in any non-approved way.
Any unauthorized modification to this device
could void the user’s authority to operate the
equipment.
Monitoring range of the sensors
Blind Spot Assist monitors the area shown in the
diagram up to 118 in (3 m) behind and directly
next to your vehicle.
If the lanes are narrow, vehicles driving in the
lane beyond the lane next to your vehicle may be
indicated, especially if the vehicles are not driv-
ing in the middle of their lane. This may be the
case if the vehicles are driving on the inner side
of their lane.
Due to the nature of the system:
Rwarnings may be issued in error when driving
close to crash barriers or similar solid lane
borders.
Rwarnings may be interrupted when driving
alongside long vehicles, e.g. trucks, for a pro-
longed time.
The two sensors for Blind Spot Assist are inte-
grated into the sides of the rear bumper. Make
sure that the bumper is free of dirt, ice or slush
in the vicinity of the sensors. The radar sensors
must not be covered, for example by rear-moun- ted cycle racks or overhanging loads. Following
a severe impact or in the event of damage to the
bumper, have the function of the radar sensors
checked at a qualified specialist workshop.
Blind Spot Assist may otherwise not work prop-
erly.
Driving systems149
Driving an d parking
Z
Page 152 of 318
. Vehicles in
the monitoring range are then not indicated.
If a vehicle is detected within the monitoring")
Warning display
Blind Spot Assist is not active at speeds below
approximately 20 mph (30 km/h). Vehicles in
the monitoring range are then not indicated.
If a vehicle is detected within the monitoring
range of Blind Spot Assist at speeds above
approximately 20 mph (30 km/h), warning
lamp:lights up red in the exterior mirror on
the corresponding side. Warning lamp :
always lights up when a vehicle enters the blind
spot monitoring range from behind or from the
side. When you overtake a vehicle, the warning
only occurs if the difference in speed is less than
7 mph (11 km/h).
If you select reverse gear, Blind Spot Assist is
inactive.
The intensity of warning lamps :depends on
the brightness of the ambient light and is con-
trolled automatically.
Collision warning
If a vehicle is detected in the monitoring range of
Blind Spot Assist and you switch on the corre-
sponding turn signal, a double warning tone
sounds once. The warning lamp in the corre-
sponding exterior mirror flashes. If the turn sig-
nal remains on, detected vehicles are indicated
by the flashing of the warning lamp in the exte-
rior mirror. There are no further warning tones.
Activating Blind Spot Assist
XMake sure that Blind Spot Assist is activated
in the on-board computer (Ypage 187).
XTurn the key to position 2in the ignition lock.
The warning lamps in the exterior mirrors light
up for approximately 1.5 seconds.
Status indicators in the status overview submenu
If Blind Spot Assist is activated, the display
shows symbol :in the StatusOverviewsub-
menu of the on-board computer (Ypage 186). If
you are driving faster than 20 mph (30 km/h),
the symbol also shows radar waves ;between
the two vehicles. Blind Spot Assist is then ready
for use.
Towing a trailer
If you attach a trailer, make sure that you have
correctly established the electrical connection.
This can be accomplished by checking the trailer
lighting. Blind Spot Assist is then deactivated
and the Blind Spot Assist Currently
Unavail. See Operator's Manualmessage
appears in the display.
Lane Keeping Assist
General notes
Lane Keeping Assist monitors the area in front of
your vehicle by means of camera :which is
mounted at the top of the windshield. Lane
Keeping Assist detects lane markings on the
road and can warn you before you leave your
lane unintentionally.
This function is available in the range between
40 mph (60 km/h) and 125 mph (200 km/h).
A warning may be given if a front wheel touches a lane marking. It will warn you by means of
150Driving systems
Driving and parking
 1
1 2
2 3
3 4
4 5
5 6
6 7
7 8
8 9
9 10
10 11
11 12
12 13
13 14
14 15
15 16
16 17
17 18
18 19
19 20
20 21
21 22
22 23
23 24
24 25
25 26
26 27
27 28
28 29
29 30
30 31
31 32
32 33
33 34
34 35
35 36
36 37
37 38
38 39
39 40
40 41
41 42
42 43
43 44
44 45
45 46
46 47
47 48
48 49
49 50
50 51
51 52
52 53
53 54
54 55
55 56
56 57
57 58
58 59
59 60
60 61
61 62
62 63
63 64
64 65
65 66
66 67
67 68
68 69
69 70
70 71
71 72
72 73
73 74
74 75
75 76
76 77
77 78
78 79
79 80
80 81
81 82
82 83
83 84
84 85
85 86
86 87
87 88
88 89
89 90
90 91
91 92
92 93
93 94
94 95
95 96
96 97
97 98
98 99
99 100
100 101
101 102
102 103
103 104
104 105
105 106
106 107
107 108
108 109
109 110
110 111
111 112
112 113
113 114
114 115
115 116
116 117
117 118
118 119
119 120
120 121
121 122
122 123
123 124
124 125
125 126
126 127
127 128
128 129
129 130
130 131
131 132
132 133
133 134
134 135
135 136
136 137
137 138
138 139
139 140
140 141
141 142
142 143
143 144
144 145
145 146
146 147
147 148
148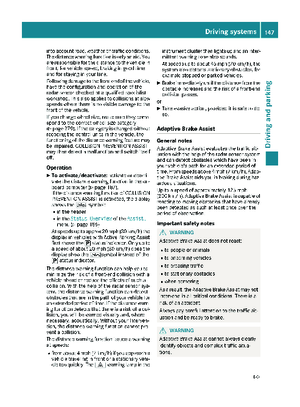 149
149 150
150 151
151 152
152 153
153 154
154 155
155 156
156 157
157 158
158 159
159 160
160 161
161 162
162 163
163 164
164 165
165 166
166 167
167 168
168 169
169 170
170 171
171 172
172 173
173 174
174 175
175 176
176 177
177 178
178 179
179 180
180 181
181 182
182 183
183 184
184 185
185 186
186 187
187 188
188 189
189 190
190 191
191 192
192 193
193 194
194 195
195 196
196 197
197 198
198 199
199 200
200 201
201 202
202 203
203 204
204 205
205 206
206 207
207 208
208 209
209 210
210 211
211 212
212 213
213 214
214 215
215 216
216 217
217 218
218 219
219 220
220 221
221 222
222 223
223 224
224 225
225 226
226 227
227 228
228 229
229 230
230 231
231 232
232 233
233 234
234 235
235 236
236 237
237 238
238 239
239 240
240 241
241 242
242 243
243 244
244 245
245 246
246 247
247 248
248 249
249 250
250 251
251 252
252 253
253 254
254 255
255 256
256 257
257 258
258 259
259 260
260 261
261 262
262 263
263 264
264 265
265 266
266 267
267 268
268 269
269 270
270 271
271 272
272 273
273 274
274 275
275 276
276 277
277 278
278 279
279 280
280 281
281 282
282 283
283 284
284 285
285 286
286 287
287 288
288 289
289 290
290 291
291 292
292 293
293 294
294 295
295 296
296 297
297 298
298 299
299 300
300 301
301 302
302 303
303 304
304 305
305 306
306 307
307 308
308 309
309 310
310 311
311 312
312 313
313 314
314 315
315 316
316 317
317