Page 265 of 549

R
Navigation map
R Consumption
R Time and date Ti
me and date Setting the time and date automatically
Multimedia sy stem:
4 System 5
& Time and date #
Deactivate ªManual time adjustment.
The time and date are set automatically for
th e selected time zone and summer time
option.
% The cor rect time is requ ired forth efo llowing
functions:
R Route guidance with time-dependent
traf fic guidance.
R Calculation of expected time of ar riva l. Setting
the time zone
Multimedia sy stem:
4 System 5
& Time and date
5 Time zone:
The list of count ries is displa yed. #
Select a count ry#.
Depending on the count ry, time zones are
displa yed. #
Select a time zone.
The time zone set is displa yed af terTime
zone:.
Setting summer time
The Automatic Summer Time andSummer Time
options cannot be selected in all countries.
Multimedia sy stem:
4 System 5
& Time and date
Au tomatically #
Switch Automatic Summer Time onO or off
ª.
Manual ly #
Switch Automatic Summer Time offª. #
Select Summer Time. #
Select OnorOff.
Setting the time and date form at
Multimedia sy stem:
4 System 5
& Time and date
5 Set format #
Set the date and time form at#.
Setting the time manually
Re quirements:
R The Manual time adjustment function is
switched on.
Multimedia sy stem:
4 System 5
& Time and date
5 Set time #
Set the hours. #
Navigate totheright toset the minutes. #
Set the minutes. #
Confirm changes when exiting the menu.
The date is set automatically via GPS. 262
Multimedia sy stem
Page 266 of 549

Connectivity
Setting up a hotsp
otvia business telephony
Multimedia sy stem:
4 System 5
ö Connectivity
5 Set up hotspot #
Select Select the vehicle's mobile hotspot .#
Select Business phone.
The hotspot is active.
Exte rnal devices (e.g. tablets) can be connec‐
te dto the multimedia sy stem via business
te lephon y.
% Information about setting up a hotspot
(/ page 326).
Switching transmission of theve hicle posi‐
tion on/off
Multimedia sy stem:
4 System 5
ö Connectivity #
Select Transmit vehicle pos.. #
Activate Oor deacti vate ª the function. Blue
tooth ® Information about Blu
etoo th®
Bl ue tooth ®
tech nology is a standard for short-
ra nge wi reless data transfer up toappr oximately
10 m.
Yo u can use Blue tooth®
to connect your mobile
phone tothe multimedia sy stem and use thefo l‐
lowing functions, forex ample:
R hands-free sy stem with access tothefo llow‐
ing options:
- con tacts (/ page 308)
- call lists (/ page311)
- text messa ges
R Internet connection
R listening tomusic via Blue tooth ®
audio
(/ page 343)
R transfer ring business cards (vCards) into the
ve hicle
Blue tooth ®
is a regis tere d trademark of Blue‐
toot h Special Interest Group (SIG) Inc. %
Internet connection via Blue tooth®
is not
av ailable in all countries.
Ac tivating/deactivating Blue tooth ®
Re quirements for switching off Blue tooth ®
:
R Apple CarPl ay™ is not active.
Multimedia sy stem:
4 System 5
ö Connectivity #
Activate Oor deacti vate ª Bluetoo th®
.
If Android Autois active, a prom ptappears ask‐
ing whe ther Blue tooth®
should be deactivated. #
Select Yes.
Android Autois closed and Blue tooth®
is
deactivated. Wi
-Fi Wi
-Fi connection overview
Yo u can use Wi-Fi toestablish a connection with
a Wi -Fi network and toaccess the Internet or
ot her network devices. Multimedia sy
stem 263
Page 267 of 549

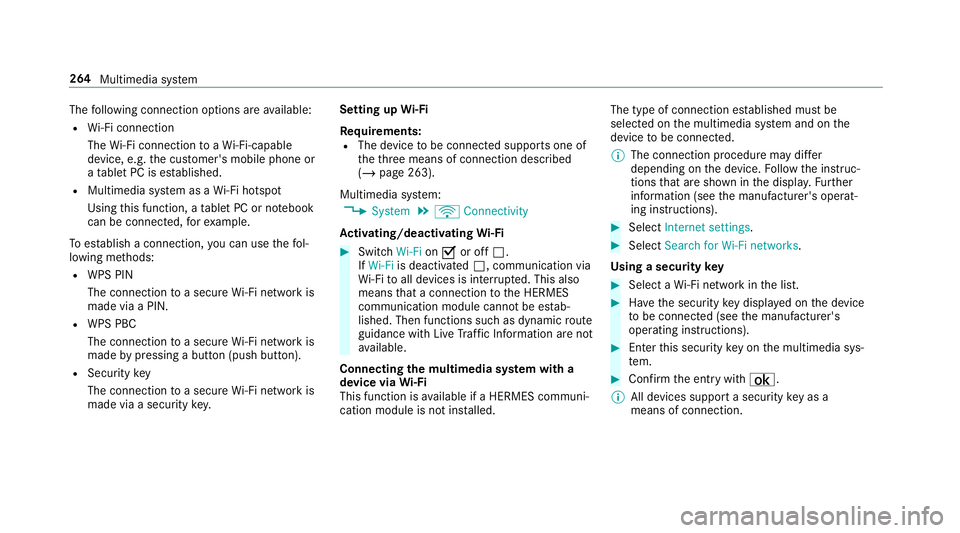
The
following connection options are available:
R Wi-Fi connection
The Wi-Fi connection toaWi -Fi-capable
device, e.g. the cus tomer's mobile phone or
a ta blet PC is es tablished.
R Multimedia sy stem as a Wi-Fi hotspot
Using this function, a tablet PC or no tebook
can be connec ted, forex ample.
To establish a connection, you can use thefo l‐
lowing me thods:
R WPS PIN
The connection toa secure Wi-Fi network is
made via a PIN.
R WPS PBC
The connection toa secure Wi-Fi network is
made bypressing a button (push button).
R Security key
The connection toa secure Wi-Fi network is
made via a secu rity key. Setting up
Wi-Fi
Requ irements:
R The device tobe connec ted supports one of
th eth re e means of connection described
(/ page 263).
Multimedia sy stem:
4 System 5
ö Connectivity
Ac tivating/deactivating Wi-Fi #
Switch Wi-FionO or off ª.
If Wi-Fi is deactivated ª, communication via
Wi -Fi toall devices is inter rupte d. This also
means that a connection tothe HERMES
communication module cann otbe es tab‐
lished. Then functions such as dynamic route
guidance with Live Traf fic Information are not
av ailable.
Connecting the multimedia sy stem with a
device via Wi-Fi
This function is available if a HERMES communi‐
cation module is not ins talled. The type of connection es
tablished must be
selected on the multimedia sy stem and on the
device tobe connec ted.
% The connection procedure may dif fer
depending on the device. Follow the instruc‐
tions that are shown in the displa y.Fu rther
information (see the manufacturer's operat‐
ing instructions). #
Select Internet settings . #
Select Search for Wi-Fi networks.
Using a security key #
Select a Wi-Fi network in the list. #
Have the security key displa yed on the device
to be connec ted (see the manufacturer's
operating instructions). #
Ente rth is security key on the multimedia sys‐
te m. #
Confirm the entry with¡.
% All devices support a security key as a
means of connection. 264
Multimedia sy stem
Page 268 of 549

Using a WPS PIN
#
Highlight a Wi-Fi network in the list. #
Select ¥Connect using WPS PIN input.
The multimedia sy stem generates an eight-
digit PIN. #
Enter this PIN on the device tobe connec ted. #
Confirm the entry.
Using a button
% This function is only available in a Wi-Fi fre‐
qu ency of 2.4 GHz. #
Highlight a Wi-Fi network in the list. #
Select ¥Connect via WPS PBC. #
Select "Connect via WPS PBC" in the options
on the device tobe connec ted. #
Press the WPS button on the device tobe
connec ted. #
Select Continue inthe multimedia sy stem.
Device has already been connected: #
Toautomatically connect: highlight aWi-Fi
network in the list. #
Activate ¥ Connect automaticallyO. #
Toconnect: highlight a Wi-Fi network in the
list. #
Select ¥Connect.
The connection is es tablished again. These
functions are possible when the device has
already been connected totheWi -Fi networ k.
Setting up a Wi-Fi hotspot
Multimedia sy stem:
4 System 5
ö Connectivity
Configuring the multimedia sy stem as a Wi-
Fi hotspot
% The availability of this function is dependent
on the count ry.
The type of connection es tablished depends on
th e device tobe connec ted. The function must
be suppor tedby the multimedia sy stem and by
th e device tobe connec ted. The type of connec‐
tion es tablished must be selected on the multi‐
media sy stem and on the device tobe connec‐
te d. #
Select Set up hotspot. #
Highlight Connect device to vehicle hotspot.
Generating a WPS PIN #
Select ¥Connect using WPS PIN genera-
tion . #
Ente rth e PIN shown in the media display on
th e device tobe connec ted and con firm.
Connecting using a WPS PIN #
Select ¥Connect using WPS PIN input. #
Select Enter WPS PIN. #
Enterth e PIN that is shown on theex tern al
device's display on the multimedia sy stem. #
Select Continue.
Connecting using a button
Re quirements:
R This function is only available in a Wi-Fi fre‐
qu ency of 2.4 GHz. #
Select ¥Connect via WPS PBC. #
Press the WPS button on the device tobe
connec ted or select Connect. #
Select Continue inthe multimedia sy stem. Multimedia sy
stem 265
Page 269 of 549

Connecting using a security
key#
Select Connect device to vehicle hotspot .
A secu rity key is displa yed. #
Select theve hicle from the device tobe con‐
nec ted. The vehicle is displa yed with the
SSID MB Hotspot XXXXX .#
Enter the security key which is shown in the
media display on the device tobe connec ted. #
Confirm the entry.
Connecting using NFC #
Select Establish a connection via NFC. #
Activate NFC on the mobile device (see the
manufacturer's operating instructions). #
Bring the mobile device into the NFC area of
th eve hicle (/ page 306). #
Select Done.
The mobile device is now connected tothe
multimedia sy stem hotspot via NFC.
Generating a new security key: #
Select Set up hotspot . #
Select Generate security key .
A connection will be es tablished with the
newly crea ted security key. #
Tosave a security key:select Save.
When a new security key is sa ved, all existing
Wi -Fi connections are then disconnected. If
th eWi -Fi connections are being re-es tab‐
lished, the new security key must be en tere d. Managing COMAND
Touch devices Re
quirements:
R The COMAND Touch app is ins talled on the
ex tern al device (e.g. tablet or smartphone).
R Wi-Fi is acti vated (/ page 264) and the mul‐
timedia sy stem is confi gured as a Wi-Fi hot‐
spot (/ page 265).
Multimedia sy stem:
4 System 5
COMAND Touch
Connecting and authorising a new device #
Select Authorise a new device. #
Select Connect new device. #
Ente rth e security key in theex tern al device.
The Please start COMAND Touch on your
device and follow the instructions. message
appears. #
Select Continue. #
Accept the connection requ est from the new
device. #
Ente rth e PIN shown on theex tern al device.
The device is authorised.
Au thorising a connected device #
Select Authorise a new device.
The devices already connec ted are displa yed. #
Select Continue using connected devices.
The Please start COMAND Touch on your
device and follow the instructions. message
appears. #
Select Continue. #
The connection requ est from the device
Accept. #
Ente rth e PIN shown on theex tern al device.
The device is authorised. 266
Multimedia sy stem
Page 270 of 549

De-authorising
the device #
Select an authorised device from the list.
A prom ptwill appear asking whe ther you
wo uld like todeauthorise the selected
device. #
Select Yes.
The device is deauthorised. Ac
tivating/deactivating child saf ety lock Multimedia sy
stem:
4 System 5
Parental control
Locking theRe ar Seat Entertainment Sy stem #
Select Rear left orRear right . #
Select Lock.
The Rear Seat En tertainment Sy stem is
loc kedO or unloc kedª.
Switching off theRe ar Seat Entertainment
Sy stem display #
Select Rear left orRear right . #
Select Display on. #
Swit chthe display on Oor off ª. Locking an
extern al device #
Select an extern al device. #
Select Lock.
The device connec ted via theCO MAND
To uch App is loc kedO or unloc kedª. Sy
stem language Note
s onthe sy stem language
This function allo wsyouto determ ine the lan‐
guage forth e menu displa ysand the navigation
announcements. The selected language af fects
th ech aracters available for entr y.The navigation
announcements are not available in all lan‐
guages. If a language is not available, the naviga‐
tion announcements will be in Engl ish.
Setting the sy stem language
Multimedia sy stem:
4 System 5
Language #
Set the language.
% Ifyo u are using Arabic map data, thete xt
information can also be shown in Arabic on
th e navigation map. Todo so, select
Page 271 of 549

%
Please no tethat the NTFS file sy stem is not
suppor ted. The FAT32 file sy stem is recom‐
mended.
Importing/exporting data
* NO
TELoss of da tadue topremature
re mo val #
Do not remo vethe data storage
medium when data is being expor ted.
Mercedes-Benz is not liable for any loss of
data. Re
quirements:
R The vehicle is stationar y.
R The ignition is switched on or theve hicle has
been star ted.
R The SD card is inser ted (/ page 335) or the
USB device is connecte d (/page 337).
Multimedia sy stem:
4 System 5
System backup #
Select Import data orExport data. Importing #
Select a data storage medium.
A prom ptappears asking whe ther youre ally
wish to overwrite the cur rent da ta. If da ta
originates from ano ther vehicle, this is recog‐
nised du ring da tareading.
The multimedia sy stem is restar ted once the
data has been impor ted.
% Current vehicle settings can be edited af ter
th e import.
Exporting
If PIN pr otection is activated, your PIN is reques‐
te d. #
Ente rth efo ur-digit PIN. #
Select a data storage medium.
The data is expor ted. The data export may
ta ke several minutes. Ac
tivating/deactivating PIN pr otection Multimedia sy
stem:
4 System 5
PIN protection
Setting the PIN #
Select Set PIN. #
Enter a four-digit PIN. #
Enterth efo ur-digit PIN again.
If bo thPINs match, PIN pr otection is active.
Changing the PIN
Re quirements:
R A cur rent PIN mu stbe set. #
Select Change settings. #
Ente rth e cur rent PIN. #
Select Change PIN . #
Set a new PIN.
Ac tivating PIN pr otection for data export #
Select Change settings .
Confirm wi th the PIN. 268
Multimedia sy stem
Page 272 of 549

#
Select Protect data export .
Ac tivate Oor deacti vate ª the function.
Un blocking the PIN
Re quirements:
R There is an Internet connection.
R A Mercedes me account exists at http://
www.me rcedes.me.
R The Personalisation service is active
(/ page 269).
If th e PIN has been entered incor rectly three
times, the PIN will be bloc ked. You can ha ve a
single-use password sent to you via the
Mercedes me connect online por talto reset the
PIN pr otection. #
Select Unblock PIN. #
Ente rth e single-use password.
PIN pr otection is reset, and you can set a
new PIN.
% Alternativel y,yo u can ha vePIN pr otection
re set at a Mercedes-Benz service centre. User profile
Setting a user profile
Multimedia sy
stem:
4 System 5
g Personalisation
Displaying a user profile when starting
If th is function is active, a prom ptappears when
st arting the sy stem asking which user profile to
use. #
Select Display profile list after start . #
Activate Oor deacti vate ª the function.
Selecting a user profile #
Select Guestor individual profile #.
% Some settings from the user profile are only
loaded when theve hicle is stationary or
when the ignition is switched on.
Au tomatic syn chronisation
Each time the ignition is switched off or on, the
individual user profiles are synchronised on the
multimedia sy stem and on the ser ver.This
ensures that the latest user profiles are alw ays
av ailable. #
Select Automatic synchronisation. #
Activate Oor deacti vate ª the function.
% For more information about importing/
ex porting user profiles (/ page270).
Creating a user profile
Multimedia sy stem:
4 System 5
g Personalisation
5 Create profile #
Ente r a name. #
Select a.
The following information is sa ved in the user
profile, forex ample:
R System settings
R Settings in theTV tuner's channel list
R Navigation and traf fic information
The settings di ffer depending on theve hicle
equipment. Multimedia sy
stem 269