2018 MERCEDES-BENZ G-CLASS oil temperature
[x] Cancel search: oil temperaturePage 11 of 294

Fuel ................................................ 124
General .......................................... 124
Gravel roads .................................. 131
Hydroplaning .................................127
Icy road surfaces ........................... 128
Important safety notes .................. 104
Limited braking efficiency on sal-
ted roads ....................................... 126
Off-road driving .............................. 129
Off-road fording .............................1 28
Pulling away on slippery surfaces .. 127
Snow chains .................................. 259
Subjecting brakes to a load ........... 126
The first 1500 km .......................... 104
Tire ruts ......................................... 131
Towing a trailer .............................. 154
Traveling uphill ............................... 132
Wet road surface ........................... 126
DVD audio
Operating (on-board computer) ..... 165
DVD video
Operating (on-board computer) ..... 166
see also Digital Operator's Man-
ual ..................................................2 03
E
EASY-ENTRY feature
Activating/deactivating ................. 170
Function/notes ................................ 81
EASY-EXIT feature
Function/notes ................................ 81
Switching on/off ........................... 170
EBD (electronic brake force distri-
bution)
Display message ............................ 176
Function/notes ................................ 61
ECO start/stop function
Deactivating/activating ................. 108
General information ....................... 107
Electronic Stability Program
see ESP
®(Electronic Stability Program)
Electronic Traction System
see 4ETS (Electronic Traction System)
Emergency
Automatic measures after an acci-
dent ................................................. 50 Emergency release
Driver's door ....................................6 8
Vehicle .............................................6 8
Emergency Tensioning Devices
Activation ........................................ .47
Emissions control
Service and warranty information .... 24
Engine
Check Engine warning lamp .......... .199
Display message ............................ 180
ECO start/stop function ................ 107
Engine number ............................... 283
Irregular running ............................ 110
Jump-starting ................................. 249
Starting problems .......................... 110
Starting the engine with the
SmartKey ....................................... 106
Switching off .................................. 123
Tow-starting (vehicle) ..................... 254
Engine electronics
Problem (malfunction) ................... 110
Engine oil
Adding ...........................................2 33
Additives ........................................ 286
Checking the oil level ..................... 232
Checking the oil level using the
dipstick .......................................... 232
Checking the oil level using the
on-board computer ........................ 232
Display message ............................ 182
Filling capacity ....... ........................ 286
G
eneral notes ................................ 285
Notes about oil grades ................... 285
Notes on oil level/consumption .... 232
Temperature (on-board com-
puter) ............................................. 171
Entering an address
see also Digital Operator's Man-
ual ..................................................2 03
ESP
®(Electronic Stability Pro-
gram)
4ETS (Electronic Traction Sys-
tem) ................................................. 59
AMG menu (on-board computer) ... 171
Characteristics ................................. 60
Deactivating/activating ................... 60
Display message ............................ 175
Function/notes ................................ 59
Index9
Page 20 of 294

Tail lampReplacing bulbs ............................... 92
Tail lamps
Display message ............................ 180
Tank content
Fuel gauge ....................................... 32
Technical data
Capacities ...................................... 283
Drawbar load (maximum) ............... 291
Information .................................... 281
Trailer loads ................................... 291
Vehicle data ................................... 288
Telephone
Accepting a call ............................. 166
Authorizing a mobile phone (con-
necting) ......................................... 207
Connecting a mobile phone (gen-
eral information) ............................ 206
Display message ............................ 191
Menu (on-board computer) ............ 166
Number from the phone book ........ 167
Redialing ........................................ 167
Rejecting/ending a call ................. 166
see also Digital Operator's Man-
ual .................................................. 203
see Mobile phone
Temperature
Coolant .......................................... 161
Coolant (on-board computer) ......... 171
Engine oil (on-board computer) ...... 171
Outside temperature ...................... 160
Setting (climate control) .................. 99
Tilt/sliding sunroof
see Sliding sunroof
Time
see separate operating instructions
Timing (RACETIMER) ......................... 172
Tire pressure
Calling up (on-board computer) ..... 263
Checking manually ........................ 263
Display message ............................ 187
Maximum ....................................... 262
Notes ............................................. 261
Recommended ............................... 260
Tire pressure monitor
Checking the tire pressure elec-
tronically ........................................ 264
Function/notes ............................. 263 General notes ................................ 263
Important safety notes .................. 263
Radio type approval for the tire
pressure monitor ........................... 266
Restarting ...................................... 265
Warning lamp ................................. 202
Warning message .......................... 265
Tires
Aspect ratio (definition) ................. 275
Average weight of the vehicle
occu pants (
definition) .................... 273
Bar (definition) ............................... 273
Changing a wheel .......................... 275
Characteristics .............................. 273
Checking ........................................ 257
Curb weight (definition) ................. 274
Definition of terms ......................... 273
Direction of rotation ...................... 276
Display message ............................ 187
Distribution of the vehicle occu-
pants (definition) ............................ 275
DOT (Department of Transporta-
tion) (definition) ............................. 273
DOT, Tire Identification Number
(TIN) ............................................... 272
GAWR (Gross Axle Weight Rating)
(definition) ..................................... 274
GTW (Gross Trailer Weight) (defi-
nition) ............................................ 274
GVW (Gross Vehicle Weight) (def-
inition) ........................................... 274
GVWR (Gross Vehicle Weight Rat-
ing) (definition) .............................. 274
Important safety notes .................. 257
Increased vehicle weight due to
optional equipment (definition) ...... 274
Information on driving .................... 257
Kilopascal (kPa) (definition) ........... 274
Labeling (overview) ........................ 270
Load bearing index (definition) ...... 275
Load index ..................................... 272
Load index (definition) ................... 274
Maximum load on a tire (defini-
tion) ............................................... 274
Maximum loaded vehicle weight
(definition) ..................................... 274
Maximum permissible tire pres-
sure (definition) ............................. 274
18Index
Page 107 of 294

There is a risk of an accident.
Wear suitable footwear to ensure correct
usage of the pedals.
GWARNING
If you switch off the ignition while driving,
safety-relevant functions are only available
with limitations, or not at all. This could affect, for example, the power steering and the brake
boosting effect. You will require considerably
more effort to steer and brake. There is a risk
of an accident.
Do not switch off the ignition while driving.
GWARNING
If the parking brake has not been fully
released when driving, the parking brake can:
Roverheat and cause a fire
Rlose its hold function.
There is a risk of fire and an accident. Release
the parking brake fully before driving off.
!Warm up the engine quickly. Do not use the
engine's full performance until it has reached
operating temperature.
Only shift the automatic transmission to the
desired drive position when the vehicle is sta-
tionary.
Where possible, avoid spinning the drive
wheels when pulling away on slippery roads.
You could otherwise damage the drive train.
!Avoid high engine speeds when the engine
is cold. The engine's service life could other-
wise be significantly shortened. Do not use
the engine's full performance until it has
reached operating temperature.
!Mercedes-AMG vehicles: at low engine oil
temperatures below 68 ‡ (+20 †), the max-
imum engine speed is restricted in order to
protect the engine. To protect the engine and
maintain smooth engine operation, avoid driv-
ing at full throttle when the engine is cold.
Key positions
gTo remove the SmartKey
1Power supply for some consumers, such as
the windshield wipers
2Ignition (power supply for all consumers)
and drive position
3To start the engine
As soon as the ignition is switched on, all the
indicator lamps in the instrument cluster light
up. If an indicator lamp does not go out after
starting the engine or lights up while driving, see
(
Ypage 193).
If the SmartKey is in position gin the ignition
lock for a longer period, it can no longer be
turned in the ignition lock. The steering is then
locked. To unlock, remove the SmartKey and
reinsert it into the ignition lock.
The steering is locked when you remove the
SmartKey from the ignition lock.
XRemove the SmartKey when the engine is
switched off.
The starter battery could otherwise be dis-
charged.
If you cannot turn the SmartKey in the ignition
lock, the starter battery may not be charged
sufficiently.
XCheck the starter battery and charge it if nec-
essary (Ypage 248).
or
XJump-start the vehicle (Ypage 249).
You can only remove the SmartKey if:
Rthe SmartKey is in position gin the ignition
lock
Rthe automatic transmission selector lever is
in j
Driving105
Driving and parking
Z
Page 131 of 294

Indicated temperatures just above the freezing
point do not guarantee that the road surface is
free of ice. The road may still be icy, especially in
wooded areas or on bridges. The vehicle could
skid if you fail to adapt your driving style. Always
adapt your driving style and drive at a speed to
suit the prevailing weather conditions.
You should pay special attention to road condi-
tions when temperatures are around freezing
point.
For more information on driving with snow
chains, see (
Ypage 259).
For more information on driving with summer
tires, see (
Ypage 259).
Observe the notes in the "Winter operation" sec-
tion (
Ypage 258).
Off-road driving
Important safety notes
GWARNING
If you drive on a steep incline at an angle or
turn when driving on an incline, the vehicle
could slip sideways, tip and rollover. There is a risk of an accident.
Always drive on a steep incline in the line of
fall (straight up or down) and do not turn the
vehicle.
GWARNING
Flammable material such as leaves, grass or
twigs may ignite if they come into contact with
hot parts of the exhaust system. There is a risk of fire.
When driving off road or on unpaved roads,
check the vehicle's underside regularly. In
particular, remove parts of plants or other
flammable materials which have become
trapped. In the case of damage, contact a
qualified specialist workshop.
!There is a risk of damage to the vehicle if:
Rthe vehicle becomes stuck, e.g. on a high
curb or an unpaved road
Ryou drive too fast over an obstacle, e.g. a
curb, a speed bump or a pothole in the road
Ra heavy object strikes the underbody or
parts of the chassis
In situations like this, the body, the under-
body, chassis parts, wheels or tires could be
damaged without the damage being visible.
Components damaged in this way can unex-
pectedly fail or, in the case of an accident, no
longer withstand the loads they are designed
to.
If the underbody paneling is damaged, com-
bustible materials such as leaves, grass or
twigs can gather between the underbody and
the underbody paneling. If these materials
come in contact with hot parts of the exhaust system, they can catch fire.
In such situations, have the vehicle checked
and repaired immediately at a qualified spe-
cialist workshop. If on continuing your jour-
ney you notice that driving safety is impaired,
pull over and stop the vehicle immediately,
paying attention to road and traffic condi-
tions. In such cases, consult a qualified spe-
cialist workshop.
When driving off-road, substances such as sand, mud and water or water mixed with oil may get
into the brakes. This may lead to a reduction in
braking performance or total brake failure as a
result of increased wear. The braking charac-
teristics change depending on the material
entering the brakes. Clean the brakes after driv-
ing off-road. If you detect a reduced braking
effect or grinding noises, ha
ve the brake system
checked in a qualified specialist workshop as
soon as possible. Adapt your driving style to the
different braking characteristics.
Driving off-road increases the likelihood of dam-
age to the vehicle, which, in turn, can lead to
failure of the mechanical assembly or systems.
Adapt your driving style to suit the terrain con-
ditions. Drive carefully. Have damage to the
vehicle rectified immediately at a qualified spe-
cialist workshop.
Do not shift into transmission position iwhen
driving off-road. You could lose control of the
vehicle if you attempt to brake the vehicle using
the service brake. If the gradient is too steep for your vehicle, drive back down in reverse gear.
Driving tips129
Driving and parking
Z
Page 173 of 294

XPress the:or9 button to select the
Auto. Mirror Foldingfunction.
If the Auto. Mirror Foldingfunction is
activated, the vehicle's exterior mirror is dis-
played in red in the multifunction display.
XPress the abutton to save the setting.
:To fold the exterior mirrors in or out
If you have activated the Auto.
MirrorFold‐ingfunction and you fold the exterior mirrors in
using button :, they will not fold out automat-
ically (
Ypage 82).
You can then only fold out the exterior mirrors
using button :.
Restoring the factory settings
XPress the=or; button on the steering
wheel to select the Sett.menu.
XPress the:or9 button to select the
Factory Settingsubmenu.
XPress ato confirm.
The ResetAllSettings?display message
appears.
XPress the :or9 button to select Noor
Yes.
XPress ato confirm the selection.
If you have selected Yesand confirmed, the
multifunction display shows a confirmation
message.
For safety reasons, the Daytime Running
Lightsfunction in theLightsubmenu is only
reset if the vehicle is stationary.
AMG menu in Mercedes-AMG vehicles
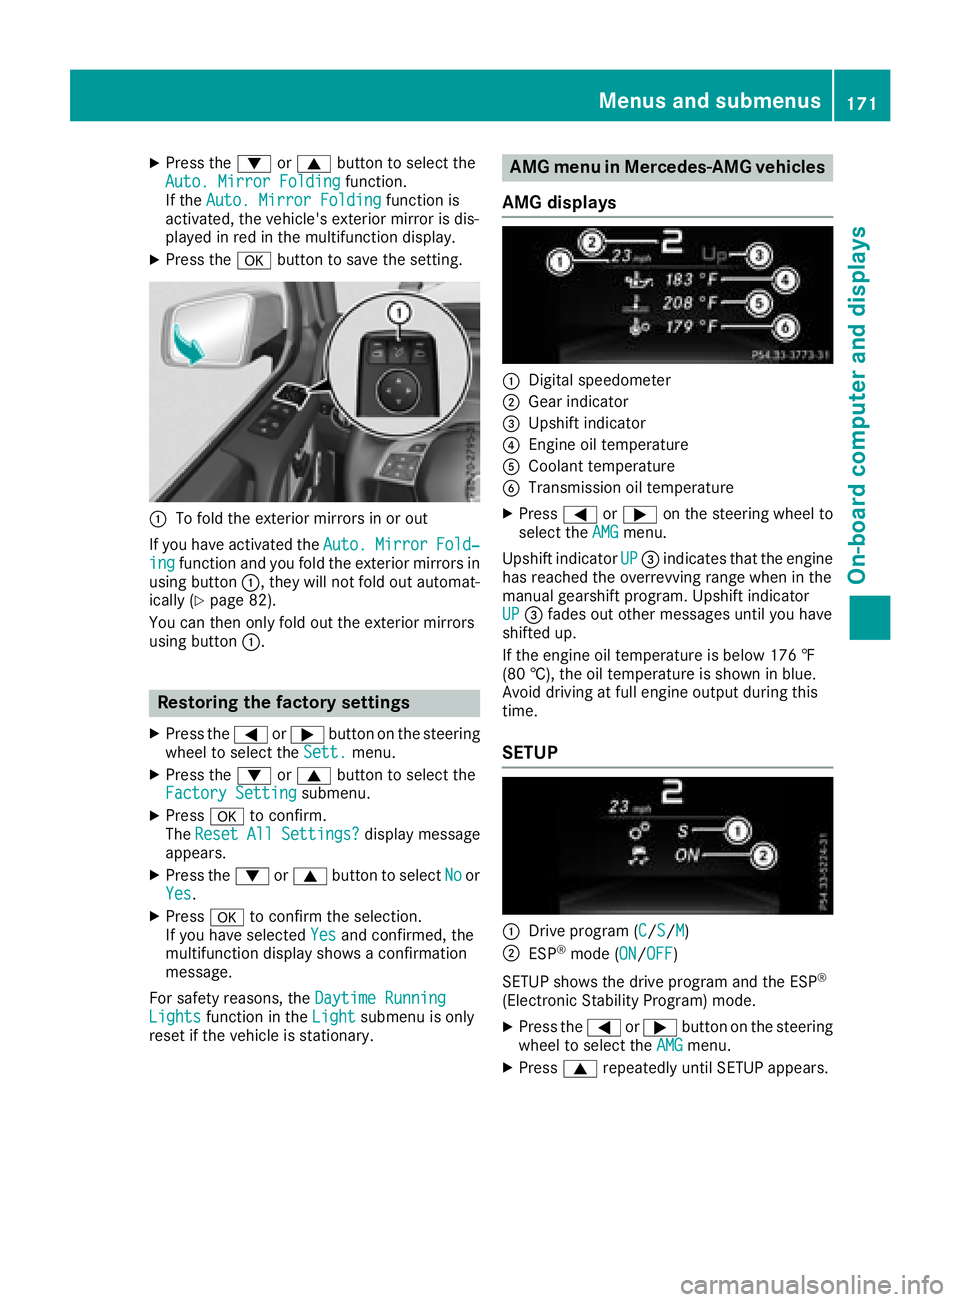
AMG displays
:Digital speedometer
;Gear indicator
=Upshift indicator
?Engine oil temperature
ACoolant temperature
BTransmission oil temperature
XPress =or; on the steering wheel to
select the AMGmenu.
Upshift indicator UP
=indicates that the engine
has reached the overrevving range when in the
manual gearshift program. Upshift indicator
UP
= fades out other messages until you have
shifted up.
If the engine oil temperature is below 176 ‡
(80 †), the oil temperature is shown in blue.
Avoid driving at full engine output during this
time.
SETUP
:Drive program (C/S/M)
;ESP®mode (ON/OFF)
SETUP shows the drive program and the ESP
®
(Electronic Stability Program) mode.
XPress the =or; button on the steering
wheel to select the AMGmenu.
XPress9repeatedly until SETUP appears.
Menus and submenus171
On-board computer and displays
Z
Page 234 of 294

GWARNING
Opening the hood when the engine is over-
heated or when there is a fire in the engine
compartment could expose you to hot gases
or other service products. There is a risk of
injury.
Let an overheated engine cool down before
opening the hood. If there is a fire in the
engine compartment, keep the hood closed
and contact the fire department.
Notes on the oil level
Depending on your driving style, the vehicle
consumes up to 0.9 US qt (0.8 liters) of oil per
600 mile s(1000 km). The oil consumption may
be higher than this when the vehicle is new or if you frequently drive at high engine speeds.
Depending on the engine, the oil dipstick may be
in a different location.
When checking the oil level:
Rpark the vehicle on a level surface
Rthe engine should be switched off for approx-
imately five minutes if the engine is at normal
operating temperature
Rif the engine is not at normal operating tem-
perature, e.g. if the engine was only started
briefly, wait approximately 30 minutes before
carrying out the measurement
Checking the oil level using the oil dip-
stick
Example: engine compartment
On the G 63 AMG, the oil level can be checked
using the oil dipstick.
XPull oil dipstick :out of the dipstick guide
tube.
XWipe off oil dipstick :.
XSlowly slide oil dipstick :into the guide tube
to the stop and take it out again after approx-
imately three seconds.
If the level is between MIN mark =and MAX
mark ;, the oil level is correct.
XIf the oil level has dropped to MIN mark =or
below, add 1.1 US qt (1.0 l)of engine oil.
On all other models, the on-board computer
must be used to check the engine oil level.
Checking the oil level using the on-
board computer
G 550: the oil level can only be checked using
the on-board computer.
XMake sure that the SmartKey is in position 2
in the ignition lock.
XPress 9or: on the steering wheel to
select the following message: Measuring
EngineOilLevelAccurateOnlyWhenVehicle Is Level
The measurement takes a few seconds. You will
see one of the following messages in the multi-
function display:
REngine Oil Level OK
RAdd1.1litersEng.OilatNextRefu‐eling
XAdd oil if necessary.
If the engine is at normal operating temperature and the Reduce Engine Oil Level
display
appears, too much oil has been added.
XHave excess oil siphoned off.
If the For Engine Oil Level Ignition
Must Be Onmessage appears:
XTurn the SmartKey to position 2in the igni-
tion lock (Ypage 105).
If the Need More Time to Check Engine
Oil Levelmessage appears:
XIf the engine is at normal operating tem-
perature: repeat the measurement after
approximately five minutes.
XIf the engine is not at normal operating
temperature: e.g. if the engine was only star-
ted briefly, repeat the measurement after
approximately 30 minutes.
232Engine compartment
Maintenance and care
Page 235 of 294

If theEngine Oil Level Not Measurablewith Running Enginemessage appears:
XSwitch off the engine.
XIf the engine is at normal operating tem-
perature: wait about five minutes before car-
rying out the measurement.
XIf the engine is not at normal operating
temperature: e.g. if the engine was only star-
ted briefly, wait approximately 30 minutes
before carrying out the measurement.
If you wish to cancel the measurement, press
the 9 or: button on the multifunction
steering wheel.
Adding engine oil
!Use only engine oils and oil filters that are
approved for vehicles with a service system. A
list of the engine oils and oil filters that have
been tested and approved in accordance with
Mercedes-Benz Specifications for Service
Products is available at any authorized
Mercedes-Benz Center.
The following cause engine failure or damage
to the exhaust system:
RUse of engine oils and oil filters that have
not been expressly approved for the service
system
RReplacement of engine oil and oil filter after
the replacement interval specified by the
service system has expired
RUse of engine oil additives
!Do not add too much oil. If the oil level is
above the "max" mark on the dipstick, too
much oil has been added. This can lead to
damage to the engine or the catalytic con-
verter. Have excess oil siphoned off.
HEnvironmental note
When adding oil, take care not to spill any. If
oil enters the soil or waterways, it is harmful to
the environment.
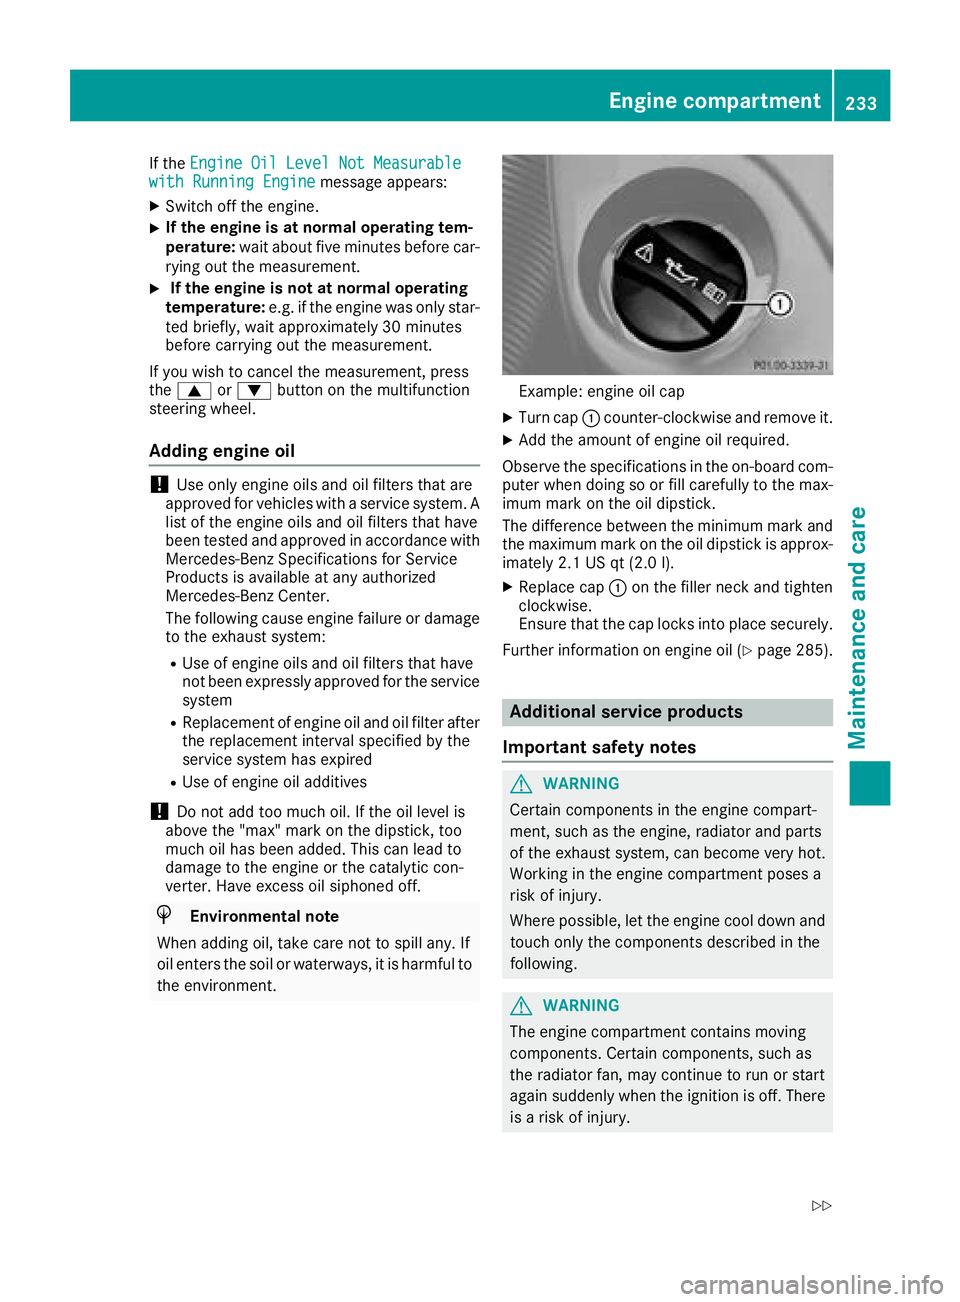
Example: engine oil cap
XTurn cap :counter-clockwise and remove it.
XAdd the amount of engine oil required.
Observe the specifications in the on-board com-
puter when doing so or fill carefully to the max-
imum mark on the oil dipstick.
The difference between the minimum mark and
the maximum mark on the oil dipstick is approx-
imately 2.1 US qt (2.0 l).
XReplace cap :on the filler neck and tighten
clockwise.
Ensure that the cap locks into place securely.
Further information on engine oil (
Ypage 285).
Additional service products
Important safety notes
GWARNING
Certain components in the engine compart-
ment, such as the engine, radiator and parts
of the exhaust system, can become very hot.
Working in the engine compartment poses a
risk of injury.
Where possible, let the engine cool down and touch only the components described in the
following.
GWARNING
The engine compartment contains moving
components. Certain components, such as
the radiator fan, may continue to run or start
again suddenly when the ignition is off. There is a risk of injury.
Engine compartment233
Maintenance and care
Z
Page 245 of 294

Where will I find...?
Reflective safety jacket
Removing reflective safety jackets
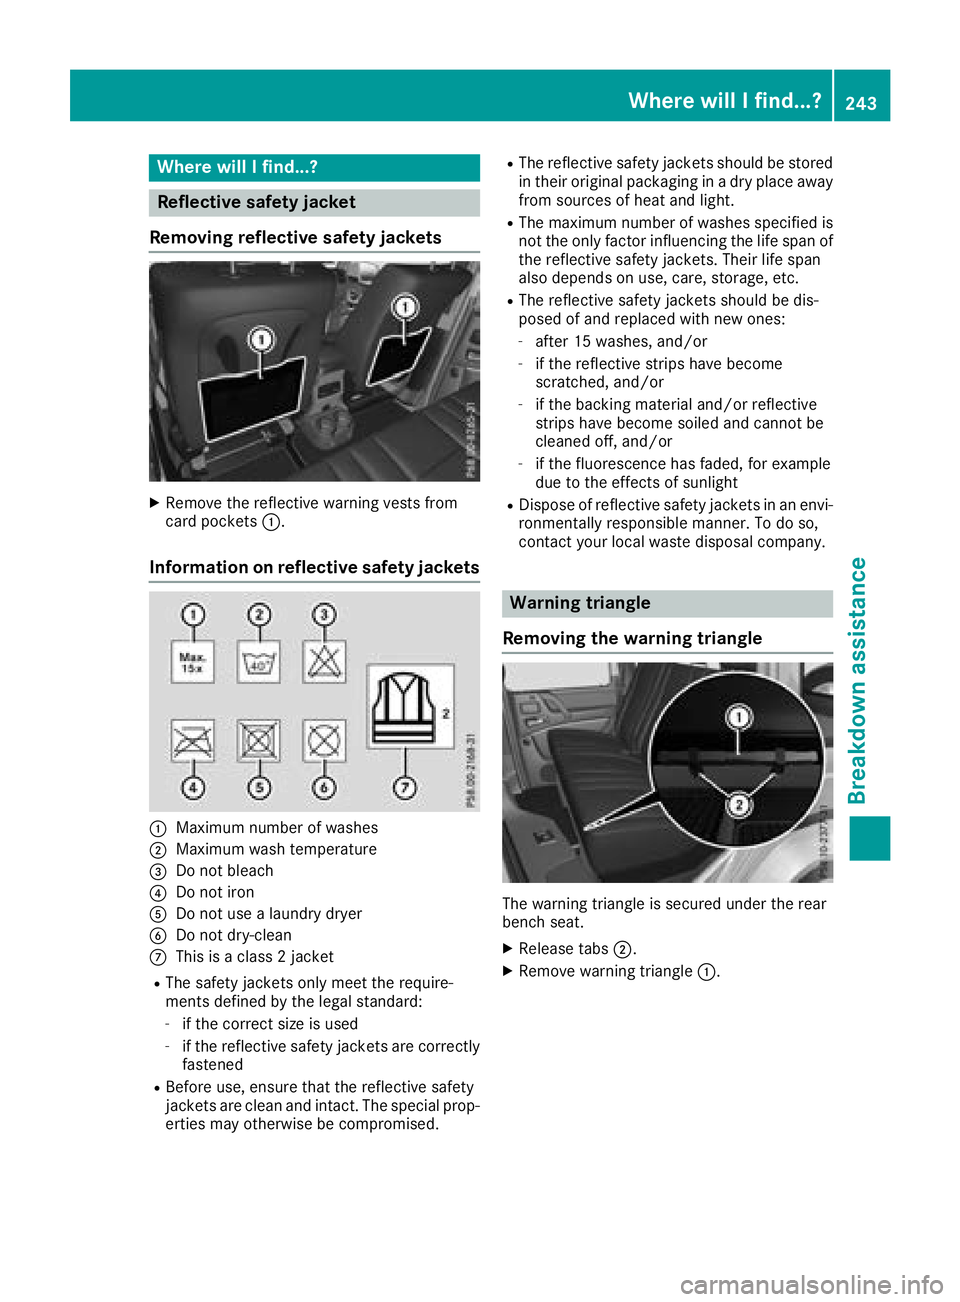
XRemove the reflective warning vests from
card pockets :.
Information on reflective safety jackets
:Maximum number of washes
;Maximum wash temperature
=Do not bleach
?Do not iron
ADo not use a laundry dryer
BDo not dry-clean
CThis is a class 2 jacket
RThe safety jackets only meet the require-
ments defined by the legal standard:
-if the correct size is used
-if the reflective safety jackets are correctly
fastened
RBefore use, ensure that the reflective safety
jackets are clean and intact. The special prop-
erties may otherwise be compromised.
RThe reflective safety jackets should be stored
in their original packaging in a dry place away
from sources of heat and light.
RThe maximum number of washes specified is not the only factor influencing the life span of
the reflective safety jackets. Their life span
also depends on use, care, storage, etc.
RThe reflective safety jackets should be dis-
posed of and replaced with new ones:
-after 15 washes, and/or
-if the reflective strips have become
scratched, and/or
-if the backing material and/or reflective
strips have become soiled and cannot be
cleaned off, and/or
-if the fluorescence has faded, for example
due to the effects of sunlight
RDispose of reflective safety jackets in an envi-
ronmentally responsible manner. To do so,
contact your local waste disposal company.
Warning triangle
Removing the warning triangle
The warning triangle is secured under the rear
bench seat.
XRelease tabs ;.
XRemove warning triangle :.
Where will I find...?243
Breakdown assistance