2018 MERCEDES-BENZ G-CLASS washer fluid
[x] Cancel search: washer fluidPage 18 of 294

S
SafetyChildren in the vehicle ..................... 50
see Occupant safety
Safety system
see Driving safety systems
SD card
Inserting ........................................2 08
Inserting/removing ........................ 208
Removing ....................................... 208
SD memory card
see also Digital Operator's Man-
ual ..................................................2 03
Search & Send
see also Digital Operator's Man-
ual ..................................................2 03
Seat
Correct driver's seat position ........... 74
Seat backrest
Folding back .................................. 212
Seat belts
Adjusting the height ......................... 41
center rear-compartment seat ......... 42
Cleaning ......................................... 242
Correct usage .................................. 41
Fastening ......................................... 41
Important safety guidelines ............. 40
Introduction ..................................... 39
Releasing ......................................... 43
Warning lamp ................................. 192
Warning lamp (function) ................... 43
Seat heating
Indicator lamp (malfunction) ............ 79
Seat ventilation
Indicator lamp (malfunction) ............ 79
Seats
Adjusting (electrically) ..................... 76
Adjusting the 4-way lumbar sup-
port .................................................. 78
Adjusting the head restraint ............ 76
Cleaning the cover ......................... 241
Important safety notes .................... 74
Overview .......................................... 74
Storing settings (memory func-
tion) ................................................. 84
Switching seat heating on/off ......... 78
Switching seat ventilation on/off .... 79 Selector lever
Cleaning ......................................... 241
Sensors (cleaning instructions) ....... 239
Service interval display
Displaying a service message (on-
board computer) ............................ 236
Service menu (on-board com-
puter) .................................................. 167
Service products
Brake fluid ..................................... 286
Coolant (engi ne) ............................ 286
Eng
ine oil ....................................... 285
Fuel ................................................ 283
Important safety notes .................. 283
Notes ............................................. 283
Refrigerant (air-conditioning sys-
tem) ............................................... 287
Washer fluid ................................... 287
Setting
Date ............................................... 168
Time ............................................... 169
Setting the air distribution ................. 99
Setting the date/time format
see also Digital Operator's Man-
ual .................................................. 203
Setting the language
see also Digital Operator's Man-
ual .................................................. 203
Setting the time
see also Digital Operator's Man-
ual .................................................. 203
Settings
Calling up a stored setting ............... 85
Factory (on-board computer) ......... 171
Language ....................................... 168
On-board computer ....................... 168
SETUP (on-board computer,
Mercedes-AMG vehicles) .................. 171
Shift ranges ....................................... 116
Side impact air bag ............................. 45
Side marker lamp (display mes-
sage) ................................................... 180
Side windows
Convenience closing feature ............ 70
Convenience opening feature .......... 70
Important safety information ........... 69
Opening/closing .............................. 69
16Index
Page 23 of 294

Distance warning ........................... 201
DISTRONIC PLUS ........................... 201
ESP
®.............................................. 196
ESP®OFF ....................................... 197
Fuel tank ........................................ 199
General notes ................................ 191
Overview .......................................... 32
Parking brake ................................ 194
PASSENGER AIR BAG OFF ............... 39
Reserve fuel ................................... 199
Restraint system ............................ 198
Seat belt ........................................ 192
Tire pressure monitor .................... 202
Warning triangle ................................ 243
Warranty .............................................. 24
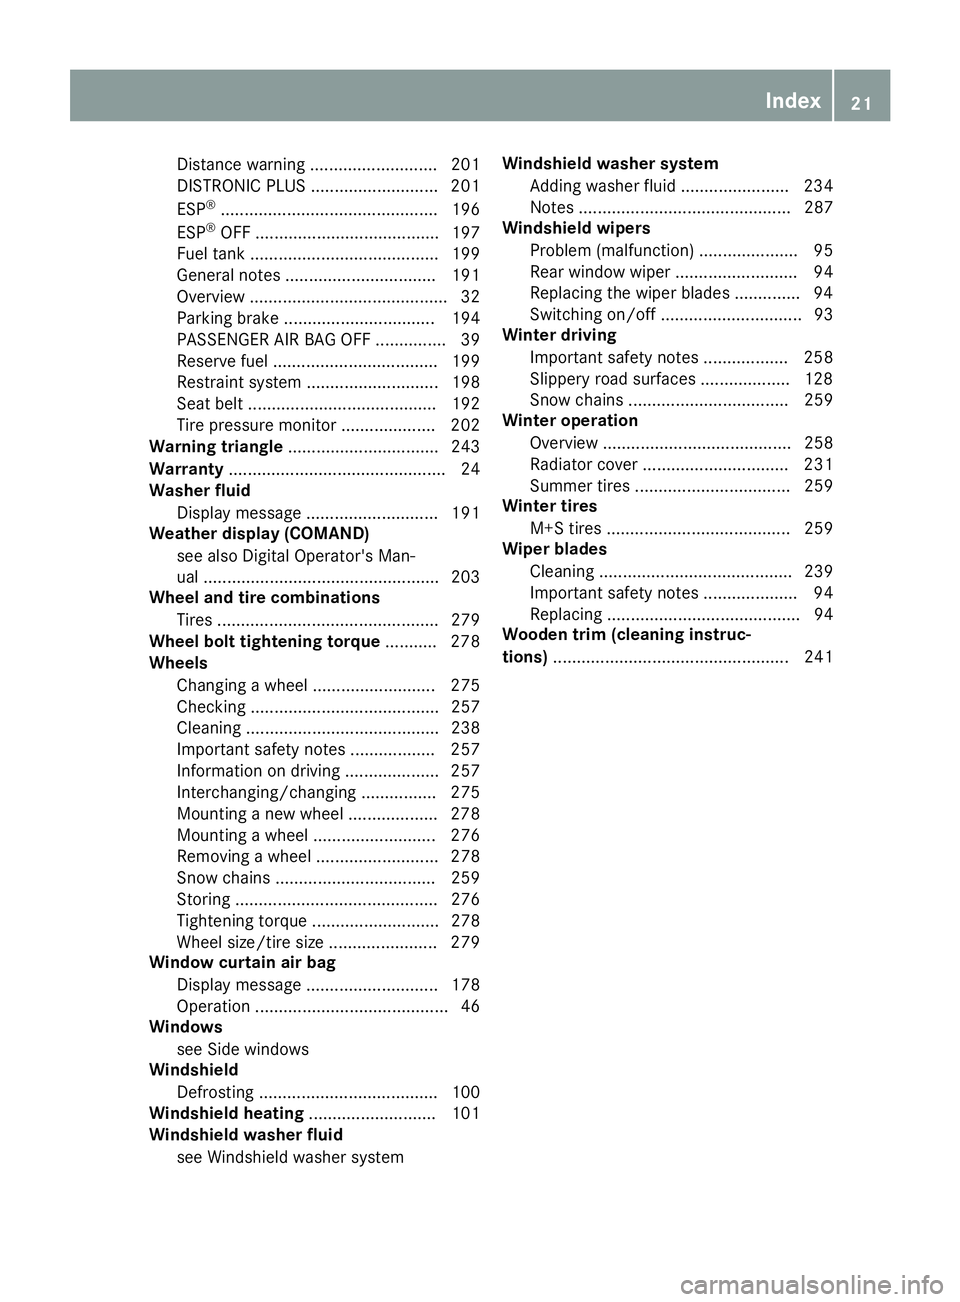
Washer fluid
Display message ............................ 191
Weather display (COMAND)
see also Digital Operator's Man-
ual .................................................. 203
Wheel and tire combinations
Tires ............................................... 279
Wheel bolt tightening torque ........... 278
Wheels
Changing a wheel .......................... 275
Checking ........................................ 257
Cleaning ......................................... 238
Important safety notes .................. 257
Information on driving .................... 257
Interchanging/changing ................ 275
Mounting a new wheel ................... 278
Mounting a wheel .......................... 276
Removing a wheel .......................... 278
Snow chains .................................. 259
Storing ........................................... 276
Tightening torque ........................... 278
Wheel size/tire size ....................... 279
Window curtain air bag
Display message ............................ 178
Operation ......................................... 46
Windows
see Side windows
Windshield
Defrosting ...................................... 100
Windshield heating ........................... 101
Windshield washer fluid
see Windshield washer system Windshield washer system
Adding washer fluid ....................... 234
Notes ............................................. 287
Windshield wipers
Problem (malfunction) ..................... 95
Rear window wiper .......................... 94
Replaci ng the w
iper blades .............. 94
Switching on/off .............................. 93
Winter driving
Important safety notes .................. 258
Slippery road surfaces ................... 128
Snow chains .................................. 259
Winter operation
Overview ........................................ 258
Radiator cover ............................... 231
Summer tires ................................. 259
Winter tires
M+S tires ....................................... 259
Wiper blades
Cleaning ......................................... 239
Important safety notes .................... 94
Replacing ......................................... 94
Wooden trim (cleaning instruc-
tions) .................................................. 241
Index21
Page 89 of 294

XTo switch on the daytime running lamps:
switch on theDaytime Running Lights
function via the on-board computer
(Ypage 169).
XTurn the light switch to the Ãposition.
With the engine running: depending on the
ambient light, the daytime running lamps or
the low-beam headlamps are switched on.
When the low-beam headlamps are switched
on, the green Lindicator lamp in the
instrument cluster lights up.
If the engine is running and you turn the light
switch to the TorL position, the manual
settings take precedence over the daytime run-
ning lamps.
Automatic headlamp mode
GWARNING
When the light switch is set to Ã, the low-
beam headlamps may not be switched on
automatically if there is fog, snow or other
causes of poor visibility due to the weather
conditions such as spray. There is a risk of an
accident.
In such situations, turn the light switch to
L.
The automatic headlamp feature is only an aid.
The driver is responsible for the vehicle's light-
ing at all times.
à is the favored light switch setting.
The light setting is automatically selected
according to the brightness of the ambient light,
but not in the event of poor visibility due to
weather conditions such as fog, snow or spray.
XTo switch on the automatic headlamps:
turn the light switch to the Ãposition.
With the SmartKey in position 1in the igni-
tion lock, the parking lamps are switched on
or off automatically depending on the bright-
ness of the ambient light.
If you have switched on the Daytime Run‐
ning Lightsfunction via the on-board com-
puter, the daytime running lamps or the park-
ing lamps and low-beam headlamps will
switch on or off automatically while the
engine is running.
When the low-beam headlamps are switched
on, the green Lindicator lamp in the
instrument cluster lights up.
Rear fog lamp
The rear fog lamp improves visibility of your
vehicle for the traffic behind in the event of thick
fog. You must observe the legal requirements
for the country in which you are currently driving
when operating the rear fog lamp.
XTo switch on the rear fog lamp: turn the
SmartKey in the ignition lock to position 2or
start the engine.
XTurn the light switch to the LorÃ
position.
XPress the Rbutton.
The yellow Rindicator lamp on the instru-
ment cluster lights up.
Parking lamps
!
If the battery charge is very low, the parking
lamps or standing lamps are automatically
switched off to enable the next engine start.
Always park your vehicle safely and in a well lit
area, in accordance with the relevant legal
stipulations. Avoid using the Tparking
lamps over a period of several hours. If pos-
sible, switch on the right-hand Xor left-
hand W standing lamps.
XTo switch on: turn the light switch to the
T position.
The green Tindicator lamp on the instru-
ment cluster lights up.
Standing lamps
Switching on the standing lamps ensures the
corresponding side of the vehicle is illuminated.
XTo switch on the standing lamp: turn the
SmartKey to position uin the ignition lock or
remove the SmartKey.
XTurn the light switch to the W(left-hand
side of the vehicle) or X(right-hand side of
the vehicle) position.
Headlamp cleaning system
The headlamps are cleaned automatically if the
"Wipe with washer fluid" function is operated
ten times while the lights are on and the engine
is running (
Ypage 93). When you switch off
Exterior lighting87
Lights and windshield wiper s
Z
Page 95 of 294

XTurn bulb=counter-clockwise, applying
slight pressure, and pull it out of the bulb
holder.
XInsert the new bulb into the bulb holder and,
applying slight pressure, turn it clockwise
until it engages.
XInstall lens ;.
XTighten screws :.
Windshield wipers
Switching the windshield wipers
on/off
!
Do not operate the windshield wipers when
the windshield is dry, as this could damage
the wiper blades. Moreover, dust that has col-
lected on the windshield/rear window can
scratch the glass if wiping takes place when
the windshield/rear window is dry.
If it is necessary to switch on the windshield
wipers in dry weather conditions, always use
washer fluid when operating the windshield
wipers.
!If the windshield wipers leave smears on the
windshield/rear window after the vehicle has
been washed in an automatic car wash, this
may be due to wax or other residue. Clean the
windshield/rear window with washer fluid
after an automatic car wash.
!Intermittent wiping with rain sensor: due to
optical influences and the windshield becom-
ing dirty in dry weather conditions, the wind-
shield wipers may be activated inadvertently.
This could then damage the windshield wiper
blades or scratch the windshield.
For this reason, you should always switch off
the windshield wipers in dry weather.
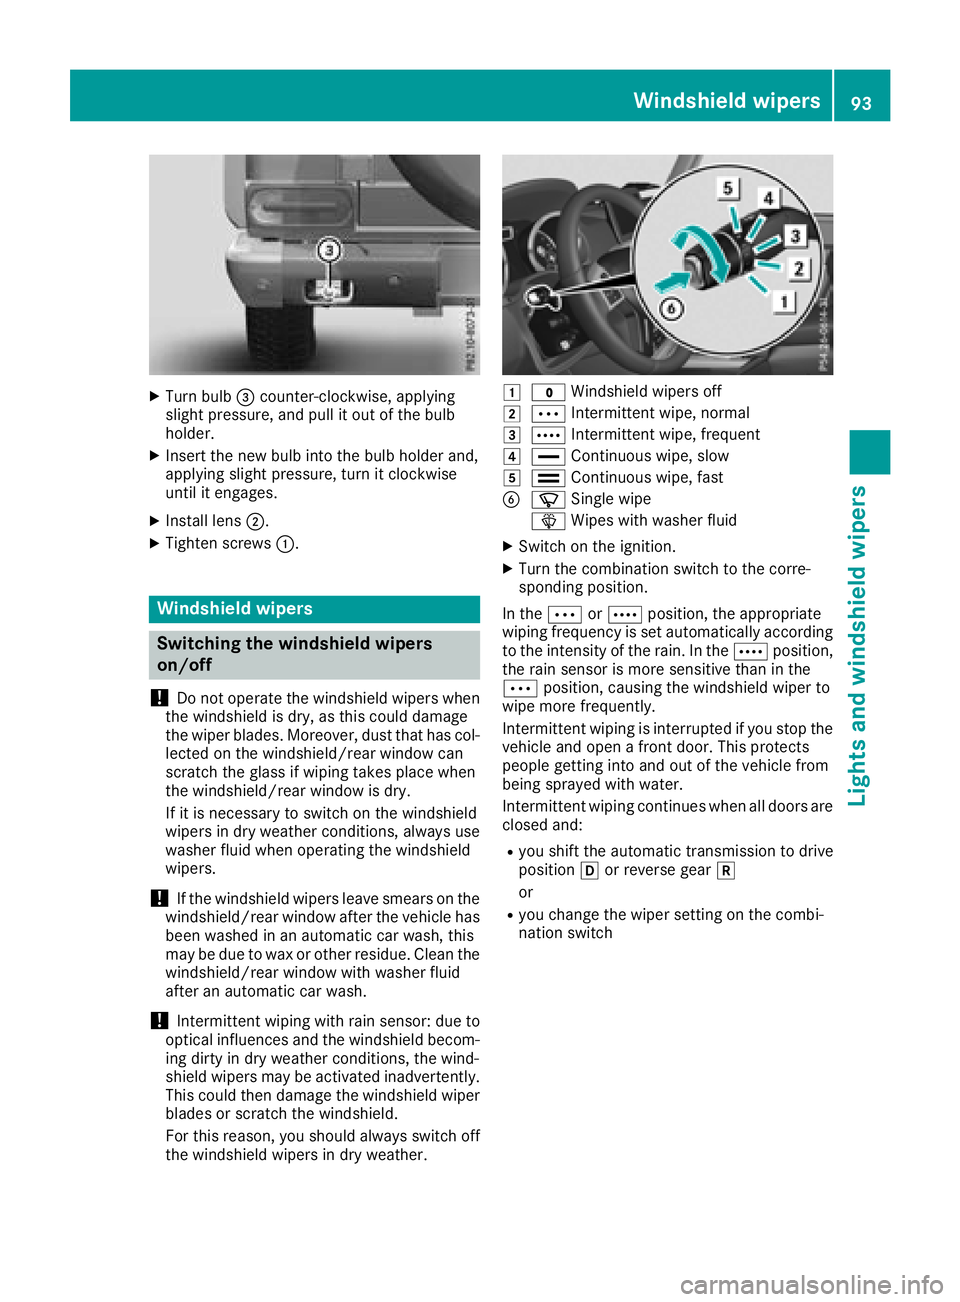
1$ Windshield wipers off
2ÄIntermittent wipe, normal
3ÅIntermittent wipe, frequent
4°Continuous wipe, slow
5¯Continuous wipe, fast
BíSingle wipe
î Wipes with washer fluid
XSwitch on the ignition.
XTurn the combination switch to the corre-
sponding position.
In the ÄorÅ position, the appropriate
wiping frequency is set automatically according
to the intensity of the rain. In the Åposition,
the rain sensor is more sensitive than in the
Ä position, causing the windshield wiper to
wipe more frequently.
Intermittent wiping is interrupted if you stop the vehicle and open a front door. This protects
people getting into and out of the vehicle from
being sprayed with water.
Intermittent wiping continues when all doors are
closed and:
Ryou shift the automatic transmission to drive
position hor reverse gear k
or
Ryou change the wiper setting on the combi-
nation switch
Windshield wipers93
Lights and windshield wipers
Z
Page 96 of 294

Switching the rear window wiper on/
off
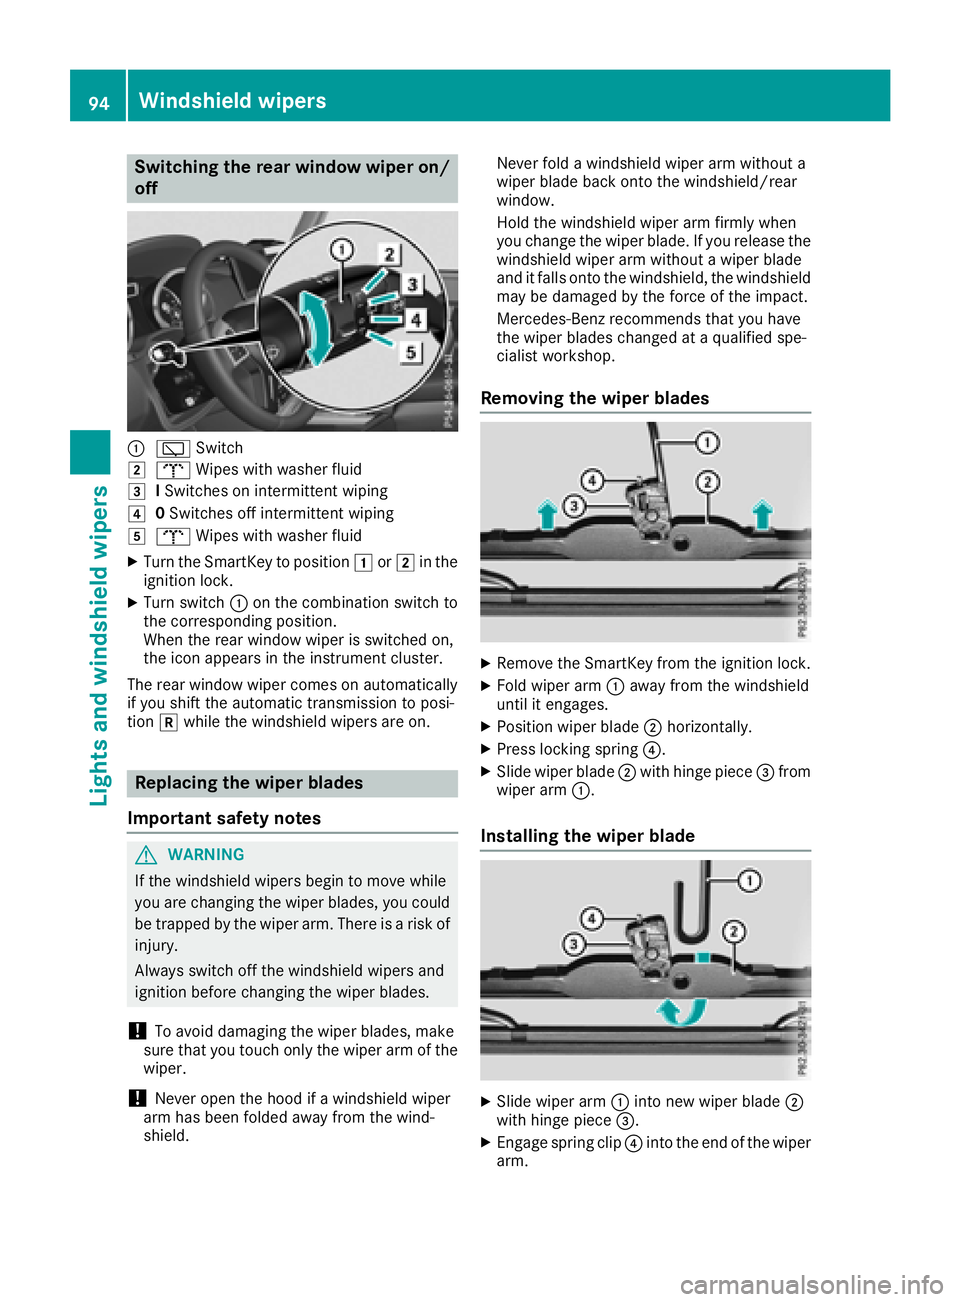
:èSwitch
2bWipes with washer fluid
3ISwitches on intermittent wiping
40 Switches off intermittent wiping
5b Wipes with washer fluid
XTurn the SmartKey to position 1or2 in the
ignition lock.
XTurn switch :on the combination switch to
the corresponding position.
When the rear window wiper is switched on,
the icon appears in the instrument cluster.
The rear window wiper comes on automatically
if you shift the automatic transmission to posi-
tion kwhile the windshield wipers are on.
Replacing the wiper blades
Important safety notes
GWARNING
If the windshield wipers begin to move while
you are changing the wiper blades, you could be trapped by the wiper arm. There is a risk of
injury.
Always switch off the windshield wipers and
ignition before changing the wiper blades.
!To avoid damaging the wiper blades, make
sure that you touch only the wiper arm of the
wiper.
!Never open the hood if a windshield wiper
arm has been folded away from the wind-
shield. Never fold a windshield wiper arm without a
wiper blade back onto the windshield/rear
window.
Hold the windshield wiper arm firmly when
you change the wiper blade. If you release the
windshield wiper arm without a wiper blade
and it falls onto the windshield, the windshield
may be damaged by the force of the impact.
Mercedes-Benz recommends that you have
the wiper blades changed at a qualified spe-
cialist workshop.
Removing the wiper blades
XRemove the SmartKey from the ignition lock.
XFold wiper arm :away from the windshield
until it engages.
XPosition wiper blade ;horizontally.
XPress locking spring ?.
XSlide wiper blade;with hinge piece =from
wiper arm :.
Installing the wiper blade
XSlide wiper arm :into new wiper blade ;
with hinge piece =.
XEngage spring clip ?into the end of the wiper
arm.
94Windshield wipers
Lights and windshield wipers
Page 97 of 294

XMake sure that wiper blade;is seated cor-
rectly.
XFold wiper arm :back onto the windshield.
Problems with the windshield wipers
ProblemPossible causes/consequences and MSolutions
The windshield wipers
are jammed.Leaves or snow, for example, are obstructing windshield wiper move-
ment. The wiper motor has been deactivated.
XSwitch off the engine.
XRemove the SmartKey from the ignition lock.
XRemove the cause of the obstruction.
XSwitch the windshield wipers back on.
The windshield wipers
fail completely.The windshield wiper drive is malfunctioning.
XSelect another wiper speed on the combination switch.
XHave the windshield wipers checked at a qualified specialist work-
shop.
The windshield washer
fluid from the spray noz-
zles no longer hits the
center of the windshield.The spray nozzles are misaligned.
XHave the spray nozzles adjusted at a qualified specialist workshop.
Windshield wipers95
Lights and windshield wipers
Z
Page 193 of 294

Display messagesPossible causes/consequences andMSolutions
D
Power Steering Mal‐function See Opera‐tor's Manual
The powersteering is malfunctioning .
A warning tone also sounds.
GWARNIN G
You will need to use mor eforce to steer .
There is aris kof an accident.
XChec kwhether you are able to apply th eextr aforce required.
XIf you ar eabl eto steer safely: carefully drive on to aqualified
specialist workshop .
XIf you areunable to steer safely: do notdrive on .Contac tth e
neares tqualified specialist workshop .
Phone No ServiceYour vehicleis outside th enetwork provider' stransmitter/receiver
range.
XWait until th emobile phone operational readiness symbol appear s
in th emultifunction display.
¥
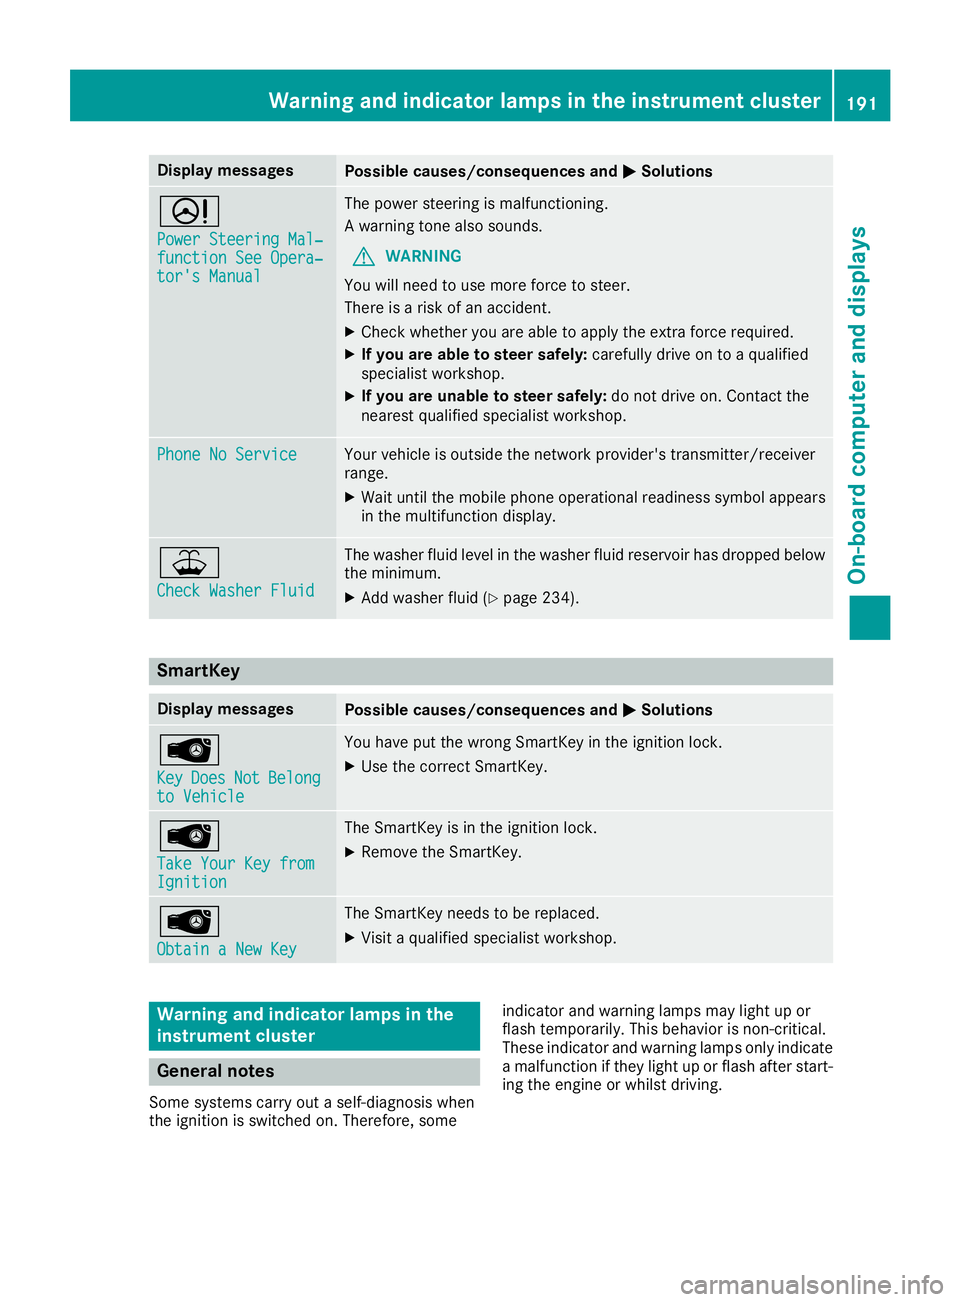
Check Washer Fluid
The washer flui dlevel in th ewasher flui dreservoir has dropped belo w
th eminimum .
XAddwasher flui d (Ypage 234).
SmartKey
Display messagesPossible causes/consequences and MSolutions
Â
KeyDoesNotBelongto Vehicl e
You haveput th ewrong SmartKey in th eignition lock.
XUse th ecorrec tSmartKey.
Â
Tak eYou rKey fro mIgnition
The SmartKey is in th eignition lock.
XRemove th eSmartKey.
Â
Obtain aNew Key
The SmartKey needs to be replaced.
XVisit aqualified specialist workshop .
Warning and indicat orlamps in the
instrume nt cluster
General notes
Some systems carry out aself-diagnosis when
th eignition is switched on .Therefore ,som e indicator and warning lamp
smay ligh tup or
flas htemporarily. This behavio ris non-critical .
These indicator and warning lamp sonly indicat e
a malfunction if they ligh tup or flas hafter start -
ing th eengin eor whils tdriving.
Warning and indicator lamps in the instrument cluster191
On-board computer and displays
Z
Page 236 of 294

If you need to do any work inside the engine
compartment:
Rswitch off the ignition
Rnever reach into the area where there is a
risk of danger from moving components,
such as the fan rotation area
Rremove jewelry and watches
Rkeep items of clothing and hair, for exam-
ple, away from moving parts
GWARNING
The cooling system is pressurized, particularly
when the motor is warm. If you open the cap,
you could be scalded if hot coolant sprays out.
There is a risk of injury.
Let the engine cool down before you open the
cap. Wear gloves and eye protection. Slowly
open the cap to relieve pressure.
GWARNING
Opening the hood when the engine is over-
heated or when there is a fire in the engine
compartment could expose you to hot gases
or other service products. There is a risk of
injury.
Let an overheated engine cool down before
opening the hood. If there is a fire in the
engine compartment, keep the hood closed
and contact the fire department.
Checking coolant level
Checking the coolant level (example)
XPark the vehicle on a level surface. Only check the coolant level when the vehicle
is on a level surface and the engine has cooled
down.
XTurn the SmartKey to position 2in the igni-
tion lock (Ypage 105).
XCheck the coolant temperature display in the
instrument cluster.
The coolant temperature must be below
158 ‡ (70 †).
XSlowly turn cap :half a turn counter-clock-
wise and allow excess pressure to escape.
XTurn cap :further counter-clockwise and
remove it.
If the coolant is at the level of marker bar =
in the filler neck when cold, there is enough
coolant in coolant expansion tank ;.
If the coolant level is approximately 0.6 in
(1.5 cm) above marker bar =in the filler neck
when warm, there is enough coolant in cool-
ant expansion tank ;.
XIf necessary, add coolant that has been tested
and approved by Mercedes-Benz.
XReplace cap:and turn it clockwise as far as
it will go.
For further information on coolant, see
(
Ypage 286).
Adding washer fluid to the windshield
washer system/headlamp cleaning
system
GWARNING
Windshield washer concentrate could ignite if it comes into contact with hot engine compo-
nents or the exhaust system. There is a risk of
fire and injury.
Make sure that no windshield washer con-
centrate is spilled next to the filler neck.
234Engine compartment
Maintenance and care