2018 HONDA ODYSSEY Check system
[x] Cancel search: Check systemPage 638 of 763

636
Maintenance
Before Performing Maintenance
Inspection and Maintenance
For your safety, perform all listed inspections and maintenance to keep your vehicle
in good condition. If you become aware of any abnormality (noise, smell, insufficient
brake fluid, oil residue on the ground, etc.), have your vehicle inspected by a dealer.
(Note, however, that service at a dealer is not mandatory to keep your warranties in
effect.)
■Daily inspections
Perform inspections before long distance trips, when washing the vehicle, or when
refueling.
■Periodic inspections
• Check the brake fluid level monthly.
2 Brake Fluid P. 656
•Check the tire pressure monthly. Examin e the tread for wear and foreign objects.
2Checking and Maintaining Tires P. 673
•Check the operation of the exterior lights monthly.
2 Replacing Light Bulbs P. 658
•Check the condition of the wiper bl ades at least every six months.
2Checking and Maintaining Wiper Blades P. 669
■Types of Inspection and Maintenance
1Inspection and Maintenance
Maintenance, replacement, or repair of
emissions control devices and systems may be
done by any automotive repair establishment or
individuals using parts that are “certified” to
EPA standards.
According to state and fede ral regulations, failure to
perform maintenance on the maintenance main
items marked with # will not void your emissions
warranties. However, all ma intenance services should
be performed in accordan ce with the intervals
indicated by the driver information interface.
2 Maintenance Service Items P. 642
If you want to perform complex maintenance tasks
that require more skills a nd tools, you can purchase a
subscription to the Service Express website at
www.techinfo.honda.com .
2 Authorized Manuals P. 748
If you want to perform ma intenance yourself, make
sure that you have the necessary tools and skills first.
After performing ma intenance, update the records in
the separate maintenance booklet.
U.S. models
18 US ODYSSEY-31THR6010.book 636 ページ 2018年12月6日 木曜日 午後4時18分
Page 655 of 763

653
uuMaintenance Under the Hood uEngine Coolant
Continued
Maintenance
Engine Coolant
This coolant is premixed with 50% an tifreeze and 50% water. Do not add any
straight antifreeze or water.
We recommend you check the engine coolant level every time you refuel. Check the
reserve tank first. If it is completely empty, also check the coolant level in the
radiator. Add the engine coolant accordingly.
1. Make sure the engine and radiator are cool.
2. Check the amount of coolant in the reserve
tank.
u If the coolant level is below the MIN
mark, add the specified coolant until it
reaches the MAX mark.
3. Inspect the cooling system for leaks.
Specified coolant: Ho nda Long Life Antifreeze/Coolant Type 2
■Reserve Tank
1Engine Coolant
NOTICE
Genuine Honda engine coolan t is a 50/50 mixture of
antifreeze and water that can withstand freezing at
temperatures as low as a bout -31°F (-35°C). If your
vehicle is consistently subjected to temperatures
below this, the concentration of antifreeze in the
coolant should be increased. Consult a dealer for
details.
If Honda antifreeze /coolant is not available, you may
use another major brand of non-silicate coolant as a
temporary replacement. Check that it is a high quality
coolant recommended for aluminum engines.
Continued use of any non-Honda coolant can result
in corrosion, causing the cooling system to
malfunction or fail. Have the cooling system flushed
and refilled with Honda anti freeze/coolant as soon as
possible.
Do not add rust inhibitors or other additives to your
vehicle’s cooling system. They may not be compatible
with the coolant or with the engine components.
3WARNING
Removing the radiator cap while the
engine is hot can cause the coolant to spray
out, seriously scalding you.
Always let the engine and radiator cool
down before removing the radiator cap.
Reserve
Tank
MAX
MIN
18 US ODYSSEY-31THR6010.book 653 ページ 2018年12月6日 木曜日 午後4時18分
Page 658 of 763

656
uuMaintenance Under the Hood uBrake Fluid
Maintenance
Brake Fluid
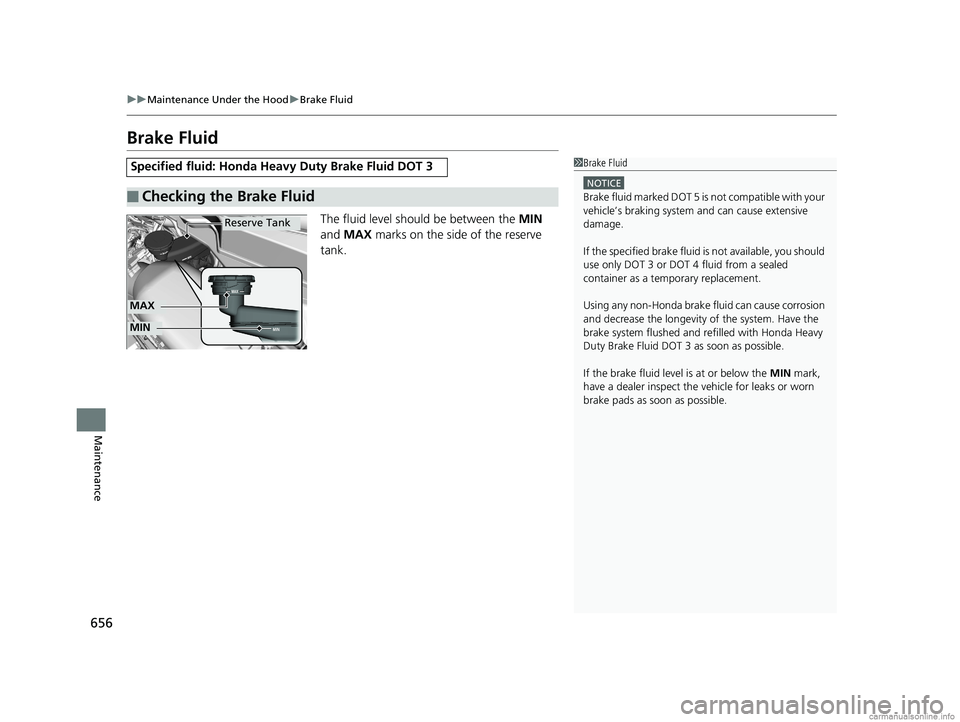
The fluid level should be between the MIN
and MAX marks on the side of the reserve
tank.
Specified fluid: Honda Heavy Duty Brake Fluid DOT 3
■Checking the Brake Fluid
1 Brake Fluid
NOTICE
Brake fluid marked DOT 5 is not compatible with your
vehicle’s braking system and can cause extensive
damage.
If the specified brake fluid is not available, you should
use only DOT 3 or DOT 4 fluid from a sealed
container as a temporary replacement.
Using any non-Honda brake fluid can cause corrosion
and decrease the longevity of the system. Have the
brake system flushed and re filled with Honda Heavy
Duty Brake Fluid DOT 3 as soon as possible.
If the brake fluid level is at or below the MIN mark,
have a dealer inspect the vehicle for leaks or worn
brake pads as soon as possible.
Reserve Tank
MIN
MAX
18 US ODYSSEY-31THR6010.book 656 ページ 2018年12月6日 木曜日 午後4時18分
Page 681 of 763

679
uuChecking and Maintaining Tires uTire and Wheel Replacement
Maintenance
Tire and Wheel Replacement
Replace your tires with radials of the sa me size, load range, speed rating, and
maximum cold tire pressure rating (as shown on the tire’s sidewall). Using tires of a
different size or construction can cause ce rtain vehicle systems such as the ABS and
Vehicle Stability Assist (VSA®) system to work incorrectly.
It is best to replace all four tires at the same time. If that isn’t possible, replace the
front or rear tires in pairs.
If you replace a wheel, only use TPMS spec ified wheels approved for your vehicle.
Make sure that the wheel’s specificati ons match those of the original wheels.1Tire and Wheel Replacement
3WARNING
Installing improper tires on your vehicle can
affect handling and stability. This can cause
a crash in which you can be seriously hurt or
killed.
Always use the size and type of tires
recommended in this owner’s manual.
18 US ODYSSEY-31THR6010.book 679 ページ 2018年12月6日 木曜日 午後4時18分
Page 684 of 763

682
Maintenance
Battery
Checking the Battery
The condition of the battery is monitored by a
sensor located on the negative terminal of the
battery. If there is a problem with this sensor,
the driver information in terface will display a
warning message. If this happens, have your
vehicle inspected by a dealer.
Check the battery terminals for corrosion
monthly.
To access the battery terminals:
1. Remove the engine compartment cover.
2 Engine Compartment Cover P. 647
2.Remove the clips using a Phillips-head
screwdriver, then remove the air intake
duct.
2 High Beam Headlights P. 658
If your vehicle’s battery is disconnected or goes dead:
•The audio system is disabled.
2 Reactivating the audio system P. 263
•The clock resets.
2 Clock P. 142
•
The immobilizer system needs to be reset.
2 Immobilizer System Indicator P. 93
1Battery
WARNING: Battery post, terminals,
and related accessories contain lead
and lead compounds.
Wash your hands after handling.
When you find corrosion, cl ean the battery terminals
by applying a baking powder and water solution.
Clean terminals with a damp towel. Cloth/towel dry
the battery. Coat the terminals with grease to help
prevent future corrosion.
When replacing the battery, the replacement must be
of the same specifications.
Consult a dealer for more information.
3WARNING
The battery gives off explosive hydrogen
gas during normal operation.
A spark or flame can cause the battery to
explode with enough force to kill or
seriously hurt you.
When conducting any battery
maintenance, wear prot ective clothing and
a face shield, or have a skilled technician do
it.
Canadian models only
18 US ODYSSEY-31THR6010.book 682 ページ 2018年12月6日 木曜日 午後4時18分
Page 699 of 763

697
Handling the Unexpected
This chapter explains how to handle unexpected troubles.
ToolsTypes of Tools .................................. 698
If a Tire Goes Flat Changing a Flat Tire ......................... 699
Engine Does Not Start Checking the Engine ........................ 708
If the Remote Battery is Weak .......... 709
Emergency Engine Stop ................... 710
Jump Starting .................................... 711
Overheating How to Handle Overheating ............. 713
Indicator, Coming On/Blinking
If the Low Oil Pressure Symbol Appears... 716
If the Charging System Indicator Comes On ................................................. 716
If the Malfunction Indicator Lamp Comes
On or Blinks ................................... 717
If the Brake System Indicator (Red) Comes On or Blinks ................................... 718
If the Brake System Indicator (Red) Comes On or Blinks at the Same Time When the Brake
System Indicator (Amber) Comes On ..... 719
If the Electric Power Steering (EPS) System Indicator Comes On ....................... 720
If the Low Tire Pressure/TPMS Indicator
Comes On or Blinks........................ 720 If the Transmission System Indicator Blinks
along with the Warning Message... 721
Fuses
Fuse Locations ................................. 722
Inspecting and Changing Fuses ........ 728
Emergency Towing ........................... 729
When You Cannot Unlock the Fuel Fill Door ................................................. 730When You Cannot Open the Tailgate..... 731When You Cannot Close the Power
Sliding Doors*................................. 733
Refueling
Refueling From a Portable Fuel Container .... 734
* Not available on all models
18 US ODYSSEY-31THR6010.book 697 ページ 2018年12月6日 木曜日 午後4時18分
Page 709 of 763

707
uuIf a Tire Goes Flat uChanging a Flat Tire
Handling the Unexpected
If you replace a flat tire with the spare tire, the low tire pressure/TPMS indicator
comes on while you are driving. After dr iving for a few miles (kilometers), the
indicator will start blinking for a short time and then stay on. Tire Pressure
Monitor Problem appears on the driver information interface, but this is normal.
If you replace the tire with a specified regular tire, the warning message on the
driver information interface and the low tire pressure/TPMS indicator will go off after
a few miles (kilometers).
■TPMS with Tire Fill Assist and the Compact Spare Tire1 TPMS with Tire Fill Assist and the Compact Spare Tire
The system cannot monitor th e pressure of the spare
tire. Manually check the spare tire pressure to be sure
that it is correct.
Use the TPMS specific wheels. Each is equipped with
a tire pressure sensor mount ed inside the tire behind
the valve stem.
18 US ODYSSEY-31THR6010.book 707 ページ 2018年12月6日 木曜日 午後4時18分
Page 710 of 763

708
Handling the Unexpected
Engine Does Not Start
Checking the Engine
If the engine does not start, check the starter.
Starter conditionChecklist
Starter doesn’t turn or turns
over slowly.
The battery may be dead. Check
each of the items on the right and
respond accordingly.Check for a message on the dr iver information interface.
• If the To Start, Hold Remote Near Start Button message appears
2If the Remote Battery is Weak P. 709
uMake sure the remote is in its operating range.
2 ENGINE START/STOP Button Operating Range P. 186
Check the brightness of the interior lights.
Turn on the interior lights and check the brightness.
• If the interior lights are dim or do not come on at all
2 Battery P. 682
•If the interior lights come on normally 2 Fuses P. 722
The starter turns over normally
but the engine doesn’t start.
There may be a problem with the
fuse. Check each of the items on
the right and resp ond accordingly. Review the engine start procedure.
Follow its instructions, and try to start the engine again.
2
Starting the Engine P. 536
Check the immobilizer system indicator.
When the immobilizer system indicator is blinking, the engine cannot be started.
2Immobilizer System P. 179
Check the fuel level.
There should be enough fuel in the tank.
2 Fuel Gauge P. 119
Check the fuses.
Check all fuses, or have the vehicle checked by a dealer.
2Inspecting and Changing Fuses P. 728
If the problem continues:
2Emergency Towing P. 729
1Checking the Engine
If you must start the vehi cle immediately, use an
assisting vehicle or booster battery to jump start it.
2 Jump Starting P. 711
18 US ODYSSEY-31THR6010.book 708 ページ 2018年12月6日 木曜日 午後4時18分