Page 33 of 268

take Allen key C fig. 36 from the tool
box or, depending on the version,
from the Fix&Go Automatic container,
insert it in housing A (for blind
movement) or B (for sun roof
movement) and turn it clockwise to
open the roof (or the blind) or
anticlockwise to close the roof (or the
blind).
SUN ROOF
INITIALISATION
Following an automatic movement
malfunction while opening/closing or
after an emergency manoeuvre (see
description in the previous paragraph),
the automatic operation of the sunroof
must be initialised again.
Proceed as follows
turn the ignition key from the STOP
position to the MAR position;
hold down button A fig. 35: after
approximately 10 seconds the roof
moves jerkily to closing position. When
the movement stops (closed roof),
release button A (if the roof is already
closed, you will hear the mechanical
lock only);
press button A again within 5
seconds after the blind reached the fully
closed position;
hold down button A: the roof will
perform an automatic opening and
closing cycle. Should this not occur,
repeat the operation from the
beginning;
hold down button A until the roof is
completely closed: the initialisation
procedure has ended.
WARNING
23)When leaving the vehicle, always
remove the key from the ignition to avoid
the risk of injury to those still inside the
vehicle due to accidental operation of the
sun roof. Improper use of the roof can
be dangerous. Before and during
operation, always check that no one is
exposed to the risk of being injured by the
moving sun roof or by objects getting
caught or hit by it.
WARNING
11)Do not open the sunroof if a transverse
roof rack is fitted. Do not open the sunroof
if there is snow or ice on it: you may
damage it.
36F0Y0234C
31
Page 34 of 268

DOORS
DOOR CENTRAL
LOCKING/UNLOCKING
Locking from the outside
With doors closed, press the
button
on the remote control or turn the metal
insert (located inside the key) in the
driver side door lock. Door locking is
carried out with all doors shut,
irrespective of the luggage
compartment open/closed status.
Door unlocking from the outside
Press the
button on the remote
control or turn the metal insert (located
inside the key) in the driver side door
lock.
Door locking/unlocking from the
inside
Press the
button on the
dashboard.fig. 37
LED on button on: doors locked /
LED on button off: doors unlocked.
IMPORTANT With central locking
active, pulling the internal opening lever
of the passenger side door unlocks
the door (the LED stays on). Pulling the
internal opening lever of the driver
side door activates central unlocking.CHILD SAFETY DEVICE
24)
This system prevents the rear doors
from being opened from the inside. The
device B fig. 38 can be activated only
with the doors open.
Position 1: device on (door locked) /
Position 2: device off (door can be
opened from the inside).
The device remains engaged even if the
doors are electrically unlocked.
IMPORTANT The rear doors cannot be
opened from the inside when the child
safety device is engaged.PASSENGER SIDE FRONT
DOOR AND REAR DOOR
EMERGENCY LOCKING
DEVICE
12)
Used to lock the doors when there is
no electrical power supply. Insert the
metal insert of the ignition key in
position A fig. 39 (passenger side front
door) or A fig. 38 (rear doors) and
then turn the key clockwise and then
remove it from position A.
37F0Y0652C
38F0Y0111C
32
KNOWING YOUR CAR
Page 35 of 268

To restore the starting condition of the
door locks (only if battery charge
restored) press the
button on the
remote control or the
button on the
dashboard or introduce the metal insert
of the ignition key in the driver's side
front door pawl and pull the door inner
handle.
INITIALISING THE DOOR
OPENING / CLOSING
MECHANISM
If the battery is disconnected or the
protection fuse blows, the door
opening/closing mechanism must be
initialised as follows:
close all the doors;
press thebutton on the remote
control or the button on the dashboard;
press thebutton on the remote
control or the button on the dashboard.
WARNING
24)Always use this device when carrying
children. After engaging the child lock
on both rear doors, check for effective
engagement by trying to open a door with
the internal handle.
WARNING
12)If the child lock was engaged and the
previously described locking procedure
carried out, operating the internal opening
handle will not open the door: in this case,
to open the door, the outside handle
must be used. The door central locking/
unlocking button
is not disabled by the
engagement of the emergency lock.
ELECTRIC WINDOWS
25)
OPERATION
These operate when the ignition key is
turned to MAR-ON and for about 3
minutes after the ignition key is turned
to STOP or removed unless one of
the front doors is opened.
DRIVE SIDE FRONT
DOOR CONTROLS
Versions with 4 electric windows
The buttons are located on the door
panel trim fig. 40.
All windows can be controlled from the
driver side door panel.
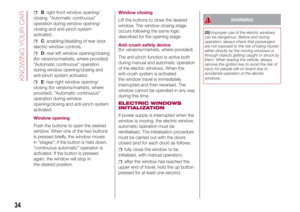
A: front left window opening/
closing. "Automatic continuous"
operation during window opening/
closing and anti-pinch system
activated.
39F0Y0110C
40F0Y0240C
33
Page 36 of 268

B: right front window opening/
closing. "Automatic continuous"
operation during window opening/
closing and anti-pinch system
activated.
C: enabling/disabling of rear door
electric window controls.
D: rear left window opening/closing
(for versions/markets, where provided).
"Automatic continuous" operation
during window opening/closing and
anti-pinch system activated.
E: rear right window opening/
closing (for versions/markets, where
provided). "Automatic continuous"
operation during window
opening/closing and anti-pinch system
activated.
Window opening
Push the buttons to open the desired
window. When one of the two buttons
is pressed briefly, the window moves
in "stages"; if the button is held down,
"continuous automatic" operation is
activated. If the button is pressed
again, the window will stop in
the desired position.Window closing
Lift the buttons to close the desired
window. The window closing stage
occurs following the same logic
described for the opening stage.
Anti-crush safety device
(for versions/markets, where provided)
The anti-pinch function is active both
during manual and automatic operation
of the electric windows. When the
anti-crush system is activated
the window travel is immediately
interrupted and then reversed. The
window cannot be operated in any way
during this time.
ELECTRIC WINDOWS
INITIALIZATION
If power supply is interrupted when the
window is moving, the electric window
automatic operation must be
reinitialised. The initialisation procedure
must be carried out with the doors
closed (and for each door) as follows:
fully close the window to be
initialised, with manual operation;
after the window has reached the
upper end of travel, hold the up button
pressed for at least one second.
WARNING
25)Improper use of the electric windows
can be dangerous. Before and during
operation, always check that passengers
are not exposed to the risk of being injured
either directly by the moving windows or
through objects getting caught or struck by
them. When leaving the vehicle, always
remove the ignition key to avoid the risk of
injury for people still on board due to
accidental operation of the electric
windows.
34
KNOWING YOUR CAR
Page 37 of 268

BONNET
OPENING
Pull the lever A fig. 41 in the direction
indicated by the arrow and then
operate the lever B fig. 42 operating in
the direction shown by the arrow.
Then lift the bonnet.
The following plate is present in the
engine compartment fig. 43.IMPORTANT Two side gas shock
absorbers are provided to assist in
opening the bonnet. Do not tamper
with these shock absorbers and
accompany the bonnet when raising.
IMPORTANT Before raising the bonnet,
make sure that the arms of the wipers
are not raised from the windscreen and
that the wiper is not operational.
CLOSING
26)
Lower the bonnet to approximately 20
centimetres from the engine
compartment then let it drop. Make
sure that the bonnet is completely
closed and not only fastened by the
locking device by trying to open it.
If it is not perfectly closed, do not try to
press the bonnet down but open it
and repeat the procedure.
WARNING
26)For safety reasons, the bonnet must
always be properly closed while the car is
travelling. Therefore, make sure that the
bonnet is properly closed and that the lock
is engaged. If you discover that the bonnet
is not perfectly closed during travel, stop
immediately and close the bonnet
correctly.
41F0Y0611C
42F0Y0115C
43F0Y1100C
35
Page 38 of 268

LUGGAGE
COMPARTMENT
28) 29) 31)13)
The luggage compartment unlocking is
electrically operated and is deactivated
when the car is in motion.
OPENING
27)
When unlocked, the luggage
compartment can be opened from
outside the car using the electric
opening handle A fig. 44 located under
the handle until the unlocking click is
heard or by pressing the
button
on the remote control.Emergency opening from the inside
Proceed as follows:
remove the rear head restraints and
fully fold the seats;
take the screwdriver provided from
the tool box or the Fix&Go Automatic
container, depending on the version;
use the screwdriver to remove
the yellow tab A fig. 45;
then insert the screwdriver in
housing B fig. 46 in order to activate
the luggage compartment release tab.CLOSING
Take hold of the handle on the inside of
the tailgate and lower it, pressing next
to the lock until it clicks.
IMPORTANT Before closing the
luggage compartment make sure that
you have the keys, since the luggage
compartment is automatically locked.
LUGGAGE
COMPARTMENT
INITIALISATION
IMPORTANT If the battery is
disconnected or the protection fuse
blows, the luggage compartment
opening/closing mechanism must be
reinitialised as follows:
close all the doors and the luggage
compartment;
press thebutton on the remote
control;
press thebutton on the remote
control;
"CARGO MAGIC SPACE"
(for versions/markets, where provided)
14)
The "Cargo Magic Space" adjustable
load platform can be adjusted to three
different heights:
Position 0 (platform completely
lowered)
44F0Y0610C
45F0Y0172C
46F0Y0173C
36
KNOWING YOUR CAR
Page 39 of 268

Position 1 (platform at threshold
level)
Position 2 (platform completely
raised)
Load platform tilting
The load platform can be located in
oblique position (tilted towards the rear
seat backrests, see fig. 47), in order
to facilitate access to the area
underneath the luggage compartment
(e.g. to pick up the space saver wheel
or the "Fix&Go Automatic" kit).
In addition, in this position, the platform
allows any object in the luggage
compartment to be correctly blocked,
preventing them from sliding in the case
of sharp braking.LUGGAGE-COVERING
CURTAIN
(500L WAGON versions)30)15)
Luggage-covering curtain A fig. 48 can
be rolled up and removed.
Rolling up the blind: take hold of
handle C and then release pins B fig.
49(one for each side) from their seats.
Then accompany the blind to the rear
of the luggage compartment.Removing the blind:roll up the blind
then pull the two hooks A fig. 50 (one
on each side) towards the inside of the
luggage compartment. Then lift the
blind up and remove it.
WARNING
27)Be careful not to hit objects on the
storage shelf when you open the tailgate.
28)Make sure the backrest is properly
secured at both sides to prevent it moving
forward in the event of sharp braking,
with possible impact with the occupants.
29)Do not move the seat if a child is
seated on the same or sitting in the
suitable child restraint system.
30)In the event of an accident or sharp
braking, any object placed on the curtain
may be projected backwards in the
passenger compartment, and risk to hurt
the occupants.
47F0Y0609C
48F0Y0371C
49F0Y0373C
50F0Y0374C
37
Page 40 of 268

31)Abrupt braking or occasional impacts
may cause sudden movements of the load
with consequent situations of hazard for
the driver and passengers: before setting
off, secure the load tightly using the hooks
provided. For securing use cables, ropes
or belts strong enough to hold the items to
be secured.
WARNING
13)Before tilting the seat backrest fully,
remove any objects laid on it.
14)The dimensions of the platform permit
a maximum capacity of distributed weight
of 70 kg (in position 1) or 40 kg (in position
2): do not load objects with a higher
weight.
15)To avoid damaging the blind, do not
place heavy objects on it.
DUALDRIVE
ELECTRIC POWER
STEERING
(for versions/markets, where provided)
This only operates with the ignition
key turned to MAR and engine running.
Electric power steering allows the
force required at the steering wheel to
be adapted to the driving conditions.
IMPORTANT When turning the ignition
key quickly, full power steering
functionality can be achieved after a
few seconds.
IMPORTANT During parking
manoeuvres requiring a lot of steering,
the steering may become harder; this is
normal and is due to the intervention
of the system to protect the electric
steering motor from overheating. No
repair intervention is needed in this
case. When the car is used again, the
power steering will work normally again.IMPORTANT The Dualdrive electric
power steering provides an electronic
damping effect when approaching
the end of travel. In some manoeuvring
conditions, the steering wheel may
perform an additional small rotation until
reaching its mechanical stop. This
behaviour is normal and is intended to
prevent excessive impacts with the
mechanical components located inside
the device.
POWER STEERING
ACTIVATION/
DEACTIVATION
32) 33)
To engage/disengage the electric
power steering press button fig. 51.
The LED above the button switches on
to indicate that the system is active.
51F0Y0646C
38
KNOWING YOUR CAR