Page 24 of 614

NOTE:The portable charging cord set is used for AC
Level 1 charging only.
WARNING!
• Read all the instructions before using this product.
• Do not put fingers or objects into the Charge Con-
nector.
• Do not use this product if the flexible power cord or
Electric Vehicle (EV) Cable is frayed, broken, has
cracked insulation or any other signs of damage.
(Continued)
WARNING! (Continued)
•Do not use this product if the enclosure or the
Charge Connector is broken, cracked, open, or shows
any other indication of damage.
• Do not use Portable EVSE Cordset with an extension
cord. Use of an extension cord may cause burns, fire,
or other damage or injury.
• This device may attempt to reset and run after an
interruption.
• There are no user serviceable parts inside the AC
Mode 2 Charging cord set. Do not attempt to repair or
service the charging cord set yourself – personal
injury may result.
• When using a charging station with the charging
cable attached, ensure the cable is not visibly dam-
aged before plugging into the vehicle.
• Do not allow children to operate this device. Adult
supervision is mandatory when children are in prox-
imity to a charge station that is in use.
• Do not use a charge station or vehicle receptacle that
is work or damaged with the AC Mode 3 charging
cable. Plugging into worn or damaged receptacles
may cause damage to the EVSE and vehicle.
(Continued)
Cargo Area Storage Bin
22 GETTING TO KNOW YOUR VEHICLE
Page 52 of 614

Remote Start Cancel Message — If Equipped
The following messages will display in the instrument
cluster if the vehicle fails to remote start or exits remote
start prematurely:
•Remote Start Cancelled — Door Open
(Prior to remote start attempt)
• Remote Start Cancelled — Hood Open
• Remote Start Cancelled — Fuel Low
• Remote Start Cancelled — Liftgate Open
• Remote Start Cancelled — Time Expired
• Remote Start Disabled — Start Vehicle To Reset
The message will stay active until the ignition is placed in
the ON/RUN position.
How To Use Remote Start
All of the following conditions must be met before the
vehicle will remote start:
• Gear Selector in PARK
• Doors closed
• Hood closed
• Liftgate closed •
Hazard switch off
• Brake switch inactive (brake pedal not pushed)
• 12 volt battery at an acceptable charge level
• Key fob PANIC button not pushed
• System not disabled from previous remote start event
• Vehicle alarm system indicator flashing
• Ignition in STOP/OFF position
• Fuel level meets minimum requirement
• MIL lamp is OFF, Vehicle is in propulsion system active
WARNING!
•Do not start or run an engine in a closed garage or
confined area. Exhaust gas contains Carbon Monox-
ide (CO) which is odorless and colorless. Carbon
Monoxide is poisonous and can cause serious injury
or death when inhaled.
• Keep key fobs away from children. Operation of the
Remote Start System, windows, door locks or other
controls could cause serious injury or death.
50 GETTING TO KNOW YOUR VEHICLE
Page 86 of 614
restraint forward, pull forward on the top of the head
restraint to desired position. To adjust the head restraint
rearward, pull forward on the head restraint to furthest
forward position and head restraint will reset to furthest
rearward position.
Normal Position
Forward Adjustment
Full Forward Position
84 GETTING TO KNOW YOUR VEHICLE
Page 94 of 614

Outside Mirrors Folding Feature
All outside mirrors are hinged and may be moved either
forward or rearward to resist damage. The hinges have
three detent positions:
•Full forward position
• Full rearward position
• Normal position
Heated Mirrors — If Equipped
These mirrors are heated to melt frost or ice. This
feature will be activated whenever you turn on the
rear window defroster (if equipped). Refer to “Climate
Controls” in this section for further information.
Power Folding Mirrors — If Equipped
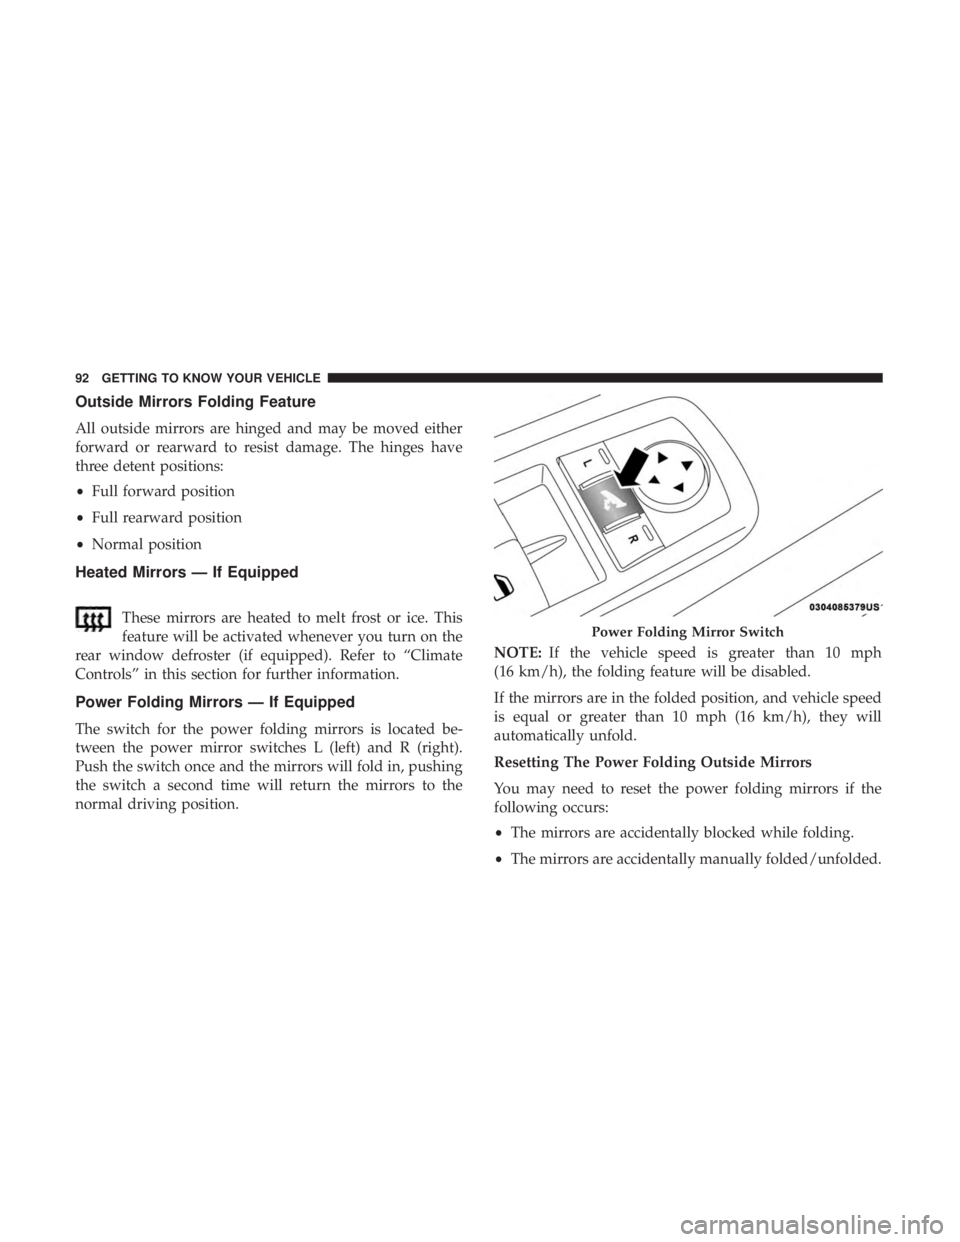
The switch for the power folding mirrors is located be-
tween the power mirror switches L (left) and R (right).
Push the switch once and the mirrors will fold in, pushing
the switch a second time will return the mirrors to the
normal driving position. NOTE:
If the vehicle speed is greater than 10 mph
(16 km/h), the folding feature will be disabled.
If the mirrors are in the folded position, and vehicle speed
is equal or greater than 10 mph (16 km/h), they will
automatically unfold.
Resetting The Power Folding Outside Mirrors
You may need to reset the power folding mirrors if the
following occurs:
• The mirrors are accidentally blocked while folding.
• The mirrors are accidentally manually folded/unfolded.
Power Folding Mirror Switch
92 GETTING TO KNOW YOUR VEHICLE
Page 95 of 614
•The mirrors come out of the unfolded position.
• The mirrors shake and vibrate at normal driving speeds.
To reset the power folding mirrors: fold and unfold them
by pushing the button (this may require multiple button
pushes). This resets them to their normal position.
Illuminated Vanity Mirrors — If Equipped
An illuminated vanity mirror is located on the sun visor. To
use the mirror, rotate the sun visor down and swing the
mirror cover upward. The lights turn on automatically.
Closing the mirror cover turns off the lights.
EXTERIOR LIGHTS
Multifunction Lever
The multifunction lever is located on the left side of the
steering column. The multifunction lever controls the turn
signals, headlight high/low beams, and flash-to-pass func-
tions.
Illuminated Mirror
Multifunction Lever
1 — Turn Signals
2 — Flash-To-Pass
3 — Headlight Beams Low/High
3
GETTING TO KNOW YOUR VEHICLE 93
Page 124 of 614

WARNING!
There is no anti-pinch protection when the window is
almost closed. To avoid personal injury be sure to clear
your arms, hands, fingers and all objects from the
window path before closing.
Auto Up Reset — If Equipped
To reactivate the Auto Up feature, perform the following
steps after vehicle power is restored:
1. Pull the window control up to close the window com- pletely and continue to hold the control up for an
additional two seconds after the window is closed.
2. Push the window control down firmly to the second detent to open the window completely and continue to
hold the control down for an additional two seconds
after the window is fully open.
Sliding Side Door Power Window Control —
If Equipped
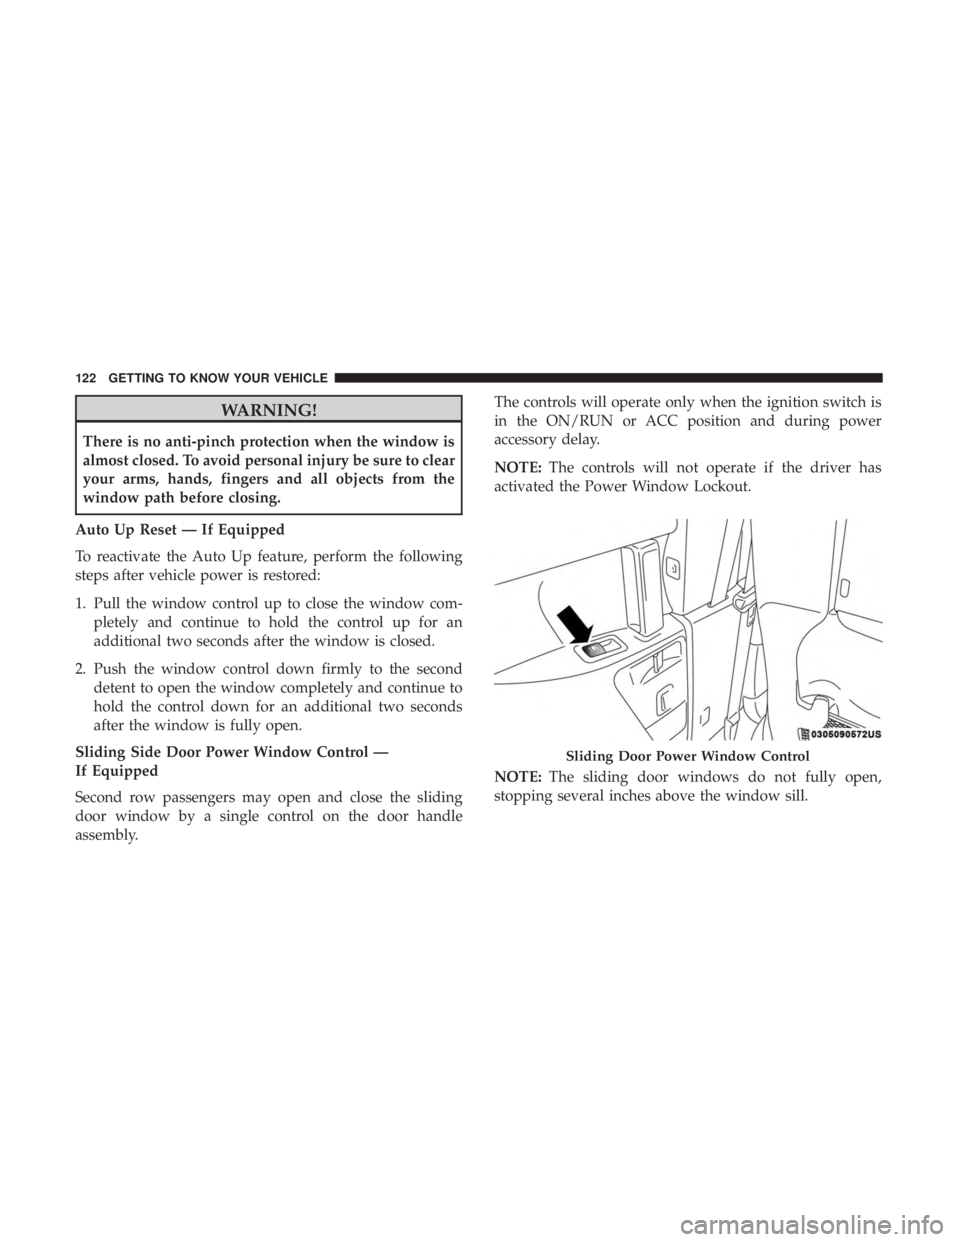
Second row passengers may open and close the sliding
door window by a single control on the door handle
assembly. The controls will operate only when the ignition switch is
in the ON/RUN or ACC position and during power
accessory delay.
NOTE:
The controls will not operate if the driver has
activated the Power Window Lockout.
NOTE: The sliding door windows do not fully open,
stopping several inches above the window sill.
Sliding Door Power Window Control
122 GETTING TO KNOW YOUR VEHICLE
Page 135 of 614

NOTE:To open the Hands-Free Liftgate requires a valid
Passive Entry key fob within 5 ft (1.5 m) of the door handle.
If a valid Passive Entry key fob is not within 5 ft (1.5 m), the
liftgate will not respond to any kicks.
CAUTION!
The Hands-Free Liftgate feature may be turned on or
off in Uconnect Settings. Refer to “Uconnect Settings”
in “Multimedia” for further information. The Hands-
Free Liftgate feature should be turned off during
Jacking, Tire Changing, and Vehicle Service.
NOTE:
• The Hands-Free Liftgate will only operate when the
transmission is in Park.
• If anything obstructs the Hands-Free liftgate while it is
opening, the liftgate will automatically reverse to the
closed position, provided it meets sufficient resistance.
• There are pinch sensors attached to the side of the
liftgate opening. Light pressure anywhere along these
strips will cause the liftgate to return to the open
position. •
If the power liftgate encounters multiple obstructions
within the same cycle, the system will automatically
stop. If this occurs, the liftgate must be operated manu-
ally.
• The power liftgate will release, but not power open, in
temperatures below �12° F (�24° C). Be sure to remove
any buildup of snow or ice from the liftgate before
opening the liftgate.
• If the liftgate is left open for an extended period of time,
the liftgate may need to be closed manually to reset
power liftgate functionality.
WARNING!
• Driving with the liftgate open can allow poisonous
exhaust gases into your vehicle. You and your pas-
sengers could be injured by these fumes. Keep the
liftgate closed when you are operating the vehicle.
• If you are required to drive with the liftgate open,
make sure that all windows are closed, and the
climate control blower switch is set at high speed. Do
not use the recirculation mode.
3
GETTING TO KNOW YOUR VEHICLE 133
Page 150 of 614

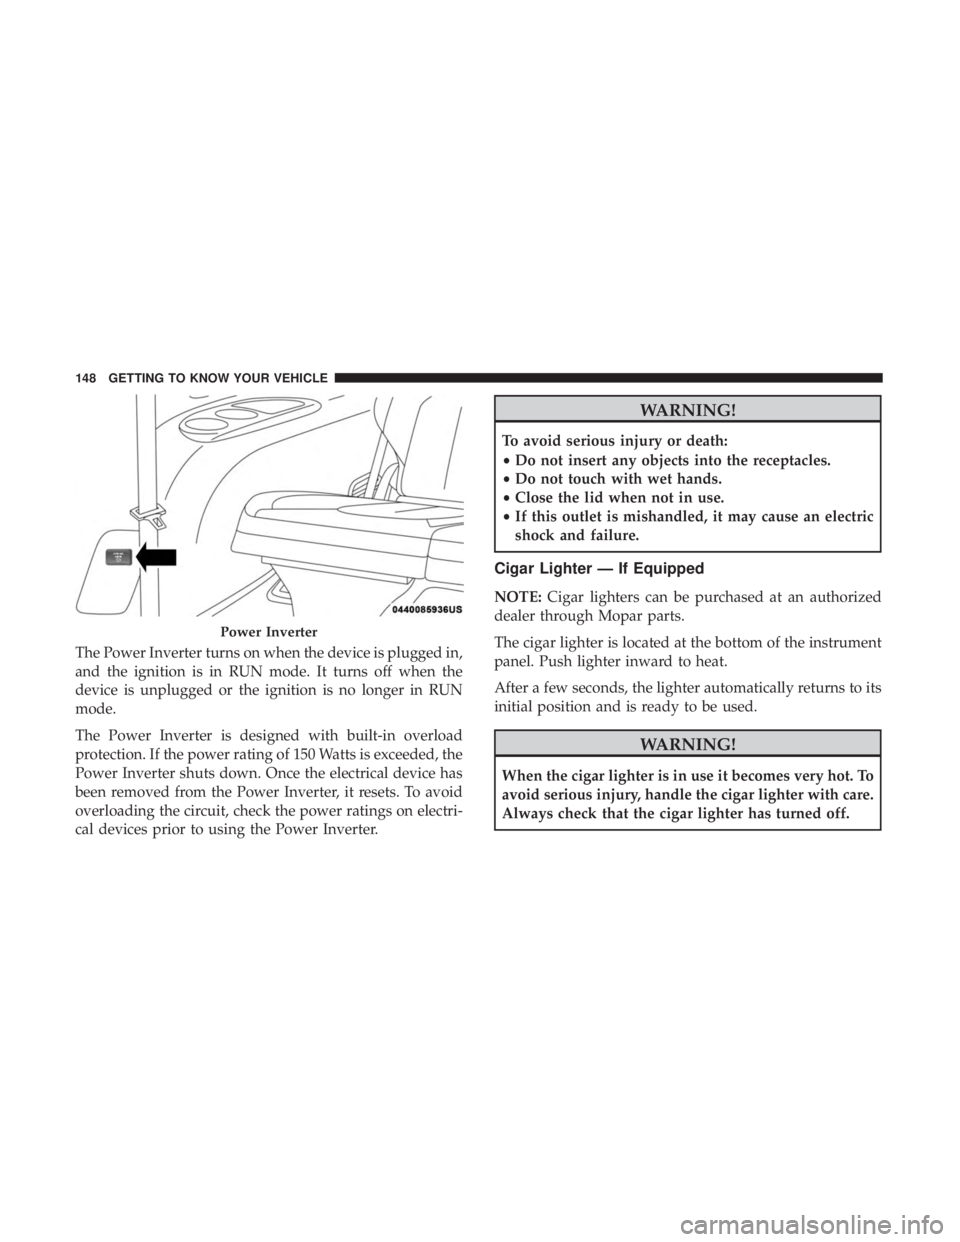
The Power Inverter turns on when the device is plugged in,
and the ignition is in RUN mode. It turns off when the
device is unplugged or the ignition is no longer in RUN
mode.
The Power Inverter is designed with built-in overload
protection. If the power rating of 150 Watts is exceeded, the
Power Inverter shuts down. Once the electrical device has
been removed from the Power Inverter, it resets. To avoid
overloading the circuit, check the power ratings on electri-
cal devices prior to using the Power Inverter.
WARNING!
To avoid serious injury or death:
•Do not insert any objects into the receptacles.
• Do not touch with wet hands.
• Close the lid when not in use.
• If this outlet is mishandled, it may cause an electric
shock and failure.
Cigar Lighter — If Equipped
NOTE: Cigar lighters can be purchased at an authorized
dealer through Mopar parts.
The cigar lighter is located at the bottom of the instrument
panel. Push lighter inward to heat.
After a few seconds, the lighter automatically returns to its
initial position and is ready to be used.
WARNING!
When the cigar lighter is in use it becomes very hot. To
avoid serious injury, handle the cigar lighter with care.
Always check that the cigar lighter has turned off.
Power Inverter
148 GETTING TO KNOW YOUR VEHICLE