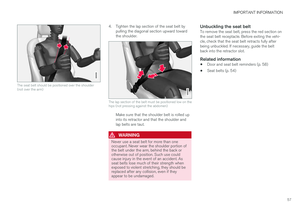
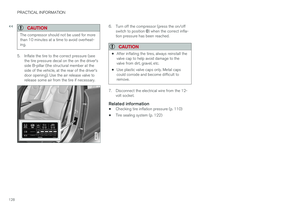
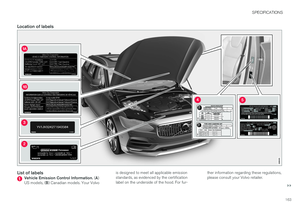
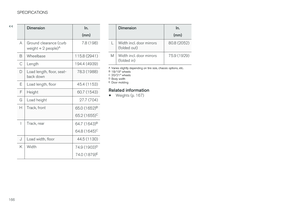
Page 25 of 184

INTRODUCTION
* Option/accessory.23
Function view: vehicle functions can be acti- vated/deactivated by tapping. Certain func-tions are called "trigger functions", which open settings windows, e.g.,
Camera and
parking functions. Settings for the head-up display * are also started from Function view
but the actual interaction is controlled from the steering wheel keypad buttons and theinstrument panel.
Home view: the initial view shown when the center display is started.
App (Application) view: shows apps that have been downloaded (third-party apps) as well as ones for integrated functions such as
FM
radio. Tap an icon to open the app.
Status bar: vehicle activities are shown at the top of the screen. Network/connection infor-mation is shown on the left side of the bar.Media-related information, the clock andinformation about background activities areshown to the right.
Top view: pull down the tab to open Top view. From here, you can access Settings,Owner's manual and stored messages.
Navigation: leads to map navigation. Tap the sub-view to expand it.
Media: the most recently used media-related apps. Tap the sub-view to expand it.
Phone: used to access phone-related func- tions. Tap the sub-view to expand it.
The extra sub-view: the most recently used apps/vehicle functions that do not belong inany of the other sub-views are listed here.Tap the sub-view to expand it.
Climate bar: information and direct access to settings such as temperature, seat heating *
and blower speed. Tap the symbol at the center of the Climate bar to open Climateview for additional settings.
Related information
• Using the center display (p. 38)
Page 26 of 184

INTRODUCTION
24
Changing center display settingsThe center display activates automatically when the driver's door is opened. Settings can bemade for e.g., sounds, background and themes.
Turning off or changing the volume of
center display sounds
System sounds in the center display can be turned off or their volume can be changed: 1. Tap
Settings in the center display's Top
view.
2. Tap
SoundSystem Volumes.
3. Pull the control under
Screen Touch to the
desired level to change volume or turn off the sound for tapping the screen or
Keypad
Touch.
Changing the screen's appearance (theme)
1. Tap Settings in the center display's Top
view.
2. Tap
My CarDisplaysThemes.
3. Select a theme, e.g.,
Minimalistic orChrome Rings.
In addition, the settings:
Normal and Bright can
also be selected. For Normal, the screen's back-
ground is dark and the text is light. This is the default setting. If
Bright is selected, the back-
ground will be light and the text will be dark, which can increase readability in strong ambient lighting. These alternatives are always available and do not shift automatically according to changes inambient lighting.
Related information
•
Using the center display (p. 38)
• Sensus (p. 11)
Page 27 of 184
INTRODUCTION
}}
25
Using the center display keyboard A keyboard can be used on the center display to enter characters and search for e.g., destina-tions using the navigation system, adding con-tacts in phone book, etc. It is also possible touse handwriting on the screen.
Entering text using the keyboardThe keyboard will only appear at the bottom of the center display in situations when it is possibleto write on the screen.
Page 28 of 184
||
INTRODUCTION
26
Keyboard function buttons (the appearance may vary depending on language settings, context, etc.)
Field for possible search hits. The word changes as new letters are added. Scroll inthe list using the left/right arrows. Tap aword to select it. The keyboard may not sup-port all language selections, in which casethis line on the screen will not be displayed.The characters that can be entered are lan- guage-dependent (see point 7). Tap a char-acter to enter it.
Page 29 of 184

INTRODUCTION
}}
27
Several buttons (depending on the context for which the keyboard is being used) will bedisplayed here. In certain cases, it can be used to enter @, .com or to start a new line.
Press to hide the keyboard. In cases where this is not possible, the button will not be dis-played.
Tap once to enter one uppercase letter.
Double-tap for Caps lock (tap again to
return to lowercase letters). Letters entered after the !, . and ? characters will automati-cally be uppercase. The first letter in the textfield or in text fields intended for names,addresses or company names will also auto-matically be uppercase. The first letter in textfields intended for passwords, webaddresses or email addresses will automati-cally be lowercase unless upper case ischosen.
Press to display the numbers that can be entered. When numbers are displayed, tap
to resume entering text or to
enter special characters.
Tap to change the keyboard language (in this example, UK English is the selected lan-guage). The characters available will changeaccording to the selected language (2). Thisbutton will only be displayed if several key-board languages have been selected (seethe section "Changing keyboard languages" below). Tap to display a list of possible lan-guages and tap a language to use it.
Tap to enter blank spaces.
Tap to erase one character at a time.
Tap to enable handwriting. See the section "Handwritten text" below.
Entering text and performing searches using thekeyboard are done somewhat differently in thenavigation system. See the section "Filtering des-tination search results" below. Tap the button above the keyboard to confirm the text that has been entered (not shown in theillustration). This button's appearance differsdepending on the context.
Changing keyboard languagesIn order to change keyboard languages, they must first be selected under Settings.
The keyboard language can be changed without changing the language used for the other sys-tems/menus in the vehicle.
1. Pull down the center display's Top view and tap
Settings.
2. Tap
SystemKeyboard Layouts. 3. Select and one or more of the languages in
the list.
> The makes it possible to change the key-board layout and characters available depending on the language(s) selected.
When more than one languagehas been selected, this button (7)3
will appear on the key-
board.
To shift between keyboard languages:
1. Press and hold the button (7).
> A list will be displayed.
2. Tap the desired language. If more than four languages have been selected in
Settings,
scroll in the list.
> The keyboard layout and characters avail- able will change to the selected language.
3In the example illustration, the button shows "UK".
Page 30 of 184

||
INTRODUCTION
28
Special characters
To enter language-specific characters such as é
or è (if available):
1. Press and hold a character key. > A box with available characters will open.
2. Tap the desired character. If none of the spe- cial characters is selected, the key's initial character will be entered.
Handwritten textTap button (10), see the overview illustrationabove, to enter the handwriting mode.
Area for entering characters.
Text box where the characters entered in area (1) appear.
Suggested characters. Scroll in the list if necessary.
Blank spaces.
Tap to erase one character at a time.
Tap to return to the standard keyboard.
Press to hide the keyboard. In cases where this is not possible, the button will not be dis-played.
Tap to change the keyboard language.
Entering characters
1. Enter a handwritten character (1) using a fin-gertip or by holding e.g., a pen near the screen.
> Several character suggestions will appear(3). The most likely character will be at the top of the list.
CAUTION
Do not touch the screen with sharp objects because this could cause scratches.
2. Continue entering characters.
> If no other choice is made, the characterat the top of the list will be used. Tap one of the other characters in the list to use itinstead.
Page 31 of 184
INTRODUCTION
29
Erasing/changing handwritten characters
Erase a character by swiping over the handwriting area (1)
Characters can be erased/changed in several ways:
• Tap the desired character in the list (3).
• Tap button (5) to erase the character andstart again.
• Sweep horizontally from right to left over thehandwriting area (1). Erase several charac-ters by swiping over the area several times.
• Tap the "x" in the text box (2) to delete allcharacters.
New lines
Create a new line by drawing above the characters as shown in the illustration
Related information
•
Using the center display (p. 38)
• Center display overview (p. 22)
• Navigating in the center display's views (p. 32)
Page 32 of 184

INTRODUCTION
30
Function view buttons
The Function view, which is one of the center display's basic views, contains all of the vehicle's on-screen function buttons. From the Homeview, swipe from left to right on the screen tocome to the Function view.Different types of buttonsThere are three different types of vehicle function buttons as listed in the following table.
Type of button
Functions Vehicle function affected
Function buttons Have On/Off modes. An LED indicator light to the left of the button's icon will illuminate when a function is active. Press the button to turn the function on or off. Most of the buttons in the function view arefunction buttons.
Start buttons Do not have On/Off modes. Pressing a start button opens a function's window, e.g., a window for adjusting thedriver's seat. •
Camera.
•
Headrest fold.
• Functions for folding down a seat.
•
Head-up display adjustments.
Parking buttons Have On/Off and scanning modes. Similar to function buttons but have an additional parking scanning mode. •
Park In.
•
Park Out.
Button modes
A function is activated (on) when the LED indicator is green
A function is deactivated (off) when the LED indicator is off
When a function or parking button's LED indica- tor is green, the function is activated. When afunction is initially activated, an additional text willbe displayed (certain functions only) in the buttonfor approx. 5 seconds, after which the button willbe displayed with the LED indicator illuminated. Press the button briefly to deactivate the func- tion.