2017 SUBARU FORESTER X mode
[x] Cancel search: X modePage 457 of 634
Starting and operating/Cruise control
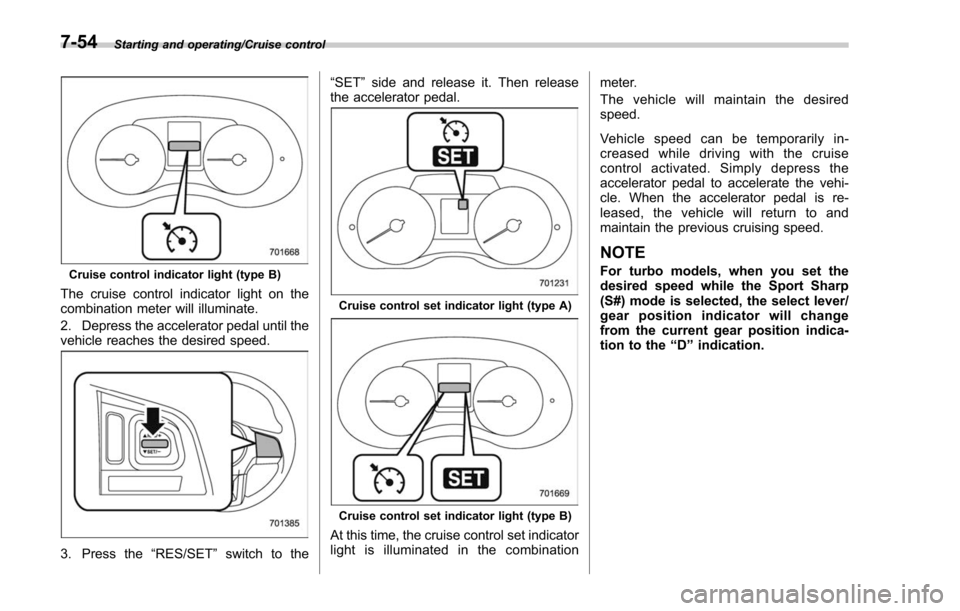
Cruise control indicator light (type B)
The cruise control indicator light on the
combination meter will illuminate.
2. Depress the accelerator pedal until the
vehicle reaches the desired speed.
3. Press the“RES/SET”switch to the “SET
”side and release it. Then release
the accelerator pedal.
Cruise control set indicator light (type A)
Cruise control set indicator light (type B)
At this time, the cruise control set indicator
light is illuminated in the combination meter.
The vehicle will maintain the desired
speed.
Vehicle speed can be temporarily in-
creased while driving with the cruise
control activated. Simp
ly depress the
accelerator pedal to accelerate the vehi-
cle. When the accelerator pedal is re-
leased, the vehicle will return to and
maintain the previous cruising speed.
NOTE
For turbo models, when you set the
desired speed while the Sport Sharp
(S#) mode is selected, the select lever/
gear position indicator will change
from the current gear position indica-
tion to the “D”indication.
7-54
Page 458 of 634
&To temporarily cancel the
cruise control
The cruise control can be temporarily
canceled in the following ways.
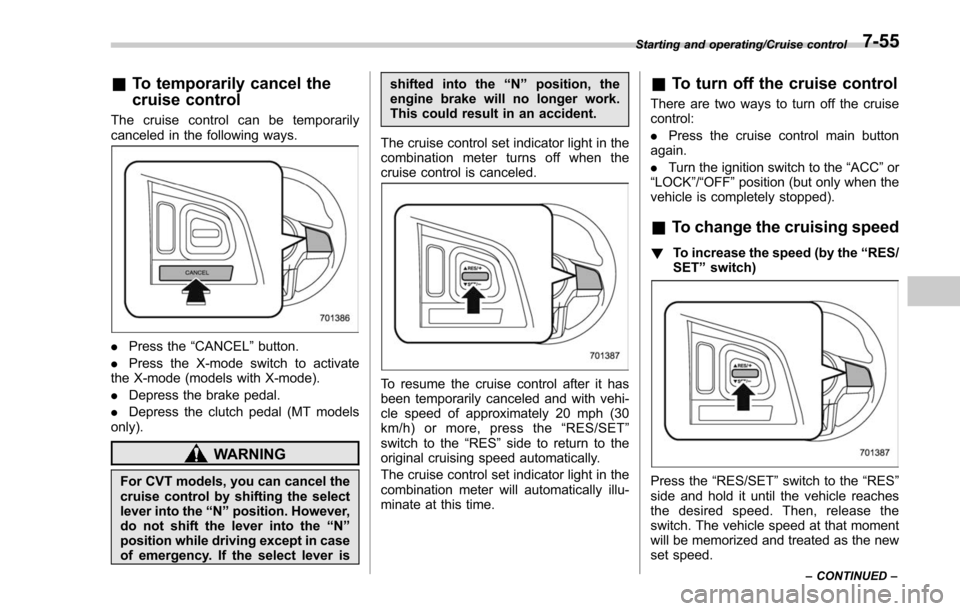
. Press the “CANCEL”button.
. Press the X-mode switch to activate
the X-mode (models with X-mode).
. Depress the brake pedal.
. Depress the clutch pedal (MT models
only).
WARNING
For CVT models, you can cancel the
cruise control by shifting the select
lever into the “N ” position. However,
do not shift the lever into the “N ”
position while driving except in case
of emergency. If the select lever is shifted into the
“N ” position, the
engine brake will no longer work.
This could result in an accident.
The cruise control set indicator light in the
combination meter turns off when the
cruise control is canceled.
To resume the cruise control after it has
been temporarily canceled and with vehi-
cle speed of approximately 20 mph (30
km/h) or more, press the “RES/SET ”
switch to the “RES ”side to return to the
original cruising speed automatically.
The cruise control set indicator light in the
combination meter will automatically illu-
minate at this time.
& To turn off the cruise control
There are two ways to turn off the cruise
control:
. Press the cruise control main button
again.
. Turn the ignition switch to the “ACC”or
“ LOCK ”/“OFF ”position (but only when the
vehicle is completely stopped).
& To change the cruising speed
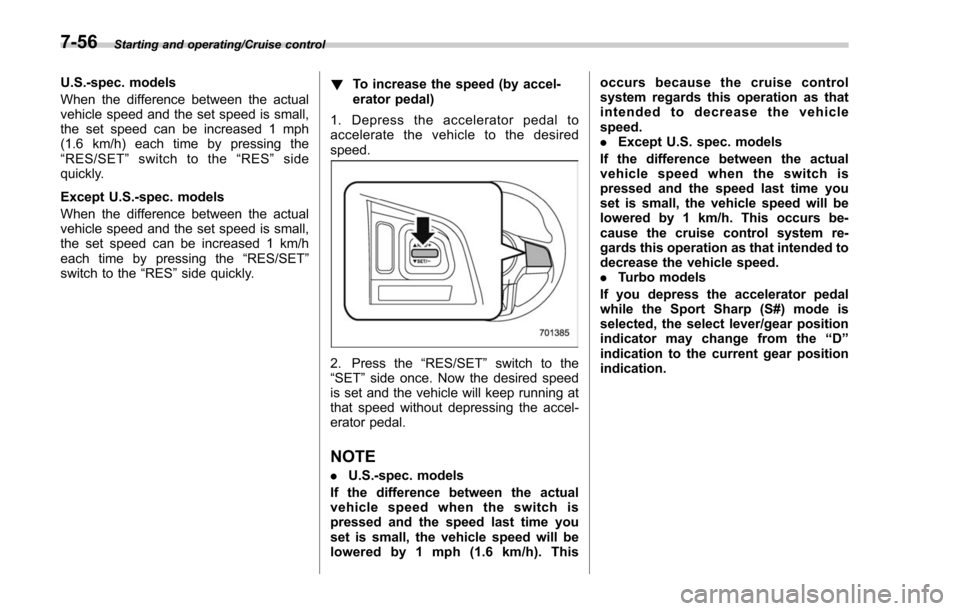
! To increase the speed (by the “RES/
SET ”switch)
Press the “RES/SET ”switch to the “RES”
side and hold it until the vehicle reaches
the desired speed. Then, release the
switch. The vehicle speed at that moment
will be memorized and treated as the new
set speed.
Starting and operating/Cruise control
–CONTINUED –7-55
Page 459 of 634
Starting and operating/Cruise control
U.S.-spec. models
When the difference between the actual
vehicle speed and the set speed is small,
the set speed can be increased 1 mph
(1.6 km/h) each time by pressing the
“RES/SET ”switch to the “RES ”side
quickly.
Except U.S.-spec. models
When the difference between the actual
vehicle speed and the set speed is small,
the set speed can be increased 1 km/h
each time by pressing the “RES/SET”
switch to the “RES”side quickly. !
To increase the speed (by accel-
erator pedal)
1. Depress the accelerator pedal to
accelerate the vehicle to the desired
speed.
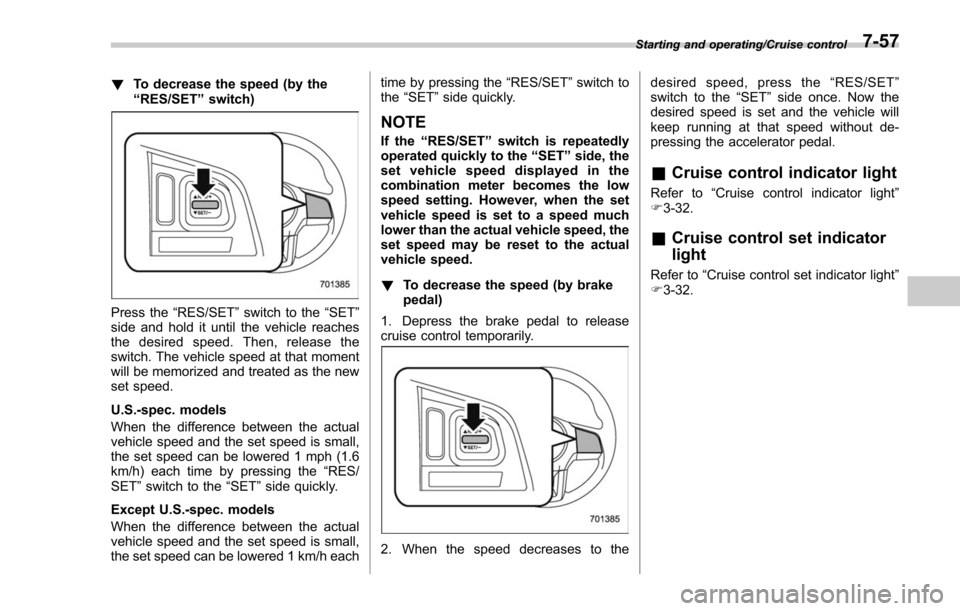
2. Press the “RES/SET”switch to the
“SET ”side once. Now the desired speed
is set and the vehicle will keep running at
that speed without depressing the accel-
erator pedal.
NOTE
. U.S.-spec. models
If the difference between the actual
vehicle speed when the switch is
pressed and the speed last time you
set is small, the vehicle speed will be
lowered by 1 mph (1.6 km/h). This occurs because the cruise control
system regards this operation as that
intended to decrease the vehicle
speed.
.
Except U.S. spec. models
If the difference between the actual
vehicle speed when the switch is
pressed and the speed last time you
set is small, the vehicle speed will be
lowered by 1 km/h. This occurs be-
cause the cruise control system re-
gards this operation as that intended to
decrease the vehicle speed.
. Turbo models
If you depress the accelerator pedal
while the Sport Sharp (S#) mode is
selected, the select lever/gear position
indicator may change from the “D ”
indication to the current gear position
indication.
7-56
Page 460 of 634
!To decrease the speed (by the
“RES/SET ”switch)
Press the “RES/SET”switch to the “SET”
side and hold it until the vehicle reaches
the desired speed. Then, release the
switch. The vehicle speed at that moment
will be memorized and treated as the new
set speed.
U.S.-spec. models
When the difference between the actual
vehicle speed and the set speed is small,
the set speed can be lowered 1 mph (1.6
km/h) each time by pressing the “RES/
SET ”switch to the “SET”side quickly.
Except U.S.-spec. models
When the difference between the actual
vehicle speed and the set speed is small,
the set speed can be lowered 1 km/h each time by pressing the
“RES/SET”switch to
the “SET ”side quickly.
NOTE
If the “RES/SET ”switch is repeatedly
operated quickly to the “SET ”side, the
set vehicle speed displayed in the
combination meter becomes the low
speed setting. However, when the set
vehicle speed is set to a speed much
lower than the actual vehicle speed, the
set speed may be reset to the actual
vehicle speed.
! To decrease the speed (by brake
pedal)
1. Depress the brake pedal to release
cruise control temporarily.
2. When the speed decreases to the desired speed, press the
“RES/SET ”
switch to the “SET”side once. Now the
desired speed is set and the vehicle will
keep running at that speed without de-
pressing the accelerator pedal.
& Cruise control indicator light
Refer to “Cruise control indicator light ”
F 3-32.
& Cruise control set indicator
light
Refer to “Cruise control set indicator light ”
F 3-32.
Starting and operating/Cruise control7-57
Page 468 of 634

vehicle
–When using a chassis dynam-
ometer or free roller device, etc.
– When running the engine and
makingthewheelsrotatewhile
lifting up the vehicle
. If the ignition switch is turned to the
“ LOCK ”/“ OFF ”position, the last known
status of the system is maintained. For
example, if the ignition switch is turned
to the “LOCK ”/“ OFF ”position with the
BSD/RCTA deactivated, the BSD/RCTA
will remain deactivated the next time
the ignition switch is turned to the
“ ON ”position.
. If the vehicle battery is disconnected
due to situations such as battery
terminal or fuse replacement, after the
battery is reconnected, the BSD/RCTA
will be activated.
& Certification for the BSD/
RCTA
. U.S.-spec. models
FCC ID: OAYSRR2A
CAUTION
FCC WARNING
Changes or modifications not ex-
pressly approved by the party re- sponsible for compliance could void
the user
’s authority to operate the
equipment.
This device complies with part 15 of the
FCC Rules. Operation is subject to the
following two conditions: (1) This device
may not cause harmful interference, and
(2) this device must accept any interfer-
ence received, including interference that
may cause undesired operation.
. Canada-spec. models
This device complies with Industry
Canada licence-exempt RSS standard
(s). Operation is subject to the following
two conditions: (1) this device may not
cause interference, and (2) this device
must accept any interference, including
interference that may cause undesired
operation of the device.
Le présent appareil est conforme aux
CNR d ’Industrie Canada applicables aux
appareils radio exempts de licence. L ’ex-
ploitation est autorisée aux deux condi-
tions suivantes: (1) l ’appareil ne doit pas
produire de brouillage, et (2) l ’utilisateur
de l ’appareil doit accepter tout brouillage
radioélectrique subi, même si le brouillage
est susceptible d ’en compromettre le
fonctionnement.
& Handling of radar sensors
Radar sensors
The radar sensors, one on each side of
the vehicle, are mounted inside the rear
bumper.
Starting and operating/BSD/RCTA
–CONTINUED –7-65
Page 478 of 634
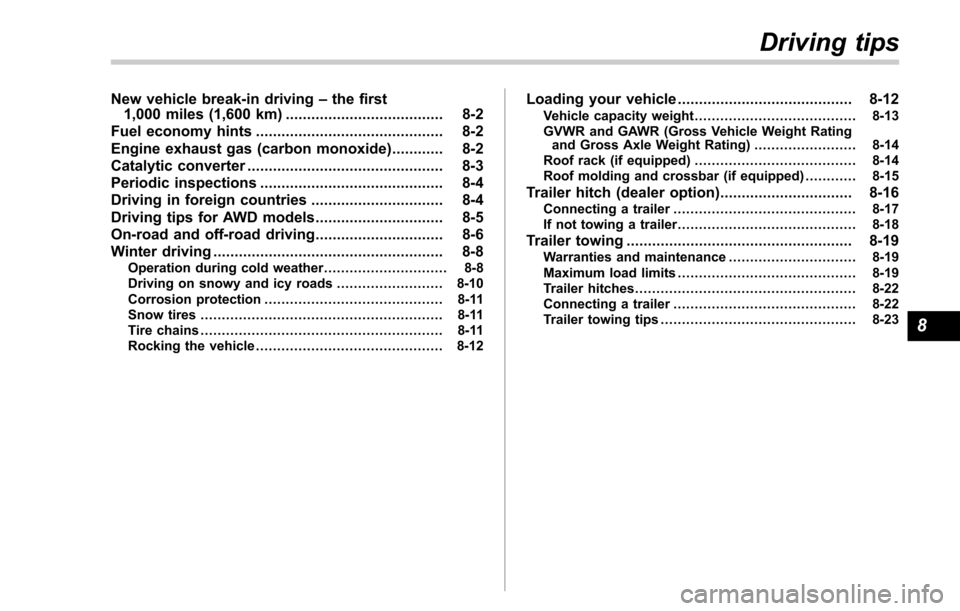
New vehicle break-in driving–the first
1,000 miles (1,600 km) ..................................... 8-2
Fuel economy hints ............................................ 8-2
Engine exhaust gas (carbon monoxide) ............ 8-2
Catalytic converter .............................................. 8-3
Periodic inspections ........................................... 8-4
Driving in foreign countries ............................... 8-4
Driving tips for AWD models .............................. 8-5
On-road and off-road driving .............................. 8-6
Winter driving ...................................................... 8-8
Operation during cold weather ............................. 8-8
Driving on snowy and icy roads ......................... 8-10
Corrosion protection .......................................... 8-11
Snow tires ......................................................... 8-11
Tire chains ......................................................... 8-11
Rocking the vehicle ............................................ 8-12
Loading your vehicle ......................................... 8-12Vehicle capacity weight ...................................... 8-13
GVWR and GAWR (Gross Vehicle Weight Rating and Gross Axle Weight Rating) ........................ 8-14
Roof rack (if equipped) ...................................... 8-14
Roof molding and crossbar (if equipped) ............ 8-15
Trailer hitch (dealer option)............................... 8-16Connecting a trailer........................................... 8-17
If not towing a trailer .......................................... 8-18
Trailer towing..................................................... 8-19Warranties and maintenance .............................. 8-19
Maximum load limits .......................................... 8-19
Trailer hitches .................................................... 8-22
Connecting a trailer ........................................... 8-22
Trailer towing tips .............................................. 8-23
Driving tips
8
Page 480 of 634
exhaust fumes are entering the
vehicle, have the problem
checked and corrected as soon
as possible. If you must drive
under these conditions, drive
only with all windows fully open.
. Keep the rear gate closed while
driving to prevent exhaust gas
from entering the vehicle.
NOTE
Due to the expansion and contraction
of the metals used in the manufacture
of the exhaust system, you may hear a
crackling sound coming from the ex-
haust system for a short time after the
engine has been shut off. This sound is
normal.
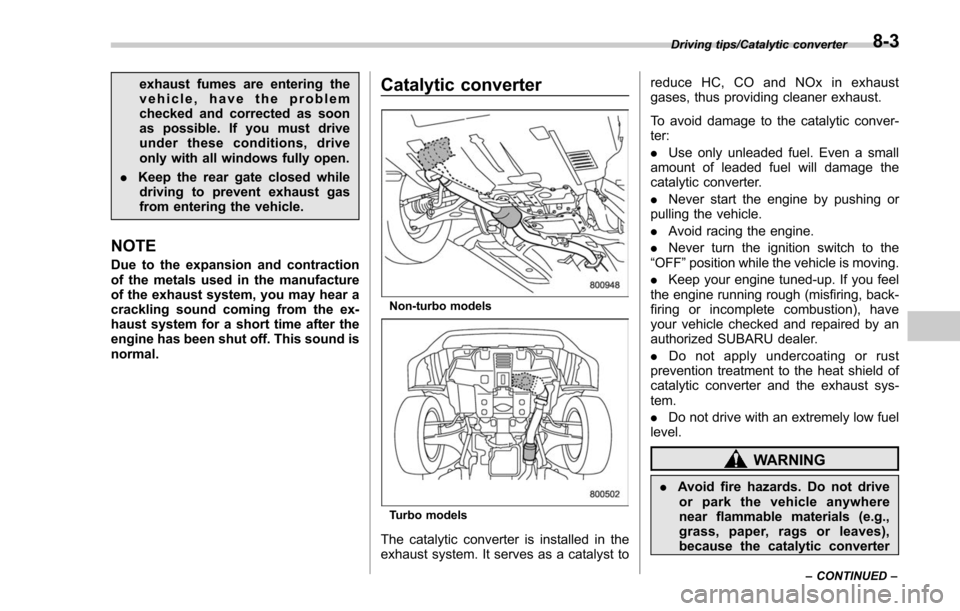
Catalytic converter
Non-turbo models
Turbo models
The catalytic converter is installed in the
exhaust system. It serves as a catalyst to reduce HC, CO and NOx in exhaust
gases, thus providing cleaner exhaust.
To avoid damage to the catalytic conver-
ter:
.
Use only unleaded fuel. Even a small
amount of leaded fuel will damage the
catalytic converter.
. Never start the engine by pushing or
pulling the vehicle.
. Avoid racing the engine.
. Never turn the ignition switch to the
“OFF ”position while the vehicle is moving.
. Keep your engine tuned-up. If you feel
the engine running rough (misfiring, back-
firing or incomplete combustion), have
your vehicle checked and repaired by an
authorized SUBARU dealer.
. Do not apply undercoating or rust
prevention treatment to the heat shield of
catalytic converter and the exhaust sys-
tem.
. Do not drive with an extremely low fuel
level.
WARNING
. Avoid fire hazards. Do not drive
or park the vehicle anywhere
near flammable materials (e.g.,
grass, paper, rags or leaves),
because the catalytic converter
Driving tips/Catalytic converter
–CONTINUED –8-3
Page 482 of 634

Driving tips for AWD models
WARNING
.Always maintain a safe driving
speed according to the road and
weather conditions in order to
avoid having an accident on a
sharp turn, during sudden brak-
ing or under other similar condi-
tions.
. Always use the utmost care in
driving –overconfidence be-
cause you are driving an All-
Wheel Drive vehicle could easily
lead to a serious accident.
. When replacing or installing tire
(s), all four tires must be the
same for the following items.
(a) Size
(b) Circumference
(c) Speed symbol
(d) Load index
(e) Construction
(f) Manufacturer
(g) Brand (tread pattern)
(h) Degrees of wear
For the items (a) to (d), you must
obey the specification that is printed on the tire placard. The
tire placard is located on the
bottom of driver
’s door pillar.
If all of four tires are not the same
in items (a) to (h), it may lead to
serious mechanical damage to
the drive train of your car and
affect the following factors.
— Ride
— Handling
— Braking
— Speedometer/Odometer
calibration
— Clearance between the body
and tires
It also may be dangerous and
lead to loss of vehicle control,
and it can lead to an accident.
CAUTION
If you use a temporary spare tire to
replace a flat tire, be sure to use the
original temporary spare tire stored
in the vehicle. Using other sizes may
result in severe mechanical damage
to the drive train of your vehicle.
All-Wheel Drive distributes the engine
power to all four wheels. AWD models
provide better traction when driving on
slippery, wet or snow-covered roads and
when moving out of mud, dirt and sand.
By shifting power between the front and
rear wheels, SUBARU AWD can also
provide added traction during acceleration
and added engine braking force during
deceleration.
Therefore, your SUBARU AWD vehicle
may handle differently than an ordinary
two wheel drive vehicle and it contains
some features unique to AWD. For safety
purposes as well as to avoid damaging
the AWD system, you should keep the
following tips in mind.
. An AWD model is better able to climb
steeper roads under snowy or slippery
Driving tips/Driving tips for AWD models
–CONTINUED –8-5