2017 SUBARU FORESTER navigation
[x] Cancel search: navigationPage 12 of 634
When possible, you should share the
driving with others.
&Modification of your vehicle
CAUTION
Your vehicle should not be modified
other than with genuine SUBARU
parts and accessories. Other types
of modifications could affect its
performance, safety or durability,
and may even violate governmental
regulations. In addition, damage or
performance problems resulting
from modification may not be cov-
ered under warranties.
&Car phone/cell phone and
driving
CAUTION
Do not use a car phone/cell phone
while driving; it may distract your
attention from driving and can lead
to an accident. If you use a car
phone/cell phone, pull off the road
and park in a safe place before
using your phone. In some States/
Provinces, only hands-free phones may legally be used while driving.
&
Driving vehicles equipped
with navigation system
WARNING
Do not allow the monitor to distract
your attention from driving. Also, do
not operate the controls of the
navigation system while driving.
The loss of attention to driving
could lead to an accident. If you
wish to operate the controls of the
navigation system, first take the
vehicle off the road and stop it in a
safe location.
&Driving with pets
Unrestrained pets can interfere with your
driving and distract your attention from
driving. In a collision or sudden stop,
unrestrained pets or cages can be thrown
around inside the vehicle and hurt you or
your passengers. Besides, the pets can
be hurt under these situations. It is also for
their own safety that pets should be
properly restrained in your vehicle. Re-
strain a pet with a special traveling
harness which can be secured to the rear seat with a seatbelt or use a pet carrier
which can be secured to the rear seat by
routing a seatbelt through the carrier
’s
handle. Never restrain pets or pet carriers
in the front passenger ’s seat. For further
information, consult your veterinarian,
local animal protection society or pet
shop.
& Tire pressures
Check and, if necessary, adjust the
pressure of each tire (including the spare)
at least once a month and before any long
journey.
Check the tire pressure when the tires are
cold. Use a pressure gauge to adjust the
tire pressures to the values shown on the
tire placard. For detailed information, refer
to“Tires and wheels” F11-23.
WARNING
Driving at high speeds with exces-
sively low tire pressures can cause
the tires to deform severely and to
rapidly become hot. A sharp in-
crease in temperature could cause
tread separation, and destruction of
the tires. The resulting loss of
vehicle control could lead to an
accident.
–CONTINUED –
7
Page 189 of 634
Instruments and controls/Information display (Mexico–spec. models)
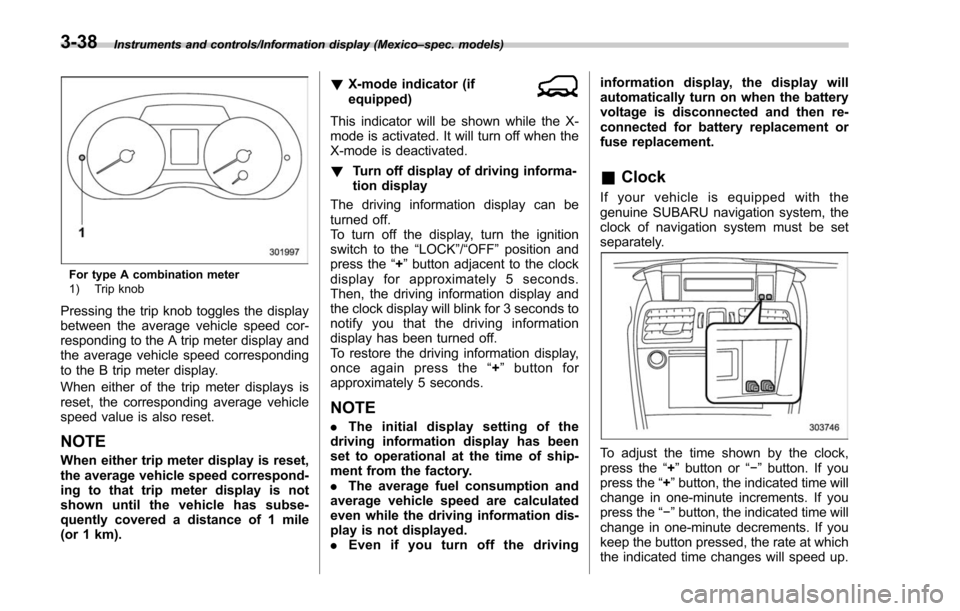
For type A combination meter
1) Trip knob
Pressing the trip knob toggles the display
between the average vehicle speed cor-
responding to the A trip meter display and
the average vehicle speed corresponding
to the B trip meter display.
When either of the trip meter displays is
reset, the corresponding average vehicle
speed value is also reset.
NOTE
When either trip meter display is reset,
the average vehicle speed correspond-
ing to that trip meter display is not
shown until the vehicle has subse-
quently covered a distance of 1 mile
(or 1 km). !
X-mode indicator (if
equipped)
This indicator will be shown while the X-
mode is activated. It will turn off when the
X-mode is deactivated.
! Turn off display of driving informa-
tion display
The driving information display can be
turned off.
To turn off the display, turn the ignition
switch to the “LOCK”/“OFF”position and
press the “+”button adjacent to the clock
display for approximately 5 seconds.
Then, the driving information display and
the clock display will blink for 3 seconds to
notify you that the driving information
display has been turned off.
To restore the driving information display,
once again press the “+ ” button for
approximately 5 seconds.
NOTE
. The initial display setting of the
driving information display has been
set to operational at the time of ship-
ment from the factory.
. The average fuel consumption and
average vehicle speed are calculated
even while the driving information dis-
play is not displayed.
. Even if you turn off the driving information display, the display will
automatically turn on when the battery
voltage is disconnected and then re-
connected for battery replacement or
fuse replacement.
&
Clock
If your vehicle is equipped with the
genuine SUBARU navigation system, the
clock of navigation system must be set
separately.
To adjust the time shown by the clock,
press the “+”button or “− ” button. If you
press the “+ ”button, the indicated time will
change in one-minute increments. If you
press the “− ”button, the indicated time will
change in one-minute decrements. If you
keep the button pressed, the rate at which
the indicated time changes will speed up.
3-38
Page 210 of 634
&Date and time settings
The items in the date and time settings
can be set. To change the items, operate
the “
”or “”switch.
NOTE
. The “Time/Date ”item must be set to
display the “Birthday ”, “Anniversary ”
and notifications for vehicle mainte-
nance.
. The “Birthday ”and “Anniversary ”
items can be entered after the “Time/
Date ”item has been set.
. Dates that do not exist in the
Gregorian calendar cannot be set (for
example, April 31).
. If your vehicle is equipped with
genuine SUBARU navigation system,
the clock of navigation system must be
set separately.
! Preparation for date setting
1. Turn the ignition switch to the “ON”
position.
2. Push and hold the
button to show
the selection screen.
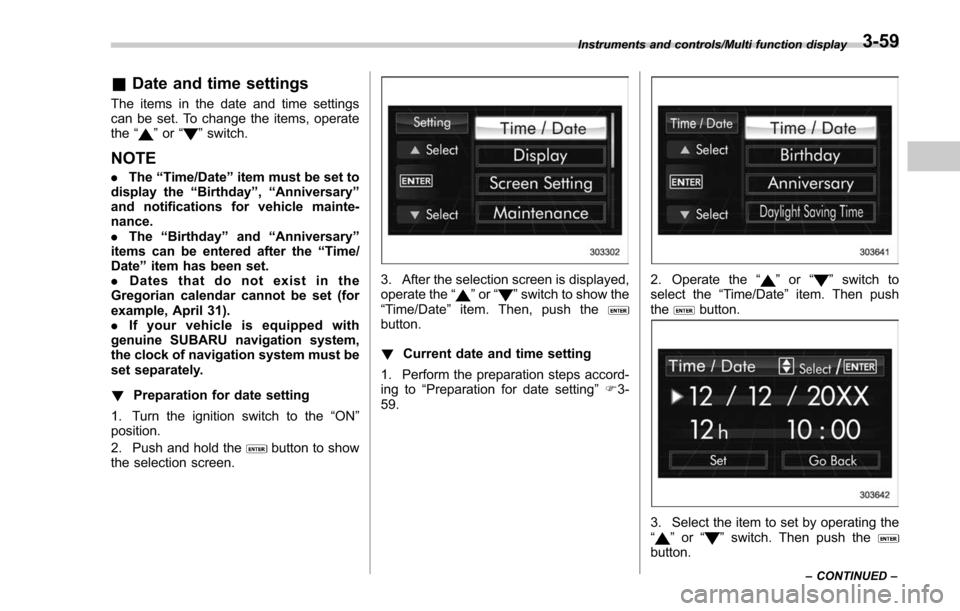
3. After the selection screen is displayed,
operate the “”or “”switch to show the
“Time/Date ”item. Then, push the
button.
! Current date and time setting
1. Perform the preparation steps accord-
ing to “Preparation for date setting ”F 3-
59.
2. Operate the “”or “”switch to
select the “Time/Date”item. Then push
the
button.
3. Select the item to set by operating the
“” or “”switch. Then push thebutton.
Instruments and controls/Multi function display
–CONTINUED –3-59
Page 292 of 634
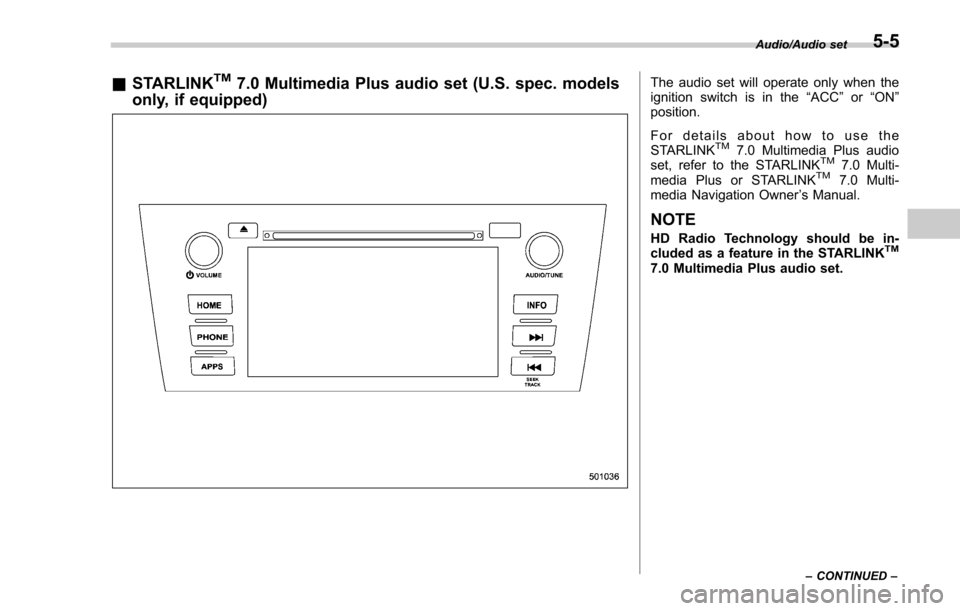
&STARLINKTM7.0 Multimedia Plus audio set (U.S. spec. models
only, if equipped)The audio set will operate only when the
ignition switch is in the “ACC”or “ON ”
position.
For details about how to use the
STARLINK
TM7.0 Multimedia Plus audio
set, refer to the STARLINKTM7.0 Multi-
media Plus or STARLINKTM7.0 Multi-
media Navigation Owner ’s Manual.
NOTE
HD Radio Technology should be in-
cluded as a feature in the STARLINKTM
7.0 Multimedia Plus audio set.
Audio/Audio set
–CONTINUED –5-5
Page 398 of 634
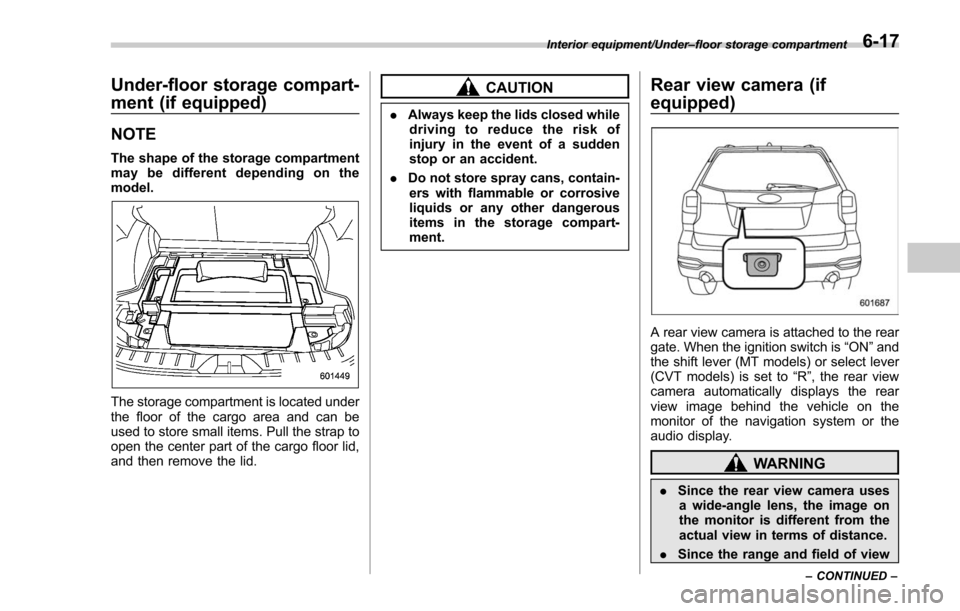
Under-floor storage compart-
ment (if equipped)
NOTE
The shape of the storage compartment
may be different depending on the
model.
The storage compartment is located under
the floor of the cargo area and can be
used to store small items. Pull the strap to
open the center part of the cargo floor lid,
and then remove the lid.
CAUTION
.Always keep the lids closed while
driving to reduce the risk of
injury in the event of a sudden
stop or an accident.
. Do not store spray cans, contain-
ers with flammable or corrosive
liquids or any other dangerous
items in the storage compart-
ment.
Rear view camera (if
equipped)
A rear view camera is attached to the rear
gate. When the ignition switch is “ON”and
the shift lever (MT models) or select lever
(CVT models) is set to “R”, the rear view
camera automatically displays the rear
view image behind the vehicle on the
monitor of the navigation system or the
audio display.
WARNING
. Since the rear view camera uses
a wide-angle lens, the image on
the monitor is different from the
actual view in terms of distance.
. Since the range and field of view
Interior equipment/Under –floor storage compartment
–CONTINUED –6-17
Page 400 of 634
is displayed.
1. Set the ignition switch to“ON”.
2. Set the shift lever/select lever to “R”.
NOTE
. For models with the genuine
SUBARU navigation or audio system,
while the navigation system is acti-
vated, the image of the rear view
camera will not be displayed. However,
the image of the rear view camera has
priority over other screen displays.
. The image of the rear view camera
has priority over other screen displays.
. The image of the rear view camera is
horizontally reversed as is the case
with the vehicle rearview mirror or the
side view mirror.
. It may be difficult to see the image of
the rear view camera in the following
cases. This is not a malfunction of the
camera.
–The vehicle is used for towing or
a trailer hitch is installed.
– The vehicle is in a dark place (at
night, in a tunnel, etc.).
– The vehicle is in an extremely hot
or cold place.
– An object (such as raindrops,
snow, dirt, etc.) that disturbs the
view of the rear view camera sticks to the lens of the camera.
–
Strong light shined directly on
the camera lens (occasionally, there
are vertical lines on the screen).& Viewing range on the screen
CAUTION
The range that can be viewed with
the rear view camera is limited.
Always be sure to check with your
eyes when moving backward and
proceed slowly.
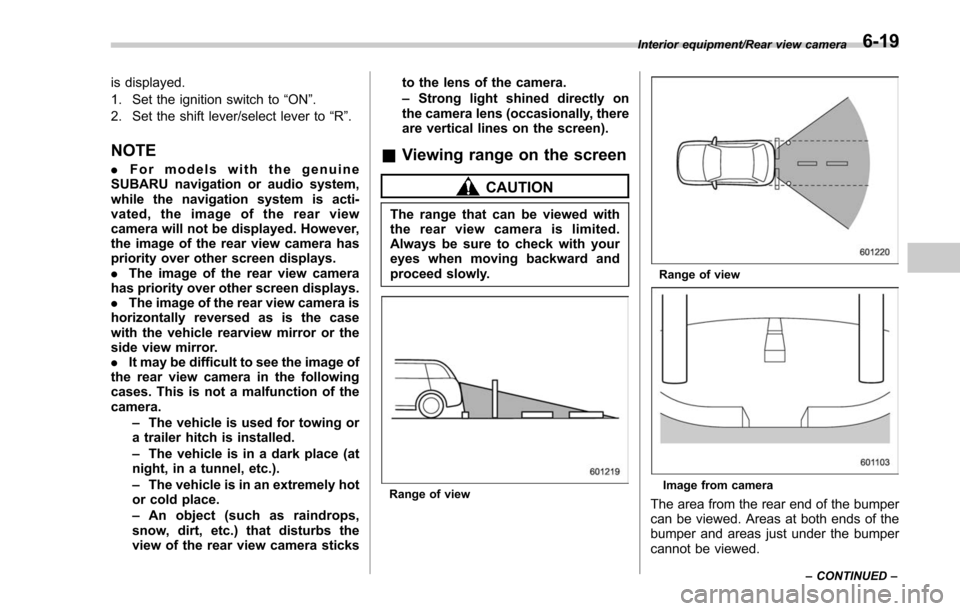
Range of view
Range of view
Image from camera
The area from the rear end of the bumper
can be viewed. Areas at both ends of the
bumper and areas just under the bumper
cannot be viewed.
Interior equipment/Rear view camera
–CONTINUED –6-19
Page 531 of 634
Appearance care/Cleaning the interior
&Synthetic leather upholstery
The synthetic leather material used on the
SUBARU may be cleaned using mild soap
or detergent and water, after first vacuum-
ing or brushing away loose dirt. Allow the
soap to soak in for a few minutes and wipe
off with a clean, damp cloth. Commercial
foam-type cleaners suitable for synthetic
leather materials may be used when
necessary.
CAUTION
Strong cleaning agents such as
solvents, paint thinners, window
cleaner or fuel must never be used
on leather or synthetic interior ma-
terials. Doing so could damage the
surface and cause the color to
deteriorate.
&Climate control panel, audio
panel, instrument panel,
console panel, and switches
Use a soft, damp cloth to clean the climate
control panel, audio equipment, instru-
ment panel, center console, combination
meter panel, and switches.
CAUTION
. Do not use organic solvents such
as paint thinners or fuel, or
strong cleaning agents that con-
tain those solvents. Doing so
could damage the surface and
cause the color to deteriorate.
. Do not use chemical solvents
that contain silicone on the vehi-
cle audio system, electrical com-
ponents of the air-conditioner or
any switches. If silicone adheres
to these parts, it may cause
damage to electrical compo-
nents.
& Monitor (if equipped)
To clean the audio/navigation/multi func-
tion display monitor, wipe it with a silicone
cloth or with a soft cloth. If the monitor is
extremely dirty, clean it with a soft cloth
moistened with neutral detergent then
carefully wipe off any remaining detergent.
CAUTION
. Do not spray neutral detergent
directly onto the monitor. Doing
so could damage the monitor ’s
components.
. Do not wipe the monitor with a
hard cloth. Doing so could
scratch the monitor.
. Do not use cleaning fluid that
contains thinner, fuel, or any
other volatile substance. Such
cleaning fluid could erase the
lettering on the switches at the
bottom of the monitor.
10-6
Page 592 of 634

Fuse
panel Fuse
rating Circuit
15 10A .Luggage light
. Keyless unit
16 7.5A .Illumination
17 15A .Seat heaters
18 10A .Backup light
19 7.5A .Wiper relay
20 10A .Accessory power outlet
(instrument panel)
21 10A .Starter relay
22 7.5A .Air conditioner
. Rear window defogger
relay coil
23 Empty
24 10A .Audio unit
. Navigation system (if
equipped)
25 15A .SRS airbag system
26 Empty
27 15A .Blower fan
28 15A .Blower fan
29 15A .Fog light
30 Empty Fuse
panel Fuse
rating Circuit
31 7.5A .Auto air conditioner unit
. Integrated unit
32 7.5A .Clutch switch
. Steering lock control
unit
33 7.5A .Vehicle Dynamics Con-
trol unit Specifications/Fuses and circuits
–CONTINUED –
12-13