Page 17 of 130
1.11
– press the joystick 8 to open the se-
lected element;
– in the tabs menus, move the joy- stick 8 left or right to switch from one
tab to another.
Confirming/cancelling a selection
Press the joystick 8 to confirm a change.
Press the button 6 to cancel your choice
and return to the previous menu.
Press the button 7 to go back to the
home page.
OPERATING PRINCIPLES (3/5)
76
8
Central control
Navigating a menu
Use the joystick 8 to move around the
different screens:
– Move the joystick 8 up or down to
move around the different areas of
the screen (upper bar, central zone,
lower bar);
– turn the joystick 8 to search the list or
zoom in/out map;
Screen controls
Shortcut to a menu
1: Multifunction capacitive touchscreen.
2: Go to the home pages.
3: Go to the driving aids settings menu or go to the user settings menu.
4: Go to the display settings menu.
234
1
Page 18 of 130

1.12
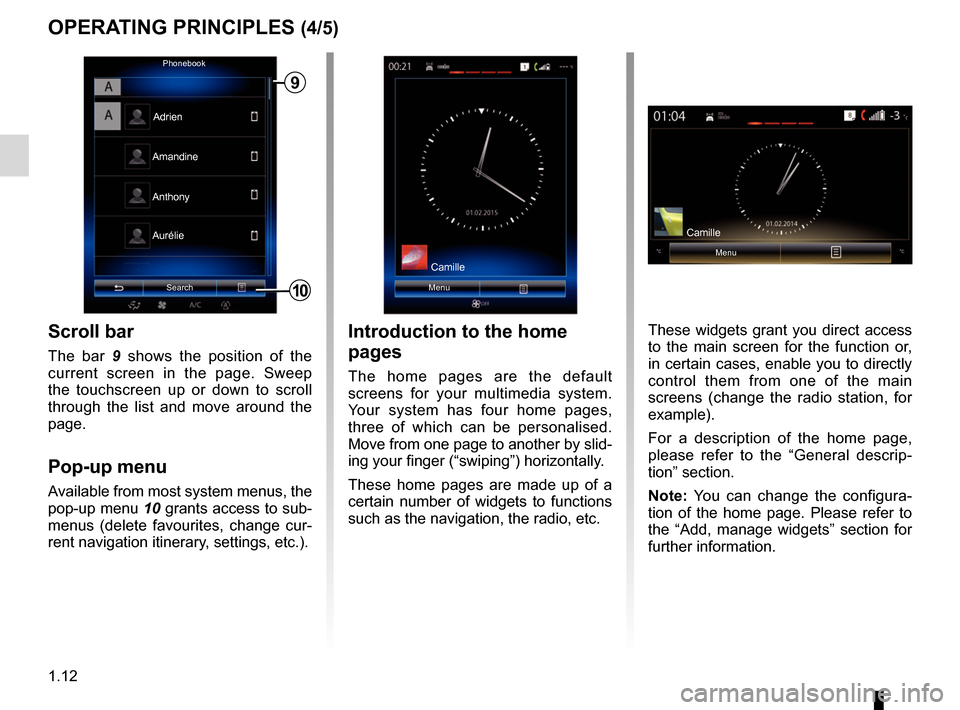
Scroll bar
The bar 9 shows the position of the
current screen in the page. Sweep
the touchscreen up or down to scroll
through the list and move around the
page.
Pop-up menu
Available from most system menus, the
pop-up menu 10 grants access to sub-
menus (delete favourites, change cur-
rent navigation itinerary, settings, etc.).
OPERATING PRINCIPLES (4/5)
Introduction to the home
pages
The home pages are the default
screens for your multimedia system.
Your system has four home pages,
three of which can be personalised.
Move from one page to another by slid-
ing your finger (“swiping”) horizontally.
These home pages are made up of a
certain number of widgets to functions
such as the navigation, the radio, etc.
Menu
Phonebook
Search
AnthonyAdrien
10
Aurélie Amandine
9
Camille
These widgets grant you direct access
to the main screen for the function or,
in certain cases, enable you to directly
control them from one of the main
screens (change the radio station, for
example).
For a description of the home page,
please refer to the “General descrip-
tion” section.
Note: You can change the configura-
tion of the home page. Please refer to
the “Add, manage widgets” section for
further information.
Camille
Menu
Page 19 of 130

1.13
OPERATING PRINCIPLES (5/5)
12
Menu
Phone Multimedia
Apps
Navigation
Vehicle System
Log In
Presentation of the
instructions provided with
your multimedia system
You can view the instructions for your
“R-Link 2” multimedia system from
the multimedia screen by pressing the
button 12, then “User manual”.
Menu
Navigation Multimedia
Phone
Apps Vehicle System
Log In
12
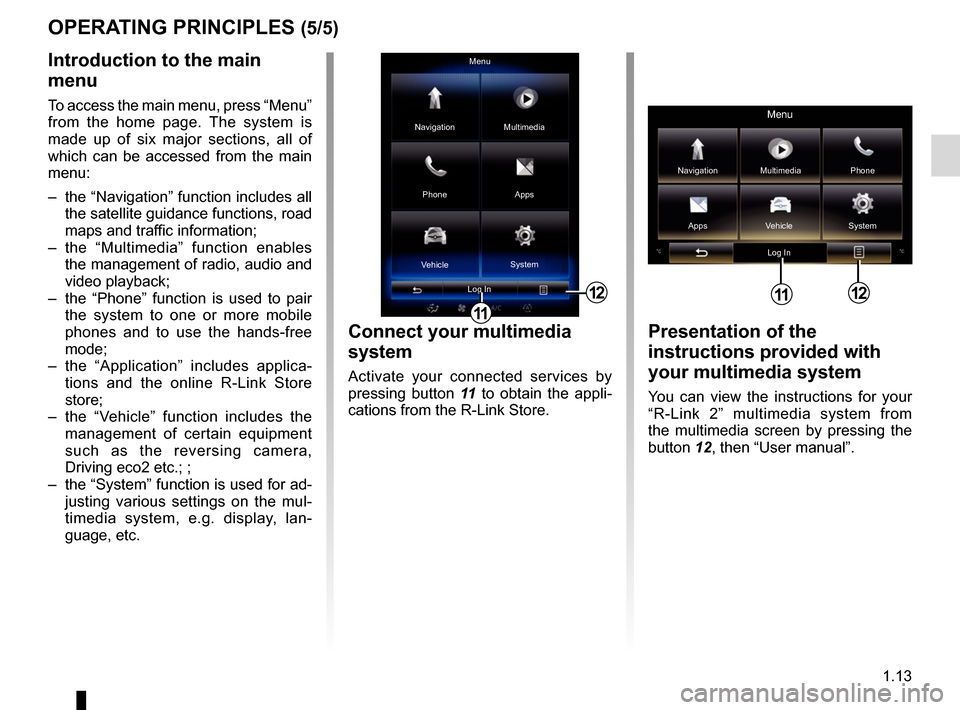
Introduction to the main
menu
To access the main menu, press “Menu”
from the home page. The system is
made up of six major sections, all of
which can be accessed from the main
menu:
– the “Navigation” function includes all the satellite guidance functions, road
maps and traffic information;
– the “Multimedia” function enables the management of radio, audio and
video playback;
– the “Phone” function is used to pair the system to one or more mobile
phones and to use the hands-free
mode;
– the “Application” includes applica- tions and the online R-Link Store
store;
– the “Vehicle” function includes the management of certain equipment
such as the reversing camera,
Driving eco2 etc.; ;
– the “System” function is used for ad- justing various settings on the mul-
timedia system, e.g. display, lan-
guage, etc.
Connect your multimedia
system
Activate your connected services by
pressing button 11 to obtain the appli-
cations from the R-Link Store.
11
11
Page 20 of 130

1.14
ON/OFF (1/2)
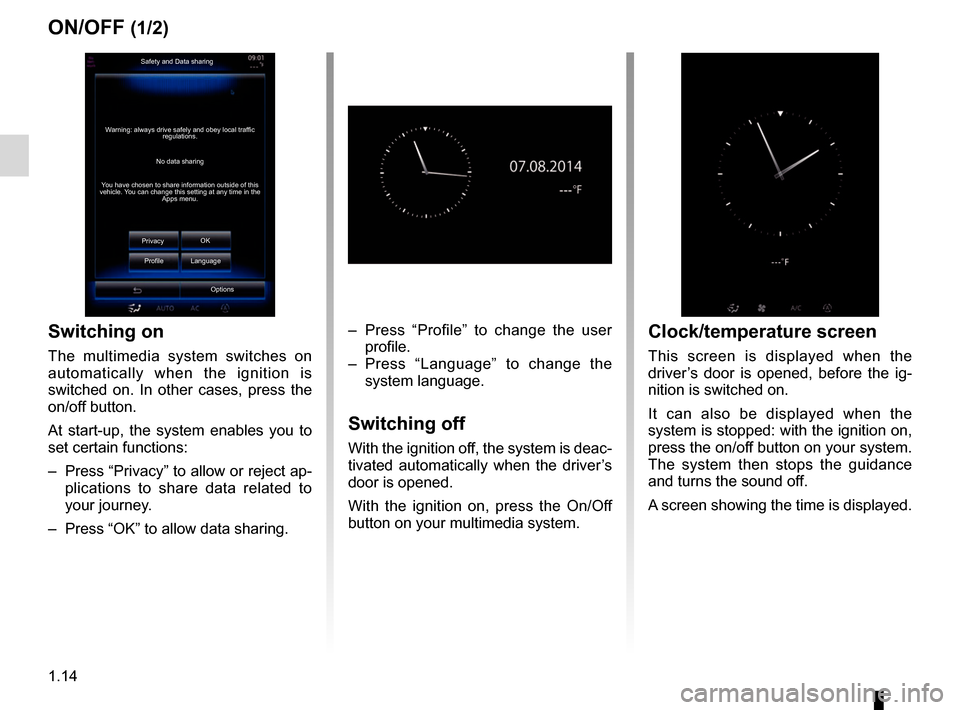
Switching on
The multimedia system switches on
automatically when the ignition is
switched on. In other cases, press the
on/off button.
At start-up, the system enables you to
set certain functions:
– Press “Privacy” to allow or reject ap-plications to share data related to
your journey.
– Press “OK” to allow data sharing. – Press “Profile” to change the user
profile.
– Press “Language” to change the system language.
Switching off
With the ignition off, the system is deac-
tivated automatically when the driver’s
door is opened.
With the ignition on, press the On/Off
button on your multimedia system.
Safety and Data sharing
No data sharing
Warning: always drive safely and obey local traffic
regulations.
You have chosen to share information outside of this
vehicle. You can change this setting at any time in the Apps menu.
Privacy OK
Language
Profile
Options
Clock/temperature screen
This screen is displayed when the
driver’s door is opened, before the ig-
nition is switched on.
It can also be displayed when the
system is stopped: with the ignition on,
press the on/off button on your system.
The system then stops the guidance
and turns the sound off.
A screen showing the time is displayed.
Page 21 of 130
1.15
ON/OFF (2/2)
Resetting the system
You can reset all system settings and/
or delete all personal data. To do this,
from the main menu, select “System”,
“General reset”, the press “Yes” to con-
firm. The system is reset.
Note: to reset all system settings,
select “System” from the main menu,
then press the pop-up menu button, fol-
lowed by “General reset”.
For safety reasons, carry
out these operations when
the vehicle is stationary.
Page 22 of 130

1.16
ADD, MANAGE WIDGETS (1/2)
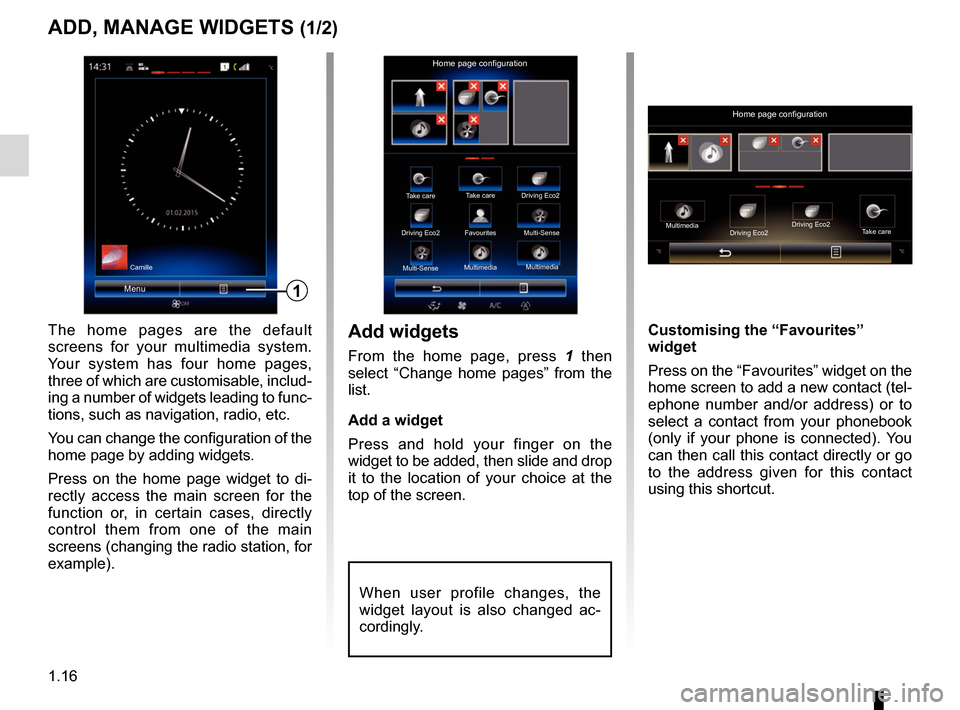
Add widgets
From the home page, press 1 then
select “Change home pages” from the
list.
Add a widget
Press and hold your finger on the
widget to be added, then slide and drop
it to the location of your choice at the
top of the screen.
Menu1
Take care
Home page configuration
Take care Driving Eco2
Driving Eco2 Favourites Multi-Sense
Multi-Sense Multimedia
Multimedia
The home pages are the default
screens for your multimedia system.
Your system has four home pages,
three of which are customisable, includ-
ing a number of widgets leading to func-
tions, such as navigation, radio, etc.
You can change the configuration of the
home page by adding widgets.
Press on the home page widget to di-
rectly access the main screen for the
function or, in certain cases, directly
control them from one of the main
screens (changing the radio station, for
example).
Camille
Home page configuration
Multimedia
Driving Eco2Driving Eco2
Take care
Customising the “Favourites”
widget
Press on the “Favourites” widget on the
home screen to add a new contact (tel-
ephone number and/or address) or to
select a contact from your phonebook
(only if your phone is connected). You
can then call this contact directly or go
to the address given for this contact
using this shortcut.
When user profile changes, the
widget layout is also changed ac-
cordingly.
Page 23 of 130
1.17
ADD, MANAGE WIDGETS (2/2)
For safety reasons, carry
out these operations when
the vehicle is stationary.
There are two sizes of widget (small
and big). Some applications may
only have one size. The number
of widgets displayed on the home
screen may vary depending on the
format of the multimedia screen.
Delete widgets
To delete a widget, press “X” at the top
right of this latter. A confirmation mes-
sage is displayed on the screen. Press
“Yes” to confirm the deletion.
Page 24 of 130

1.18
USING VOICE RECOGNITION (1/9)
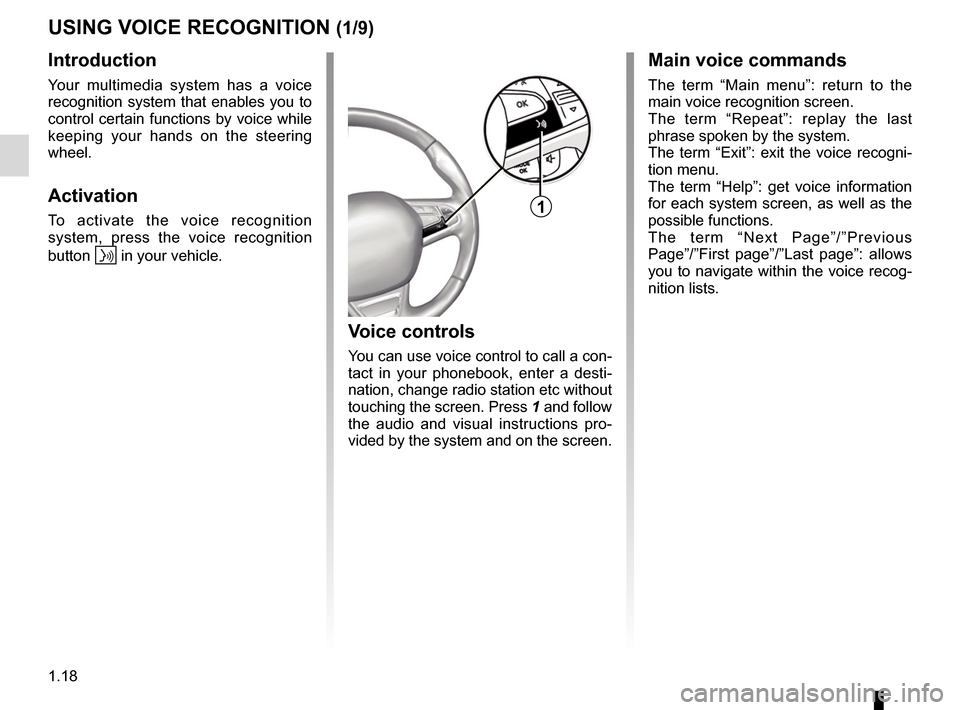
Introduction
Your multimedia system has a voice
recognition system that enables you to
control certain functions by voice while
keeping your hands on the steering
wheel.
Activation
To activate the voice recognition
system, press the voice recognition
button
in your vehicle.
Main voice commands
The term “Main menu”: return to the
main voice recognition screen.
The term “Repeat”: replay the last
phrase spoken by the system.
The term “Exit”: exit the voice recogni-
tion menu.
The term “Help”: get voice information
for each system screen, as well as the
possible functions.
The term “Next Page”/”Previous
Page”/”First page”/”Last page”: allows
you to navigate within the voice recog-
nition lists.
Voice controls
You can use voice control to call a con-
tact in your phonebook, enter a desti-
nation, change radio station etc without
touching the screen. Press 1 and follow
the audio and visual instructions pro-
vided by the system and on the screen.
1