2017 PEUGEOT 5008 tow
[x] Cancel search: towPage 81 of 404
79
Front head restraints
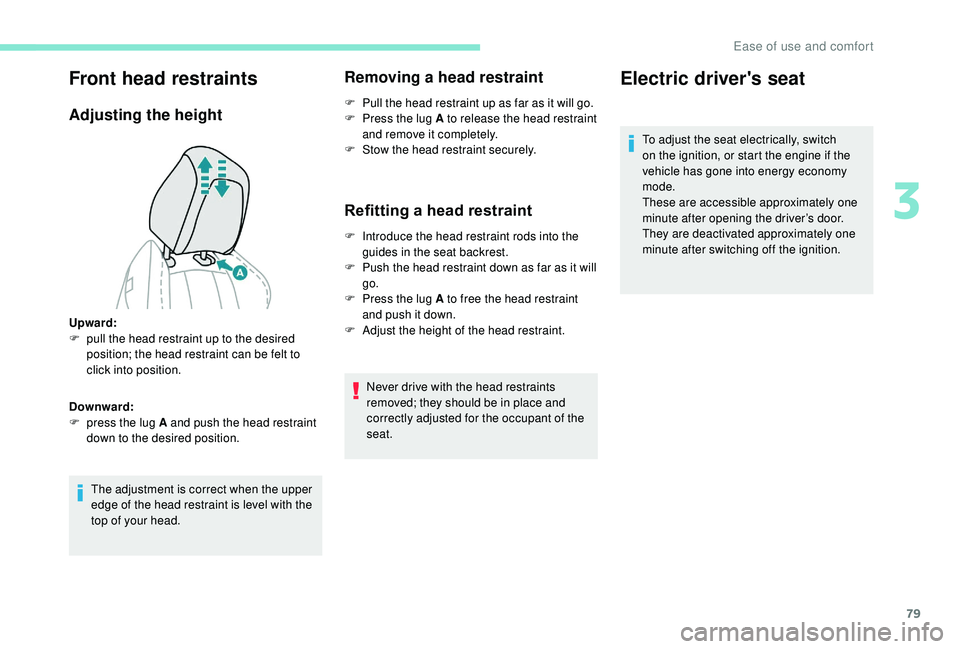
Adjusting the height
The adjustment is correct when the upper
edge of the head restraint is level with the
top of your head.
Removing a head restraint
F Pull the head restraint up as far as it will go.
F P ress the lug A to release the head restraint
and remove it completely.
F
S
tow the head restraint securely.
Refitting a head restraint
F Introduce the head restraint rods into the guides in the seat backrest.
F
P
ush the head restraint down as far as it will
go.
F
P
ress the lug A to free the head restraint
and push it down.
F
A
djust the height of the head restraint.
Never drive with the head restraints
removed; they should be in place and
correctly adjusted for the occupant of the
seat.
Upward:
F
p
ull the head restraint up to the desired
position; the head restraint can be felt to
click into position.
Downward:
F
p
ress the lug A and push the head restraint
down to the desired position.
Electric driver's seat
To adjust the seat electrically, switch
on the ignition, or start the engine if the
vehicle has gone into energy economy
mode.
These are accessible approximately one
minute after opening the driver’s door.
They are deactivated approximately one
minute after switching off the ignition.
3
Ease of use and comfort
Page 87 of 404
85
Second row seats
Rear head restraints
The rear head restraints can be removed.
To remove a head restraint:
F
p
ull the head restraint as far up as it will go,
F
p
ress the lug A to release the head restraint
and remove it completely,
F
s
tow the head restraint. To refit a head restraint:
F
i
nsert the head restraint rods into the guides
in the corresponding seat backrest,
F
p
ush the head restraint down as far as it will
go,
F
p
ress the lug A to free the head restraint
and push it down.
Never drive with passengers seated at
the rear when the head restraints are
removed; they must be in place and in the
high position.
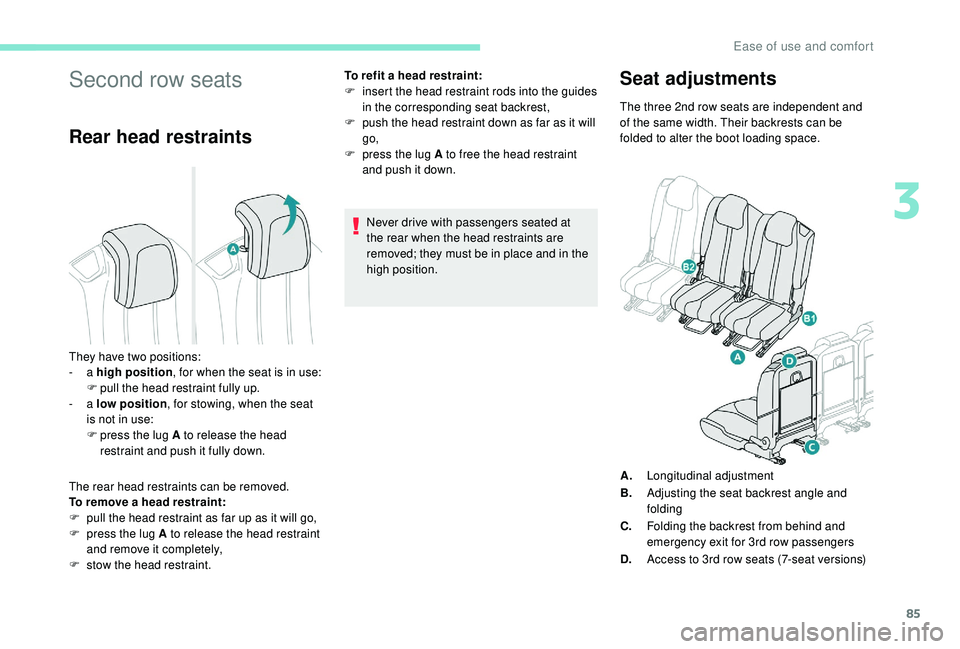
Seat adjustments
They have two positions:
- a high position , for when the seat is in use:
F
p
ull the head restraint fully up.
-
a low position , for stowing, when the seat
is not in use:
F
p
ress the lug A to release the head
restraint and push it fully down. The three 2nd row seats are independent and
of the same width. Their backrests can be
folded to alter the boot loading space.
A. Longitudinal adjustment
B. Adjusting the seat backrest angle and
folding
C. Folding the backrest from behind and
emergency exit for 3rd row passengers
D. Access to 3rd row seats (7-seat versions)
3
Ease of use and comfort
Page 92 of 404
90
Rear head restraints
The rear head restraints can be removed.
To remove a head restraint:
F
p
ull the head restraint as far up as it will go,
F
p
ress the lug A to release the head restraint
and remove it completely,
F
s
tow the head restraint.
Never drive with passengers seated at
the rear when the head restraints are
removed; they must be in place and in the
high position.
Removal of the seats
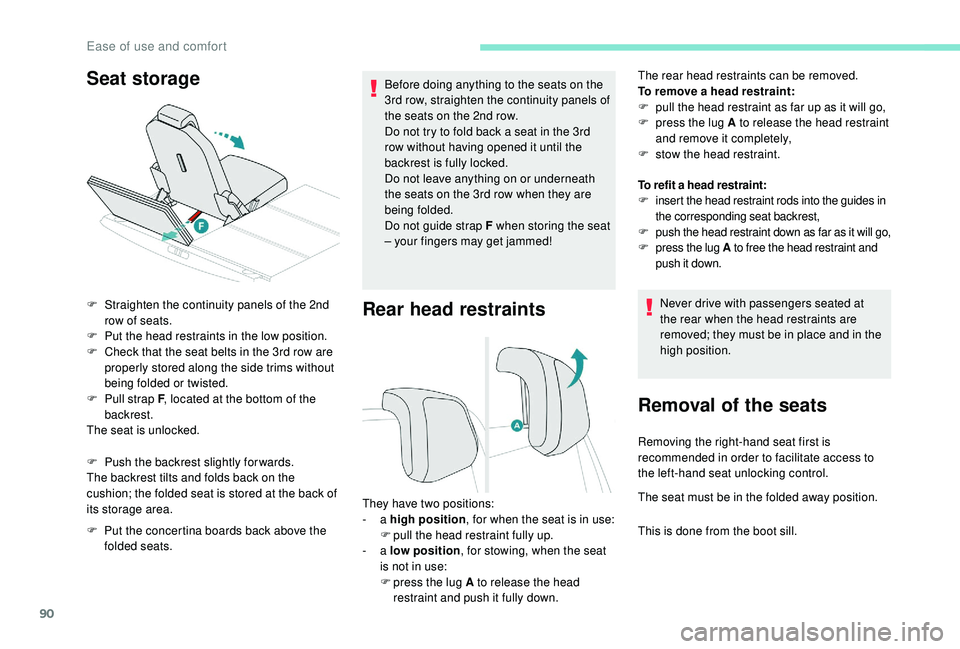
Seat storage
F Straighten the continuity panels of the 2nd
row of seats.
F
P
ut the head restraints in the low position.
F
C
heck that the seat belts in the 3rd row are
properly stored along the side trims without
being folded or twisted.
F
P
ull strap F , located at the bottom of the
backrest.
The seat is unlocked.
F
P
ush the backrest slightly for wards.
The backrest tilts and folds back on the
cushion; the folded seat is stored at the back of
its storage area.
F
P
ut the concertina boards back above the
folded seats. Before doing anything to the seats on the
3rd row, straighten the continuity panels of
the seats on the 2nd row.
Do not try to fold back a seat in the 3rd
row without having opened it until the
backrest is fully locked.
Do not leave anything on or underneath
the seats on the 3rd row when they are
being folded.
Do not guide strap F when storing the seat
– your fingers may get jammed!
They have two positions:
- a high position , for when the seat is in use:
F
p
ull the head restraint fully up.
-
a low position , for stowing, when the seat
is not in use:
F
p
ress the lug A to release the head
restraint and push it fully down. To refit a head restraint:
F
i
nsert the head restraint rods into the guides in
the corresponding seat backrest,
F
p
ush the head restraint down as far as it will go,
F
p
ress the lug A
to free the head restraint and
push it down.
Removing the right-hand seat first is
recommended in order to facilitate access to
the left-hand seat unlocking control.
The seat must be in the folded away position.
This is done from the boot sill.
Ease of use and comfort
Page 96 of 404
94
Heating and Ventilation
Air intake
The air circulating in the passenger
compartment is filtered and originates either
from the outside via the grille located at the
base of the windscreen or from the inside in air
recirculation mode.
Controls
The incoming air follows various routes
depending on the controls selected by
the driver, the front passenger and rear
passengers, according to the level of
equipment .
The temperature control enables you to obtain
the level of comfort required by mixing the air of
the various circuits.
The air distribution control enables you to
select the air vents used in the passenger
compartment by the combined use of the
associated buttons.
The air flow control enables you to increase or
reduce the speed of the ventilation fan.
Depending on your vehicle, the controls are
accessible in the "Air conditioning" menu of
the touch screen or are grouped together on
control panel on the centre console.
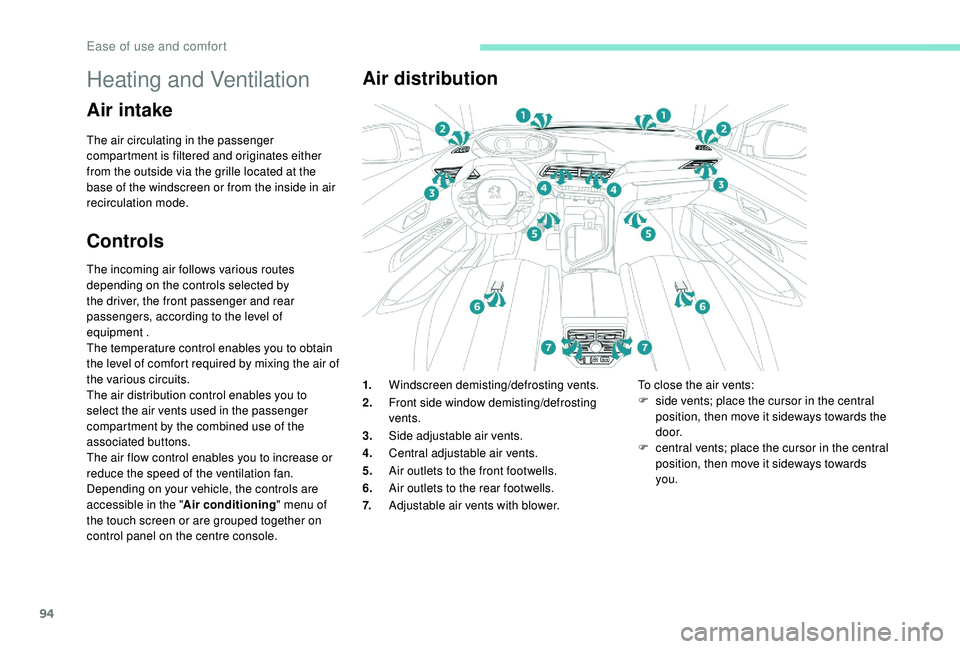
Air distribution
1. Windscreen demisting/defrosting vents.
2. Front side window demisting/defrosting
vents.
3. Side adjustable air vents.
4. Central adjustable air vents.
5. Air outlets to the front footwells.
6. Air outlets to the rear footwells.
7. Adjustable air vents with blower. To close the air vents:
F
s ide vents; place the cursor in the central
position, then move it sideways towards the
d o o r.
F
c
entral vents; place the cursor in the central
position, then move it sideways towards
you.
Ease of use and comfort
Page 97 of 404

95
Recommendations for ventilation and air
conditioning
In order for these systems to be fully effective,
follow the operation and maintenance
guidelines below:
F
T
o ensure that the air is distributed evenly,
keep the external air intake grilles at the
base of the windscreen, the nozzles, the
vents, the air outlets and the air extractor
in the boot free from obstructions.
F
D
o not cover the sunshine sensor,
located on the dashboard; this is used for
regulation of the automatic air conditioning
system.
F
O
perate the air conditioning system for
at least 5
to 10 minutes once or twice a
month to keep it in per fect working order.
F
E
nsure that the passenger compartment
filter is in good condition and have the
filter elements replaced regularly. We
recommend the use of a combined
passenger compartment filter. Thanks to
its special active additive, it contributes
to the purification of the air breathed by
the occupants and the cleanliness of the
passenger compartment (reduction of
allergic symptoms, bad odours and greasy
deposits). If after an extended stop in sunshine,
the interior temperature is very
high, first ventilate the passenger
compartment for a few moments.
Put the air flow control at a setting high
enough to quickly change the air in the
passenger compartment.
The condensation created by the air
conditioning results in a discharge of
water under the vehicle which is per fectly
normal.
F
T o ensure correct operation of the
air conditioning system, you are also
advised to have it checked regularly
as recommended in the Warranty and
Maintenance Record.
F
I
f the system does not produce cold air,
switch it off and contact a PEUGEOT
dealer or a qualified workshop.
When towing the maximum load on a steep
gradient in high temperatures, switching off
the air conditioning increases the available
engine power and so improves the towing
ability.
Stop & Star t
The heating and air conditioning systems
only work when the engine is running.
To maintain a comfortable temperature
in the passenger compartment, you can
temporarily deactivate the Stop & Start
system.
For more information on Stop & Star t,
refer to the corresponding section.
3
Ease of use and comfort
Page 100 of 404
98
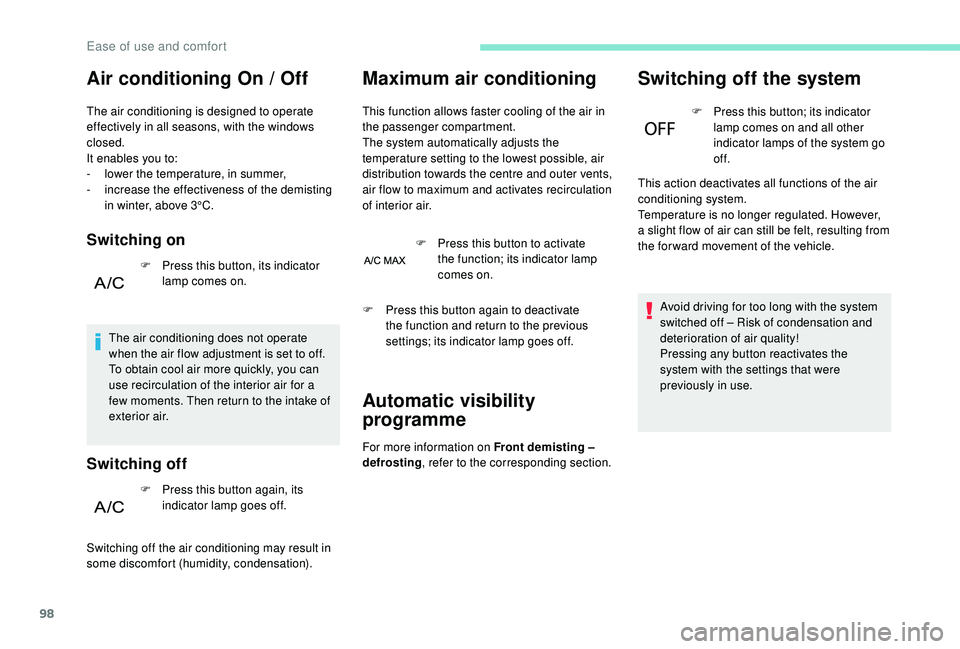
Air conditioning On / Off
The air conditioning is designed to operate
effectively in all seasons, with the windows
closed.
It enables you to:
-
l
ower the temperature, in summer,
-
i
ncrease the effectiveness of the demisting
in winter, above 3°C.
Switching on
F Press this button, its indicator lamp comes on.
The air conditioning does not operate
when the air flow adjustment is set to off.
To obtain cool air more quickly, you can
use recirculation of the interior air for a
few moments. Then return to the intake of
exterior air.
Switching off
F Press this button again, its indicator lamp goes off.
Switching off the air conditioning may result in
some discomfort (humidity, condensation).
Maximum air conditioning
This function allows faster cooling of the air in
the passenger compartment.
The system automatically adjusts the
temperature setting to the lowest possible, air
distribution towards the centre and outer vents,
air flow to maximum and activates recirculation
of interior air. F
P
ress this button to activate
the function; its indicator lamp
comes on.
Automatic visibility
programme
For more information on Front demisting –
defrosting , refer to the corresponding section.
Switching off the system
F Press this button; its indicator
lamp comes on and all other
indicator lamps of the system go
of f.
This action deactivates all functions of the air
conditioning system.
Temperature is no longer regulated. However,
a slight flow of air can still be felt, resulting from
the for ward movement of the vehicle.
Avoid driving for too long with the system
switched off – Risk of condensation and
deterioration of air quality!
Pressing any button reactivates the
system with the settings that were
previously in use.
F
P
ress this button again to deactivate
the function and return to the previous
settings; its indicator lamp goes off.
Ease of use and comfort
Page 103 of 404
101
By reducing the air flow to minimum, you are
stopping ventilation.
"OFF " is displayed alongside the fan.
Avoid driving too long without ventilation –
Risk of condensation and deterioration of
air quality!
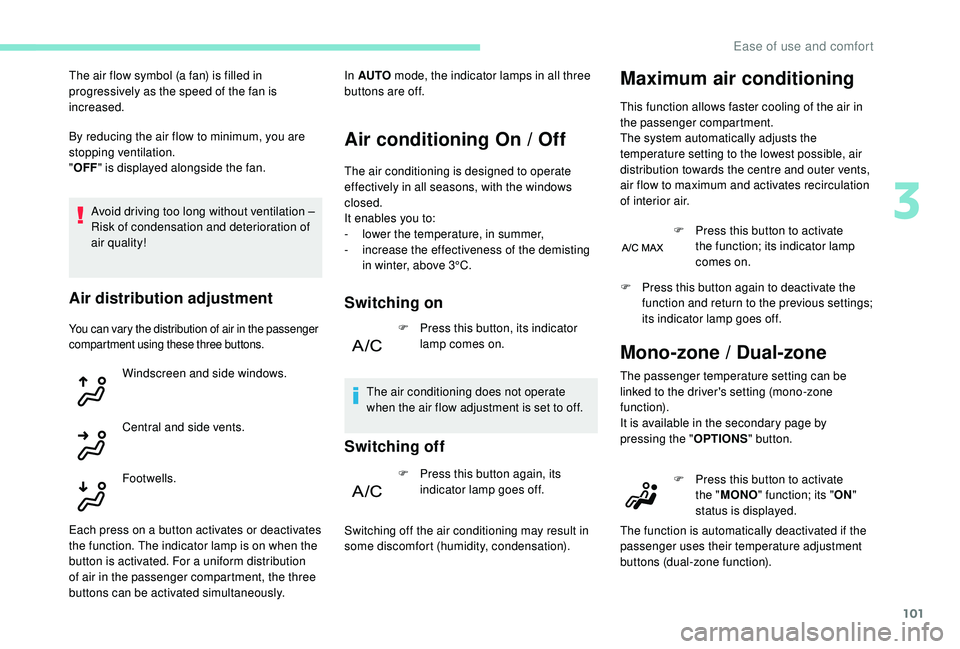
Air distribution adjustment
You can vary the distribution of air in the passenger
compartment using these three buttons.
Windscreen and side windows.
Central and side vents.
The air flow symbol (a fan) is filled in
progressively as the speed of the fan is
increased.
Footwells.
Each press on a button activates or deactivates
the function. The indicator lamp is on when the
button is activated. For a uniform distribution
of air in the passenger compartment, the three
buttons can be activated simultaneously. In AUTO mode, the indicator lamps in all three
buttons are off.
Air conditioning On / Off
The air conditioning is designed to operate
effectively in all seasons, with the windows
closed.
It enables you to:
-
l
ower the temperature, in summer,
-
i
ncrease the effectiveness of the demisting
in winter, above 3°C.
Switching on
F Press this button, its indicator lamp comes on.
The air conditioning does not operate
when the air flow adjustment is set to off.
Switching off
F Press this button again, its indicator lamp goes off.
Maximum air conditioning
This function allows faster cooling of the air in
the passenger compartment.
The system automatically adjusts the
temperature setting to the lowest possible, air
distribution towards the centre and outer vents,
air flow to maximum and activates recirculation
of interior air.
Switching off the air conditioning may result in
some discomfort (humidity, condensation). F
P
ress this button to activate
the function; its indicator lamp
comes on.
F
P
ress this button again to deactivate the
function and return to the previous settings;
its indicator lamp goes off.
Mono-zone / Dual-zone
The passenger temperature setting can be
linked to the driver's setting (mono-zone
function).
It is available in the secondary page by
pressing the " OPTIONS" button.
F
P
ress this button to activate
the " MONO " function; its " ON"
status is displayed.
The function is automatically deactivated if the
passenger uses their temperature adjustment
buttons (dual-zone function).
3
Ease of use and comfort
Page 105 of 404
103
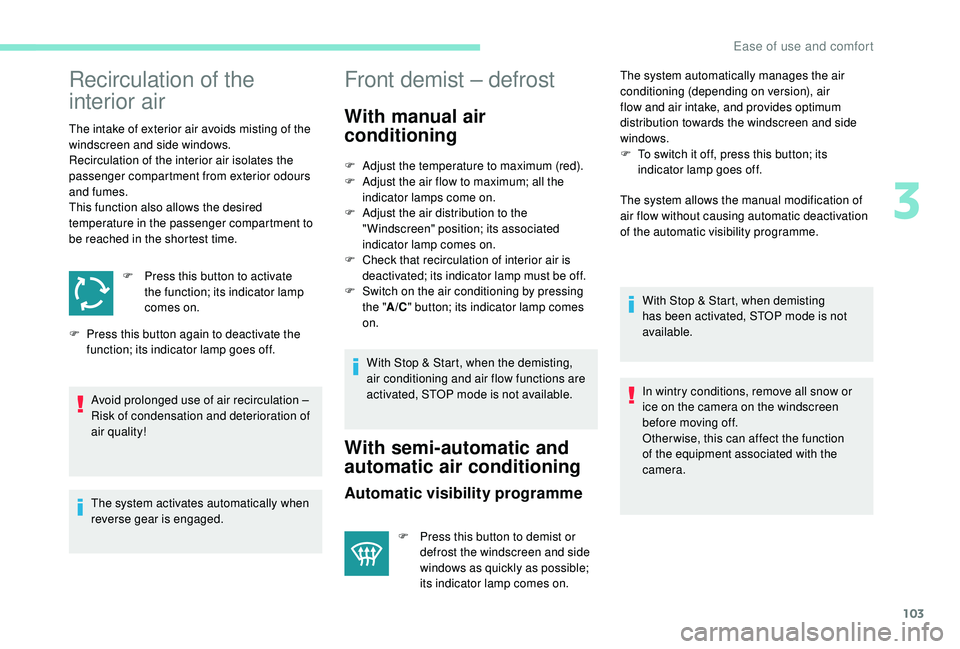
Recirculation of the
interior air
The intake of exterior air avoids misting of the
windscreen and side windows.
Recirculation of the interior air isolates the
passenger compartment from exterior odours
and fumes.
This function also allows the desired
temperature in the passenger compartment to
be reached in the shortest time.F
P
ress this button to activate
the function; its indicator lamp
comes on.
Avoid prolonged use of air recirculation –
Risk of condensation and deterioration of
air quality!
The system activates automatically when
reverse gear is engaged.
F
P
ress this button again to deactivate the
function; its indicator lamp goes off.
Front demist – defrost
With manual air
conditioning
F Adjust the temperature to maximum (red).
F A djust the air flow to maximum; all the
indicator lamps come on.
F
A
djust the air distribution to the
" Windscreen" position; its associated
indicator lamp comes on.
F
C
heck that recirculation of interior air is
deactivated; its indicator lamp must be off.
F
S
witch on the air conditioning by pressing
the " A/C" button; its indicator lamp comes
on.
With Stop & Start, when the demisting,
air conditioning and air flow functions are
activated, STOP mode is not available.
With semi-automatic and
automatic air conditioning
Automatic visibility programme
F Press this button to demist or defrost the windscreen and side
windows as quickly as possible;
its indicator lamp comes on. The system automatically manages the air
conditioning (depending on version), air
flow and air intake, and provides optimum
distribution towards the windscreen and side
windows.
F
T
o switch it off, press this button; its
indicator lamp goes off.
The system allows the manual modification of
air flow without causing automatic deactivation
of the automatic visibility programme.
With Stop & Start, when demisting
has been activated, STOP mode is not
available.
In wintry conditions, remove all snow or
ice on the camera on the windscreen
before moving off.
Other wise, this can affect the function
of the equipment associated with the
camera.
3
Ease of use and comfort