2017 NISSAN QUEST navigation system
[x] Cancel search: navigation systemPage 254 of 520
.DTS and DTS 2.0 “” are registered
trademarks of DTS, Inc.
Parental level (parental control):
DVDs with the parental control setting can be
played with this system. Please use your own
judgement to set the parental control with the
system.
Disc selection:
The following disc formats can be played with
the DVD drive.
. DVD-VIDEO
. VIDEO-CD
. CD-DA (Conventional Compact Disc)
. DTS-CD (models with navigation system)
USB (Universal Serial Bus) Connection
Port (if so equipped)
WARNING
Do not connect, disconnect or operate
the USB device while driving. Doing so
can be a distraction. If distracted you
could lose control of your vehicle and
cause an accident or serious injury.
CAUTION
.Do not force the USB device into the
USB port. Inserting the USB device
tilted or up-side-down into the port
may damage the port. Make sure
that the USB device is connected
correctly into the USB port.
. Do not grab the USB port cover (if
so equipped) when pulling the USB
device out of the port. This could
damage the port and the cover.
. Do not leave the USB cable in a
place where it can be pulled unin-
tentionally. Pulling the cable may
damage the port.
The vehicle is not equipped with a USB device.
USB devices should be purchased separately
as necessary.
This system cannot be used to format USB
devices. To format a USB device, use a personal
computer.
In some states/area, the USB device for the
front seats plays only sound without images for
regulatory reasons, even when the vehicle is
parked.
This system supports various USB memory devices, USB hard drives and iPod
�Šplayers.
Some USB devices may not be supported by
this system.
. Partitioned USB devices may not be played
correctly.
. Some characters used in other languages
(Chinese, Japanese, etc.) are not displayed
properly on display. Using English language
characters with a USB device is recom-
mended.
General notes for USB use:
Refer to your device manufacturer’s owner
information regarding the proper use and care
of the device.
Notes for iPod
�Šuse:
“Made for iPod�Š”, “Made for iPhone�Š”, and
“Made for iPad�Š” mean that an electronic
accessory has been designed to connect
specifically to iPod
�Š, iPhone�Š, or iPad�Š, respec-
tively, and has been certified by the developer to
meet Apple performance standards.
Apple is not responsible for the operation of this
device or its compliance with safety and
regulatory standards.
Please note that the use of this accessory with
iPod
�Š, iPhone�Š, or iPad�Šmay affect wireless
performance.
iPad
�Š, iPhone�Š,iPod�Š, iPod classic�Š,iPod
Monitor, heater, air conditioner, audio, phone and voice recognition systems4-65
Page 278 of 520
.UPDATING (When the satellite radio sub-
scription is not active)
SCAN tuning:
Push the SCAN tuning button to tune from low
to high frequencies and stop at each broad-
casting station/channel for 5 seconds. Pushing
the button again during this 5 seconds period
will stop SCAN tuning and the radio will remain
tuned to that station/channel.
If the SCAN tuning button is not pushed within 5
seconds, SCAN tuning moves to the next
station/channel.
*1to*6Station memory operations:
12 stations/channels can be set for the FM band
(6 each for FM1 and FM2) , 18 for SiriusXM
Satellite Radio (6 each for XM1, XM2 and XM3)
and 6 stations can be set for the AM band.
1. Choose the radio band using the radio band select button.
2. Tune to the desired station/channel using the SEEK/TRACK, SCAN button or the
radio TUNE knob.
3. Push and hold the desired station preset button
*1to*6until the radio mutes.
4. The station indicator will then come on and the sound will resume. Memorizing is now
complete. 5. Other buttons can be set in the same
manner.
If the battery cable is disconnected, or if the fuse
opens, the radio memory will be erased. In that
case, reset the desired stations/channels.
List (AM and FM radio) (models with
navigation system):
When the “List” key on the display is selected
while the FM or AM radio is being played, the
preset station list will be displayed.
If 1 of the 6 preset stations listed is touched and
held, the current station will be stored as the
new preset.
Menu (SiriusXM Satellite Radio):
When the “Menu” key on the display is selected
while the SiriusXM Satellite Radio is being
played, the menu list will be displayed.
The following items are available.
. Preset List
Displays the preset channel list. If 1 of the 6
preset stations listed is touched and held,
the current station will be stored as the new
preset.
. Customize Channel List
Selects specific channels to skip while using
the TUNE, SEEK/CATEGORY or Menu-
Categories feature. .
Favorite Artists & Songs
Stores the current artist or song that is being
played. Touch the “Alert” key to be reminded
when the stored artist or song is playing on a
station while listening to SiriusXM Satellite
Radio.
. Categories
Selecting a category will go to the first
channel in that category as defined by
SiriusXM Satellite Radio.
. Direct Tune
Inputs the channel number by using a
keypad.
Text (models without navigation system):
When the “Text” key is selected with the multi-
function controller on the display and then the
ENTER button is pushed while the satellite radio
is being played, the text information listed below
will be displayed on the screen.
. CH Name
. Category
. Name
. Title
. Other
Monitor, heater, air conditioner, audio, phone and voice recognition systems4-89
Page 279 of 520
4-90Monitor, heater, air conditioner, audio, phone and voice recognition systems
SAA3607
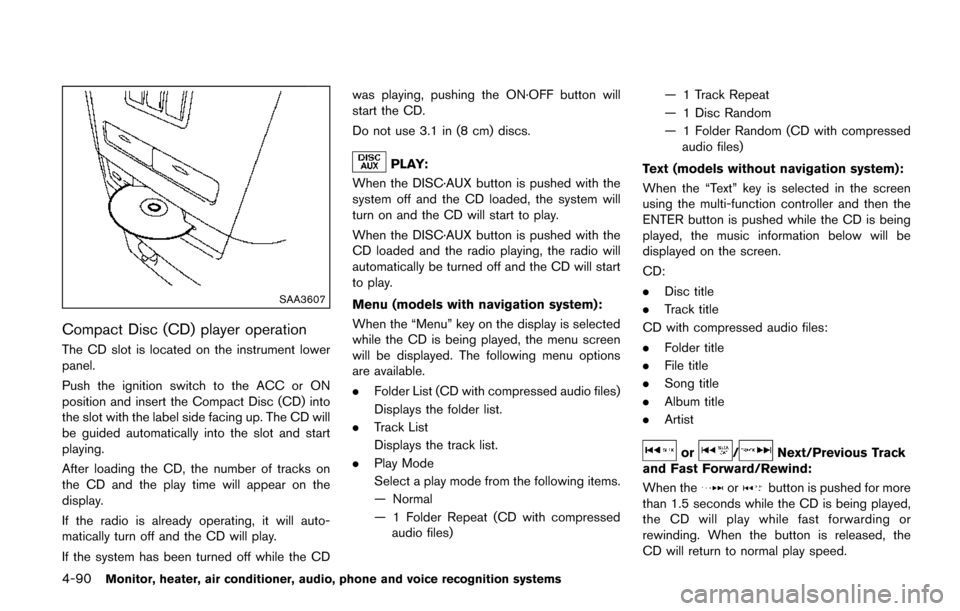
Compact Disc (CD) player operation
The CD slot is located on the instrument lower
panel.
Push the ignition switch to the ACC or ON
position and insert the Compact Disc (CD) into
the slot with the label side facing up. The CD will
be guided automatically into the slot and start
playing.
After loading the CD, the number of tracks on
the CD and the play time will appear on the
display.
If the radio is already operating, it will auto-
matically turn off and the CD will play.
If the system has been turned off while the CDwas playing, pushing the ON·OFF button will
start the CD.
Do not use 3.1 in (8 cm) discs.
PLAY:
When the DISC·AUX button is pushed with the
system off and the CD loaded, the system will
turn on and the CD will start to play.
When the DISC·AUX button is pushed with the
CD loaded and the radio playing, the radio will
automatically be turned off and the CD will start
to play.
Menu (models with navigation system):
When the “Menu” key on the display is selected
while the CD is being played, the menu screen
will be displayed. The following menu options
are available.
. Folder List (CD with compressed audio files)
Displays the folder list.
. Track List
Displays the track list.
. Play Mode
Select a play mode from the following items.
— Normal
— 1 Folder Repeat (CD with compressed
audio files) — 1 Track Repeat
— 1 Disc Random
— 1 Folder Random (CD with compressed
audio files)
Text (models without navigation system):
When the “Text” key is selected in the screen
using the multi-function controller and then the
ENTER button is pushed while the CD is being
played, the music information below will be
displayed on the screen.
CD:
. Disc title
. Track title
CD with compressed audio files:
. Folder title
. File title
. Song title
. Album title
. Artist
or/Next/Previous Track
and Fast Forward/Rewind:
When the
orbutton is pushed for more
than 1.5 seconds while the CD is being played,
the CD will play while fast forwarding or
rewinding. When the button is released, the
CD will return to normal play speed.
Page 284 of 520
WARNING
Do not connect, disconnect or operate
the USB device while driving. Doing so
can be a distraction. If distracted you
could lose control of your vehicle and
cause an accident or serious injury.
CAUTION
.Do not force the USB device into the
USB port. Inserting the USB device
tilted or up-side-down into the port
may damage the port. Make sure
that the USB device is connected
correctly into the USB port.
. Do not grab the USB port cover (if
so equipped) when pulling the USB
device out of the port. This could
damage the port and the cover.
. Do not leave the USB cable in a
place where it can be pulled unin-
tentionally. Pulling the cable may
damage the port. Refer to your device manufacturer’s owner
information regarding the proper use and care
of the device.SAA2500
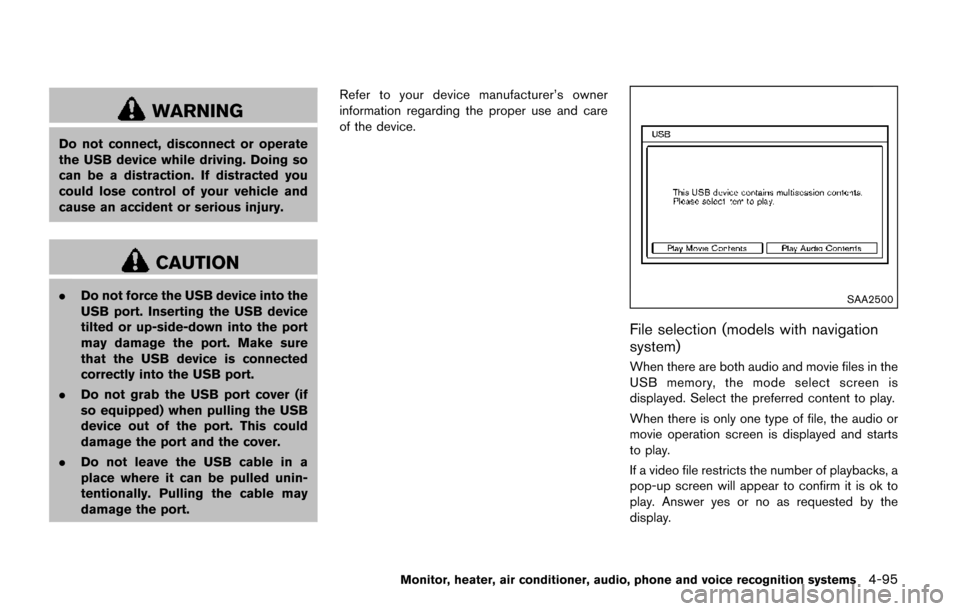
File selection (models with navigation
system)
When there are both audio and movie files in the
USB memory, the mode select screen is
displayed. Select the preferred content to play.
When there is only one type of file, the audio or
movie operation screen is displayed and starts
to play.
If a video file restricts the number of playbacks, a
pop-up screen will appear to confirm it is ok to
play. Answer yes or no as requested by the
display.
Monitor, heater, air conditioner, audio, phone and voice recognition systems4-95
Page 285 of 520
4-96Monitor, heater, air conditioner, audio, phone and voice recognition systems
SAA2501
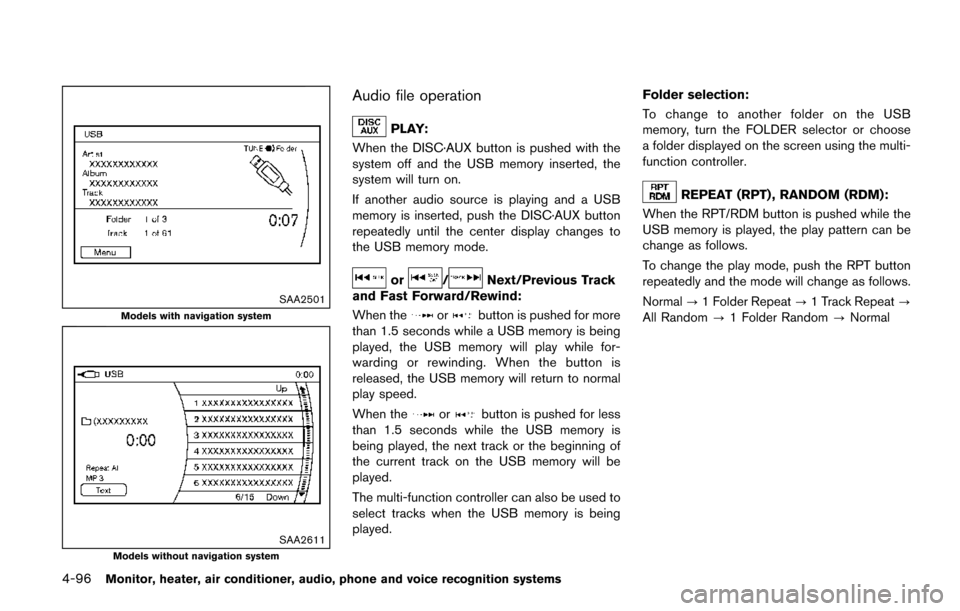
Models with navigation system
SAA2611Models without navigation system
Audio file operation
PLAY:
When the DISC·AUX button is pushed with the
system off and the USB memory inserted, the
system will turn on.
If another audio source is playing and a USB
memory is inserted, push the DISC·AUX button
repeatedly until the center display changes to
the USB memory mode.
or/Next/Previous Track
and Fast Forward/Rewind:
When the
orbutton is pushed for more
than 1.5 seconds while a USB memory is being
played, the USB memory will play while for-
warding or rewinding. When the button is
released, the USB memory will return to normal
play speed.
When the
orbutton is pushed for less
than 1.5 seconds while the USB memory is
being played, the next track or the beginning of
the current track on the USB memory will be
played.
The multi-function controller can also be used to
select tracks when the USB memory is being
played. Folder selection:
To change to another folder on the USB
memory, turn the FOLDER selector or choose
a folder displayed on the screen using the multi-
function controller.
REPEAT (RPT) , RANDOM (RDM):
When the RPT/RDM button is pushed while the
USB memory is played, the play pattern can be
change as follows.
To change the play mode, push the RPT button
repeatedly and the mode will change as follows.
Normal ?1 Folder Repeat ?1 Track Repeat ?
All Random ?1 Folder Random ?Normal
Page 286 of 520
SAA2502
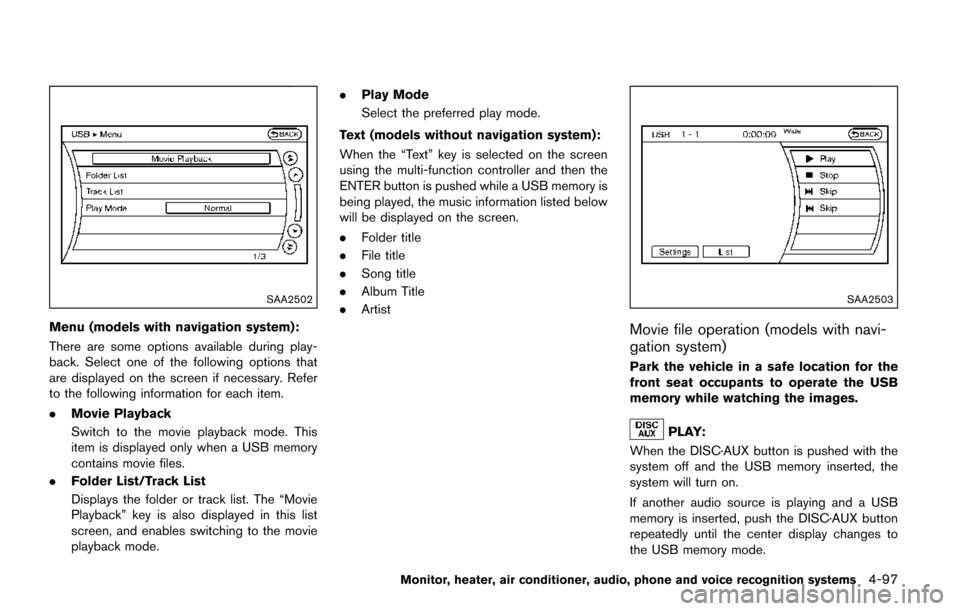
Menu (models with navigation system):
There are some options available during play-
back. Select one of the following options that
are displayed on the screen if necessary. Refer
to the following information for each item.
.Movie Playback
Switch to the movie playback mode. This
item is displayed only when a USB memory
contains movie files.
. Folder List/Track List
Displays the folder or track list. The “Movie
Playback” key is also displayed in this list
screen, and enables switching to the movie
playback mode. .
Play Mode
Select the preferred play mode.
Text (models without navigation system):
When the “Text” key is selected on the screen
using the multi-function controller and then the
ENTER button is pushed while a USB memory is
being played, the music information listed below
will be displayed on the screen.
. Folder title
. File title
. Song title
. Album Title
. Artist
SAA2503
Movie file operation (models with navi-
gation system)
Park the vehicle in a safe location for the
front seat occupants to operate the USB
memory while watching the images.
PLAY:
When the DISC·AUX button is pushed with the
system off and the USB memory inserted, the
system will turn on.
If another audio source is playing and a USB
memory is inserted, push the DISC·AUX button
repeatedly until the center display changes to
the USB memory mode.
Monitor, heater, air conditioner, audio, phone and voice recognition systems4-97
Page 289 of 520
4-100Monitor, heater, air conditioner, audio, phone and voice recognition systems
Refer to your device manufacturer’s owner
information regarding the proper use and care
of the device.
Compatibility
The following models are available:
Models with navigation system:
.Fifth generation iPod
�Š(firmware version
1.2.3 or later)
. iPod Classic
�Š(firmware version 1.1.1 or
later)
. First generation iPod touch
�Š(firmware ver-
sion 2.0.0 or later)
. Second generation iPod touch
�Š(firmware
version 1.2.3 or later)
. First generation iPod nano
�Š(firmware ver-
sion 1.3.1 or later)
. Second generation iPod nano
�Š(firmware
version 1.1.3 or later)
. Third generation iPod nano
�Š(firmware ver-
sion 1.1 or later)
. Fourth generation iPod nano
�Š(firmware
version 1.0.2 or later)
Models without navigation system:
. Fifth generation iPod
�Š(firmware version 1.3)
. First generation iPod Classic�Š(firmware
version 1.1.2 PC) .
Second generation iPod Classic
�Š(firmware
version 2.0 PC)
. First generation iPod touch
�Š(firmware ver-
sion 2.1)
. Second generation iPod touch
�Š(firmware
version 2.1.1)
. First generation iPod nano
�Š(firmware ver-
sion 1.3.1)
. Second generation iPod nano
�Š(firmware
version 1.1.3)
. Third generation iPod nano
�Š(firmware ver-
sion 1.1 PC)
. Third generation iPhone
�Š(firmware version
2.1)
Make sure that the iPod
�Šversion is updated.
Audio main operation
Push the ignition switch to the ACC or ON
position. Then, push the DISC·AUX button
repeatedly to switch to the iPod
�Šmode.
If the system has been turned off while the iPod�Š
was playing, pushing the ON·OFF button will
start the iPod�Š.
play:
When the DISC·AUX button is pushed with the
system off and the iPod
�Šconnected, the system
will turn on. If another audio source is playing
and the iPod
�Šis connected, push the DISC·AUX button repeatedly until the center display
changes to the iPod
�Šmode.
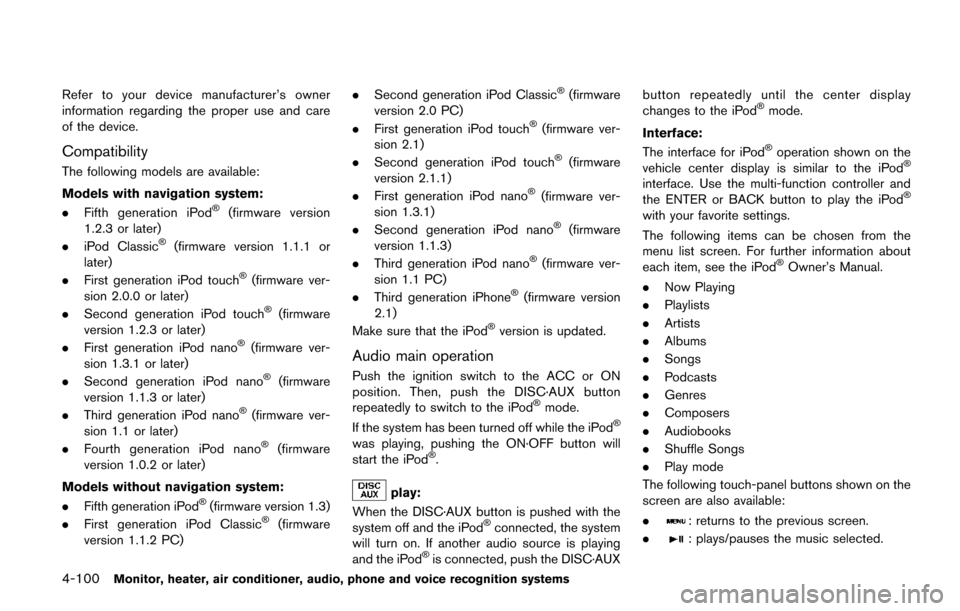
Interface:
The interface for iPod
�Šoperation shown on the
vehicle center display is similar to the iPod�Š
interface. Use the multi-function controller and
the ENTER or BACK button to play the iPod�Š
with your favorite settings.
The following items can be chosen from the
menu list screen. For further information about
each item, see the iPod
�ŠOwner’s Manual.
. Now Playing
. Playlists
. Artists
. Albums
. Songs
. Podcasts
. Genres
. Composers
. Audiobooks
. Shuffle Songs
. Play mode
The following touch-panel buttons shown on the
screen are also available:
.
: returns to the previous screen.
.
: plays/pauses the music selected.
Page 290 of 520
Next/Previous Track and Fast
Forward/Rewind:
When the
orbutton is pushed for more
than 1.5 seconds while the iPod�Šis playing, the
iPod�Šwill play while fast forwarding or rewind-
ing. When the button is released, the iPod�Šwill
return to the normal play speed.
When the
orbutton is pushed for less
than 1.5 seconds while the iPod�Šis playing, the
next track or the beginning of the current track
on the iPod
�Šwill be played.
The multi-function controller can also be used to
select tracks when the iPod
�Šis playing.
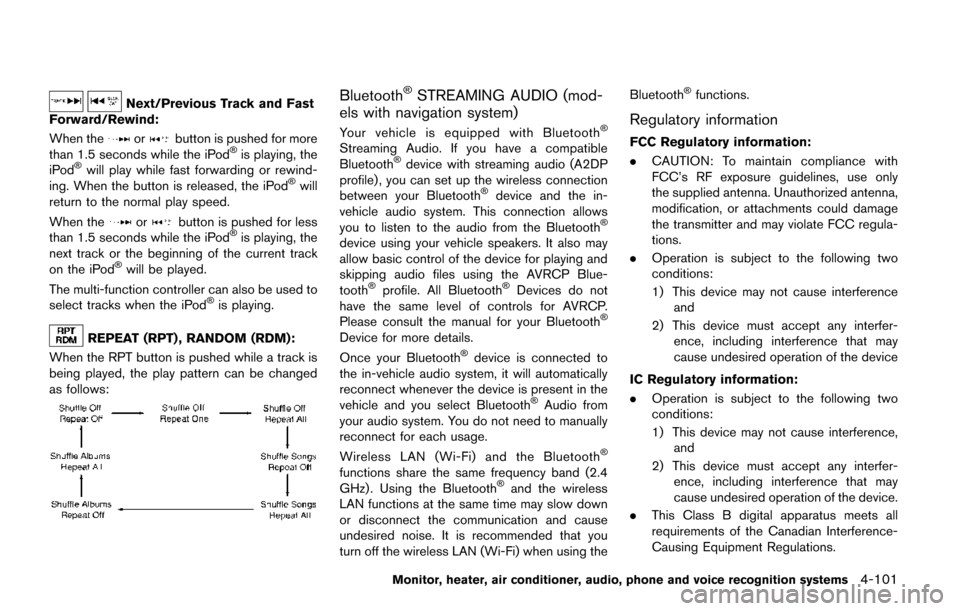
REPEAT (RPT) , RANDOM (RDM):
When the RPT button is pushed while a track is
being played, the play pattern can be changed
as follows:
Bluetooth�ŠSTREAMING AUDIO (mod-
els with navigation system)
Your vehicle is equipped with Bluetooth�Š
Streaming Audio. If you have a compatible
Bluetooth�Šdevice with streaming audio (A2DP
profile) , you can set up the wireless connection
between your Bluetooth
�Šdevice and the in-
vehicle audio system. This connection allows
you to listen to the audio from the Bluetooth
�Š
device using your vehicle speakers. It also may
allow basic control of the device for playing and
skipping audio files using the AVRCP Blue-
tooth
�Šprofile. All Bluetooth�ŠDevices do not
have the same level of controls for AVRCP.
Please consult the manual for your Bluetooth
�Š
Device for more details.
Once your Bluetooth�Šdevice is connected to
the in-vehicle audio system, it will automatically
reconnect whenever the device is present in the
vehicle and you select Bluetooth
�ŠAudio from
your audio system. You do not need to manually
reconnect for each usage.
Wireless LAN (Wi-Fi) and the Bluetooth
�Š
functions share the same frequency band (2.4
GHz) . Using the Bluetooth�Šand the wireless
LAN functions at the same time may slow down
or disconnect the communication and cause
undesired noise. It is recommended that you
turn off the wireless LAN (Wi-Fi) when using the Bluetooth
�Šfunctions.
Regulatory information
FCC Regulatory information:
.
CAUTION: To maintain compliance with
FCC’s RF exposure guidelines, use only
the supplied antenna. Unauthorized antenna,
modification, or attachments could damage
the transmitter and may violate FCC regula-
tions.
. Operation is subject to the following two
conditions:
1) This device may not cause interference
and
2) This device must accept any interfer- ence, including interference that may
cause undesired operation of the device
IC Regulatory information:
. Operation is subject to the following two
conditions:
1) This device may not cause interference,
and
2) This device must accept any interfer- ence, including interference that may
cause undesired operation of the device.
. This Class B digital apparatus meets all
requirements of the Canadian Interference-
Causing Equipment Regulations.
Monitor, heater, air conditioner, audio, phone and voice recognition systems4-101