2017 MERCEDES-BENZ GLA SUV turn signal
[x] Cancel search: turn signalPage 213 of 369
Due to the nature of the system:
R warnings may be issued in error when driving
close to crash barriers or similar solid boun-
daries
R warnings may be interrupted when you are
driving alongside particularly long vehicles,
such as lorries, for a prolonged time
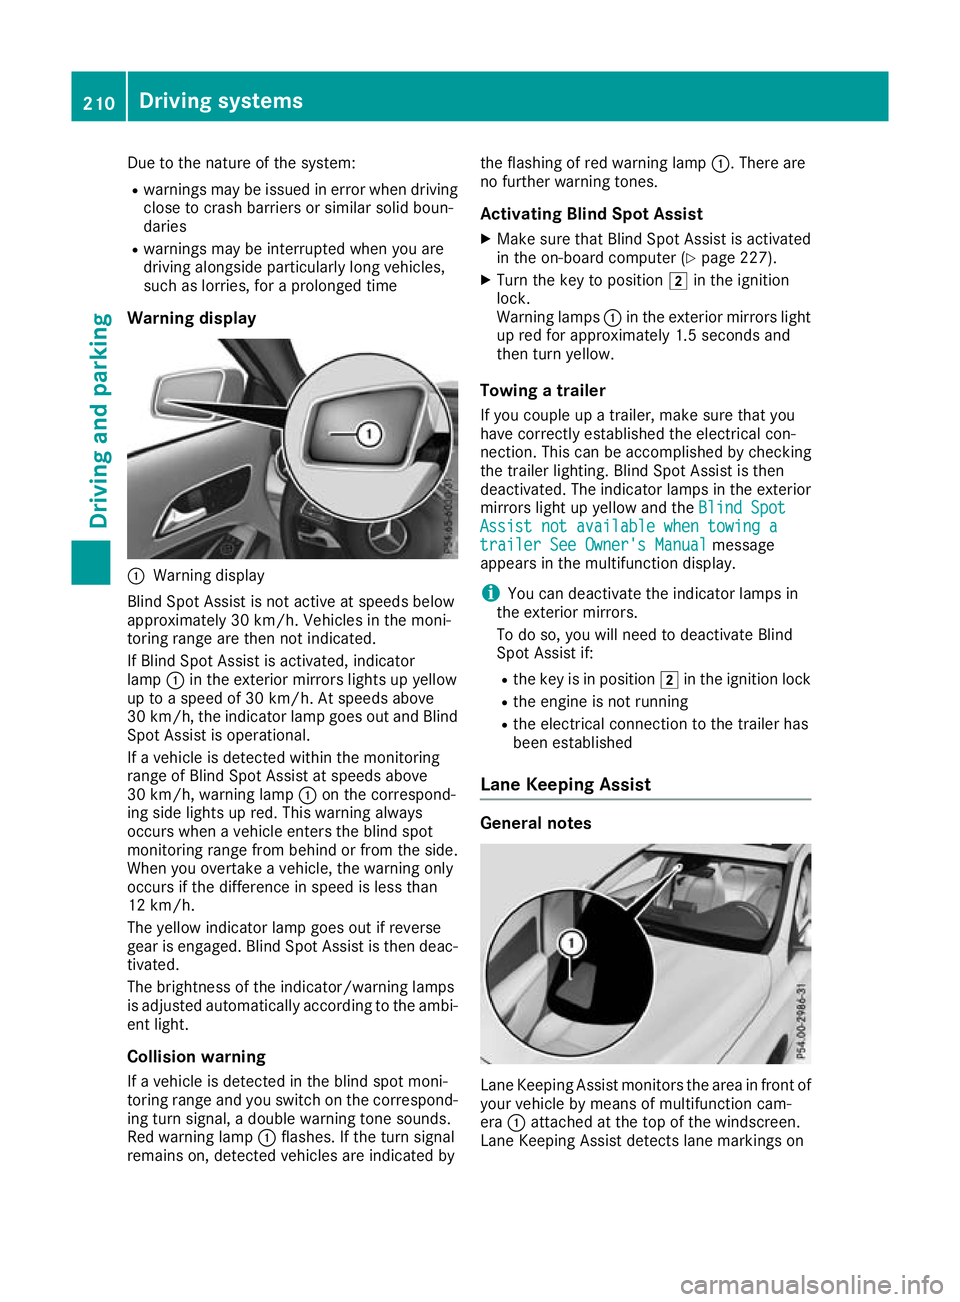
Warning display :
Warning display
Blind Spot Assist is not active at speeds below
approximately 30 km/h. Vehicles in the moni-
toring range are then not indicated.
If Blind Spot Assist is activated, indicator
lamp :in the exterior mirrors lights up yellow
up to a speed of 30 km/h. At speeds above
30 km/h, the indicator lamp goes out and Blind
Spot Assist is operational.
If a vehicle is detected within the monitoring
range of Blind Spot Assist at speeds above
30 km/h, warning lamp :on the correspond-
ing side lights up red. This warning always
occurs when a vehicle enters the blind spot
monitoring range from behind or from the side.
When you overtake a vehicle, the warning only
occurs if the difference in speed is less than
12 km/h.
The yellow indicator lamp goes out if reverse
gear is engaged. Blind Spot Assist is then deac- tivated.
The brightness of the indicator/warning lamps
is adjusted automatically according to the ambi-
ent light.
Collision warning
If a vehicle is detected in the blind spot moni-
toring range and you switch on the correspond-
ing turn signal, a double warning tone sounds.
Red warning lamp :flashes. If the turn signal
remains on, detected vehicles are indicated by the flashing of red warning lamp
:. There are
no further warning tones.
Activating Blind Spot Assist X Make sure that Blind Spot Assist is activated
in the on-board computer (Y page 227).
X Turn the key to position 2in the ignition
lock.
Warning lamps :in the exterior mirrors light
up red for approximately 1.5 second s and
then turn yellow.
Towing a trailer
If you couple up a trailer, make sure that you
have correctly established the electrical con-
nection. This can be accomplished by checking
the trailer lighting. Blind Spot Assist is then
deactivated. The indicator lamps in the exterior
mirrors light up yellow and the Blind Spot
Blind Spot
Assist not available when towing a Assist not available when towing a
trailer See Owner's Manual trailer See Owner's Manual message
appears in the multifunction display.
i You can deactivate the indicator lamps in
the exterior mirrors.
To do so, you will need to deactivate Blind
Spot Assist if:
R the key is in position 2in the ignition lock
R the engine is not running
R the electrical connection to the trailer has
been established
Lane Keeping Assist General notes
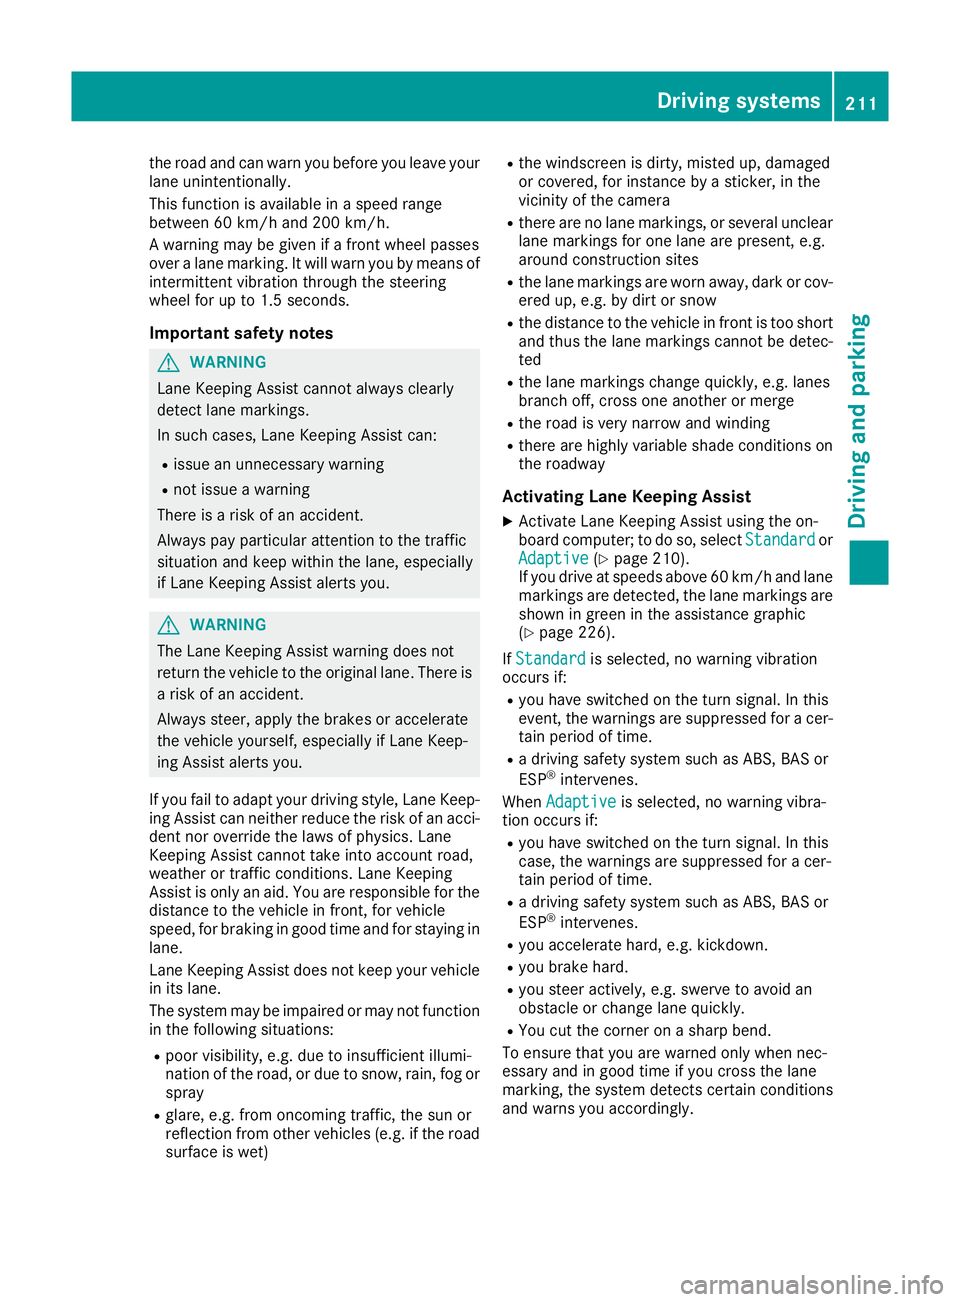
Lane Keeping Assist monitors the area in front of
your vehicle by means of multifunction cam-
era :attached at the top of the windscreen.
Lane Keeping Assist detects lane markings on 210
Driving systemsDriving an
d parking
Page 214 of 369
the road and can warn you before you leave your
lane unintentionally.
This function is available in a speed range
between 60 km/h and 200 km/h.
A warning may be given if a front wheel passes
over a lane marking. It will warn you by means of intermittent vibration through the steering
wheel for up to 1.5 second s.
Im portant safety notes G
WARNING
Lane Keeping Assist cannot always clearly
detect lane markings.
In such cases, Lane Keeping Assist can:
R issue an unnecessary warning
R not issue a warning
There is a risk of an accident.
Always pay particular attention to the traffic
situation and keep within the lane, especially
if Lane Keeping Assist alerts you. G
WARNING
The Lane Keeping Assist warning does not
return the vehicle to the original lane. There is a risk of an accident.
Always steer, apply the brakes or accelerate
the vehicle yourself, especially if Lane Keep-
ing Assist alerts you.
If you fail to adapt your driving style, Lane Keep-
ing Assist can neither reduce the risk of an acci-
dent nor override the laws of physics. Lane
Keeping Assist cannot take into account road,
weather or traffic conditions. Lane Keeping
Assist is only an aid. You are responsible for the distance to the vehicle in front, for vehicle
speed, for braking in good time and for staying in
lane.
Lane Keeping Assist does not keep your vehicle
in its lane.
The system may be impaired or may not function in the following situations:
R poor visibility, e.g. due to insufficient illumi-
nation of the road, or due to snow, rain, fog or
spray
R glare, e.g. from oncoming traffic, the sun or
reflection from other vehicles (e.g. if the road
surface is wet) R
the windscreen is dirty, misted up, damaged
or covered, for instance by a sticker, in the
vicinity of the camera
R there are no lane markings, or several unclear
lane markings for one lane are present, e.g.
around construction sites
R the lane markings are worn away, dark or cov-
ered up, e.g. by dirt or snow
R the distance to the vehicle in front is too short
and thus the lane markings cannot be detec-
ted
R the lane markings change quickly, e.g. lanes
branch off, cross one another or merge
R the road is very narrow and winding
R there are highly variable shade conditions on
the roadway
Activating Lane Keeping Assist X Activate Lane Keeping Assist using the on-
board computer; to do so, select Standard
Standard or
Adaptive Adaptive (Ypage 210).
If you drive at speeds above 60 km/h and lane
markings are detected, the lane markings are
shown in green in the assistance graphic
(Y page 226).
If Standard Standard is selected, no warning vibration
occurs if:
R you have switched on the turn signal. In this
event, the warnings are suppressed for a cer-
tain period of time.
R a driving safety system such as ABS, BAS or
ESP ®
intervenes.
When Adaptive Adaptive is selected, no warning vibra-
tion occurs if:
R you have switched on the turn signal. In this
case, the warnings are suppressed for a cer-
tain period of time.
R a driving safety system such as ABS, BAS or
ESP ®
intervenes.
R you accelerate hard, e.g. kickdown.
R you brake hard.
R you steer actively, e.g. swerve to avoid an
obstacle or change lane quickly.
R You cut the corner on a sharp bend.
To ensure that you are warned only when nec-
essary and in good time if you cross the lane
marking, the system detects certain conditions
and warns you accordingly. Driving systems
211Driving and parking Z
Page 232 of 369
Selecting permanent display
United Kingdom: this function is unavailable.
The Permanent display:
Permanent display: function allows you
to choose whether the multifunction display
always shows the outside temperature or the
speed.
The speed display is inverse to your speedome- ter.
X Press the =or; button on the steering
wheel to select the Settings
Settings menu.
X Press the :or9 button to select the
Instrument cluster Instrument cluster submenu.
X Press ato confirm.
X Press the :or9 button to select the
Permanent display:
Permanent display: function.
The current setting, outside temperature
outside temperature
or Dig. speedo [mph]:
Dig. speedo [mph]:, appears.
X Press the abutton to save the setting.
Lights Switching the daytime driving lights
on/off
The Daytime driving lights Daytime driving lights function can
only be switched on with the engine turned off.
X Press the =or; button on the steering
wheel to select the Settings
Settingsmenu.
X Press the :or9 button to select the
Lights
Lights submenu.
X Press ato confirm.
X Press the :or9 button to select the
Daytime driving lights
Daytime driving lights function.
If the Daytime
Daytime driving
drivinglights
lightsfunction has
been switched on, the cone of light and the
W symbol in the multifunction display are
shown in orange.
X Press the abutton to save the setting.
Further information on daytime driving lights
(Y page 116).
Vehicle Setting permanent SPEEDTRONIC
You can set the permanent limiter using the
Limit speed (winter tyres):
Limit speed (winter tyres): function.
X Press the =or; button on the steering
wheel to select the Settings Settingsmenu.
X Press the :or9 button to select the
Vehicle
Vehicle submenu. X
Press ato confirm.
X Press :or9 to select the Limit
Limit
speed (winter tyres):
speed (winter tyres): function.
You will see the current setting.
X Press ato confirm.
X Press the :or9 button to adjust the
permanent speed limiter in increments of ten
(160 km/h 160 km/h to240 km/h
240 km/h). The Off
Offsetting
switches the permanent speed limiter off.
X Press the abutton to store the entry.
Further information on the permanent speed
limiter (Y page 180).
Activating/deactivating the automatic
locking feature
X Press the =or; button on the steering
wheel to select the Settings Settingsmenu.
X Press the :or9 button to select the
Vehicle
Vehicle submenu.
X Press ato confirm.
X Press the :or9 button to select the
Automatic door locks
Automatic door locks function.
If the Automatic door locks
Automatic door locks function is
switched on, the multifunction display shows
the vehicle's doors in orange.
X Press ato save the setting.
If you activate the Automatic door locks
Automatic door locks
function, the vehicle is centrally locked above a
speed of around 15 km/h.
For further information on the automatic locking feature; see (Y page 87).
Activating/deactivating the acoustic
locking confirmation
If you switch on the Acoustic AcousticLock
Lockfunction, an
acoustic signal sounds when you lock the vehi-
cle.
X Press the =or; button on the steering
wheel to select the Settings Settingsmenu.
X Press the :or9 button to select the
Vehicle
Vehicle submenu.
X Press ato confirm.
X Press the :or9 button to select the
Acoustic Lock
Acoustic Lock function.
If the Acoustic Lock
Acoustic Lock function is activated,
the & symbol in the multifunction display
lights up orange.
X Press the abutton to save the setting. Menus and submenus
229On-board computer and displays Z
Page 249 of 369
Display messages
Possible causes/consequences and
M
MSolutions Further information on the automatic front-passenger front airbag
deactivation system (Y page 49).Lights
i Vehicles with LED light bulbs in the light clusters:
The display message for the corresponding lamp only appears when all the LEDs in the lamp have
failed. Display messages
Possible causes/consequences and
M
MSolutions b
Left cornering Left cornering
light light
orRight cor‐
Right cor‐
nering light
nering light The left or right-hand cornering light is faulty.
X Check whether you are permitted to replace the bulb yourself
(Y page 120).
or
X Consult a qualified specialist workshop. b
Left dipped beam Left dipped beam
or
Right dipped beam
Right dipped beam The left or right-hand dipped-beam headlamp is faulty.
X Check whether you are permitted to replace the bulb yourself
(Y page 120).
or
X Consult a qualified specialist workshop. b
Trailer left tail Trailer left tail
lamp lamp
orTrailer
Trailer
right tail lamp
right tail lamp The left or right-hand trailer tail lamp is faulty.
X Consult the manufacturer's operating instructions. b
Trailer left turn Trailer left turn
signal signal
orTrailer
Trailer
right turn signal
right turn signal The left or right-hand trailer turn signal lamp is faulty.
X
Consult the manufacturer's operating instructions. b
Trailer brake lamp Trailer brake lamp The trailer brake lamp is faulty.
X Consult the manufacturer's operating instructions. b
Rear left indicator Rear left indicator
or Rear right indi‐
Rear right indi‐
cator
cator The rear left-hand or rear right-hand turn signal is faulty.
X Check whether you are permitted to replace the bulb yourself
(Y page 120).
or
X Consult a qualified specialist workshop. b
Front Front
left
leftindicator
indicator
or Front right
Front right
indicator
indicator The front left-hand or front right-hand turn signal is faulty.
X Check whether you are permitted to replace the bulb yourself
(Y page 120).
or
X Consult a qualified specialist workshop. 246
Display
messagesOn-board computer and displays
Page 250 of 369
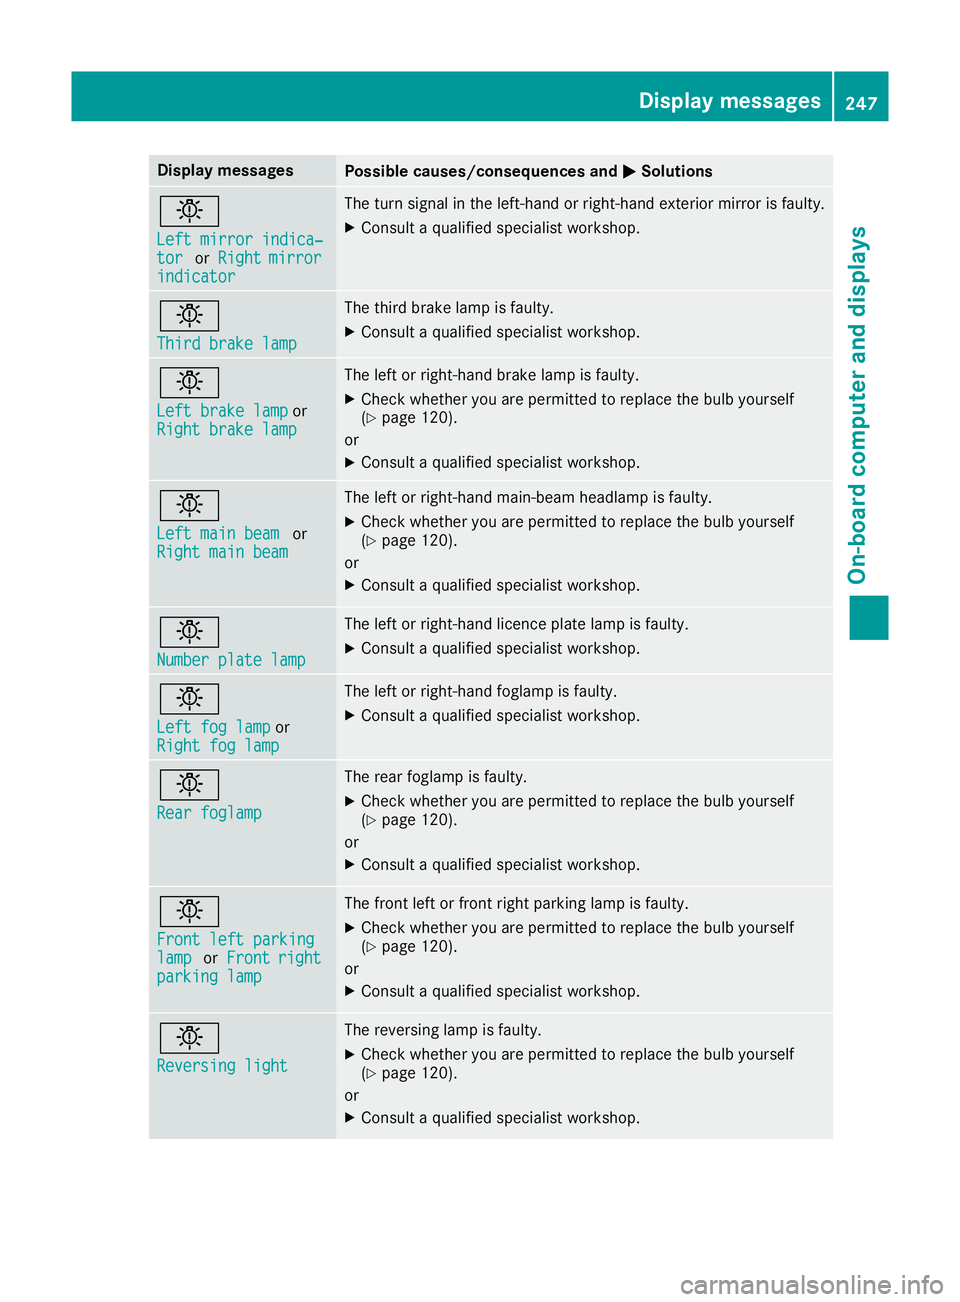
Display messages
Possible causes/consequences and
M
MSolutions b
Left mirror indica‐ Left mirror indica‐
tor tor
orRight
Right mirror
mirror
indicator
indicator The turn signal in the left-hand or right-hand exterior mirror is faulty.
X Consult a qualified specialist workshop. b
Third brake lamp Third brake lamp The third brake lamp is faulty.
X Consult a qualified specialist workshop. b
Left brake lamp Left brake lamp
or
Right brake lamp
Right brake lamp The left or right-hand brake lamp is faulty.
X Check whether you are permitted to replace the bulb yourself
(Y page 120).
or
X Consult a qualified specialist workshop. b
Left main beam Left main beam
or
Right main beam
Right main beam The left or right-hand main-beam headlamp is faulty.
X Check whether you are permitted to replace the bulb yourself
(Y page 120).
or X Consult a qualified specialist workshop. b
Number plate lamp Number plate lamp The left or right-hand licence plate lamp is faulty.
X Consult a qualified specialist workshop. b
Left fog lamp Left fog lamp
or
Right fog lamp
Right fog lamp The left or right-hand foglamp is faulty.
X Consult a qualified specialist workshop. b
Rear foglamp Rear foglamp The rear foglamp is faulty.
X Check whether you are permitted to replace the bulb yourself
(Y page 120).
or X Consult a qualified specialist workshop. b
Front left parking Front left parking
lamp lamp
orFront
Front right
right
parking lamp
parking lamp The front left or front right parking lamp is faulty.
X Check whether you are permitted to replace the bulb yourself
(Y page 120).
or X Consult a qualified specialist workshop. b
Reversing light Reversing light The reversing lamp is faulty.
X Check whether you are permitted to replace the bulb yourself
(Y page 120).
or
X Consult a qualified specialist workshop. Display
messages
247On-board computer and displays Z
Page 314 of 369
X
Fold the wiper arms away from the wind-
screen.
X Clean the wiper blades carefully using a damp
cloth.
X Fold the windscreen wipers back again before
switching on the ignition.
Cleaning the exterior lighting !
Only use cleaning agents or cleaning cloths
that are suitable for plastic lenses. Unsuitable
cleaning agents or cleaning cloths could
scratch or damage the plastic lenses of the
exterior lighting.
X Clean the plastic lenses of the exterior light-
ing using a wet sponge and a mild cleaning
agent, e.g. Mercedes-Benz car shampoo or
cleaning cloths.
Cleaning the mirror turn signal !
Only use cleaning agents or cleaning cloths
that are suitable for plastic lenses. Unsuitable
cleaning agents or cleaning cloths could
scratch or damage the plastic lenses of the
mirror turn signals.
X Clean the plastic lenses of the mirror turn sig-
nals in the exterior mirror housing using a wet sponge and mild cleaning agent, e.g.
Mercedes-Benz car shampoo or cleaning
cloths.
Cleaning the sensors !
If you clean the sensors with a high-pressure
cleaner, make sure that you keep a distance
of at least 30 cm between the vehicle and the high-pressure cleaner nozzle. Information
about the correct distance is available from
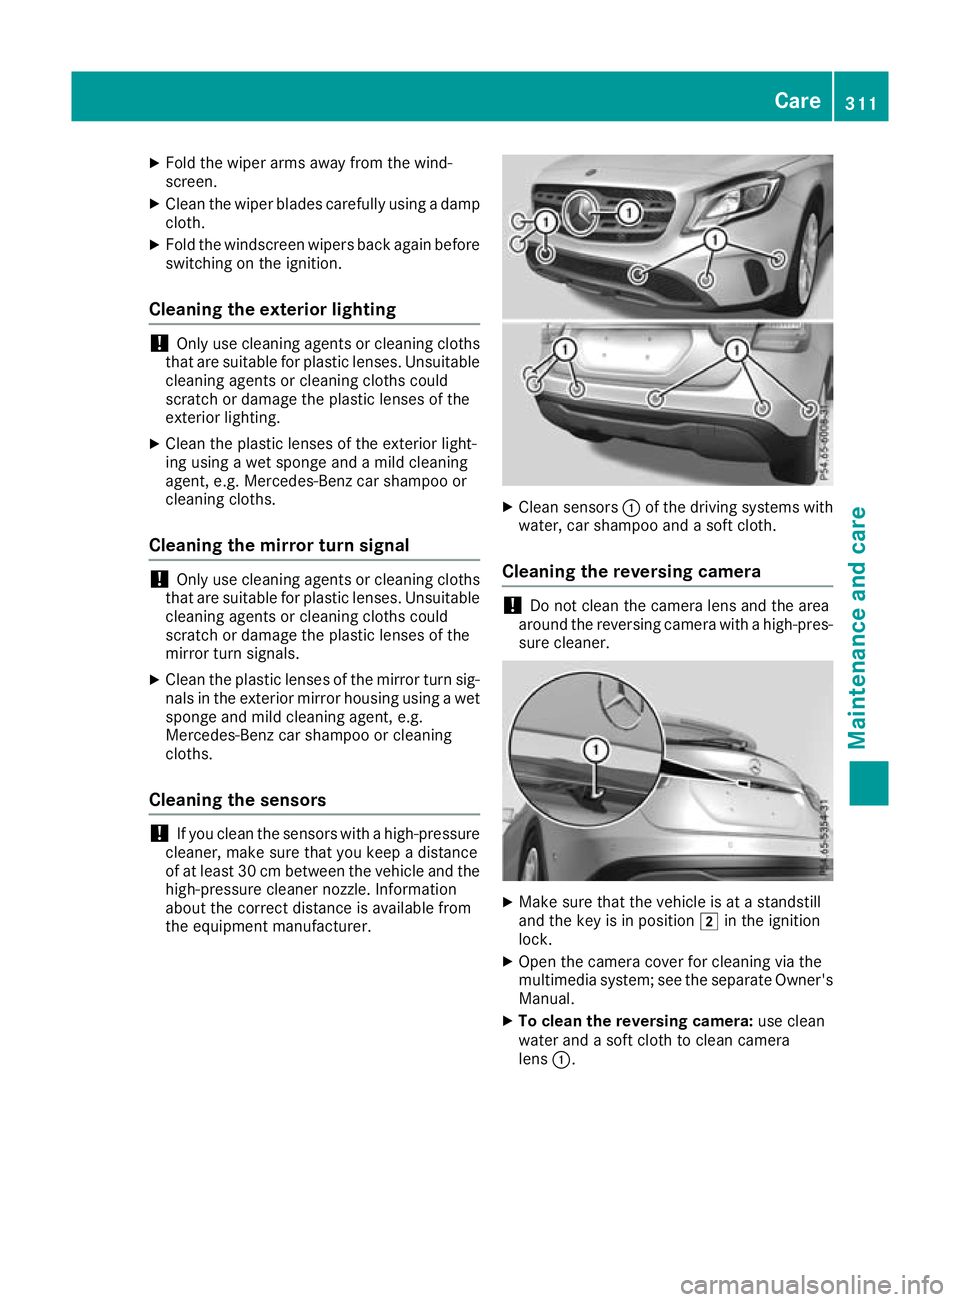
the equipment manufacturer. X
Clean sensors :of the driving systems with
water, car shampoo and a soft cloth.
Cleaning the reversing camera !
Do not clean the camera lens and the area
around the reversing camera with a high-pres-
sure cleaner. X
Make sure that the vehicle is at a standstill
and the key is in position 2in the ignition
lock.
X Open the camera cover for cleaning via the
multimedia system; see the separate Owner's
Manual.
X To clean the reversing camera: use clean
water and a soft cloth to clean camera
lens :. Care
311Maintenance and care Z
Page 333 of 369
X
Depress the brake pedal and keep it
depressed.
X Shift the automatic transmission to position
i.
Vehicles with manual transmission: X Turn the key to position 2in the ignition
lock.
X When the vehicle is stationary, depress the
brake pedal and keep it depressed.
X Depress the clutch pedal fully and engage
neutral.
Vehicles with manual or automatic trans-
mission:
X Leave the key in position 2in the ignition
lock.
X Release the brake pedal.
X Release the electric parking brake.
X Switch on the hazard warning lamps
(Y page 118).
i In order to signal a change of direction when
towing the vehicle with the hazard warning
lamps switched on, use the combination
switch as usual. In this case, only the turn
signals for the desired direction flash. When
you reset the combination switch, the hazard warning lamps start flashing again. Transporting the vehicle
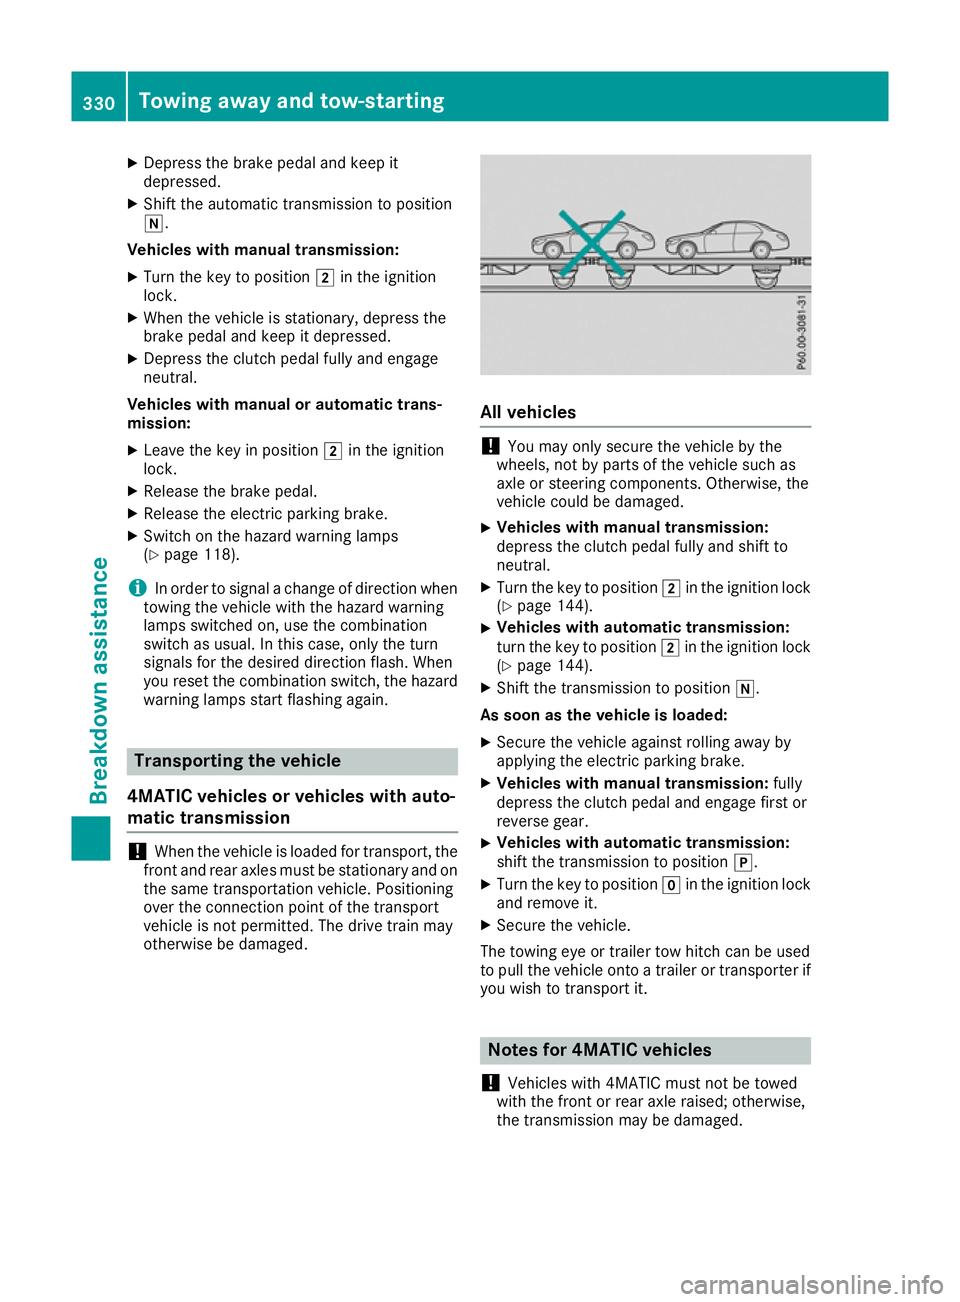
4MATIC vehicles or vehicles with auto-
matic transmission !
When the vehicle is loaded for transport, the
front and rear axles must be stationary and on
the same transportation vehicle. Positioning
over the connection point of the transport
vehicle is not permitted. The drive train may
otherwise be damaged. All vehicles
!
You may only secure the vehicle by the
wheels, not by parts of the vehicle such as
axle or steering components. Otherwise, the
vehicle could be damaged.
X Vehicles with manual transmission:
depress the clutch pedal fully and shift to
neutral.
X Turn the key to position 2in the ignition lock
(Y page 144).
X Vehicles with automatic transmission:
turn the key to position
2in the ignition lock
(Y page 144).
X Shift the transmission to position i.
As soon as the vehicle is loaded:
X Secure the vehicle against rolling away by
applying the electric parking brake.
X Vehicles with manual transmission: fully
depress the clutch pedal and engage first or
reverse gear.
X Vehicles with automatic transmission:
shift the transmission to position
j.
X Turn the key to position gin the ignition lock
and remove it.
X Secure the vehicle.
The towing eye or trailer tow hitch can be used
to pull the vehicle onto a trailer or transporter if
you wish to transport it. Notes for 4MATIC vehicles
! Vehicles with 4MATIC must not be towed
with the front or rear axle raised; otherwise,
the transmission may be damaged. 330
Towing away and tow-startingBreakdown assistance