2017 MERCEDES-BENZ GLA SUV rear view mirror
[x] Cancel search: rear view mirrorPage 117 of 369
If you come into contact with the electrolyte,
observe the following:
R Rinse off the electrolyte from your skin
immediately with water.
R Immediately rinse the electrolyte out of
your eyes thoroughly with clean water.
R If the electrolyte is swallowed, immediately
rinse your mouth out thoroughly. Do not
induce vomiting.
R If electrolyte comes into contact with your
skin or hair or is swallowed, seek medical
attention immediately.
R Immediately change out of clothing which
has come into contact with electrolyte.
R If an allergic reaction occurs, seek medical
attention immediately.
The "Automatic anti-dazzle mirrors" function is
only available if the vehicle is equipped with the
"Mirror package".
The rear-view mirror and the exterior mirror on
the driver's side automatically go into anti-daz-
zle mode if:
R the ignition is switched on and
R incident light from headlamps strikes the sen-
sor in the rear-view mirror
The mirrors do not go into anti-dazzle mode if
reverse gear is engaged or if the interior lighting
is switched on. Parking position of the exterior mirror
on the front-passenger side
Setting and storing the parking position You can adjust the front-passenger-side exterior
mirror such that you can see the rear wheel on
that side as soon as you engage reverse gear.
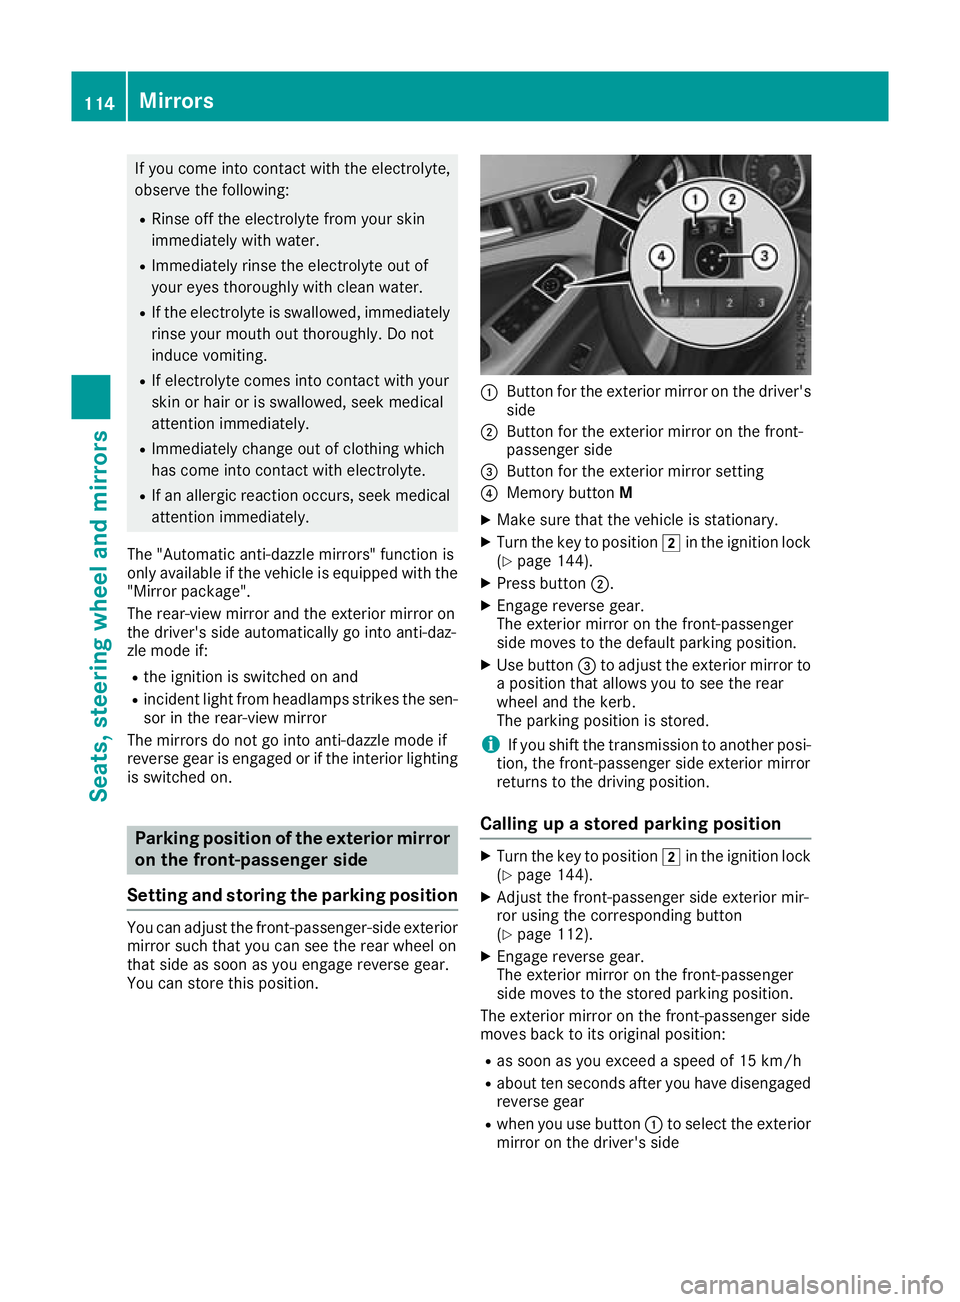
You can store this position. :
Button for the exterior mirror on the driver's
side
; Button for the exterior mirror on the front-
passenger side
= Button for the exterior mirror setting
? Memory button M
X Make sure that the vehicle is stationary.
X Turn the key to position 2in the ignition lock
(Y page 144).
X Press button ;.
X Engage reverse gear.
The exterior mirror on the front-passenger
side moves to the default parking position.
X Use button =to adjust the exterior mirror to
a position that allows you to see the rear
wheel and the kerb.
The parking position is stored.
i If you shift the transmission to another posi-
tion, the front-passenger side exterior mirror
returns to the driving position.
Calling up a stored parking position X
Turn the key to position 2in the ignition lock
(Y page 144).
X Adjust the front-passenger side exterior mir-
ror using the corresponding button
(Y page 112).
X Engage reverse gear.
The exterior mirror on the front-passenger
side moves to the stored parking position.
The exterior mirror on the front-passenger side
moves back to its original position:
R as soon as you exceed a speed of 15 km/h
R about ten seconds after you have disengaged
reverse gear
R when you use button :to select the exterior
mirror on the driver's side 114
MirrorsSeats, steering wheel and mirrors
Page 203 of 369
Cancelling Parking Pilot
X
Stop the movement of the multifunction
steering wheel or steer yourself.
Parking Pilot is cancelled at once. The Park‐ Park‐
ing Pilot cancelled
ing Pilot cancelled message appears in
the multifunction display.
or X Press the PARKTRONIC button (Y page 195).
Parking Assist PARKTRONIC is switched off
and Parking Pilot is immediately cancelled.
The Parking Pilot cancelled
Parking Pilot cancelled message
appears in the multifunction display.
Parking Pilot is cancelled automatically when:
R the electric parking brake is applied
R transmission position jis selected in vehi-
cles with automatic transmission
R parking using Parking Pilot is no longer pos-
sible
R you are driving at a speed greater than
10 km/h
R a wheel spins and ESP ®
intervenes or fails. In
such cases the ÷warning lamp lights up
on the instrument cluster
A warning tone sounds. The parking symbol dis-
appears and the multifunction display shows the
Parking Pilot cancelled
Parking Pilot cancelled message.
When Parking Pilot is cancelled, you must steer and brake again yourself.
If a system malfunction occurs, the vehicle is
braked to a standstill. To drive on, depress the
accelerator pedal again. Rear view camera
General notes Reversing camera
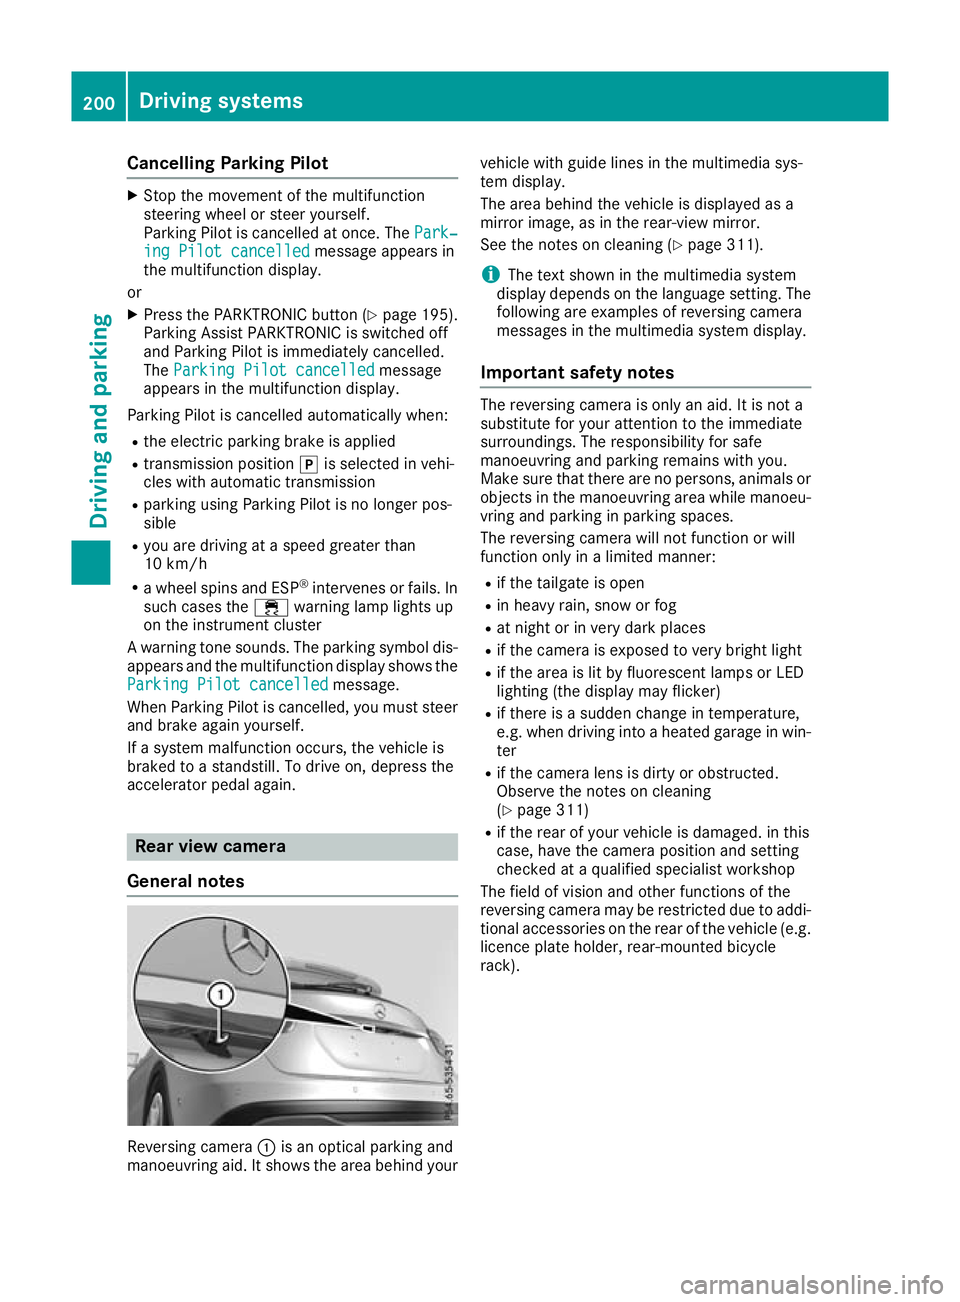
:is an optical parking and
manoeuvring aid. It shows the area behind your vehicle with guide lines in the multimedia sys-
tem display.
The area behind the vehicle is displayed as a
mirror image, as in the rear-view mirror.
See the notes on cleaning (Y
page 311).
i The text shown in the multimedia system
display depends on the language setting. The following are examples of reversing camera
messages in the multimedia system display.
Important safety notes The reversing camera is only an aid. It is not a
substitute for your attention to the immediate
surroundings. The responsibility for safe
manoeuvring and parking remains with you.
Make sure that there are no persons, animals or
objects in the manoeuvring area while manoeu-
vring and parking in parking spaces.
The reversing camera will not function or will
function only in a limited manner:
R if the tailgate is open
R in heavy rain, snow or fog
R at night or in very dark places
R if the camera is exposed to very bright light
R if the area is lit by fluorescent lamps or LED
lighting (the display may flicker)
R if there is a sudden change in temperature,
e.g. when driving into a heated garage in win-
ter
R if the camera lens is dirty or obstructed.
Observe the notes on cleaning
(Y page 311)
R if the rear of your vehicle is damaged. in this
case, have the camera position and setting
checked at a qualified specialist workshop
The field of vision and other functions of the
reversing camera may be restricted due to addi-
tional accessories on the rear of the vehicle (e.g. licence plate holder, rear-mounted bicycle
rack). 200
Driving systemsDriving and parking
Page 204 of 369
Activating/deactivating the reversing
camera X
To activate: make sure that the key is in
position 2in the ignition lock.
X Make sure that the Activation by R gear
Activation by R gear
function is selected in the multimedia system; see the Digital Owner's Manual.
X Engage reverse gear.
The area behind the vehicle is shown with
guide lines in the multimedia system display.
The image from the reversing camera is avail-
able throughout the manoeuvring process.
X To switch the function mode for vehicles
with trailer tow hitch: using the controller,
select symbol :for the "Reverse parking"
function or symbol ;for "Coupling up a
trailer".
The symbol of the selected function is high-
lighted.
To deactivate: the reversing camera deacti-
vates if you shift the transmission to jor after
driving forwards a short distance.
Messages in the multimedia system dis-
play The reversing camera may show a distorted view
of obstacles, show them incorrectly or not at all. Obstacles are not shown by the reversing cam-
era in the following locations:
R very close to the rear bumper
R under the rear bumper
R in the area immediately above the recessed
tailgate handle
! Objects not at ground level may appear to
be further away than they actually are, e.g.:
R the bumper of a parked vehicle
R the drawbar of a trailer R
the ball coupling of a trailer tow hitch
R the rear section of an HGV
R a slanted post
Use the guidelines only for orientation.
Approach objects no further than the bottom-
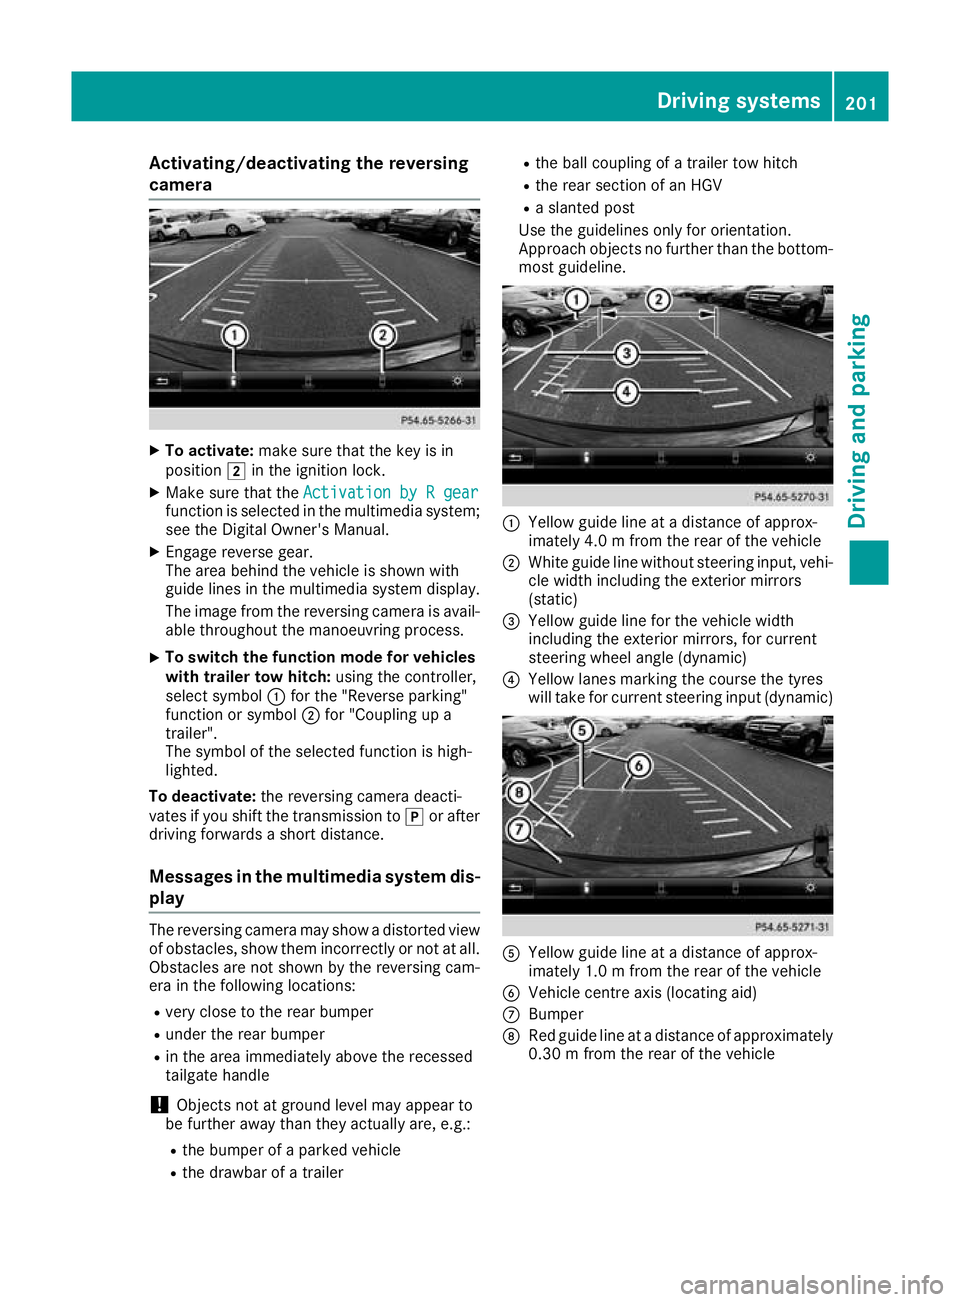
most guideline. :
Yellow guide line at a distance of approx-
imately 4.0 m from the rear of the vehicle
; White guide line without steering input, vehi-
cle width including the exterior mirrors
(static)
= Yellow guide line for the vehicle width
including the exterior mirrors, for current
steering wheel angle (dynamic)
? Yellow lanes marking the course the tyres
will take for current steering input (dynamic) A
Yellow guide line at a distance of approx-
imately 1.0 m from the rear of the vehicle
B Vehicle centre axis (locating aid)
C Bumper
D Red guide line at a distance of approximately
0.30 m from the rear of the vehicle Driving systems
201Driving and parking Z
Page 207 of 369
X
Select symbol ?using the controller.
The "Coupling up a trailer" function is selec-
ted. The distance specifications now apply
only to objects that are at the same level as
the ball coupling.
X Reverse carefully, making sure that trailer
drawbar locating aid ;points approximately
in the direction of trailer drawbar =.
X Reverse carefully until trailer drawbar =rea-
ches the red guide line.
The distance between the trailer drawbar and
the red guide line is now approximately
0.30 m.
X Couple up the trailer (Y page 213).
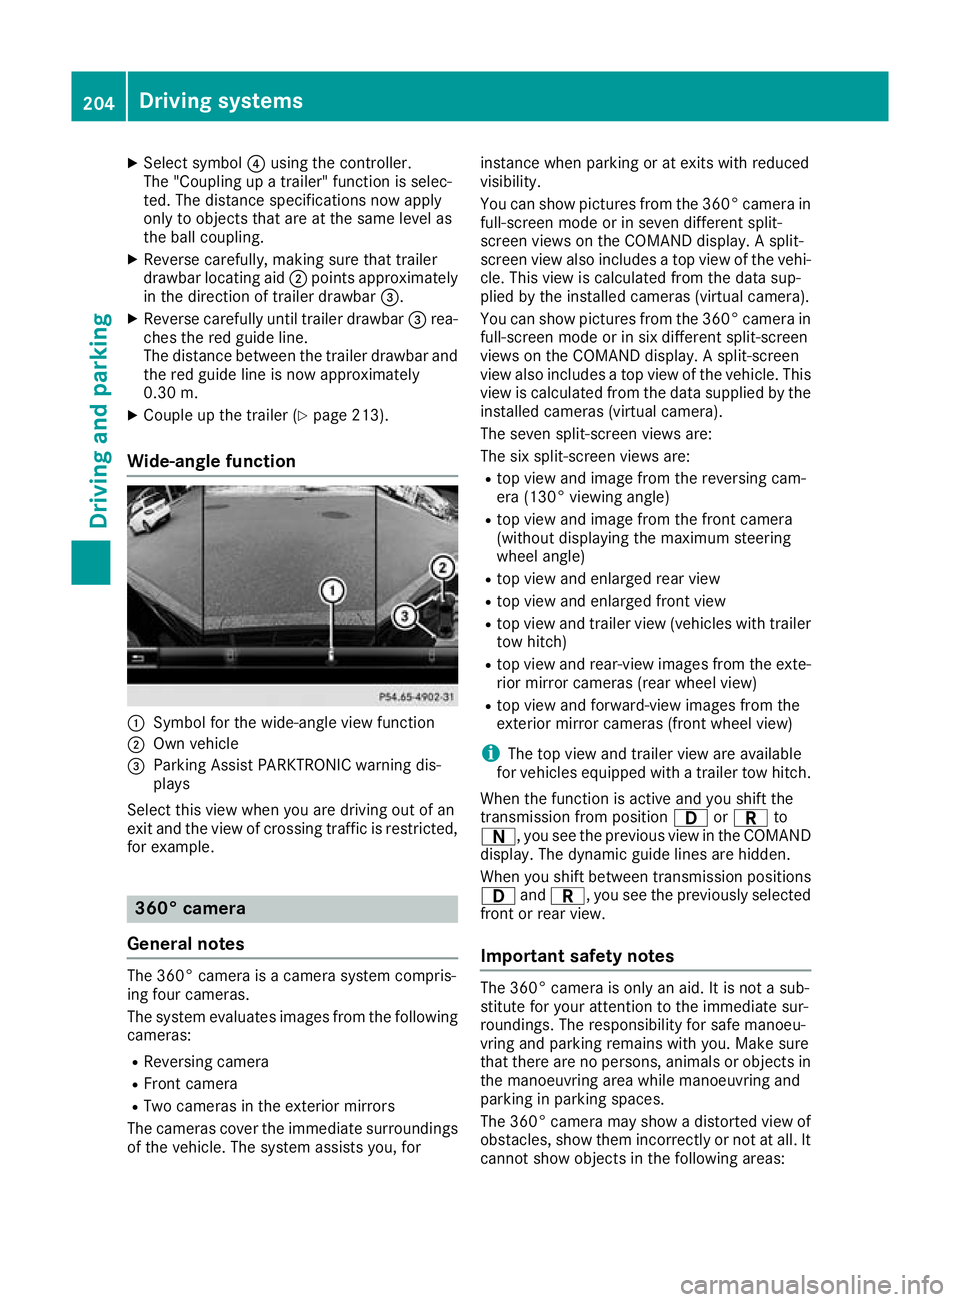
Wide-angle function :
Symbol for the wide-angle view function
; Own vehicle
= Parking Assist PARKTRONIC warning dis-
plays
Select this view when you are driving out of an
exit and the view of crossing traffic is restricted, for example. 360° camera
General notes The 360° camera is a camera system compris-
ing four cameras.
The system evaluates images from the following
cameras:
R Reversing camera
R Front camera
R Two cameras in the exterior mirrors
The cameras cover the immediate surroundings
of the vehicle. The system assists you, for instance when parking or at exits with reduced
visibility.
You can show pictures from the 360° camera in
full-screen mode or in seven different split-
screen views on the COMAND display. A split-
screen view also includes a top view of the vehi-
cle. This view is calculated from the data sup-
plied by the installed cameras (virtual camera).
You can show pictures from the 360° camera in
full-screen mode or in six different split-screen
views on the COMAND display. A split-screen
view also includes a top view of the vehicle. This
view is calculated from the data supplied by the installed cameras (virtual camera).
The seven split-screen views are:
The six split-screen views are:
R top view and image from the reversing cam-
era (130° viewing angle)
R top view and image from the front camera
(without displaying the maximum steering
wheel angle)
R top view and enlarged rear view
R top view and enlarged front view
R top view and trailer view (vehicles with trailer
tow hitch)
R top view and rear-view images from the exte-
rior mirror cameras (rear wheel view)
R top view and forward-view images from the
exterior mirror cameras (front wheel view)
i The top view and trailer view are available
for vehicles equipped with a trailer tow hitch.
When the function is active and you shift the
transmission from position 7orC to
A, you see the previous view in the COMAND
display. The dynamic guide lines are hidden.
When you shift between transmission positions 7 andC, you see the previously selected
front or rear view.
Important safety notes The 360° camera is only an aid. It is not a sub-
stitute for your attention to the immediate sur-
roundings. The responsibility for safe manoeu-
vring and parking remains with you. Make sure
that there are no persons, animals or objects in
the manoeuvring area while manoeuvring and
parking in parking spaces.
The 360° camera may show a distorted view of
obstacles, show them incorrectly or not at all. It
cannot show objects in the following areas: 204
Driving systemsDriving an
d parking
Page 208 of 369
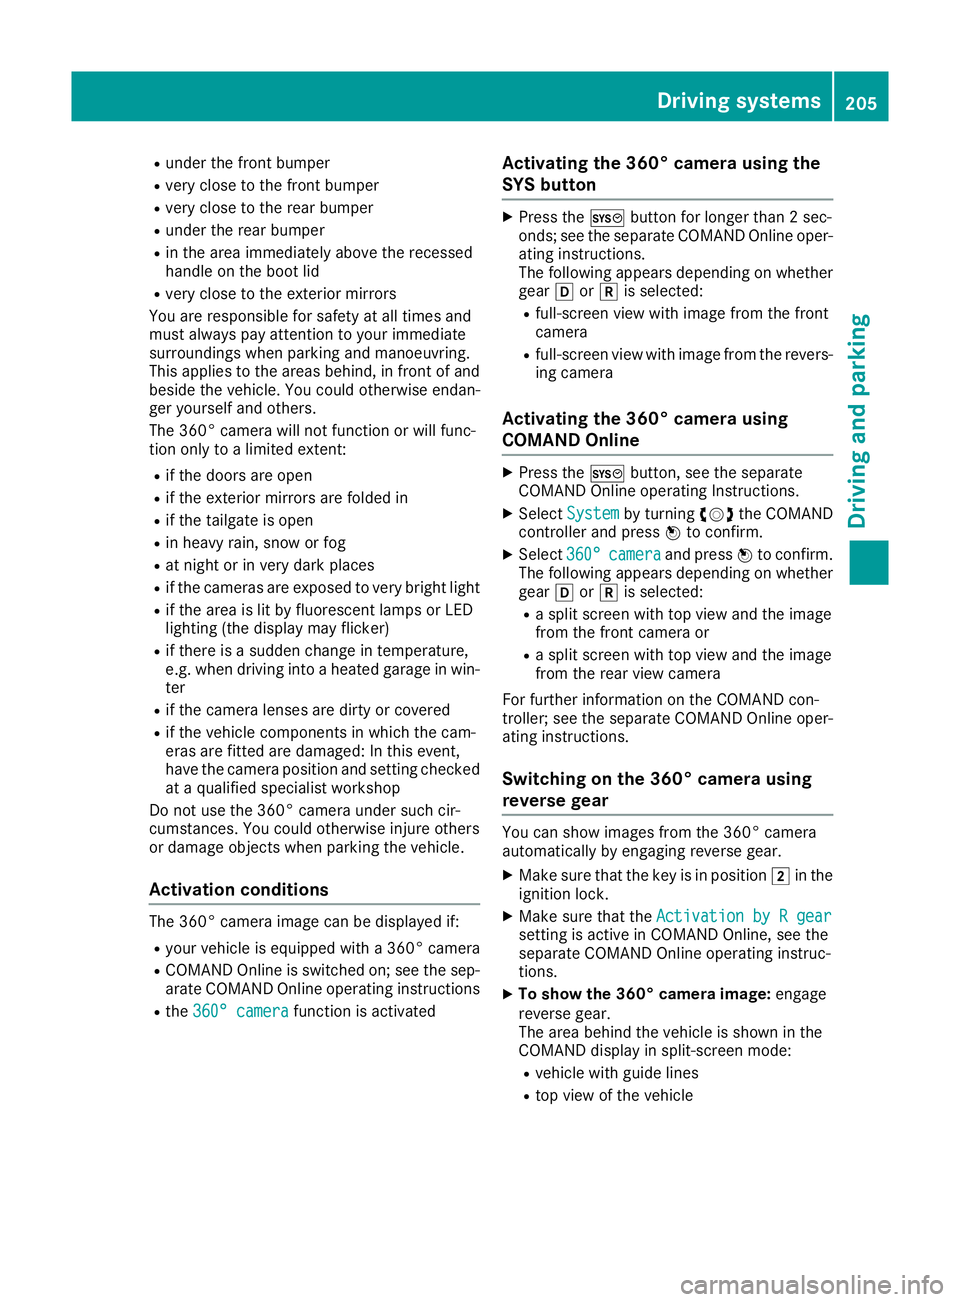
R
under the front bumper
R very close to the front bumper
R very close to the rear bumper
R under the rear bumper
R in the area immediately above the recessed
handle on the boot lid
R very close to the exterior mirrors
You are responsible for safety at all times and
must always pay attention to your immediate
surroundings when parking and manoeuvring.
This applies to the areas behind, in front of and
beside the vehicle. You could otherwise endan-
ger yourself and others.
The 360° camera will not function or will func-
tion only to a limited extent:
R if the doors are open
R if the exterior mirrors are folded in
R if the tailgate is open
R in heavy rain, snow or fog
R at night or in very dark places
R if the cameras are exposed to very bright light
R if the area is lit by fluorescent lamps or LED
lighting (the display may flicker)
R if there is a sudden change in temperature,
e.g. when driving into a heated garage in win- ter
R if the camera lenses are dirty or covered
R if the vehicle components in which the cam-
eras are fitted are damaged: In this event,
have the camera position and setting checked at a qualified specialist workshop
Do not use the 360° camera under such cir-
cumstances. You could otherwise injure others
or damage objects when parking the vehicle.
Activation conditions The 360° camera image can be displayed if:
R your vehicle is equipped with a 360° camera
R COMAND Online is switched on; see the sep-
arate COMAND Online operating instructions
R the 360° camera 360° camera function is activated Activating the 360° camera using the
SYS button X
Press the Wbutton for longer than 2 sec-
onds; see the separate COMAND Online oper-
ating instructions.
The following appears depending on whether
gear hork is selected:
R full-screen view with image from the front
camera
R full-screen view with image from the revers-
ing camera
Activating the 360° camera using
COMAND Online X
Press the Wbutton, see the separate
COMAND Online operating Instructions.
X Select System System by turning cVdthe COMAND
controller and press Wto confirm.
X Select 360°
360°camera
camera and press Wto confirm.
The following appears depending on whether
gear hork is selected:
R a split screen with top view and the image
from the front camera or
R a split screen with top view and the image
from the rear view camera
For further information on the COMAND con-
troller; see the separate COMAND Online oper-
ating instructions.
Switching on the 360° camera using
reverse gear You can show images from the 360° camera
automatically by engaging reverse gear.
X Make sure that the key is in position 2in the
ignition lock.
X Make sure that the Activation by R gear Activation by R gear
setting is active in COMAND Online, see the
separate COMAND Online operating instruc-
tions.
X To show the 360° camera image: engage
reverse gear.
The area behind the vehicle is shown in the
COMAND display in split-screen mode:
R vehicle with guide lines
R top view of the vehicle Driving systems
205Driving and parking Z
Page 300 of 369
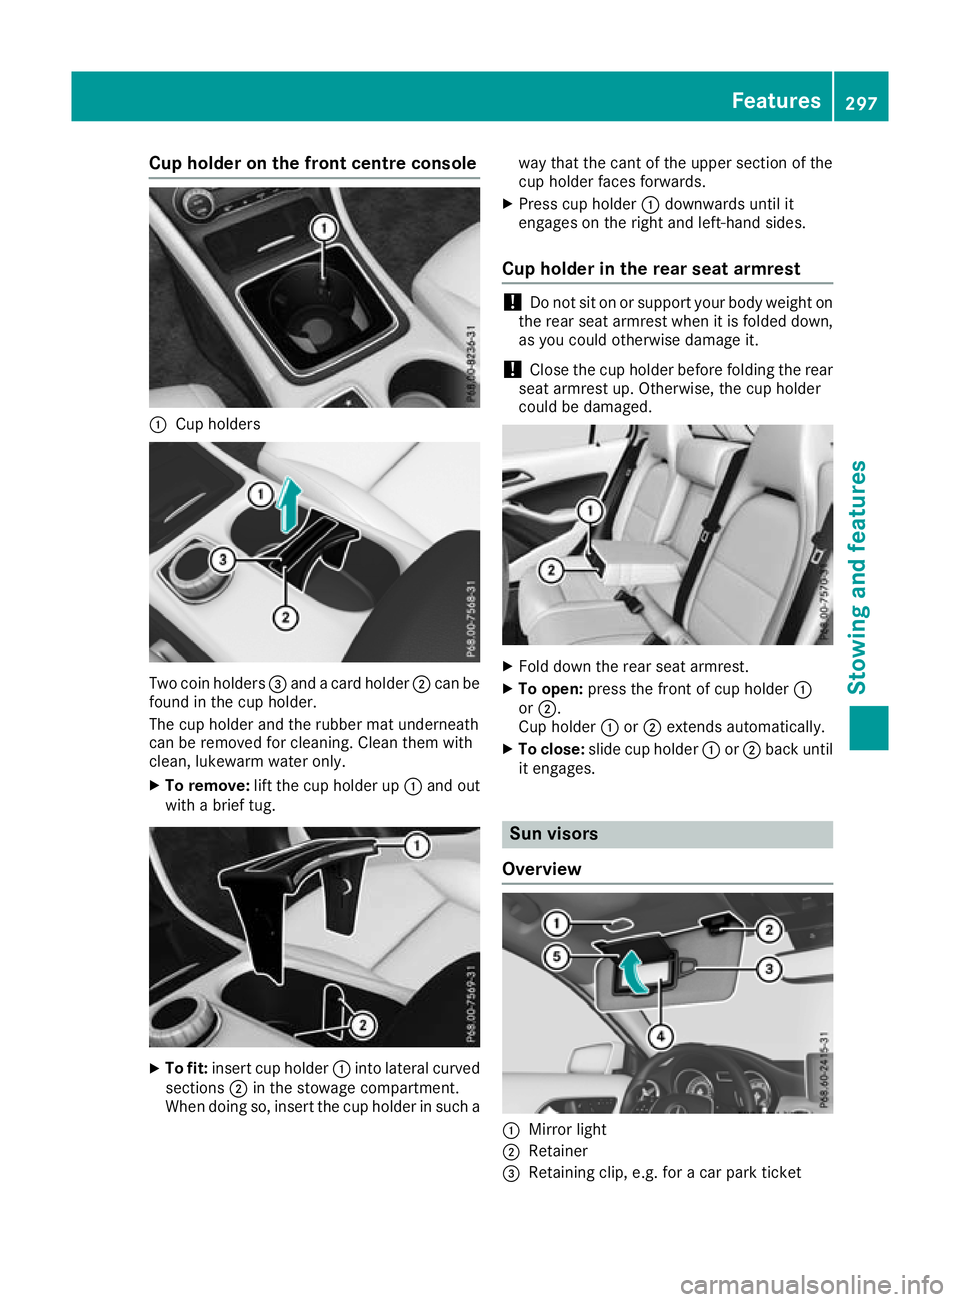
Cup holder on the front centre console
:
Cup holders Two coin holders
=and a card holder ;can be
found in the cup holder.
The cup holder and the rubber mat underneath
can be removed for cleaning. Clean them with
clean, lukewarm water only.
X To remove: lift the cup holder up :and out
with a brief tug. X
To fit: insert cup holder :into lateral curved
sections ;in the stowage compartment.
When doing so, insert the cup holder in such a way that the cant of the upper section of the
cup holder faces forwards.
X Press cup holder :downwards until it
engages on the right and left-hand sides.
Cup holder in the rear seat armrest !
Do not sit on or support your body weight on
the rear seat armrest when it is folded down,
as you could otherwise damage it.
! Close the cup holder before folding the rear
seat armrest up. Otherwise, the cup holder
could be damaged. X
Fold down the rear seat armrest.
X To open: press the front of cup holder :
or ;.
Cup holder :or; extends automatically.
X To close: slide cup holder :or; back until
it engages. Sun visors
Overview :
Mirror light
; Retainer
= Retaining clip, e.g. for a car park ticket Features
297Stowing and features Z