2017 MERCEDES-BENZ E-CLASS SALOON tow
[x] Cancel search: towPage 237 of 497
%
On completion of the parking procedure, the
ve hicle is loc ked.
Re quirements:
R The mobile phone and Remo teParking Assist
are connec ted (→ page 236)
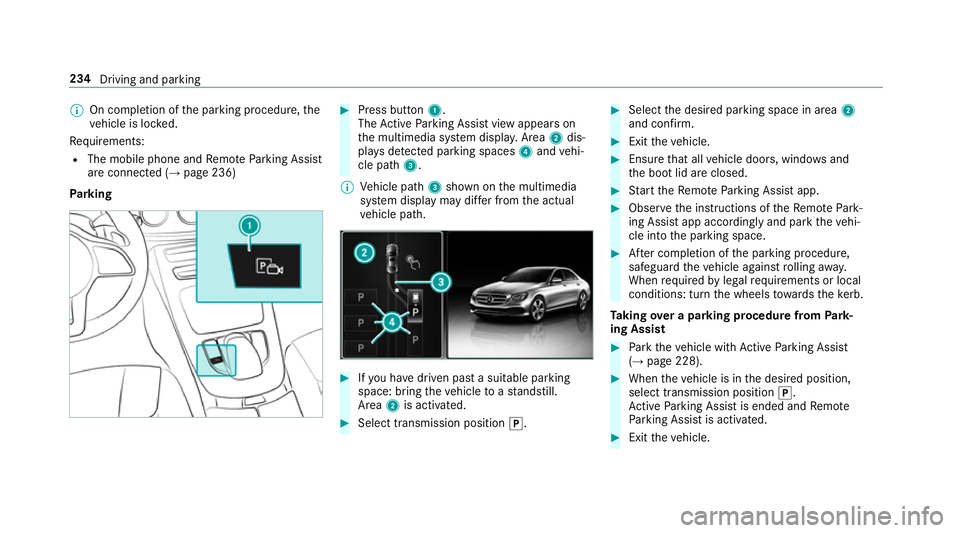
Park ing #
Press button 1.
The Active Parking Assist view appears on
th e multimedia sy stem displa y.Area 2dis‐
pl ay s de tected pa rking spaces 4and vehi‐
cle path 3.
% Vehicle path 3shown on the multimedia
sy stem display may dif fer from the actual
ve hicle path. #
Ifyo u ha vedriven past a suitable parking
space: bring theve hicle toast andstill.
Area 2is activated. #
Select transmission position j. #
Select the desired parking space in area 2
and confi rm. #
Exit theve hicle. #
Ensure that all vehicle doors, windo wsand
th e boot lid are closed. #
Start theRe mo teParking Assist app. #
Obser vethe instructions of theRe mo tePark‐
ing Assist app accordingly and park theve hi‐
cle into the parking space. #
After completion of the parking procedure,
safeguard theve hicle against rolling away.
When requ ired bylegal requirements or local
conditions: turn the wheels towa rdsth eke rb.
Ta king over a parking procedu refrom Park‐
ing Assist #
Park theve hicle with Active Parking Assist
(→ page 228). #
When theve hicle is in the desired position,
select transmission position j.
Ac tive Parking Assist is ended and Remo te
Pa rking Assist is activated. #
Exit theve hicle. 234
Driving and parking
Page 238 of 497
#
Ensu rethat all vehicle doors, windo wsand
th e boot lid are closed. #
Start theRe mo teParking Assist app. #
Obser vethe instructions of theRe mo tePark‐
ing Assist app accordingly and park theve hi‐
cle into the parking space. #
After completion of the parking procedure,
safeguard theve hicle against rolling away.
When requ ired bylegal requirements or local
conditions: turn the wheels towa rdsth eke rb.
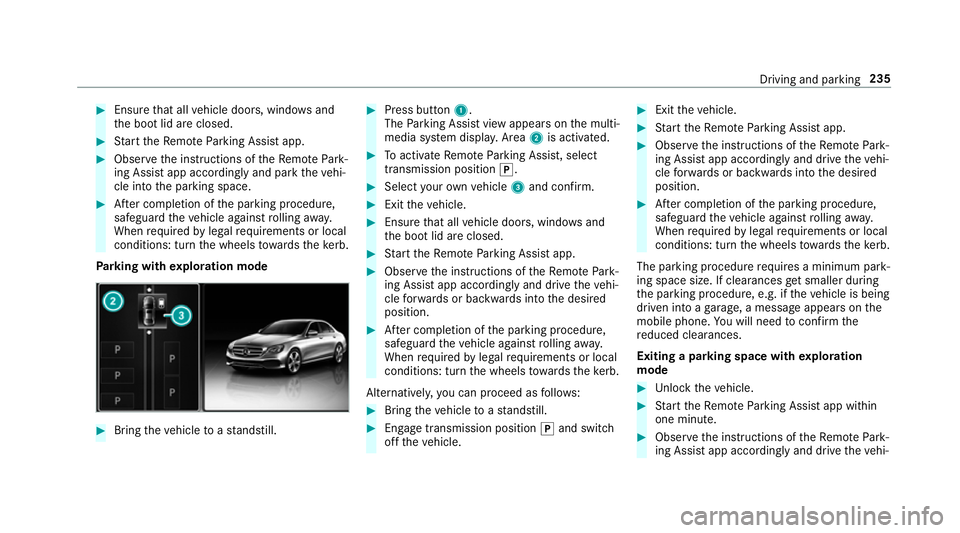
Pa rking with explo ration mode #
Bring theve hicle toast andstill. #
Press button 1.
The Parking Assist view appears on the multi‐
media sy stem displa y.Area 2is acti vated. #
Toactivate Remo teParking Assist, select
transmission position j. #
Select your ow nve hicle 3and confirm. #
Exit theve hicle. #
Ensure that all vehicle doors, windo wsand
th e boot lid are closed. #
Start theRe mo teParking Assist app. #
Obser vethe instructions of theRe mo tePark‐
ing Assist app accordingly and drive theve hi‐
cle forw ards or backwards into the desired
position. #
After completion of the parking procedure,
safeguard theve hicle against rolling away.
When requ ired bylegal requirements or local
conditions: turn the wheels towa rdsth eke rb.
Alternatively, you can proceed as follo ws: #
Bring theve hicle toast andstill. #
Engage transmission position jand switch
off theve hicle. #
Exit theve hicle. #
Start theRe mo teParking Assist app. #
Obser vethe instructions of theRe mo tePark‐
ing Assist app accordingly and drive theve hi‐
cle forw ards or backwards into the desired
position. #
After completion of the parking procedure,
safeguard theve hicle against rolling away.
When requ ired bylegal requirements or local
conditions: turn the wheels towa rdsth eke rb.
The parking procedu re requires a minimum park‐
ing space size. If clearances getsmaller during
th e parking procedure, e.g. if theve hicle is being
driven into a garage , a message appears on the
mobile phone. You will need toconfirm the
re duced clearances.
Exiting a parking space with explo ration
mode #
Unlock theve hicle. #
Start theRe mo teParking Assist app within
one minute. #
Obser vethe instructions of theRe mo tePark‐
ing Assist app accordingly and drive theve hi‐ Driving and parking
235
Page 247 of 497
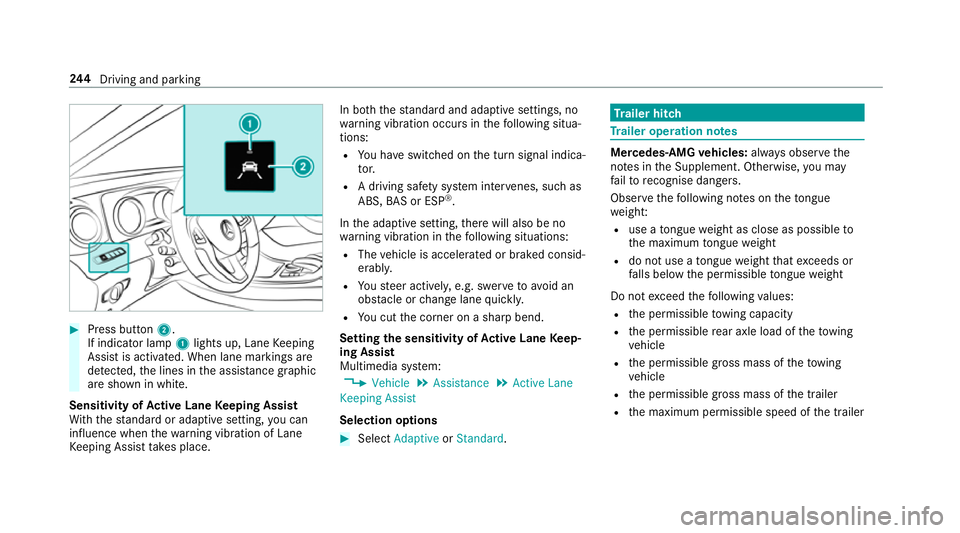
#
Press button 2.
If indicator lamp 1lights up, Lane Keeping
Assist is activated. When lane markings are
de tected, the lines in the assis tance graphic
are shown in white.
Sensitivity of Active Lane Keeping Assist
Wi th th est andard or adaptive setting, you can
influence when thewa rning vibration of Lane
Ke eping Assist take s place. In bo
th thest andard and adaptive settings, no
wa rning vibration occurs in thefo llowing situa‐
tions:
R You ha veswitched on the turn signal indica‐
to r.
R A driving sa fety sy stem inter venes, su chas
ABS, BAS or ESP ®
.
In the adaptive setting, there will also be no
wa rning vibration in thefo llowing situations:
R The vehicle is accelerated or braked consid‐
erably.
R Yousteer actively, e.g. swer vetoavo id an
obs tacle or change lane quickl y.
R You cut the corner on a sharp bend.
Setting the sensitivity of Active Lane Keep‐
ing Assist
Multimedia sy stem:
, Vehicle .
Assistance .
Active Lane
Keeping Assist
Selection options #
Select Adaptive orStandard. Tr
ailer hitch Tr
ailer operation no tes Mercedes‑AMG
vehicles: always obser vethe
no tes in the Supplement. Otherwise, you may
fa ilto recognise dangers.
Obser vethefo llowing no tes on theto ngue
we ight:
R use a tongue weight as close as possible to
th e maximum tongue weight
R do not use a tongue weight that exc eeds or
fa lls below the permissible tongue weight
Do not exceed thefo llowing values:
R the permissible towing capacity
R the permissible rear axle load of theto wing
ve hicle
R the permissible gross mass of theto wing
ve hicle
R the permissible gross mass of the trailer
R the maximum permissible speed of the trailer 244
Driving and pa rking
Page 262 of 497
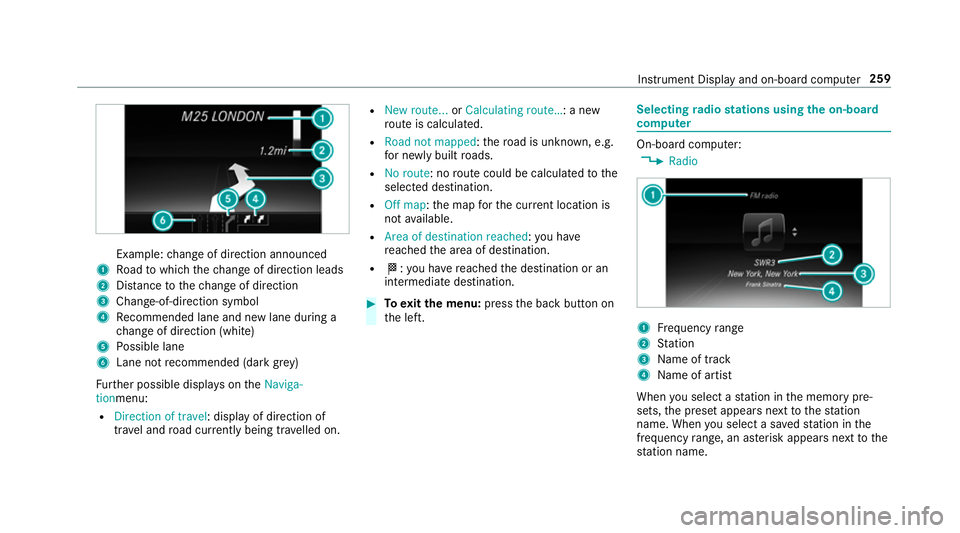
Example:
change of direction announced
1 Road towhich thech ange of direction leads
2 Distance tothech ange of direction
3 Chan ge-of-direction symbol
4 Recommended lane and new lane du ring a
ch ange of direction (white)
5 Possible lane
6 Lane not recommended (da rkgrey)
Fu rther possible displa yson theNaviga-
tionmenu:
R Direction of travel: display of direction of
tra vel and road cur rently being tr avelled on. R
New route... orCalculating route… : a new
ro ute is calculated.
R Road not mapped :th ero ad is unknown, e.g.
fo r newly built roads.
R No route: no route could be calculated tothe
selected destination.
R Off map: the map forth e cur rent location is
not available.
R Area of destination reached :yo u ha ve
re ached the area of destination.
R O: you ha vereached the destination or an
intermediate destination. #
Toexitth e menu: pressthe back button on
th e left. Selecting
radio stations using the on-boa rd
compu ter On-board computer:
, Radio 1
Frequency range
2 Station
3 Name of track
4 Name of artist
When you select a station in the memory pre‐
sets, the preset appears next tothest ation
name. When you select a sa vedstation in the
frequency range, an as terisk appears nexttothe
st ation name. In
stru ment Display and on-board computer 259
Page 275 of 497
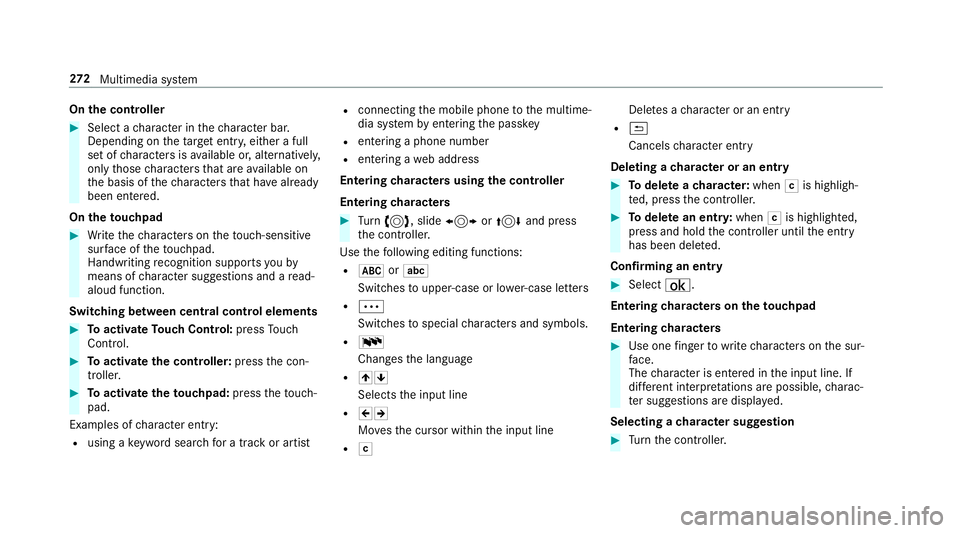
On
the controller #
Select a character in thech aracter bar.
Depending on theta rget entry , either a full
set of characters is available or, alternativel y,
only those characters that are available on
th e basis of thech aracters that ha vealready
been entered.
On theto uchpad #
Write thech aracters on theto uch-sensitive
sur face of theto uchpad.
Handwriting recognition suppo rts yo uby
means of character suggestions and a read-
aloud function.
Swit ching between central control elements #
Toactivate Touch Control: pressTouch
Control. #
Toactivate the controller: pressthe con‐
troller. #
Toactivate theto uchpad: presstheto uch‐
pad.
Examples of character ent ry:
R using a keyword sear chfor a track or artist R
connecting the mobile phone tothe multime‐
dia sy stem byentering the passk ey
R entering a phone number
R entering a web address
Entering characters using the controller
Entering characters #
Turn 3 , slide 1 or4 and press
th e controller.
Use thefo llowing editing functions:
R * orE
Swit ches toupper-case or lo wer-case letters
R Ä
Switches tospecial characters and symbols.
R B
Chan gesth e language
R 45
Selects the input line
R 23
Movesth e cursor within the input line
R F Dele
tes a character or an ent ry
R &
Cancels character ent ry
Deleting a character or an entry #
Todel ete a character: whenFis highligh‐
te d, press the controller. #
Todel ete an entr y:when Fis highlighted,
press and hold the controller until the entry
has been dele ted.
Confirming an entry #
Select ¡.
Entering characters on theto uchpad
Entering characters #
Use one finger towrite characters on the sur‐
fa ce.
The character is entered in the input line. If
dif fere nt interpr etations are possible, charac‐
te r suggestions are displa yed.
Selecting a character suggestion #
Turn the controller. 272
Multimedia sy stem
Page 284 of 497
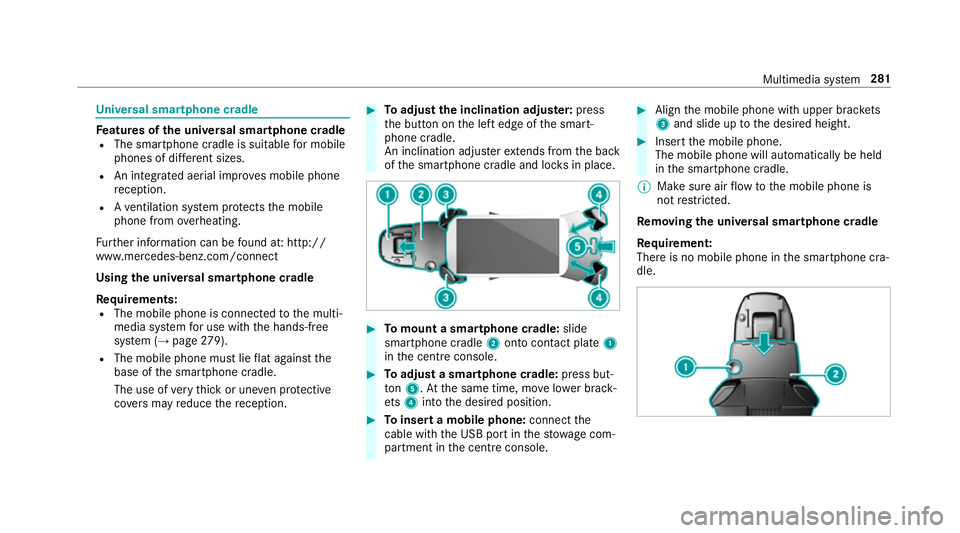
Un
iversal sma rtphone cradle Fe
atures of the universal sma rtphone cradle
R The sma rtphone cradle is suitable for mobile
phones of dif fere nt sizes.
R An integrated ae rial impr oves mobile phone
re ception.
R Ave ntilation sy stem pr otects the mobile
phone from overheating.
Fu rther information can be found at: http://
www.mercedes-benz.com/connect
Using the universal sma rtphone cradle
Re quirements:
R The mobile phone is connec tedto the multi‐
media sy stem for use with the hands-free
sy stem (→ page279).
R The mobile phone mu stlie flat against the
base of the smartphone cradle.
The use of very thick or une ven pr otective
co vers may reduce there ception. #
Toadjust the inclination adju ster: press
th e button on the left edge of the smart‐
phone cradle.
An inclination adjus terex tends from the back
of the smartphone cradle and loc ksin place. #
Tomount a smartphone cradle: slide
sma rtphone cradle 2onto con tact plate 1
in the cent reconsole. #
Toadjust a smartphone cradle: press but‐
to n5. Atthe same time, mo velowe r brack‐
et s4 into the desired position. #
Toinsert a mobile phone: connectthe
cable wi th the USB port in thestow age com‐
partment in the cent reconsole. #
Align the mobile phone with upper brac kets
3 and slide up tothe desired height. #
Insert the mobile phone.
The mobile phone will automatically be held
in the smartphone cradle.
% Make sure air flow tothe mobile phone is
not restricted.
Re moving the uni versal smartphone cradle
Re quirement:
There is no mobile phone in the smartphone cra‐
dle. Multimedia sy
stem 281
Page 292 of 497
R
Other products and services from Mercedes-
Benz
Data is transmitted during the connection tothe
Mercedes-Benz Cus tomer Centre (→ page 290).
Information on the breakd own assistance
call
A breakdown assis tance call tothe Mercedes-
Benz Cus tomer Centre has been initia ted via the
ov erhead control panel (→ page 288) orthe mul‐
timedia sy stem (→ page 287).
R Aqu alified Mercedes-Benz tech nician car ries
out repairs on site and/or theve hicle will be
to we dto the nearest Mercedes-Benz Service
Centre.
Yo u may be charge dfo rth ese services.
Data is transfer red during the connection tothe
Mercedes-Benz Cus tomer Centre (→ page 290).
Information on Mercedes me connect acci‐
dent management
The Mercedes me connect accident manage‐
ment is an extension of the Mercedes-Benz
emer gency call sy stem (→ page 290). An emer
gency call is made tothe Mercedes-
Benz emer gency call centre af ter an accident:
R Avo ice connection is made toa contact per‐
son at the Mercedes-Benz emer gency call
centre.
R If necessa ry,th e conta ct person at the
Mercedes-Benz emer gency call centre for‐
wa rdsth e call toMercedes me connect acci‐
dent management.
R If necessar y,theve hicle will be towe dto a
Mercedes-Benz service centre.
Ar ranging a service appointment via
Mercedes me connect
If yo u ha veactivated the maintenance manage‐
ment service, releva nt vehicle data is transfer red
automatically tothe Mercedes-Benz Cus tomer
Centre. You will then recei veindividual recom‐
mendations rega rding the maintenance of your
ve hicle.
Re gardless of whe ther you ha veconsented to
th e maintenance management service, the multi‐
media sy stem reminds you af ter a cer tain
amount of time that a service is due. A prom ptappears asking if
youwo uld like tomake an
appointment. #
Toarra nge a service appointment: select
Call .
Af teryo ur confirmation, theve hicle data is
sent and a Mercedes-Benz Cus tomer Centre
emplo yee deals with your appointment. The
information is then sent toyour desired
service outlet.
This service outlet will then conta ctyou
within 24hours.
% Ifyo u select Call later afte rth e service mes‐
sage appears, the message is hidden and
re appears af ter a cer tain period of time.
Consenting todata transfer for Me rcedes me
connect
Re quirements:
R There is an active breakdown assis tance or
Info call on the multimedia sy stem
(→ page 287) or theove rhead control panel
(→ page 288).
If th e breakdown and Mercedes me connect
Concier geservices are not activated on Multimedia sy
stem 289
Page 299 of 497

%
The multimedia sy stem supports up to a
tot al of 15,000 files.
Suppor tedfo rm ats:
R MP3
R WMA
R AAC form ats
% Due tothe lar gevariet y of available music
fi les rega rding encoders, sampling rates and
data rates, playback cannot alw ays be guar‐
anteed.
% Due tothe wide range of USB devices availa‐
ble on the mar ket, pl ayback cann otbe guar‐
anteed for all brands of USB devices.
% Cop y-pr otected music files or DRM enc ryp‐
te dfiles cannot be pla yed bac k.
% MP3 pla yers must support Media Trans fer
Pr oto col (MTP).
Note s on copyright
Au dio files that you create or reproduce yourself
fo r playback aregeneral lysubject tocopyright
pr otection. In many count ries, reproductions,
eve nfo r private use, are not permitted without th
e prior consent of the copyright holder. Make
sure that you kn owabout the applicable copy‐
ri ght regulations and that you co mply withthese.
Switching tomedia mode
Multimedia sy stem:
, Media .
Media
The following functions are available:
R Memory card
R Media Interface 1
R Media Interface 2
R Bluetooth audio #
Select the media source.
Pla yable music files are pla yed bac k.
Inserting/removing an SD memory card &
DANG ER Risk of fata l injury from swal‐
lowing SD cards
SD cards are small parts.
They could be swallo wed and lead tochok‐
ing. #
Keep SD cards out of there ach of chil‐
dren. #
Seek medical attention immediately if
an SD card has been swallo wed. *
NO
TEDama gecaused byhigh temp era‐
tures High
temp eratures can damage the SD mem‐
ory card. #
Remo vethe SD memory card af ter use
and take it out of theve hicle. Multimedia sy
stem:
, Media .
Media .
Memory card
Inserting
The multimedia connection unit is located in the
stow age compartment under the armrest. #
Insert the SD memory card into the SD card
slot until it engages. The side with the con‐
ta cts must face down wards.
Pla yable music files are pla yed bac k. 296
Multimedia sy stem