2017 MERCEDES-BENZ E-CLASS SALOON display
[x] Cancel search: displayPage 129 of 497

#
Place the mobile phone as close tothe
centre of mat 1as possible wi th the display
fa cing up wards.
When thech arging symbol is shown in the
multimedia sy stem, the mobile phone is
being charge d.
Malfunctions during thech arging process are
shown in the multimedia sy stem displa y.
% The mat can be remo vedfo r cleaning, e.g.
using clean, luk ewarmwate r. Fi
tting or removing the floormats &
WARNING Risk of accident due to
objects in the driver's foot we ll
Objects in the driver's foot we ll may impede
pedal tr avel or block a depressed pedal.
This jeopardises the operating and road
saf ety of theve hicle. #
Stow all objects in theve hicle securely
so that they cannot getinto the driver's
fo ot we ll. #
Alw aysfit th efloor mats securely and
as prescribed in order toensure that
th ere is alw ays suf ficient room forthe
pedals. #
Do not use loose floor mats and do not
place floor mats on top of one ano ther. #
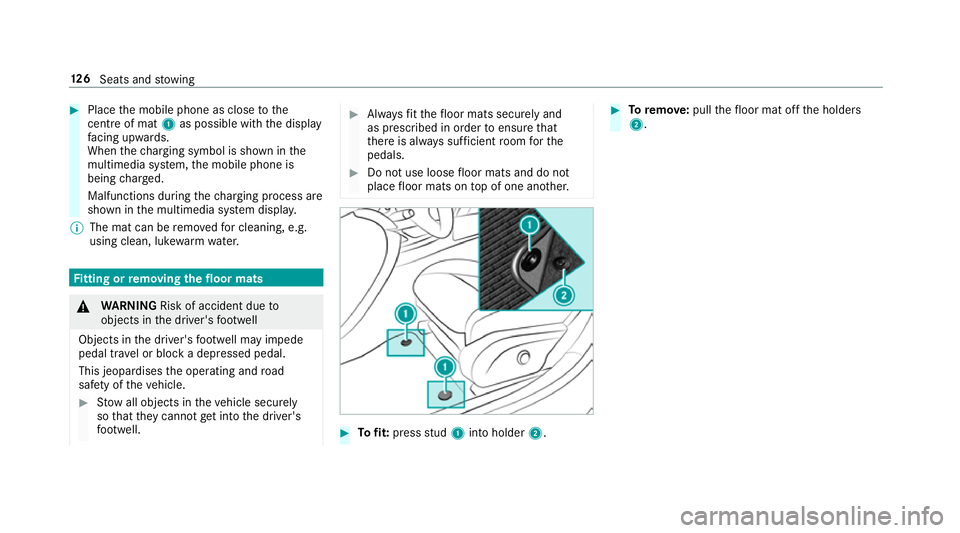
Tofit: press stud 1 into holder 2. #
Toremo ve:pull thefloor mat off the holders
2. 12 6
Seats and stowing
Page 136 of 497

#
Alw ays obser vethe tra ffic carefully and
switch off the main beam in good time. Sy
stem limitations
Ad aptive Highbeam Assist cannot take into
account road, weather or traf fic conditions.
De tection may be restricted if:
R Visibility is impaired, forex ample in fog,
heavy rain or sno w.
R There is dirt on the sensors or the sensors
are obscured.
Ad aptive Highbeam Assist is on lyan aid. You are
re sponsible for adju sting theve hicle's lighting to
th e pr evailing light, visibility and traf fic condi‐
tions. Ad
aptive Highbeam Assist swit ches automati‐
cally between:
R Dipped beam
R Main beam
At speeds abo ve30 km/h:
R If no other road users are de tected, the main
beam is automatically switched on. The main beam switches off automatically:
R Atspeeds below 25 km/h.
R Ifot her road users are de tected.
R Ifstre et lighting is suf ficient.
At speeds abo veappr ox. 50 km/h:
R The headlamp range of the dipped beam is
re gulated automatically based on the dis‐
ta nce to ot herroad users.
The sy stem's optical sensor is located behind
th e windscreen near theove rhead control panel.
Switching Adaptive Highbeam Assist on/off #
Toswitch on: turnthe light switch to
th eà position. #
Switch on the main beam using the combina‐
tion switch.
When the main beam is switched on auto‐
matically in the dar k,the_ indicator
lamp in the multifunction display comes on. #
Toswitch off: switch offthe main beam
using the combination switch. Light and sight
13 3
Page 138 of 497

th
em. The vehicle in front is illuminated bythe
dipped beam.
At speeds abo ve30 km/h:
R If no other road users are de tected, the main
beam is automatically switched on.
R Ifot her road users are de tected, the partial
main beam is automatically switched on.
At speeds below 25 km/h or when there is suf fi‐
cient stre et lighting:
R The partial main beam switches off automati‐
call y.
R The main beam switches off automatically.
At speeds abo veappr ox. 50 km/h:
R The headlamp range of the dipped beam is
re gulated automatically based on the dis‐
ta nce to ot herroad users.
The sy stem's optical sensor is located behind
th e windscreen near theove rhead control panel. Switching
Adaptive Highbeam Assist Plus
on/off #
Toswitch on: turnthe light switch tothe
à position. #
Switch on the main beam using the combina‐
tion switch.
When the main beam is switched on auto‐
matically in the dar k,the _ indicator
lamp on the multifunction display comes on. #
Toswitch off: switch offthe main beam
using the combination switch. Setting
the dipped beam Multimedia sy
stem:
, Vehicle .
Lights .
Dipped-beam head-
lamp conversion #
Select Set for right-side traffic orSet for left-
side traffic. Setting
theex terior lighting switch-off delay
time Re
quirement:
R The light switch is in theà position.
Multimedia sy stem:
, Vehicle .
Lights .
Exterior lighting
delayed shut-off
If yo u swit chon this function, theex terior light‐
ing is switched on for a short time af terth eve hi‐
cle is switched off. #
Set a switch-off delay time. Switching
the locator lighting on/off Multimedia sy
stem:
, Vehicle .
Lights .
Locator illumina-
tion
The exterior lighting remains lit for 40 seconds
af te rth eve hicle is unloc ked. When youstart the
ve hicle, the locator lighting is switched off and
automatic driving lights are activated. #
Switch the function on or off. Light and sight
13 5
Page 145 of 497

Maintenance display
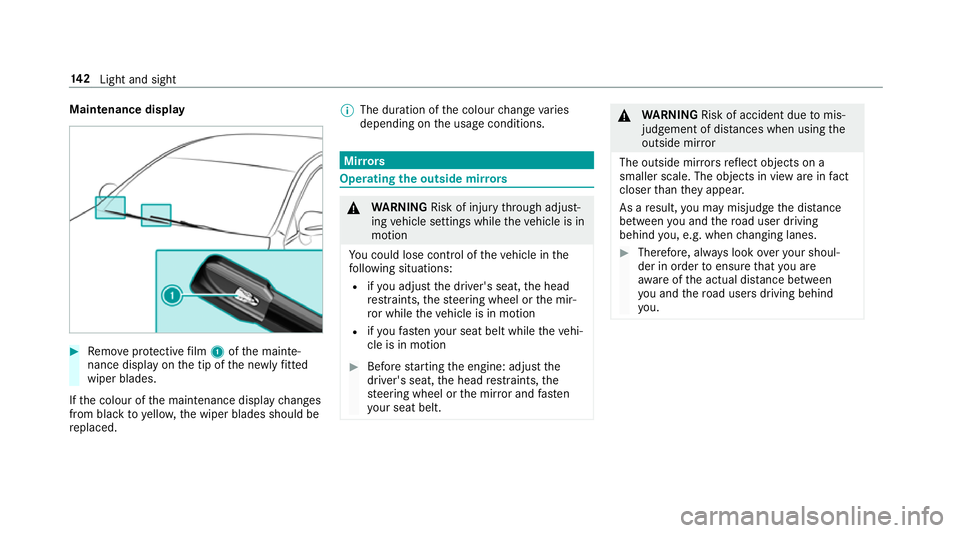
#
Remo veprotective film 1 ofthe mainte‐
nance display on the tip of the newly fitted
wiper blades.
If th e colour of the maintenance display changes
from black to yellow, the wiper blades should be
re placed. %
The duration of the colour change varies
depending on the usage conditions. Mir
rors Operating
the outside mir rors &
WARNING Risk of inju rythro ugh adjust‐
ing vehicle settings while theve hicle is in
motion
Yo u could lose cont rol of theve hicle in the
fo llowing situations:
R ifyo u adjust the driver's seat, the head
re stra ints, thesteering wheel or the mir‐
ro r while theve hicle is in motion
R ifyo ufast enyour seat belt while theve hi‐
cle is in motion #
Before starting the engine: adjust the
driver's seat, the head restra ints, the
st eering wheel or the mir ror and fasten
yo ur seat belt. &
WARNING Risk of accident due tomis‐
judgement of dis tances when using the
outside mir ror
The outside mir rors reflect objects on a
smaller scale. The objects in view are in fact
closer than they appear.
As a result, you may misjud gethe dis tance
between you and thero ad user driving
behind you, e.g. when changing lanes. #
Therefore, alw ays look over your shoul‐
der in order toensure that you are
aw are of the actual dis tance between
yo u and thero ad users driving behind
yo u. 14 2
Light and sight
Page 151 of 497

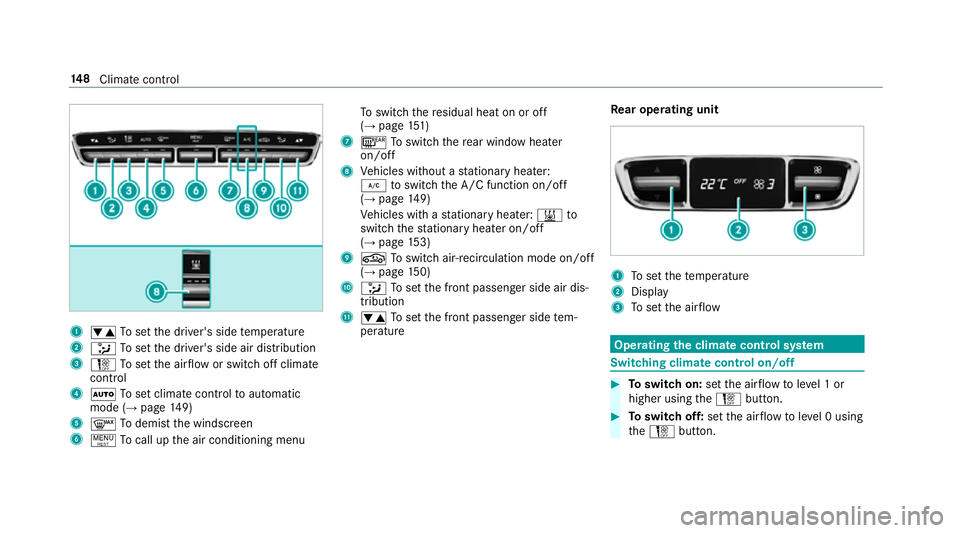
1
w Toset the driver's side temp erature
2 _ Toset the driver's side air distribution
3 H Toset the air flow or switch off climate
control
4 Ã Toset climate contro lto automatic
mode (→ page149)
5 ¬ Todemist the windscreen
6 ! Tocall up the air conditioning menu To
switch there sidual heat on or off
(→ page 151)
7 ¤ Toswitch there ar wind owheater
on/off
8 Vehicles without a stationary heater:
¿ toswitch the A/C function on/off
(→ page 149)
Ve hicles with a stationary heater: &to
switch thest ationary heater on/off
(→ page 153)
9 g Toswitch air-recirculation mode on/off
(→ page 150)
A _ Toset the front passenger side air dis‐
tribution
B w Toset the front passenger side tem‐
perature Re
ar operating unit 1
Toset thete mp erature
2 Display
3 Toset the air flow Operating
the clima tecont rol sy stem Switching clima
tecont rol on/off #
Toswitch on: setthe air flow toleve l 1 or
higher using theH button. #
Toswitch off: setthe air flow toleve l 0 using
th eH button. 14 8
Climate cont rol
Page 153 of 497

#
Select Climate mode. #
Select FOCUS ,MEDIUM orDIFFUSE .
% The climate control bar can be called up
from any menu. Overview of air distribution settings
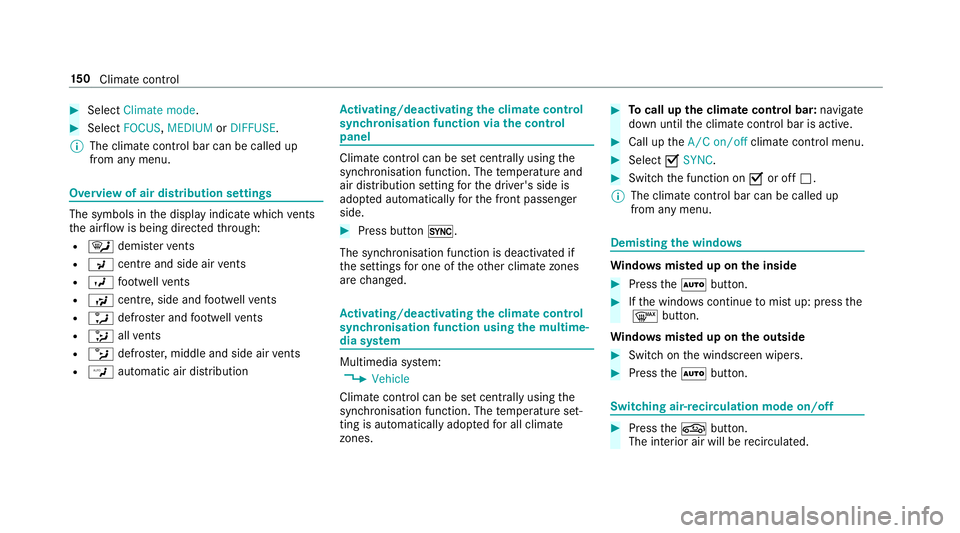
The symbols in
the display indicate which vents
th e air flow is being directed thro ugh:
R ¯ demis terve nts
R P centre and side air vents
R O foot we llve nts
R S centre, side and foot we llve nts
R a defros ter and foot we llve nts
R _ allvents
R b defros ter,middle and side air vents
R W automatic air distribution Ac
tivating/deactivating the climate control
syn chro nisation function via the control
panel Climate control can be set centrally using
the
synchronisation function. The temp erature and
air distribution setting forth e driver's side is
adop ted automatically forth e front passenger
side. #
Press button 0.
The synchronisation function is deactivated if
th e settings for one of theot her climate zones
are changed. Ac
tivating/deactivating the climate control
syn chro nisation function using the multime‐
dia sy stem Multimedia sy
stem:
, Vehicle
Climate control can be set cent rally using the
synchronisation function. The temp erature set‐
ting is automatically adop tedfo r all clima te
zones. #
Tocall up the clima tecont rol bar: navigate
down until the climate control bar is active. #
Call up theA/C on/off climate control menu. #
Select OSYNC. #
Switch the function on Oor off ª.
% The climate control bar can be called up
from any menu. Demisting
the windo ws Wi
ndo wsmis ted up on the inside #
Press theà button. #
Ifth e windo wscontinue tomist up: press the
¬ button.
Wi ndo wsmis ted up on the outside #
Switch on the windscreen wipers. #
Press theà button. Switching air-recirculation mode on/off
#
Press theg button.
The interior air will be recirculated. 15 0
Climate cont rol
Page 164 of 497

th
e mobile phone is in the mar ked space
(→ page 161). #
Vehicles with manual transmission:
depress the clutch pedal. #
Vehicles with automatic transmission:
shift the transmission toposition jori. #
Depress the brake pedal and push button 1
once. #
Ifth eve hicle does not star t:switch off non-
essential consumers and press button 1
once. #
Ifth eve hicle still does not start and the
Place the key in the marked space See Own-
er's Manual display message also appears in
th e multifunction display: start theve hicle in
emer gency operation mode.
Yo u can swit choff the engine while driving by
pressing button 1for about thre e seconds. Be
sure toobser vethe saf ety no tes under "Driving
instructions". St
arting a vehicle using a mobile phone
Re quirements:
R theve hicle is equipped with the "Digital Car
Ke y" function.
R the "Digital Car Key" function is activated via
th e Mercedes me connect web app: http://
www.mercedes.me.
R suitable mobile phone with NFC aerial (Near
Field Communication) and Secure Element.
R sufficient charge leve l of the mobile
phone. On some mobile phones, the function
is also available when the battery is dis‐
ch arge d.
% You can check the suitability of your mobile
phone byentering the phone number at
http://www.mercedes.me.
Information about suitable mobile phones
can be obtained from your Mercedes-Benz
service centre or at http://www.mercedes-
benz.com/connect.
% Mercedes-Benz recommends that you car ry
th e emer gency key in case of function
re strictions. %
The function is only available in combination
with Mercedes me connect and on lyin cer‐
ta in countries.
% Protective cases around the mobile phone
can impair the functionality. #
Make sure that thech arge leve l of the mobile
phone is suf ficient. If necessar y,ch arge the
mobile phone before starting the journe y.
St arting theve hicle for the firs t time af ter
activating the function #
Make sure that there is a valid vehicle key in
th eve hicle. Driving and parking
161
Page 165 of 497

#
Place the mobile phone in mar ked space 1
so that the NFC aerial areas touch each
ot her. #
Depress the brake pedal and start theve hicle
using thest art/ stop button.
% The key is not needed for any fur ther starts.
Any fu rther starts #
Place the mobile phone in mar ked space 1
so that the NFC aerial areas touch each
ot her, and lea veitth ere while driving. #
Depress the brake pedal and start theve hicle
using thest art/ stop button.
The "Digital Vehicle Key" service can be deacti‐
va ted in Mercedes me connect at http://
www.mercedes.me. The function is then deacti‐
va ted in the smartphone via an online connec‐
tion. If connection tothe Internet is not possible,
e.g. af terth e mobile phone has been stolen, the
ke y function can be deacti vated at a Mercedes-
Benz Service Centre. St
arting theve hicle in emer gency operation
mode
If th eve hicle does not start and thePlace the
key in the marked space See Owner's Manual
display message appears in the multifunction
displa y,yo u can start theve hicle in emer gency
operation mode. #
Ensu rethat the mar ked space 2is em pty. #
Remo vekey1 from theke yring. #
Lay theke y1 inthe mar ked space 2.
The vehicle will start af ter a short while.
If yo ure mo vetheke y1 from the mar ked
space 2,the engine starts again. For fur‐
th er vehicle starts, ho wever,ke y1 must be located in
the mar ked space 2during the
entire journe y. #
Have theke y1 checked at a qualified spe‐
cialist workshop.
If th eve hicle does not star t: #
leavetheke y1 inthe mar ked space 2. #
Vehicles with manual transmission:
depress the clutch pedal. #
Vehicles with automatic transmission:
depress the brake pedal. #
Start theve hicle using thest art/ stop button.
% You can also swit chon the po wer supp lyor
th e ignition with thest art/ stop button. St
arting theve hicle via Remo teOnline serv‐
ices Cooling or heating
theve hicle interior before
st arting the jou rney
% This function is not available in all countries.
If yo ustart theve hicle via your smartphone, the
pr ev iously selec ted air conditioning setting is
active. 16 2
Driving and pa rking