Page 596 of 723

89
Maintenance
OWNER MAINTENANCE
We recommend that the following
lists are vehicle checks and inspec-
tions that should be performed by the
owner or an authorised Kia dealer atthe frequencies indicated to help
ensure safe, dependable operation
of your vehicle.
If you have any question, we recom-
mend that you consult an authorised
Kia dealer.
These Owner Maintenance Checks
are generally not covered by war-
ranties and you may be charged for
labour, parts and lubricants used. Owner maintenance schedule
When you stop for fuel:
Check the engine oil level.
Check coolant level in coolant
reservoir.
Check the windscreen washer fluid level.
Look for low or under-inflated tyres.
Check the radiator and condenser. Check if the front of the radiator and condenser are clean and not
blocked with leaves, dirt or insectsetc.
If any of the above parts are
extremely dirty or you are not sure
of their condition, we recommend
that you contact an authorised Kia
dealer.
Whilst operating your vehicle:
Note any changes in the sound ofthe exhaust or any smell of
exhaust fumes in the vehicle.
Check for vibrations in the steering wheel. Notice any increased steer-
ing effort or looseness in the steer-
ing wheel, or change in its straight-ahead position.
Notice if your vehicle constantly turns slightly or “pulls” to one side
when travelling on smooth, levelroad.
When stopping, listen and check for unusual sounds, pulling to one
side, increased brake pedal travel
or “hard-to-push” brake pedal.
If any slipping or changes in the operation of your transaxle occurs,
check the transaxle fluid level.
Check manual transaxle operation, including clutch operation.
WARNING
Be careful when checking your
engine coolant level when the
engine is hot. Scalding hot
coolant and steam may blow out
under pressure. This could cause
burns or other serious injury.
Page 597 of 723

Maintenance
10
8
Check automatic transaxle / dual
clutch transmission P (Park) func- tion.
Check parking brake.
Check for fluid leaks under your vehicle (water dripping from the air
conditioning system during or after
use is normal).
At least monthly:
Check coolant level in the enginecoolant reservoir.
Check the operation of all exterior lights, including the stoplights, turn
signals and hazard warning flash-
ers.
Check the inflation pressures of all tyres including the spare.
At least twice a year
(i.e., every Spring and Fall) :
Check radiator, heater and air con- ditioning hoses for leaks or dam-
age.
Check windscreen washer spray and wiper operation. Clean wiper
blades with clean cloth dampened
with washer fluid.
Check headlight alignment.
Check muffler, exhaust pipes, shields and clamps.
Check the lap/shoulder belts for wear and function.
Check for worn tyres and loose wheel lug nuts.
At least once a year :
Clean body and door drain holes.
Lubricate door hinges and checks,and bonnet hinges.
Lubricate door and bonnet locks and latches.
Lubricate door rubber weather- strips.
Check the air conditioning system.
Inspect and lubricate automatic transaxle / dual clutch transmission
linkage and controls.
Clean battery and terminals.
Check the brake (and clutch) fluid level.
Page 627 of 723
Maintenance
40
8
FUEL FILTER (FOR DIESEL)
Draining water from fuel filter
The fuel filter for diesel engine plays
an important role of separating water
from fuel and accumulating the waterin its bottom.
If water accumulates in the fuel filter,
the warning light comes on when the
ignition switch is in the ON position. If this warning light illumi-
nates, we recommend that
the system be serviced by
an authorised Kia dealer. Filter replacement
It must be replaced when necessary,
and should not be washed.
You can clean the filter when inspect- ing the air cleaner element.
Clean the filter by using compressed
air.
1. Loosen the air cleaner cover
attaching clips and open the cover.
CAUTION
If the water accumulated in the
fuel filter is not drained at prop-er times, damages to the major parts such as the fuel systemcan be caused by water perme-ation in the fuel filter.
AIR CLEANER AIR CLEANER
OMD070011
OMD070010
Page 634 of 723
847
Maintenance
4. Push down the wiper arm (3) andinstall the new blade assembly in
the reverse order of removal.
5. Return the wiper arm on the wind- screen.
Rear window wiper blade
1. Raise the wiper arm and pull outthe wiper blade assembly. 2. Install the new blade assembly by
inserting the centre part into the
slot in the wiper arm until it clicks
into place.
3. Make sure the blade assembly is installed firmly by trying to pull it
slightly.
To prevent damage to the wiper arms
or other components, we recom-
mend that the wiper blade be
replaced by an authorised Kia deal-
er.
OHM078063
OHM078062
OSBL071002R
Page 635 of 723

Maintenance
48
8
BATTERY
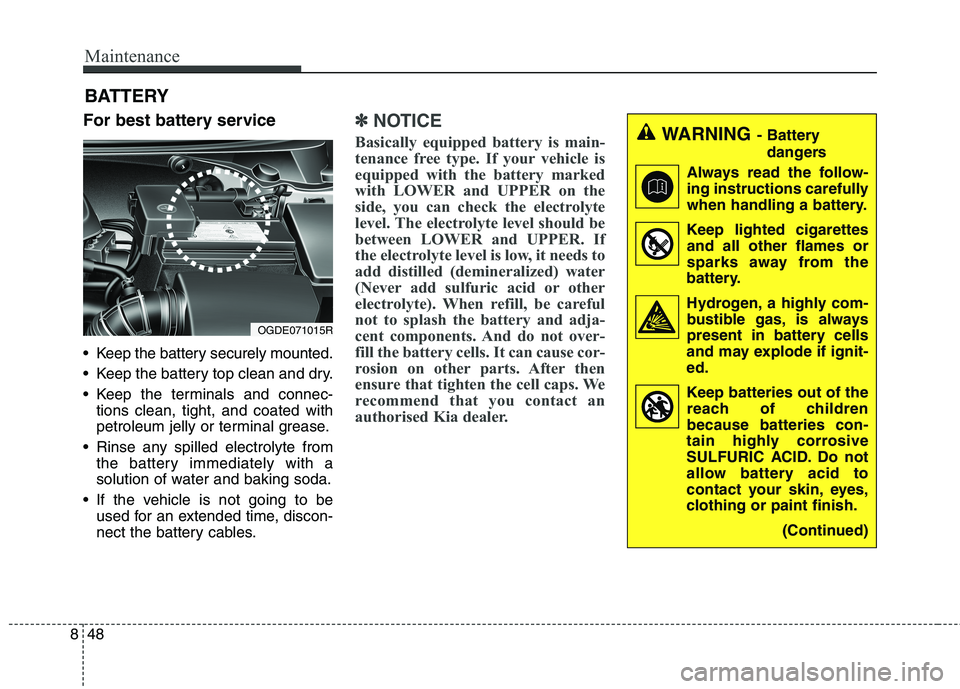
For best battery service
Keep the battery securely mounted.
Keep the battery top clean and dry.
Keep the terminals and connec- tions clean, tight, and coated with
petroleum jelly or terminal grease.
Rinse any spilled electrolyte from the battery immediately with a
solution of water and baking soda.
If the vehicle is not going to be used for an extended time, discon-
nect the battery cables.
✽✽ NOTICE
Basically equipped battery is main-
tenance free type. If your vehicle is
equipped with the battery marked
with LOWER and UPPER on the
side, you can check the electrolyte
level. The electrolyte level should be
between LOWER and UPPER. If
the electrolyte level is low, it needs to
add distilled (demineralized) water
(Never add sulfuric acid or other
electrolyte). When refill, be careful
not to splash the battery and adja-
cent components. And do not over-
fill the battery cells. It can cause cor-
rosion on other parts. After then
ensure that tighten the cell caps. We
recommend that you contact an
authorised Kia dealer.WARNING - Battery
dangers
Always read the follow-
ing instructions carefully
when handling a battery.
Keep lighted cigarettes and all other flames or
sparks away from the
battery.
Hydrogen, a highly com- bustible gas, is always
present in battery cells
and may explode if ignit-ed.
Keep batteries out of the reach of children because batteries con-
tain highly corrosive
SULFURIC ACID. Do not
allow battery acid to
contact your skin, eyes,
clothing or paint finish.
(Continued)
OGDE071015R
Page 637 of 723

Maintenance
50
8
Battery capacity label
(see the example) ❈ The actual battery label in the vehicle may
differ from the illustration.
1. CMF60L-BCI : The Kia model name of battery
2. 12V : The nominal voltage
3. 60Ah(20HR) : The nominal capac- ity (in Amperehours)
4. 92RC : The nominal reserve
capacity (in min.)
5. 550CCA : The cold-test current in amperes by SAE
6. 440A : The cold-test current in
amperes by EN Battery recharging
Your vehicle has a maintenance-free,
calcium-based battery.
If the battery becomes discharged
in a short time (because, for exam-
ple, the headlights or interior lights
were left on whilst the vehicle was
not in use), recharge it by slow
charging (trickle) for 10 hours.
If the battery gradually discharges because of high electric load whilst
the vehicle is being used, recharge
it at 20-30A for two hours.
OJD072039
Example
CAUTION -
AGM battery (if equipped)
Absorbent Glass Matt (AGM)
batteries are maintenance-freeand we recommend that the AGM battery be serviced by anauthorised Kia dealer. Forcharging your AGM battery, use only fully automatic bat-tery chargers that are speciallydeveloped for AGM batteries.
When replacing the AGM bat- tery, we recommend that youuse parts for replacementfrom an authorised Kia dealer.
Do not open or remove the cap on top of the battery. Thismay cause leaks of internal electrolyte that could result insevere injury.
Page 644 of 723

857
Maintenance
Compact spare tyre replacement (if equipped)
A compact spare tyre has a shorter
tread life than a regular size tyre.
Replace it when you can see the
tread wear indicator bars on the tyre.The replacement compact spare tyre
should be the same size and design
tyre as the one provided with your
new vehicle and should be mountedon the same compact spare tyre
wheel. The compact spare tyre is notdesigned to be mounted on a regular
size wheel, and the compact spare
tyre wheel is not designed for mount-
ing a regular size tyre. Wheel replacement
When replacing the metal wheels for
any reason, make sure the new
wheels are equivalent to the original
factory units in diameter, rim widthand offset.
Tyre traction
Tyre traction can be reduced if you
drive on worn tyres, tyres that are
improperly inflated or on slippery
road surfaces. Tyres should be
replaced when tread wear indicators
appear. To reduce the possibility of
losing control, slow down whenever
there is rain, snow or ice on the road.
Tyre maintenance In addition to proper inflation, correct wheel alignment helps to decrease
tyre wear. If you find a tyre is worn
unevenly, have your dealer check thewheel alignment.
When you have new tyres installed,
make sure they are balanced. This
will increase vehicle ride comfort and
tyre life. Additionally, a tyre should
always be rebalanced if it is removedfrom the wheel.
WARNING
A wheel that is not the correct
size may adversely affect wheel
and bearing life, braking and
stopping abilities, handling
characteristics, ground clear-
ance, body-to-tyre clearance,
snow chain clearance,speedometer and odometer cal-
ibration, headlight aim and
bumper height.
Page 645 of 723

Maintenance
58
8
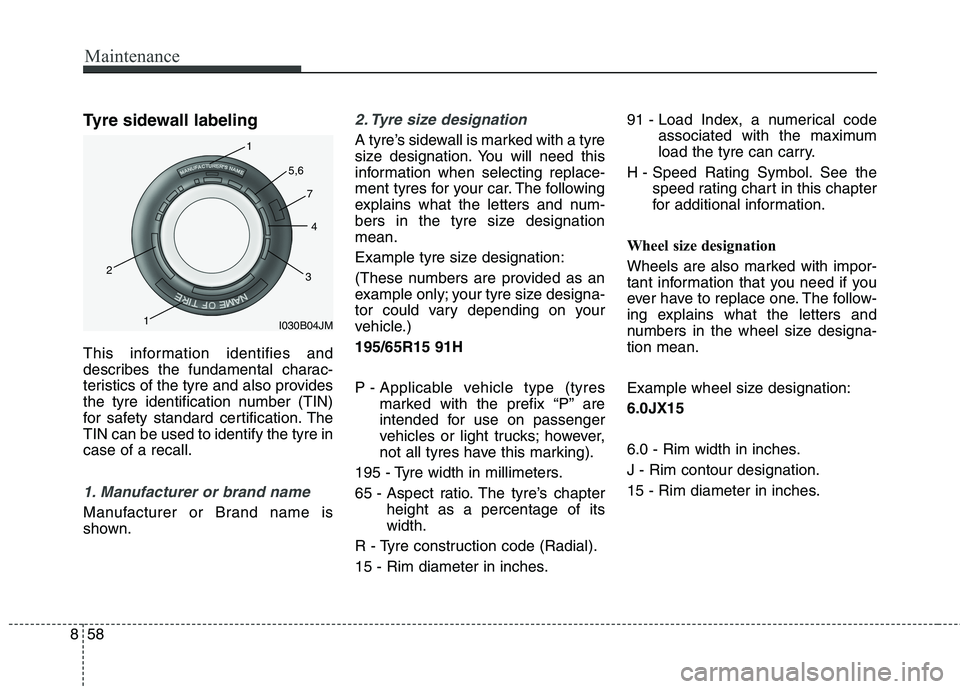
Tyre sidewall labeling
This information identifies and
describes the fundamental charac-
teristics of the tyre and also provides
the tyre identification number (TIN)
for safety standard certification. TheTIN can be used to identify the tyre incase of a recall.
1. Manufacturer or brand name
Manufacturer or Brand name is
shown.
2. Tyre size designation
A tyre’s sidewall is marked with a tyre
size designation. You will need this
information when selecting replace-
ment tyres for your car. The following
explains what the letters and num-
bers in the tyre size designationmean.
Example tyre size designation:
(These numbers are provided as an
example only; your tyre size designa-
tor could vary depending on your
vehicle.) 195/65R15 91H
P - Applicable vehicle type (tyres
marked with the prefix “P’’ are
intended for use on passenger
vehicles or light trucks; however,
not all tyres have this marking).
195 - Tyre width in millimeters.
65 - Aspect ratio. The tyre’s chapter height as a percentage of its width.
R - Tyre construction code (Radial).
15 - Rim diameter in inches. 91 - Load Index, a numerical code
associated with the maximum
load the tyre can carry.
H - Speed Rating Symbol. See the speed rating chart in this chapter
for additional information.
Wheel size designation
Wheels are also marked with impor-
tant information that you need if you
ever have to replace one. The follow-
ing explains what the letters and
numbers in the wheel size designa-tion mean.
Example wheel size designation: 6.0JX15
6.0 - Rim width in inches. J - Rim contour designation.
15 - Rim diameter in inches.
I030B04JM
1
1
2
34
5,6
7