2017 FORD F450 SUPER DUTY park assist
[x] Cancel search: park assistPage 226 of 642

Apply the parking brake whenever yourvehicle is parked. Press the pedaldownward to set the parking brake. Thebrake warning lamp in the instrumentcluster will illuminate and remainsilluminated until the parking brake isreleased.
To release, pull the brake release leverlocated at the lower left side of theinstrument panel.
If you are parking your vehicle on a gradeor with a trailer, press and hold the brakepedal down, then set the parking brake.There may be a little vehicle movement asthe parking brake sets to hold the vehicle'sweight. This is normal and should be noreason for concern. If needed, press andhold the service brake pedal down, thentry reapplying the parking brake. Chock thewheels if required. If the parking brakecannot hold the weight of the vehicle, theparking brake may need to be serviced orthe vehicle may be overloaded.
HILL START ASSIST
WARNINGS
The system does not replace theparking brake. When you leave yourvehicle, always apply the parkingbrake and shift the transmission into park(P) (automatic transmission) or first gear(1) (manual transmission).
You must remain in your vehicle onceyou have activated the system.
During all times, you are responsiblefor controlling your vehicle,supervising the system andintervening, if required.
If the engine is revved excessively, orif a malfunction is detected, thesystem will be deactivated.
The system makes it easier to pull awaywhen your vehicle is on a slope without theneed to use the parking brake.
When the system is active, your vehicle willremain stationary on the slope for two tothree seconds after you release the brakepedal. This allows you time to move yourfoot from the brake to the acceleratorpedal. The brakes release automaticallywhen the engine has sufficient torque toprevent your vehicle from rolling down thegrade. This is an advantage when pullingaway on a slope, for example from a carpark ramp, traffic lights or when reversinguphill into a parking space.
The system will activate automatically onany slope that will cause significant vehiclerollback. For vehicles with a manualtransmission, you can switch this featureoff using the information display. SeeInformation Displays (page 111). Thesystem will remain on or off depending onhow it was last set.
Note:There is no warning lamp to indicatethe system is either on or off.
Note:If your vehicle is equipped with AutoHold, Hill Start Assist will not be availablewhile Auto Hold is active.
Using Hill Start Assist
1. Bring your vehicle to a completestandstill. Keep the brake pedalpressed and select an uphill gear (forexample, first (1) when facing uphill orreverse (R) when facing downhill).
2. If the sensors detect that your vehicleis on a slope, the system will activateautomatically.
3. When you remove your foot from thebrake pedal, your vehicle will remainon the slope without rolling away forabout two or three seconds. This holdtime will automatically be extended ifyou are in the process of driving off.
223
Super Duty (TFE) Canada/United States of America, enUSA, Edition date: 201710, Second Printing
Brakes
Page 232 of 642
PRINCIPLE OF OPERATION
WARNINGS
Hill descent control cannot controldescent in all surface conditions andcircumstances, such as ice orextremely steep grades. Hill descentcontrol is a driver assist system and cannotsubstitute for good judgment by the driver.Failure to do so may result in loss of vehiclecontrol, crash or serious injury.
Hill descent control does not providehill hold at zero miles per hour (0kilometers per hour). When stopped,the parking brake must be applied or thevehicle must be placed in P (Park) or itmay roll away.
Hill descent control allows the driver to setand maintain vehicle speed whiledescending steep grades in various surfaceconditions.
Hill descent control can maintain vehiclespeeds on downhill grades between 2 mph(3 km/h) and 12 mph (20 km/h). Above 20mph (32 km/h), the system remainsarmed, but descent speed cannot be setor maintained.
Hill descent control requires a coolingdown interval after a period of sustaineduse. The amount of time that the featurecan remain active before cooling varieswith conditions. The system will provide awarning in the message center and a chimewill sound when the system is about todisengage for cooling. At this time,manually apply the brakes as needed tomaintain descent speed.
USING HILL DESCENT
CONTROL
Press and release the hilldescent button located on theinstrument panel. A light in thecluster will illuminate and a chime willsound when this feature is activated.
To increase descent speed, press theaccelerator pedal until the desired speedis reached. To decrease descent speed,press the brake pedal until the desiredspeed is reached.
Whether accelerating or decelerating, oncethe desired descent speed is reached,remove your feet from the pedals and thechosen vehicle speed will be maintained.
Note:Noise from the ABS pump motor maybe observed during hill descent controloperation. This is a normal characteristic ofthe ABS and should be no reason forconcern.
Hill descent modes
•At speeds below 20 mph (32 km/h):When the Hill Descent Control switchis pressed and Hill Descent Control isactive, the Hill Descent Control telltalewill flash.
•At speeds below 20 mph (32 km/h):When the Hill Descent Control switchis pressed and conditions are notcorrect for hill descent activation, theHill Descent Control system will beenabled, the Hill Descent Controltelltale will be solid and a message willdisplay in the information display.
•At speeds above 20 mph (32 km/h):When the Hill Descent Control switchis pressed, the Hill Descent Controlsystem will be enabled, the telltale inthe cluster will not be illuminated anda message will be displayed in theinformation display.
229
Super Duty (TFE) Canada/United States of America, enUSA, Edition date: 201710, Second Printing
Terrain Control (If Equipped)E163957
Page 234 of 642

PRINCIPLE OF OPERATION
WARNINGS
To help avoid personal injury, pleaseread and understand the limitationsof the system as contained in thissection. Sensing is only an aid for some(generally large and fixed) objects whenmoving on a flat surface at parking speeds.Certain objects with surfaces that absorbultrasonic waves, surrounding vehicle'sparking aid systems, traffic controlsystems, fluorescent lamps, inclementweather, air brakes, and external motorsand fans may also affect the function ofthe sensing system. This may includereduced performance or a false activation.
To help avoid personal injury, alwaysuse caution when in reverse (R) andwhen using the sensing system.
This system is not designed toprevent contact with small or movingobjects. The system is designed toprovide a warning to assist the driver indetecting large stationary objects to avoiddamaging your vehicle. The system maynot detect smaller objects, particularlythose close to the ground.
Certain add-on devices such as largetrailer hitches, bike or surfboard racksand any device that may block thenormal detection zone of the system, maycreate false beeps.
Note:Keep the sensors, located on thebumper or fascia, free from snow, ice andlarge accumulations of dirt. If the sensorsare covered, the system’s accuracy can beaffected. Do not clean the sensors withsharp objects.
Note:If your vehicle sustains damage tothe bumper or fascia, leaving it misalignedor bent, the sensing zone may be alteredcausing inaccurate measurement ofobstacles or false alarms.
Note:The sensing system cannot be turnedoff when a MyKey is present. See Principleof Operation (page 61).
Note:If your vehicle is equipped with atrailer tow package and a trailer isconnected to your vehicle, the rear sensingsystem disables and you cannot switch thesystem on through the information display.
The sensing system warns the driver ofobstacles within a certain range of yourvehicle. The system turns on automaticallywhenever you switch the ignition on.
When receiving a detection warning, theradio volume reduces to a predeterminedlevel. After the warning goes away, theradio volume returns to the previous level.
You can turn the system on oroff by pressing the parking aidbutton. If your vehicle does nothave a parking aid button, the system canbe switched off through the informationdisplay menu or from the pop-up messagethat appears once you shift thetransmission into reverse (R). See GeneralInformation (page 111).
If a fault is present in the system, a warningmessage appears in the informationdisplay and you cannot switch the systemon through the pop-up message. SeeInformation Messages (page 128).
REAR PARKING AID
The rear sensors are only active when thetransmission is in reverse (R). As yourvehicle moves closer to the obstacle, therate of the audible warning increases.When the obstacle is less than 12 in(30 cm) away, the warning soundscontinuously. If the system detects a
231
Super Duty (TFE) Canada/United States of America, enUSA, Edition date: 201710, Second Printing
Parking AidsE139213
Page 239 of 642
The following camera views can beaccessed in park (P), neutral (N) or drive(D) when you press the camera button:
•Front 360 + Normal: Contains thenormal front camera view next to a360 degree camera view.
•Front Normal View: Provides animage of what is directly in front of yourvehicle.
•Front Split View: Provides anextended view of what is in front ofyour vehicle by using the front and sidecameras.
The following camera views can beaccessed when you shift into reverse (R):
•Rear 360 + Normal: Contains thenormal rear camera view next to a 360degree camera view. Press the zoom(+) button to quickly access RearNormal View from this screen.
•Rear Normal View: Provides an imageof what is directly behind your vehicle.
•Rear Split View: Provides anextended view of what is behind yourvehicle by using the rear and sidecameras.
•Rear High View: Provides an imageof your truck bed and can be used toassist you when backing up to align andhitch a fifth wheel or gooseneck trailer.
•Auxiliary View: Provides a rear viewimage from the back of your trailerwhile reversing.
•Trailer Reverse Guidance View:Provides an image of the rear of yourvehicle using the side cameras, usefulwhen reversing with a trailer. Use thearrows at the bottom of the screen toadjust the side camera position.
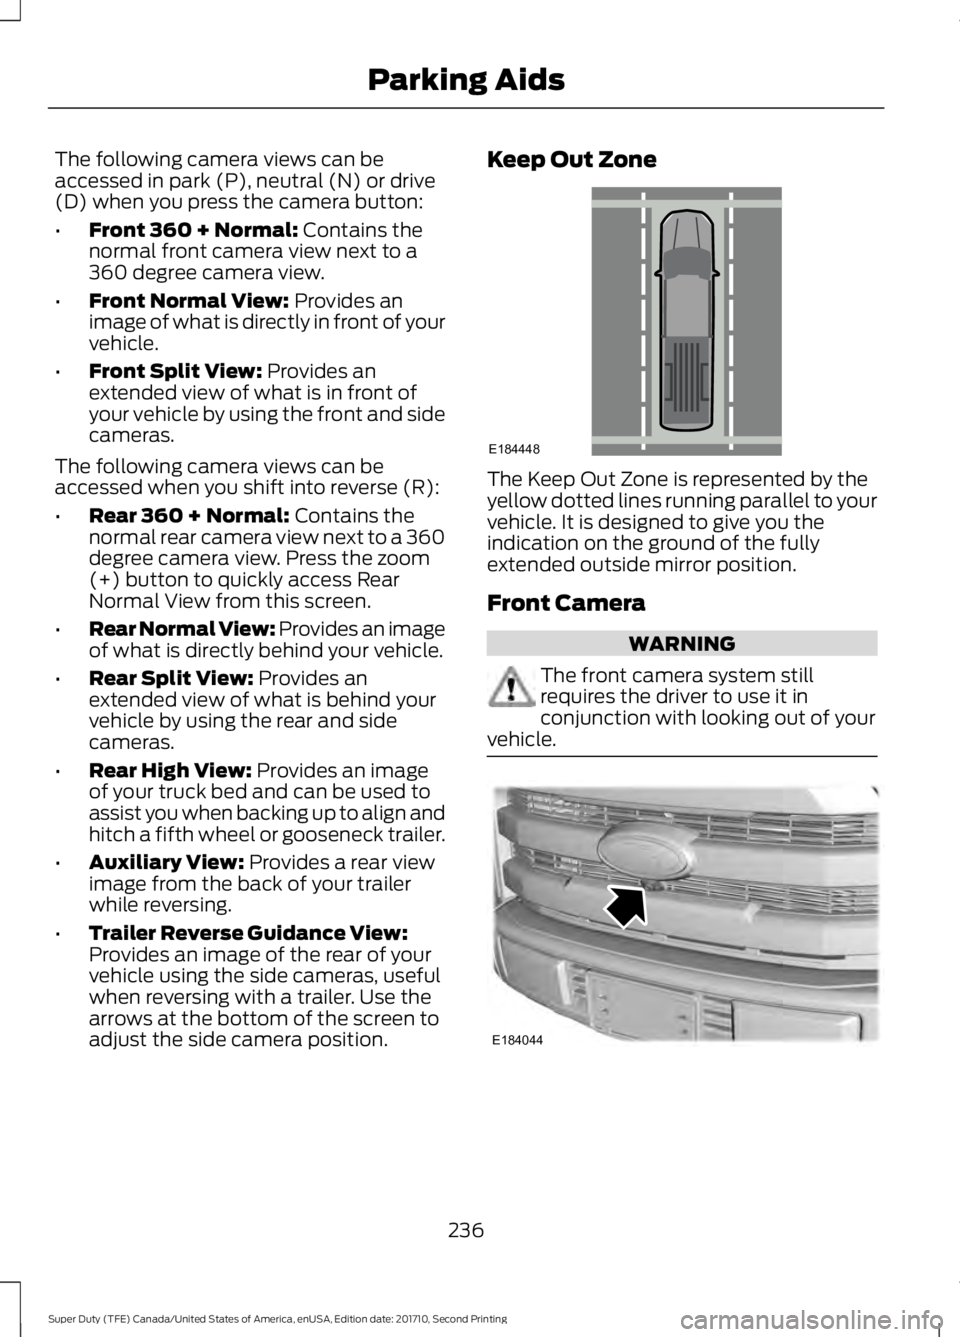
Keep Out Zone
The Keep Out Zone is represented by theyellow dotted lines running parallel to yourvehicle. It is designed to give you theindication on the ground of the fullyextended outside mirror position.
Front Camera
WARNING
The front camera system stillrequires the driver to use it inconjunction with looking out of yourvehicle.
236
Super Duty (TFE) Canada/United States of America, enUSA, Edition date: 201710, Second Printing
Parking AidsE184448 E184044
Page 240 of 642
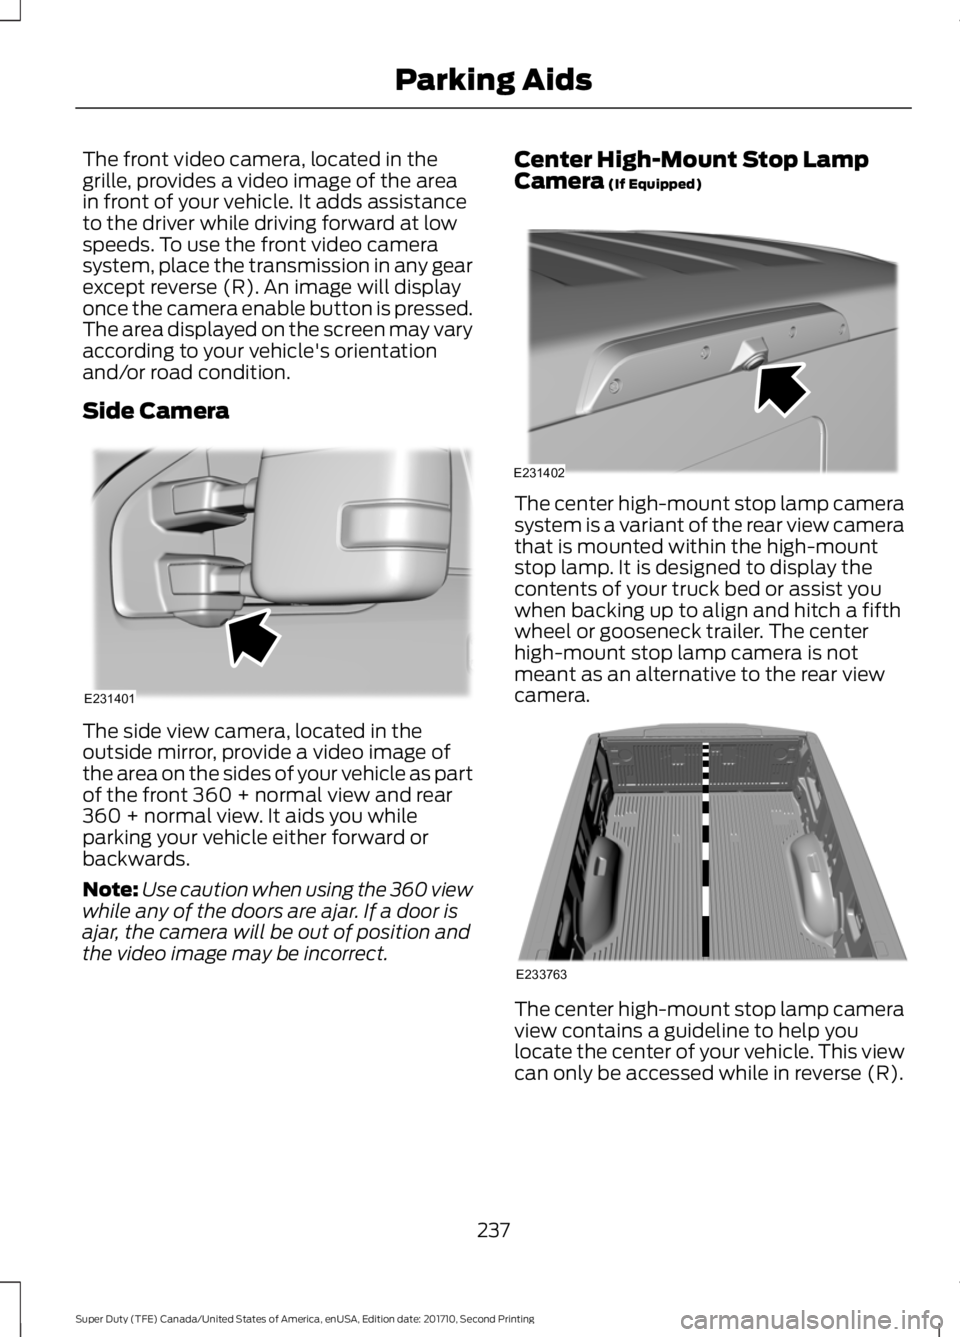
The front video camera, located in thegrille, provides a video image of the areain front of your vehicle. It adds assistanceto the driver while driving forward at lowspeeds. To use the front video camerasystem, place the transmission in any gearexcept reverse (R). An image will displayonce the camera enable button is pressed.The area displayed on the screen may varyaccording to your vehicle's orientationand/or road condition.
Side Camera
The side view camera, located in theoutside mirror, provide a video image ofthe area on the sides of your vehicle as partof the front 360 + normal view and rear360 + normal view. It aids you whileparking your vehicle either forward orbackwards.
Note:Use caution when using the 360 viewwhile any of the doors are ajar. If a door isajar, the camera will be out of position andthe video image may be incorrect.
Center High-Mount Stop LampCamera (If Equipped)
The center high-mount stop lamp camerasystem is a variant of the rear view camerathat is mounted within the high-mountstop lamp. It is designed to display thecontents of your truck bed or assist youwhen backing up to align and hitch a fifthwheel or gooseneck trailer. The centerhigh-mount stop lamp camera is notmeant as an alternative to the rear viewcamera.
The center high-mount stop lamp cameraview contains a guideline to help youlocate the center of your vehicle. This viewcan only be accessed while in reverse (R).
237
Super Duty (TFE) Canada/United States of America, enUSA, Edition date: 201710, Second Printing
Parking AidsE231401 E231402 E233763
Page 272 of 642
RV & Trailer Towing Guide Online
http://www.fleet.ford.com/towing-guides/Website
TRAILER REVERSING AIDS
Trailer Reverse Guidance
WARNING
Driving while distracted can result inloss of vehicle control, crash andinjury. We strongly recommend thatyou use extreme caution when using anydevice that may take your focus off theroad. Your primary responsibility is the safeoperation of your vehicle. We recommendagainst the use of any hand-held devicewhile driving and encourage the use ofvoice-operated systems when possible.Make sure you are aware of all applicablelocal laws that may affect the use ofelectronic devices while driving.
Note:The system is not a substitute forsafe driving practices.
Note:You must always be aware of thevehicle and trailer combination and thesurrounding environment.
Note:The system does not detect orprevent the vehicle or trailer from makingcontact with obstacles in the surroundingenvironment.
Note:Keep in mind that the front end ofthe vehicle swings out when changing thedirection of the trailer.
Note:The system relies on usermeasurements to determine stickerplacement and system limits. It is critical totake the key measurements correctly.Incorrect measurements can result in theimproper function of the system up to andincluding contact between the vehicle andtrailer.
Note:The system limits vehicle speed whenbacking up. The system is not a replacementfor proper use of the throttle and brakepedals.
Principle of Operation
Trailer Reverse Guidance (TRG) is a driverassistance feature that helps take theguesswork out of getting your trailerpositioned where you want it, quickly andeasily, while you're driving in reverse.
Each trailer you use with your vehicle hasto be setup once.
Sticker placement is extremely importantand there are specific placement rules.
Setting Up Trailer ReverseGuidance
Note:Once you have entered a trailer'sinformation into the system, it is stored foreasy recall. A maximum of 10 trailers can beadded to the system.
Step 1: Position your Vehicle and Trailer
Hitch your trailer to the truck and connectthe electrical wiring harness. Check tomake sure that the wiring is working SeeEssential Towing Checks (page 281).
Park your vehicle and hitched trailer on alevel surface.
269
Super Duty (TFE) Canada/United States of America, enUSA, Edition date: 201710, Second Printing
Towing
Page 291 of 642
When Towing a Trailer
•Check your hitch, electrical connectionsand trailer wheel lug nuts thoroughlyafter you have traveled 50 mi (80 km).
•Do not drive faster than 70 mph(113 km/h) during the first 500 mi(800 km).
•Do not make full-throttle starts.
•When stopped in congested or heavytraffic during hot weather, place thegearshift in position P to aid engine andtransmission cooling and to help A/Cperformance.
•Turn off the speed control with heavyloads or in hilly terrain. The speedcontrol may turn off automaticallywhen you are towing on long, steepgrades.
•Shift to a lower gear when driving downa long or steep hill. Do not apply thebrakes continuously, as they mayoverheat and become less effective.
•If your transmission is equipped with aGrade Assist or Tow/Haul feature, usethis feature when towing. This providesengine braking and helps eliminateexcessive transmission shifting foroptimum fuel economy andtransmission cooling.
•If your vehicle is equipped withAdaptive Steering and you haveenabled Tow/Haul, the AdaptiveSteering system adjusts the steeringresponse to match your vehicle’s load.The system reduces vehicle sensitivityto steering inputs at higher vehiclespeeds while it maintains the ease ofparking and maneuverability at lowspeeds.
•If your vehicle is equipped withAdvanceTrac with RSC, this systemmay turn on during typical corneringmaneuvers with a heavily loaded trailer.This is normal. Turning the corner at aslower speed while towing may reducethis tendency.
•If you are towing a trailer frequently inhot weather, hilly conditions, at thegross combined weight rating (or anycombination of these factors), considerrefilling your rear axle with syntheticgear lubricant (if the axle is not alreadyfilled with it).
•Allow more distance for stopping witha trailer attached. Anticipate stops andbrake gradually.
•Avoid parking on a grade. However, ifyou must park on a grade:
1. Turn the steering wheel to point yourvehicle tires away from traffic flow.
2. Set your vehicle parking brake.
3. Place the automatic transmission inposition P.
4. Place wheel chocks in front and backof the trailer wheels. (Chocks notincluded with vehicle.)
Your vehicle may be equipped with atemporary or conventional spare tire. A"temporary" spare tire is different in size(diameter or width), tread-type(All-Season or All Terrain) or is from adifferent manufacturer than the road tireson your vehicle. Consult information on thetire label or Safety Compliance label forlimitations when using.
Launching or Retrieving a Boat orPersonal Watercraft (PWC)
Note:Disconnect the wiring to the trailerbefore backing the trailer into the water.
Note:Reconnect the wiring to the trailerafter you remove the trailer from the water.
288
Super Duty (TFE) Canada/United States of America, enUSA, Edition date: 201710, Second Printing
Towing
Page 302 of 642
Note:When you try to restart your vehicleafter a fuel shutoff, your vehicle makes surethat various systems are safe to restart.Once your vehicle determines that thesystems are safe, then your vehicle willallow you to restart.
In the event of a moderate to severecollision, your vehicle is equipped with afuel pump shut-off feature that stops theflow of fuel to the engine. Not every impactwill cause a shutoff.
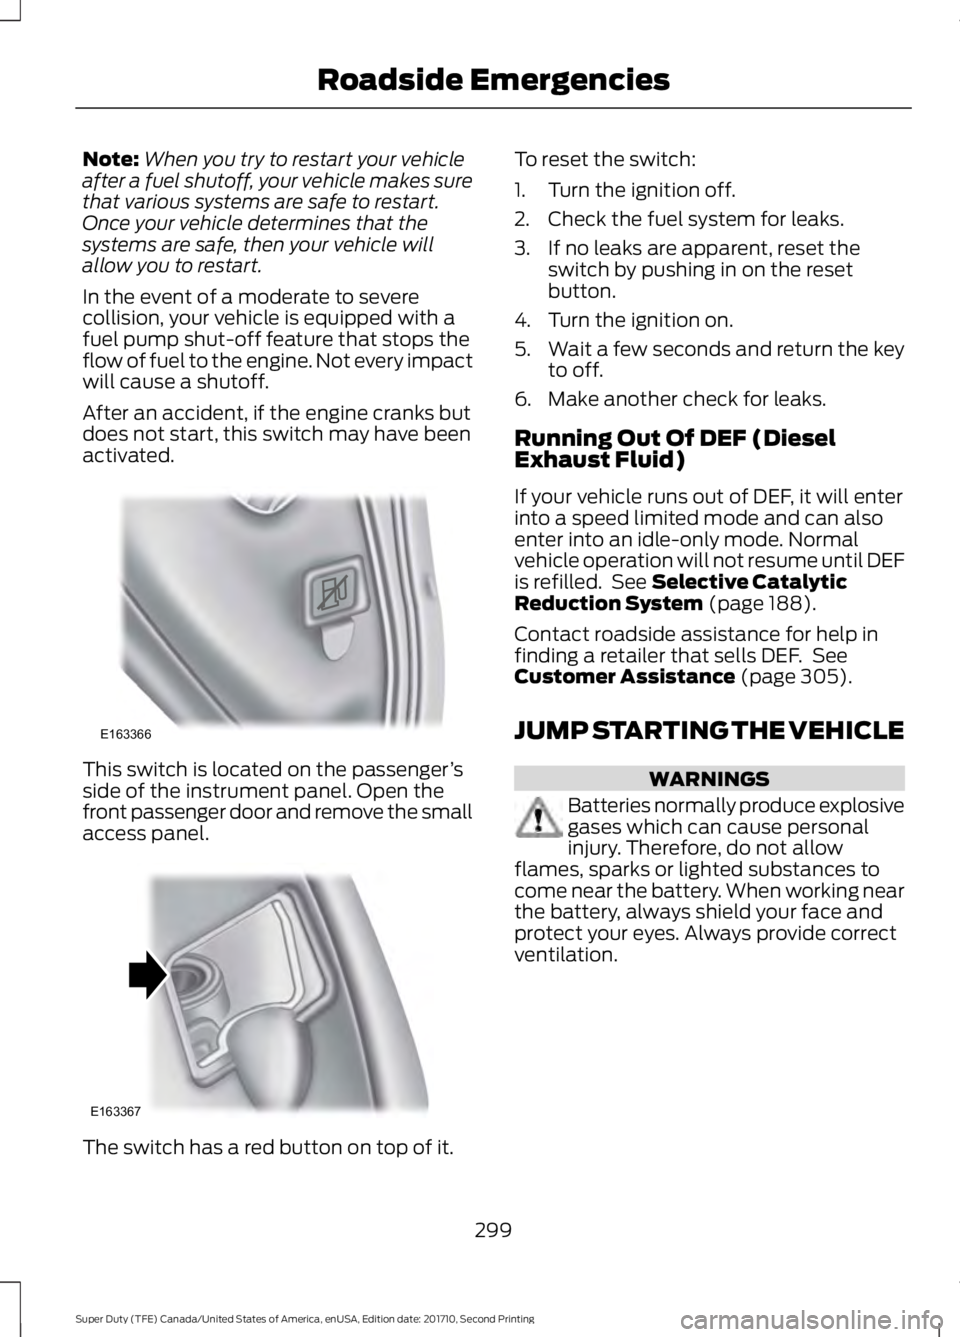
After an accident, if the engine cranks butdoes not start, this switch may have beenactivated.
This switch is located on the passenger’sside of the instrument panel. Open thefront passenger door and remove the smallaccess panel.
The switch has a red button on top of it.
To reset the switch:
1. Turn the ignition off.
2. Check the fuel system for leaks.
3. If no leaks are apparent, reset theswitch by pushing in on the resetbutton.
4. Turn the ignition on.
5.Wait a few seconds and return the keyto off.
6. Make another check for leaks.
Running Out Of DEF (DieselExhaust Fluid)
If your vehicle runs out of DEF, it will enterinto a speed limited mode and can alsoenter into an idle-only mode. Normalvehicle operation will not resume until DEFis refilled. See Selective CatalyticReduction System (page 188).
Contact roadside assistance for help infinding a retailer that sells DEF. SeeCustomer Assistance (page 305).
JUMP STARTING THE VEHICLE
WARNINGS
Batteries normally produce explosivegases which can cause personalinjury. Therefore, do not allowflames, sparks or lighted substances tocome near the battery. When working nearthe battery, always shield your face andprotect your eyes. Always provide correctventilation.
299
Super Duty (TFE) Canada/United States of America, enUSA, Edition date: 201710, Second Printing
Roadside EmergenciesE163366 E163367