2017 FORD F450 SUPER DUTY headlamp
[x] Cancel search: headlampPage 7 of 642

Bed Ramps....................................................265
Towing
Towing a Trailer............................................268
Trailer Reversing Aids.................................269
Trailer Sway Control....................................277
Recommended Towing Weights............277
Essential Towing Checks...........................281
Towing the Vehicle on Four Wheels......289
Driving Hints
Breaking-In.....................................................292
Economical Driving.....................................292
Driving Through Water...............................293
Floor Mats.......................................................293
Snowplowing................................................294
Roadside Emergencies
Roadside Assistance..................................297
Hazard Flashers...........................................298
Fuel Shutoff - 6.2L/6.8L...........................298
Fuel Shutoff - 6.7L Diesel.........................298
Jump Starting the Vehicle........................299
Post-Crash Alert System..........................302
Transporting the Vehicle...........................302
Towing Points...............................................303
Customer Assistance
Getting the Services You Need..............305
In California (U.S. Only)............................306
The Better Business Bureau (BBB) AutoLine Program (U.S. Only)......................307
Utilizing the Mediation/ArbitrationProgram (Canada Only)......................308
Getting Assistance Outside the U.S. andCanada.......................................................308
Ordering Additional Owner'sLiterature....................................................309
Reporting Safety Defects (U.S.Only).............................................................310
Reporting Safety Defects (CanadaOnly).............................................................310
Fuses
Fuse Specification Chart............................312
Changing a Fuse..........................................320
Maintenance
General Information....................................322
Opening and Closing the Hood..............322
Under Hood Overview - 6.2L...................323
Under Hood Overview - 6.7L Diesel......324
Under Hood Overview - 6.8L..................326
Engine Oil Dipstick - 6.2L/6.8L...............327
Engine Oil Dipstick - 6.7L Diesel.............327
Engine Oil Check - 6.2L/6.8L...................327
Engine Oil Check - 6.7L Diesel................328
Changing the Engine Oil and OilFilter..............................................................329
Changing the Coalescer FilterElement......................................................330
Oil Change Indicator Reset.......................331
Engine Coolant Check - 6.2L/6.8L........332
Engine Coolant Check - 6.7L Diesel......336
Automatic Transmission FluidCheck...........................................................340
Transfer Case Fluid Check........................343
Brake Fluid Check........................................343
Power Steering Fluid Check....................344
Washer Fluid Check....................................344
Draining the Fuel Filter Water Trap - 6.7LDiesel...........................................................345
Fuel Filter - 6.2L/6.8L................................346
Changing the 12V Battery.........................346
Checking the Wiper Blades.....................348
Changing the Wiper Blades.....................348
Adjusting the Headlamps........................349
Changing a Bulb..........................................350
Bulb Specification Chart...........................353
Changing the Engine Air Filter - 6.2L/6.8L...............................................................356
4
Super Duty (TFE) Canada/United States of America, enUSA, Edition date: 201710, Second Printing
Table of Contents
Page 89 of 642
GENERAL INFORMATION
Condensation in the Exterior FrontLamps and Rear Lamps
Exterior front lamps and rear lamps havevents to accommodate normal changesin air pressure.
Condensation can be a natural by-productof this design. When moist air enters thelamp assembly through the vents, there isa possibility that condensation can occurwhen the temperature is cold. Whennormal condensation occurs, a fine mistcan form on the interior of the lens. Thefine mist eventually clears and exitsthrough the vents during normal operation.
Clearing time may take as long as 48 hoursunder dry weather conditions.
Examples of acceptable condensation are:
•The presence of a fine mist (no streaks,drip marks or large droplets).
•A fine mist covers less than 50% of thelens.
Examples of unacceptable condensationare:
•A water puddle inside the lamp.
•Streaks, drip marks or large dropletspresent on the interior of the lens.
If you see any unacceptable condensation,have your vehicle checked by an authorizeddealer.
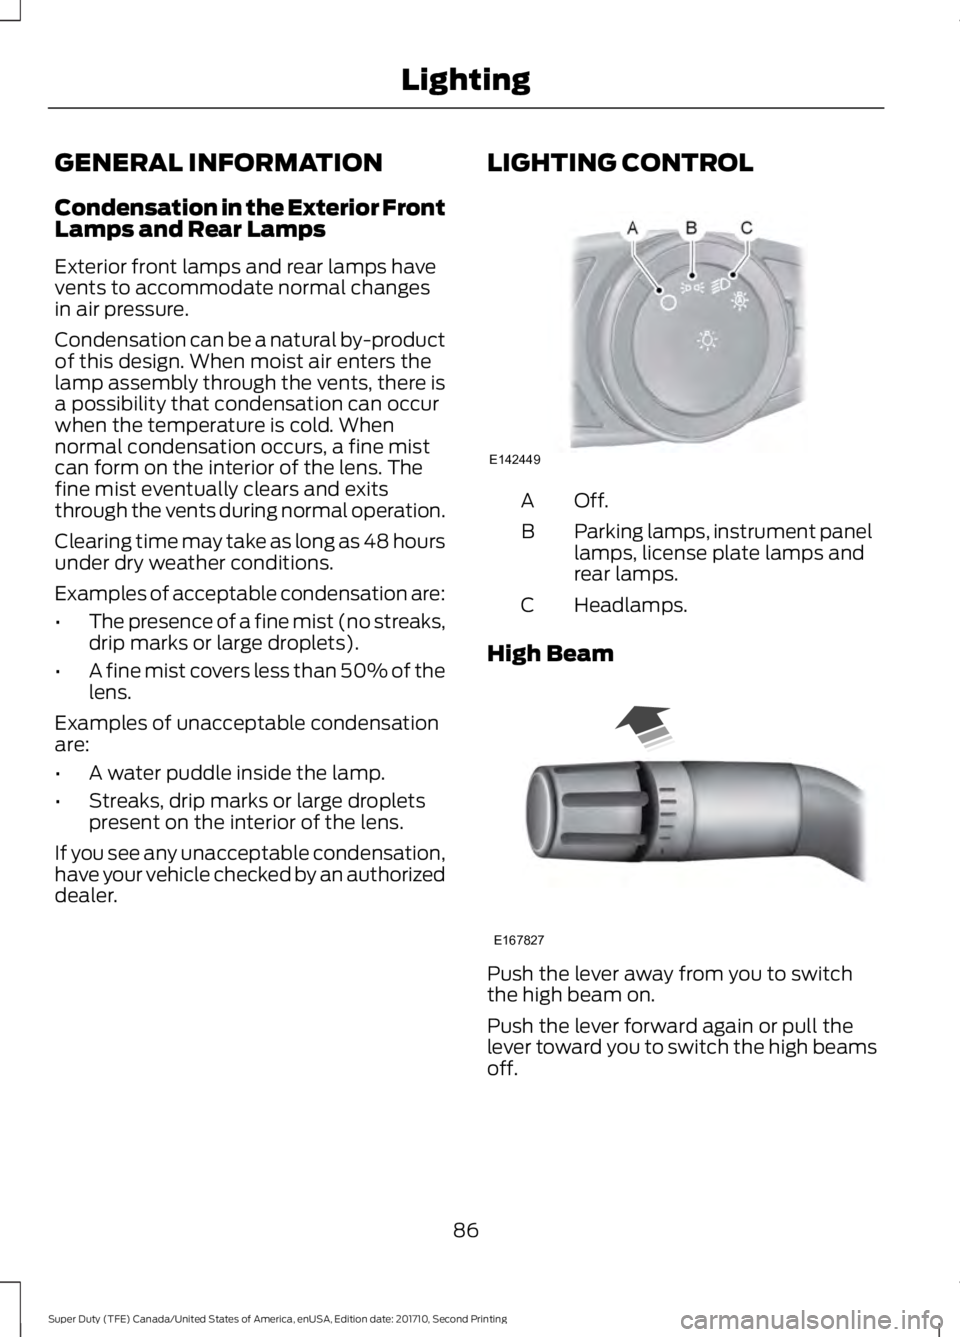
LIGHTING CONTROL
Off.A
Parking lamps, instrument panellamps, license plate lamps andrear lamps.
B
Headlamps.C
High Beam
Push the lever away from you to switchthe high beam on.
Push the lever forward again or pull thelever toward you to switch the high beamsoff.
86
Super Duty (TFE) Canada/United States of America, enUSA, Edition date: 201710, Second Printing
LightingE142449 E167827
Page 90 of 642
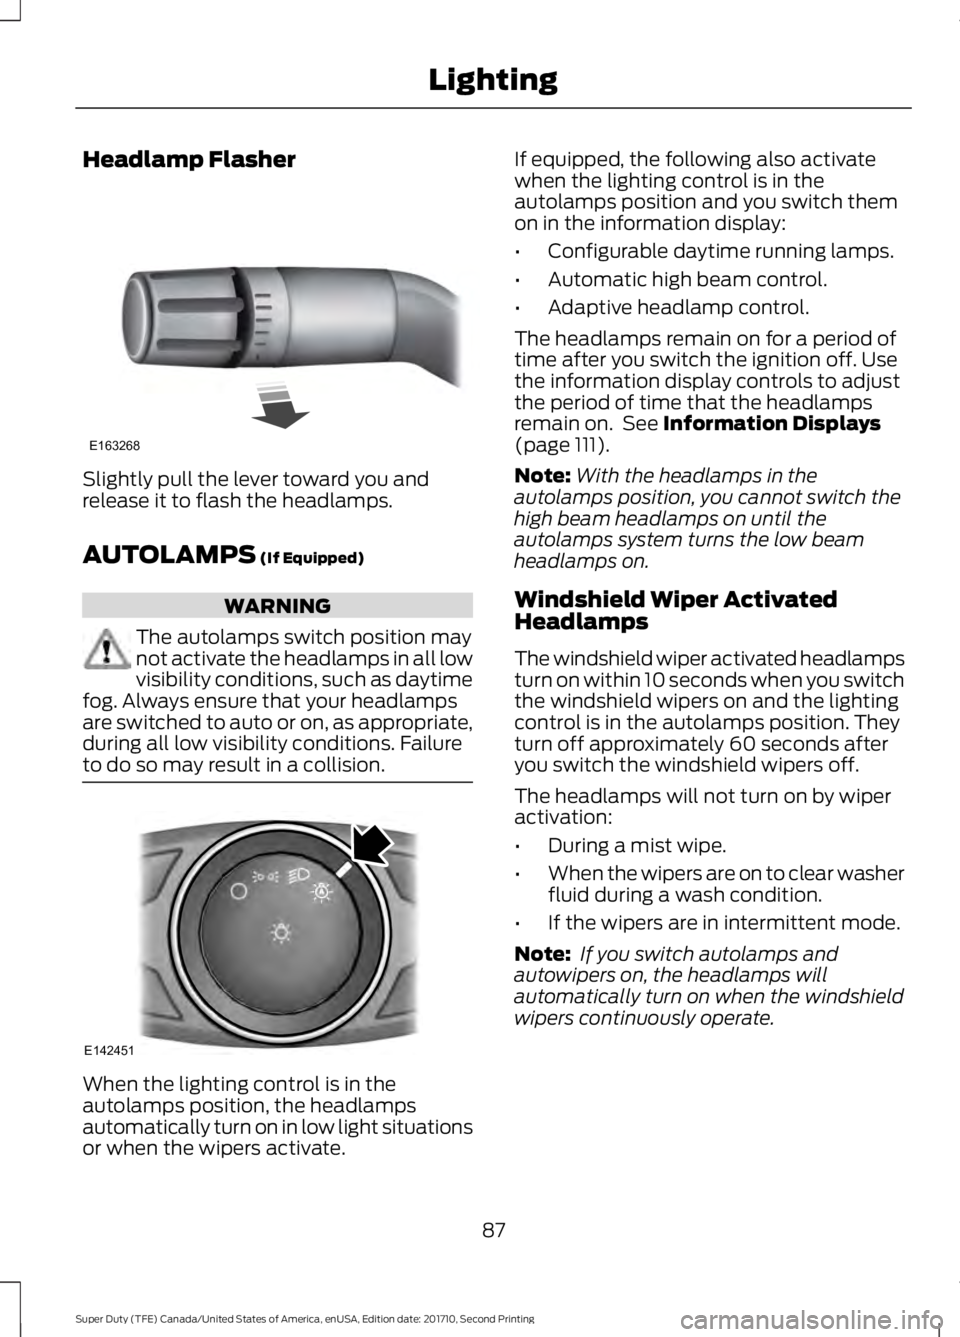
Headlamp Flasher
Slightly pull the lever toward you andrelease it to flash the headlamps.
AUTOLAMPS (If Equipped)
WARNING
The autolamps switch position maynot activate the headlamps in all lowvisibility conditions, such as daytimefog. Always ensure that your headlampsare switched to auto or on, as appropriate,during all low visibility conditions. Failureto do so may result in a collision.
When the lighting control is in theautolamps position, the headlampsautomatically turn on in low light situationsor when the wipers activate.
If equipped, the following also activatewhen the lighting control is in theautolamps position and you switch themon in the information display:
•Configurable daytime running lamps.
•Automatic high beam control.
•Adaptive headlamp control.
The headlamps remain on for a period oftime after you switch the ignition off. Usethe information display controls to adjustthe period of time that the headlampsremain on. See Information Displays(page 111).
Note:With the headlamps in theautolamps position, you cannot switch thehigh beam headlamps on until theautolamps system turns the low beamheadlamps on.
Windshield Wiper ActivatedHeadlamps
The windshield wiper activated headlampsturn on within 10 seconds when you switchthe windshield wipers on and the lightingcontrol is in the autolamps position. Theyturn off approximately 60 seconds afteryou switch the windshield wipers off.
The headlamps will not turn on by wiperactivation:
•During a mist wipe.
•When the wipers are on to clear washerfluid during a wash condition.
•If the wipers are in intermittent mode.
Note: If you switch autolamps andautowipers on, the headlamps willautomatically turn on when the windshieldwipers continuously operate.
87
Super Duty (TFE) Canada/United States of America, enUSA, Edition date: 201710, Second Printing
LightingE163268 E142451
Page 91 of 642
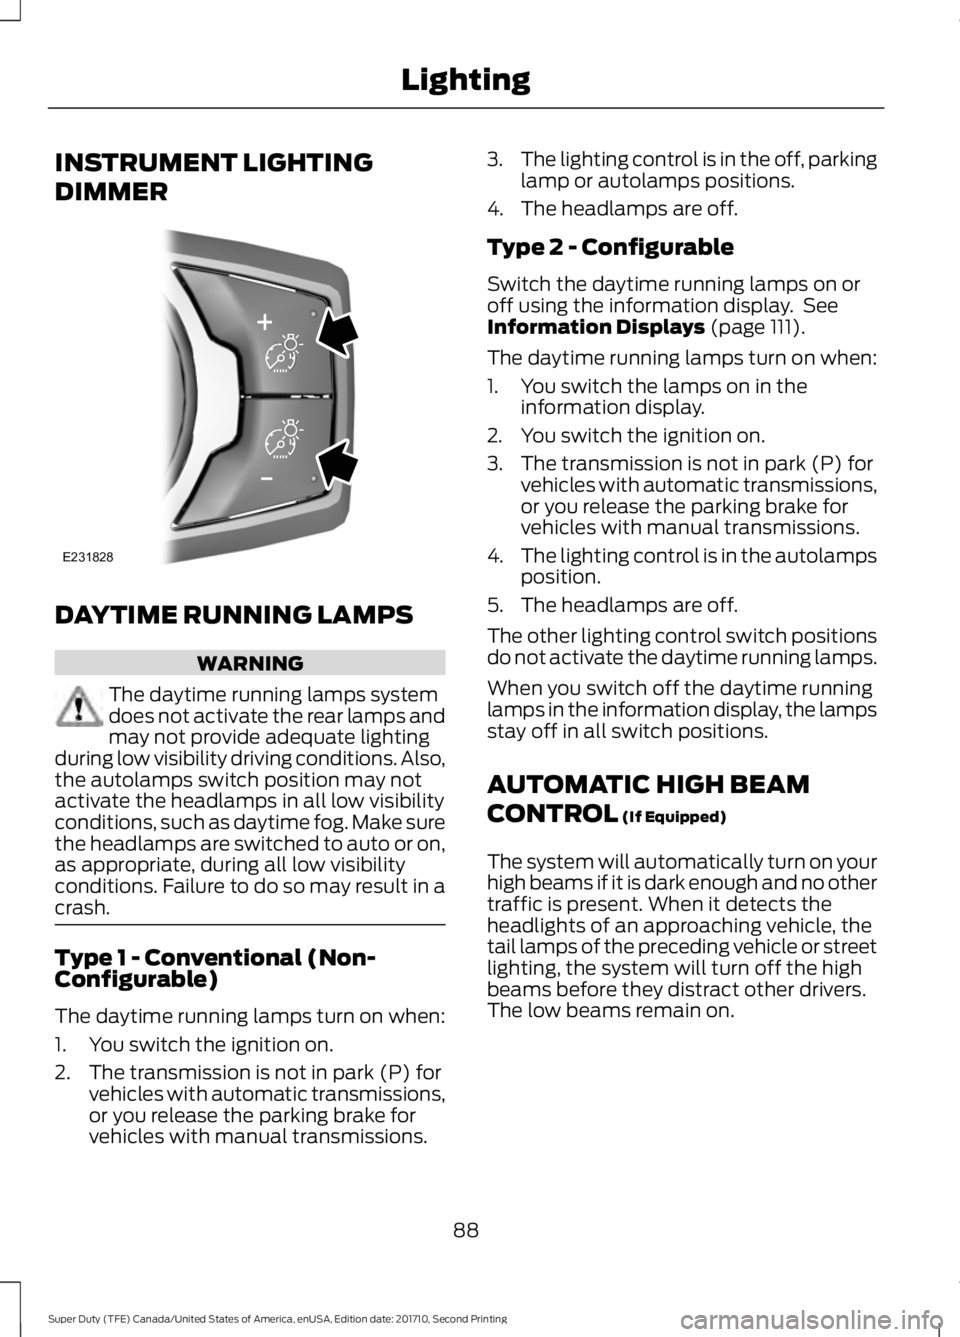
INSTRUMENT LIGHTING
DIMMER
DAYTIME RUNNING LAMPS
WARNING
The daytime running lamps systemdoes not activate the rear lamps andmay not provide adequate lightingduring low visibility driving conditions. Also,the autolamps switch position may notactivate the headlamps in all low visibilityconditions, such as daytime fog. Make surethe headlamps are switched to auto or on,as appropriate, during all low visibilityconditions. Failure to do so may result in acrash.
Type 1 - Conventional (Non-Configurable)
The daytime running lamps turn on when:
1. You switch the ignition on.
2. The transmission is not in park (P) forvehicles with automatic transmissions,or you release the parking brake forvehicles with manual transmissions.
3.The lighting control is in the off, parkinglamp or autolamps positions.
4. The headlamps are off.
Type 2 - Configurable
Switch the daytime running lamps on oroff using the information display. SeeInformation Displays (page 111).
The daytime running lamps turn on when:
1. You switch the lamps on in theinformation display.
2. You switch the ignition on.
3. The transmission is not in park (P) forvehicles with automatic transmissions,or you release the parking brake forvehicles with manual transmissions.
4.The lighting control is in the autolampsposition.
5. The headlamps are off.
The other lighting control switch positionsdo not activate the daytime running lamps.
When you switch off the daytime runninglamps in the information display, the lampsstay off in all switch positions.
AUTOMATIC HIGH BEAM
CONTROL (If Equipped)
The system will automatically turn on yourhigh beams if it is dark enough and no othertraffic is present. When it detects theheadlights of an approaching vehicle, thetail lamps of the preceding vehicle or streetlighting, the system will turn off the highbeams before they distract other drivers.The low beams remain on.
88
Super Duty (TFE) Canada/United States of America, enUSA, Edition date: 201710, Second Printing
LightingE231828
Page 92 of 642

Note:If it appears that automatic controlof the high beams is not functioningproperly, check the windshield in front ofthe camera for a blockage. A clear view ofthe road is required for proper systemoperation. Have any windshield damage inthe area of the camera’s field-of-viewrepaired.
Note:If the system detects a blockage, forexample bird droppings, bug splatter, snowor ice, the system will go into low beammode until you clear the blockage. Amessage may also appear in the instrumentcluster display noting the front camera isblocked.
Note:Typical road dust, dirt and waterspots will not affect the performance of theautomatic high beam system. However, incold or inclement weather conditions, youwill notice a decrease in the availability ofthe high beam system, especially at startup. If you want to change the beam stateindependently of the system, you mayswitch the high beams on or off using themultifunction switch. Automatic control willresume when conditions are correct.
Note:Modification of the vehicle ride heightsuch as using much larger tires, maydegrade feature performance.
A camera sensor, centrally mountedbehind the windshield of your vehicle,continuously monitors conditions to decidewhen to switch the high beams off and on.
Once the system is active, the high beamswill switch on if:
•the ambient light level is low enough
•there is no traffic in front of the vehicle
•the vehicle speed is greater thanapproximately 32 mph (52 km/h).
The high beams will switch off if:
•the system detects the headlamps ofan approaching vehicle or the taillamps of a preceding vehicle.
•vehicle speed falls belowapproximately 27 mph (44 km/h)
•the ambient light level is high enoughthat high beams are not required
•the system detects severe rain, snowor fog
•the camera is blocked.
Activating the System
Switch the system on using the informationdisplay. See Information Displays (page111). Switch the autolamps on. SeeAutolamps (page 87).
Manually Overriding the System
89
Super Duty (TFE) Canada/United States of America, enUSA, Edition date: 201710, Second Printing
LightingE142451 E169254
Page 93 of 642
When the automatic control has activatedthe high beams, pushing or pulling the stalkwill provide a temporary override to lowbeam.
Use the information display menu topermanently deactivate the system, or turnthe lighting control switch from autolampsto headlamps.
FRONT FOG LAMPS (If Equipped)
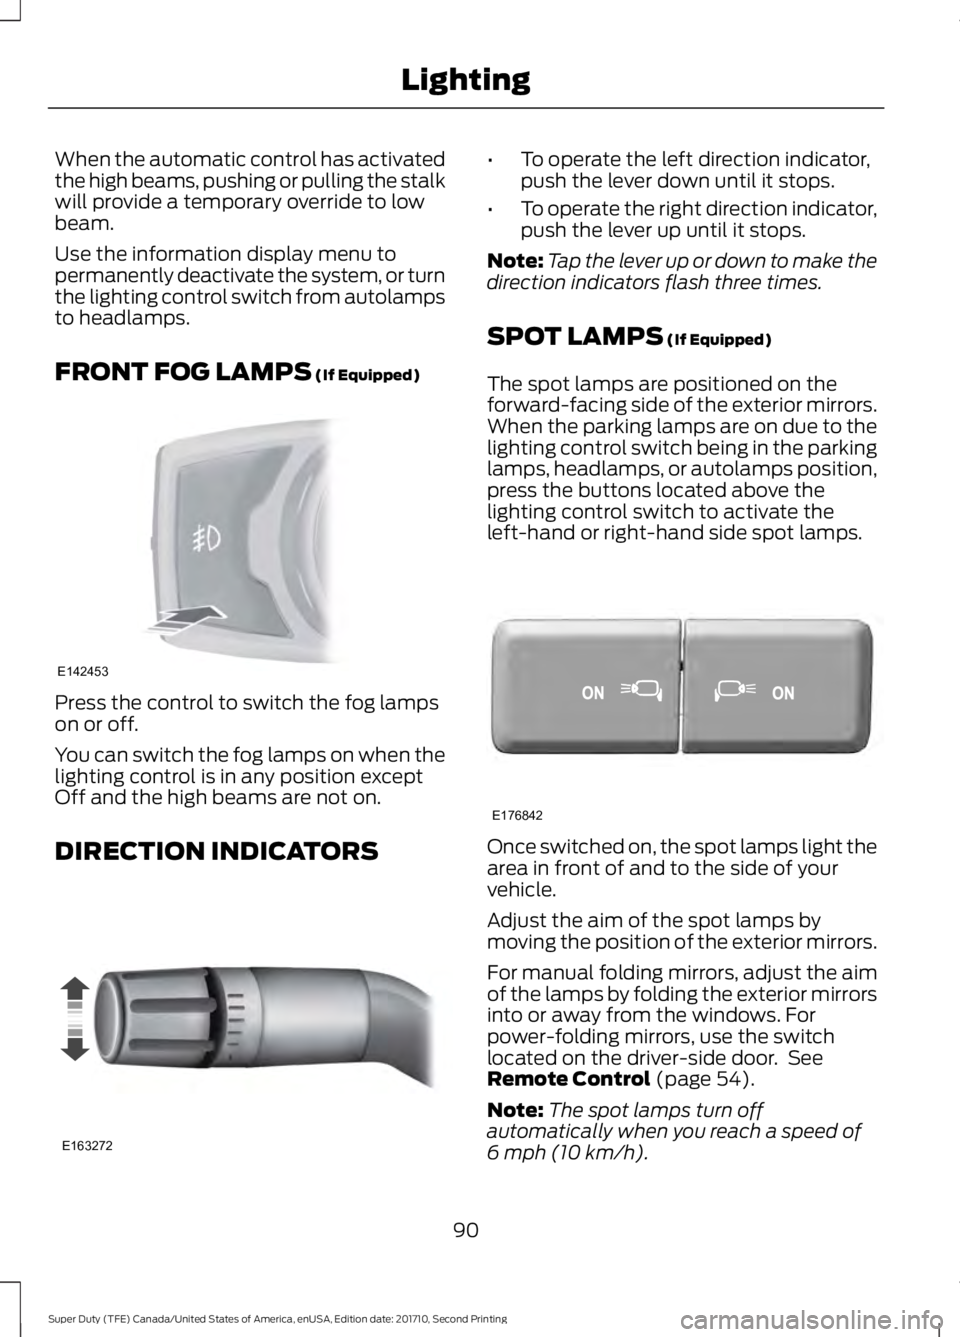
Press the control to switch the fog lampson or off.
You can switch the fog lamps on when thelighting control is in any position exceptOff and the high beams are not on.
DIRECTION INDICATORS
•To operate the left direction indicator,push the lever down until it stops.
•To operate the right direction indicator,push the lever up until it stops.
Note:Tap the lever up or down to make thedirection indicators flash three times.
SPOT LAMPS (If Equipped)
The spot lamps are positioned on theforward-facing side of the exterior mirrors.When the parking lamps are on due to thelighting control switch being in the parkinglamps, headlamps, or autolamps position,press the buttons located above thelighting control switch to activate theleft-hand or right-hand side spot lamps.
Once switched on, the spot lamps light thearea in front of and to the side of yourvehicle.
Adjust the aim of the spot lamps bymoving the position of the exterior mirrors.
For manual folding mirrors, adjust the aimof the lamps by folding the exterior mirrorsinto or away from the windows. Forpower-folding mirrors, use the switchlocated on the driver-side door. SeeRemote Control (page 54).
Note:The spot lamps turn offautomatically when you reach a speed of6 mph (10 km/h).
90
Super Duty (TFE) Canada/United States of America, enUSA, Edition date: 201710, Second Printing
LightingE142453 E163272 E176842
Page 101 of 642
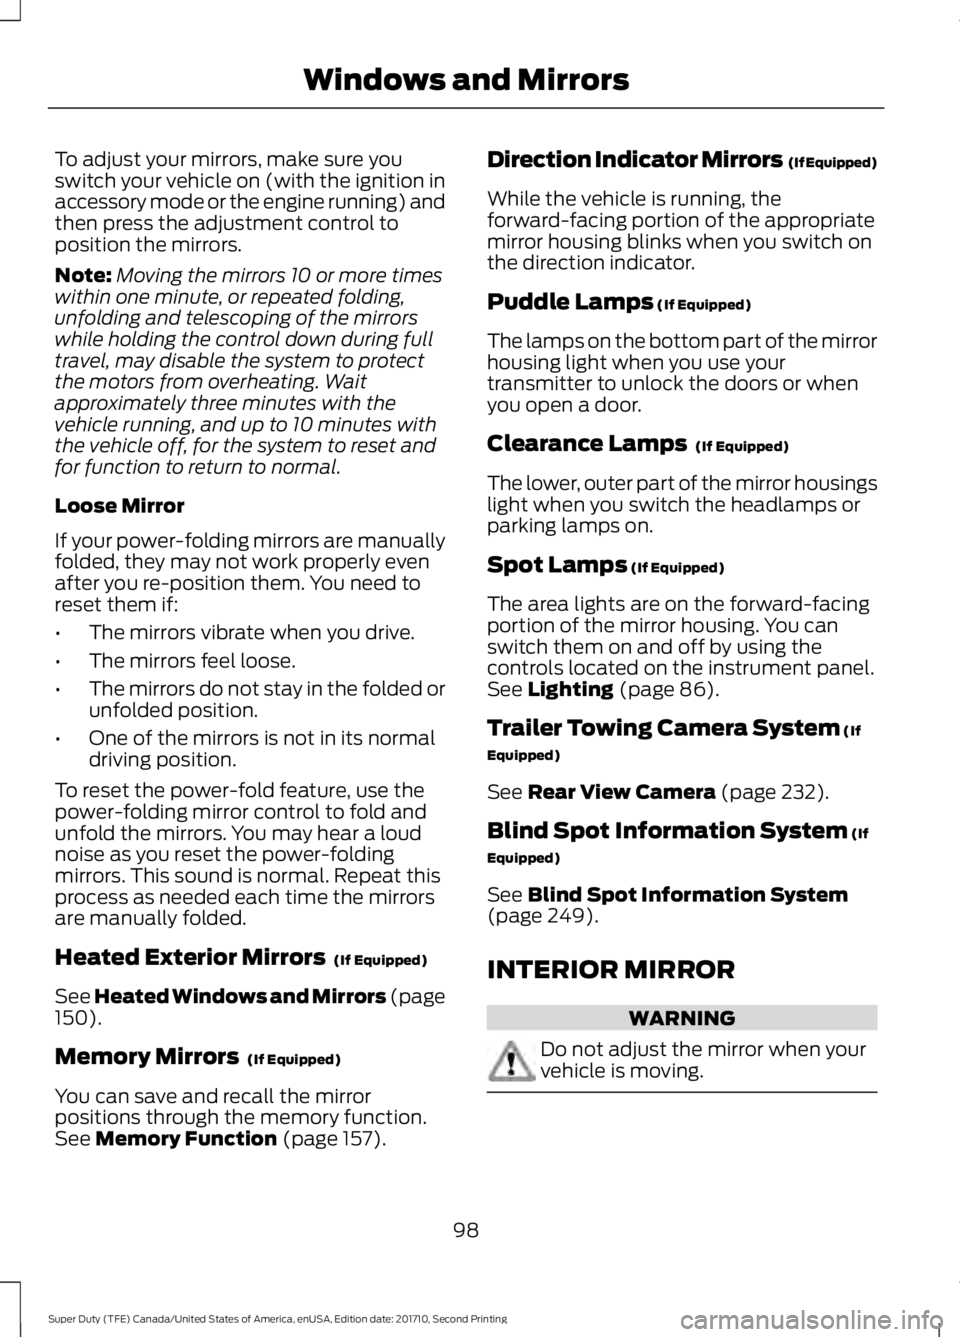
To adjust your mirrors, make sure youswitch your vehicle on (with the ignition inaccessory mode or the engine running) andthen press the adjustment control toposition the mirrors.
Note:Moving the mirrors 10 or more timeswithin one minute, or repeated folding,unfolding and telescoping of the mirrorswhile holding the control down during fulltravel, may disable the system to protectthe motors from overheating. Waitapproximately three minutes with thevehicle running, and up to 10 minutes withthe vehicle off, for the system to reset andfor function to return to normal.
Loose Mirror
If your power-folding mirrors are manuallyfolded, they may not work properly evenafter you re-position them. You need toreset them if:
•The mirrors vibrate when you drive.
•The mirrors feel loose.
•The mirrors do not stay in the folded orunfolded position.
•One of the mirrors is not in its normaldriving position.
To reset the power-fold feature, use thepower-folding mirror control to fold andunfold the mirrors. You may hear a loudnoise as you reset the power-foldingmirrors. This sound is normal. Repeat thisprocess as needed each time the mirrorsare manually folded.
Heated Exterior Mirrors (If Equipped)
See Heated Windows and Mirrors (page150).
Memory Mirrors (If Equipped)
You can save and recall the mirrorpositions through the memory function.See Memory Function (page 157).
Direction Indicator Mirrors (If Equipped)
While the vehicle is running, theforward-facing portion of the appropriatemirror housing blinks when you switch onthe direction indicator.
Puddle Lamps (If Equipped)
The lamps on the bottom part of the mirrorhousing light when you use yourtransmitter to unlock the doors or whenyou open a door.
Clearance Lamps (If Equipped)
The lower, outer part of the mirror housingslight when you switch the headlamps orparking lamps on.
Spot Lamps (If Equipped)
The area lights are on the forward-facingportion of the mirror housing. You canswitch them on and off by using thecontrols located on the instrument panel.See Lighting (page 86).
Trailer Towing Camera System (If
Equipped)
See Rear View Camera (page 232).
Blind Spot Information System (If
Equipped)
See Blind Spot Information System(page 249).
INTERIOR MIRROR
WARNING
Do not adjust the mirror when yourvehicle is moving.
98
Super Duty (TFE) Canada/United States of America, enUSA, Edition date: 201710, Second Printing
Windows and Mirrors
Page 110 of 642

Cruise Control (If Equipped)
Illuminates when you switch thisfeature on. See Using CruiseControl (page 239).
Direction Indicator
Illuminates when the left or rightturn signal or the hazard warningflasher is turned on. If theindicators stay on or flash faster, check fora burned out bulb.
Door Ajar
Displays when the ignition is onand any door is not completelyclosed.
Electronic Locking Differential (If
Equipped)
Illuminates when using theelectronic locking differential.
Engine Coolant Temperature
Illuminates when the enginecoolant temperature is high.Stop the vehicle as soon aspossible, switch off the engine and let cool.
Engine Oil
If it illuminates with the enginerunning or when you are driving,this indicates a malfunction.Stop your vehicle as soon as it is safe todo so and switch the engine off. Check theengine oil level. See Engine Oil Check(page 327).
Note:Do not resume your journey if itilluminates despite the level being correct.Have the system checked by your authorizeddealer immediately.
Fasten Seatbelt
It illuminates and a chimesounds to remind you to fastenyour seatbelt.
Front Airbag
If it fails to illuminate when youstart your vehicle, continues toflash or remains on, it indicatesa malfunction. Have the system checkedby your authorized dealer.
Front Fog Lamps (If Equipped)
It illuminates when you switchthe front fog lamps on.
High Beam
Illuminates when you switch thehigh beam headlamps on. It willflash when you use theheadlamp flasher.
Hill Descent (If Equipped)
Illuminates when hill descent isswitched on.
Low Fuel Level
Illuminates when the fuel levelis low or the fuel tank is nearlyempty. Refuel as soon aspossible.
Low Tire Pressure Warning
Illuminates when your tirepressure is low. If the lampremains on with the enginerunning or when driving, check your tirepressure as soon as possible.
107
Super Duty (TFE) Canada/United States of America, enUSA, Edition date: 201710, Second Printing
Instrument ClusterE71340 E163170 E71880 E67017 E163171