2017 FIAT TALENTO Owner handbook (in English)
-
 1
1 -
 2
2 -
 3
3 -
 4
4 -
 5
5 -
 6
6 -
 7
7 -
 8
8 -
 9
9 -
 10
10 -
 11
11 -
 12
12 -
 13
13 -
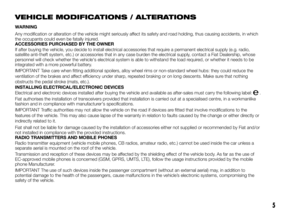
 14
14 -
 15
15 -
 16
16 -
 17
17 -
 18
18 -
 19
19 -
 20
20 -
 21
21 -
 22
22 -
 23
23 -
 24
24 -
 25
25 -
 26
26 -
 27
27 -
 28
28 -
 29
29 -
 30
30 -
 31
31 -
 32
32 -
 33
33 -
 34
34 -
 35
35 -
 36
36 -
 37
37 -
 38
38 -
 39
39 -
 40
40 -
 41
41 -
 42
42 -
 43
43 -
 44
44 -
 45
45 -
 46
46 -
 47
47 -
 48
48 -
 49
49 -
 50
50 -
 51
51 -
 52
52 -
 53
53 -
 54
54 -
 55
55 -
 56
56 -
 57
57 -
 58
58 -
 59
59 -
 60
60 -
 61
61 -
 62
62 -
 63
63 -
 64
64 -
 65
65 -
 66
66 -
 67
67 -
 68
68 -
 69
69 -
 70
70 -
 71
71 -
 72
72 -
 73
73 -
 74
74 -
 75
75 -
 76
76 -
 77
77 -
 78
78 -
 79
79 -
 80
80 -
 81
81 -
 82
82 -
 83
83 -
 84
84 -
 85
85 -
 86
86 -
 87
87 -
 88
88 -
 89
89 -
 90
90 -
 91
91 -
 92
92 -
 93
93 -
 94
94 -
 95
95 -
 96
96 -
 97
97 -
 98
98 -
 99
99 -
 100
100 -
 101
101 -
 102
102 -
 103
103 -
 104
104 -
 105
105 -
 106
106 -
 107
107 -
 108
108 -
 109
109 -
 110
110 -
 111
111 -
 112
112 -
 113
113 -
 114
114 -
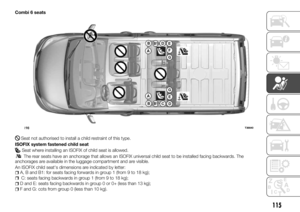
 115
115 -
 116
116 -
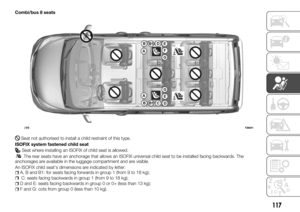
 117
117 -
 118
118 -
 119
119 -
 120
120 -
 121
121 -
 122
122 -
 123
123 -
 124
124 -
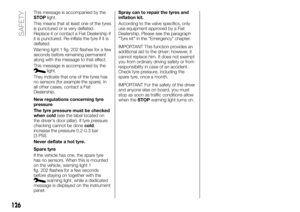
 125
125 -
 126
126 -
 127
127 -
 128
128 -
 129
129 -
 130
130 -
 131
131 -
 132
132 -
 133
133 -
 134
134 -
 135
135 -
 136
136 -
 137
137 -
 138
138 -
 139
139 -
 140
140 -
 141
141 -
 142
142 -
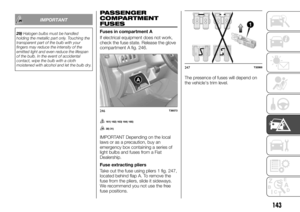
 143
143 -
 144
144 -
 145
145 -
 146
146 -
 147
147 -
 148
148 -
 149
149 -
 150
150 -
 151
151 -
 152
152 -
 153
153 -
 154
154 -
 155
155 -
 156
156 -
 157
157 -
 158
158 -
 159
159 -
 160
160 -
 161
161 -
 162
162 -
 163
163 -
 164
164 -
 165
165 -
 166
166 -
 167
167 -
 168
168 -
 169
169 -
 170
170 -
 171
171 -
 172
172 -
 173
173 -
 174
174 -
 175
175 -
 176
176 -
 177
177 -
 178
178 -
 179
179 -
 180
180 -
 181
181 -
 182
182 -
 183
183 -
 184
184 -
 185
185 -
 186
186 -
 187
187 -
 188
188 -
 189
189 -
 190
190 -
 191
191 -
 192
192 -
 193
193 -
 194
194 -
 195
195 -
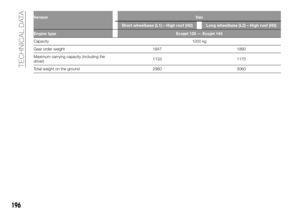
 196
196 -
 197
197 -
 198
198 -
 199
199 -
 200
200 -
 201
201 -
 202
202 -
 203
203 -
 204
204 -
 205
205 -
 206
206 -
 207
207 -
 208
208 -
 209
209 -
 210
210 -
 211
211 -
 212
212 -
 213
213 -
 214
214 -
 215
215 -
 216
216 -
 217
217 -
 218
218 -
 219
219 -
 220
220 -
 221
221 -
 222
222 -
 223
223 -
 224
224 -
 225
225 -
 226
226 -
 227
227
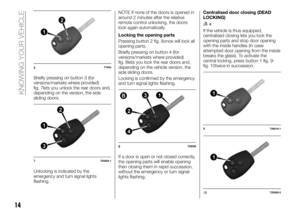
 The warning light in the switch lights up
to remind you the system is
deactivated.
Press it again and the system will be
reactivated and the light will go off.
Depending on the vehicle type, you can
d")
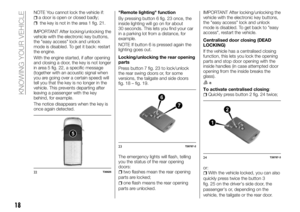
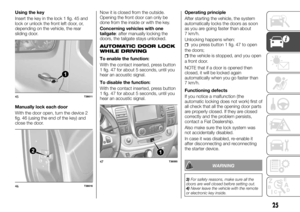
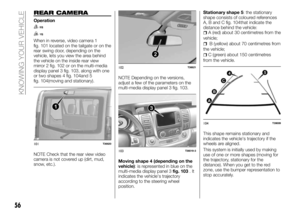
 REAR CAMERA
Operation
53)
15)
When in reverse, video camera 1
fig. 101 located on the tailgate or on the
rear swing door, depending on the
vehicle, lets you view the area behind
the vehicle on the ins")
 IMPORTANT The display will show a
reversed image. The shapes are a
projected representation on flat ground;
this information has to be ignored when
you superimpose it on a vertical object
or one resti")
 IMPORTANT Do not place objects on a
partly closed window: it could damage
the window.
Press functions
Depending on the versions, this mode
is an additional function to the electric
window described ea")
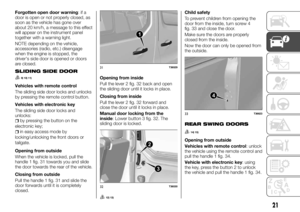
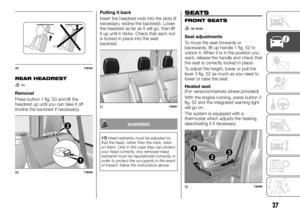
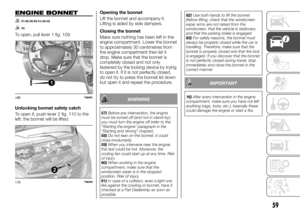
 ENGINE BONNET
57) 58) 59) 60) 61) 62) 63)
16)
To open, pull lever 1 fig. 109.
Unlocking bonnet safety catch
To open it, push lever 2 fig. 110 to the
left: the bonnet will be lifted.Opening the bonnet")
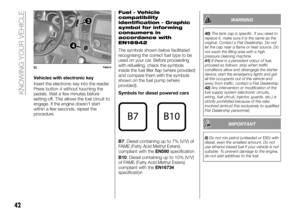
 INTERIOR FITTINGS
SUN VISORS
Lower the sun visor 1 fig. 111. You can
tilt the sun visor against the side
window.
For versions/markets where provided,
lower the sun visor 3 fig. 112 to access
the mirro")
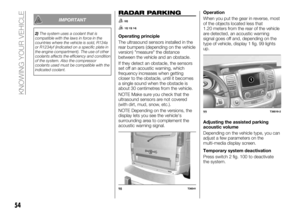
 SUPPORT FOR MULTI-
MEDIA TABLET
(For versions/markets where provided)
Pull handle 7 fig. 117 all the way
towards the driver as far as it will go.
Rotate support 8 fig. 118 and push it as
far as it wil")
 PASSENGER SIDE GLOVE
COMPARTMENT
67)
To open, pull handle 16.fig. 122
Depending on the version, the glove
compartment is also ventilated and air
conditioned (it can hold a 1.5 l bottle).
HOUSING
Housi")