2017 CHEVROLET EXPRESS CARGO VAN lock
[x] Cancel search: lockPage 184 of 346
Chevrolet Express Owner Manual (GMNA-Localizing-U.S./Canada/Mexico-9967827) - 2017 - crc - 5/6/16
Driving and Operating 183
Warning (Continued)
.There are holes or openingsin the vehicle body fromdamage or aftermarketmodifications that are notcompletely sealed.
If unusual fumes are detected or
if it is suspected that exhaust is
coming into the vehicle:
.Drive it only with thewindows completely down.
.Have the vehicle repairedimmediately.
Never park the vehicle with the
engine running in an enclosed
area such as a garage or a
building that has no fresh air
ventilation.
Running the Vehicle
While Parked
It is better not to park with theengine running.
If the vehicle is left with the enginerunning, follow the proper steps tobe sure the vehicle will not move.SeeShifting Into Park0180andEngine Exhaust0182.
If parking on a hill and pulling atrailer, seeDriving Characteristicsand Towing Tips0202.
Automatic
Transmission
Ashiftpositionindicatorisintheinstrument cluster.
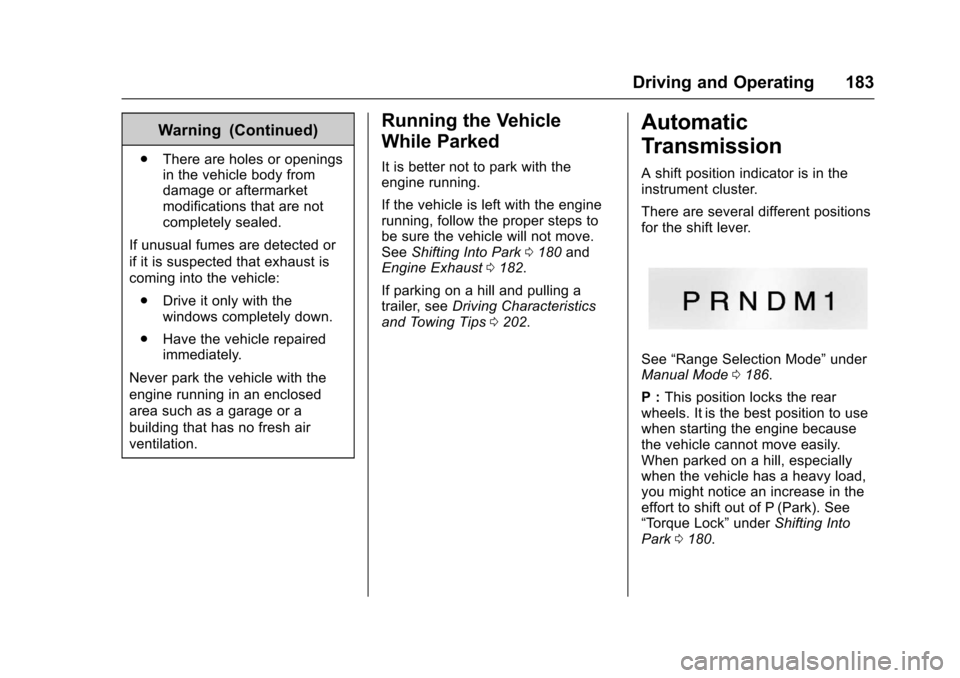
There are several different positionsfor the shift lever.
See“Range Selection Mode”underManual Mode0186.
P:This position locks the rearwheels. It is the best position to usewhen starting the engine becausethe vehicle cannot move easily.When parked on a hill, especiallywhen the vehicle has a heavy load,you might notice an increase in theeffort to shift out of P (Park). See“To r q u e L o c k”underShifting IntoPark0180.
Page 189 of 346
Chevrolet Express Owner Manual (GMNA-Localizing-U.S./Canada/Mexico-9967827) - 2017 - crc - 5/6/16
188 Driving and Operating
Tow/Haul Mode Grade Braking
To w / H a u l M o d e G r a d e B r a k i n g i sonly enabled while the Tow/HaulMode is selected and the vehicle isnot in the Range Selection Mode.See“To w / H a u l M o d e”listedpreviously andManual Mode0186.To w / H a u l M o d e G r a d e B r a k i n gassists in maintaining desiredvehicle speeds when driving ondownhill grades by using the engineand transmission to slow thevehicle.
To d i s a b l e o r e n a b l e To w / H a u l M o d eGrade Braking within the currentignition key cycle, press and holdthe Tow/Haul button forthree seconds. A DIC message willbe displayed. SeeTr a n s m i s s i o nMessages011 8.
SeeTo w i n g E q u i p m e n t0210.
For other forms of grade braking,seeAutomatic Transmission0183andCruise Control0192.
Brakes
Antilock Brake
System (ABS)
This vehicle has an Antilock BrakeSystem (ABS), an advancedelectronic braking system that helpsprevent a braking skid.
When the vehicle begins to driveaway, ABS checks itself.Amomentarymotororclickingnoisemay be heard while this test is goingon, and it may even be noticed thatthe brake pedal moves a little. Thisis normal.
If there is a problem with ABS, thiswarning light stays on. SeeAntilockBrake System (ABS) WarningLight0104.
If driving safely on a wet road and itbecomes necessary to slam on thebrakes and continue braking toavoid a sudden obstacle, acomputer senses the wheels areslowing down. If one of the wheelsis about to stop rolling, the computerwill separately work the brakes ateach wheel.
ABS can change the brake pressureto each wheel, as required, fasterthan any driver could. This can helpyou steer around the obstacle whilebraking hard.
As the brakes are applied, thecomputer keeps receiving updateson wheel speed and controlsbraking pressure accordingly.
Remember: ABS does not changethe time needed to get a foot up tothe brake pedal or always decreasestopping distance. If you get tooclose to the vehicle in front of you,there will not be enough time toapply the brakes if that vehiclesuddenly slows or stops. Alwaysleave enough room up ahead tostop, even with ABS.
Page 192 of 346
Chevrolet Express Owner Manual (GMNA-Localizing-U.S./Canada/Mexico-9967827) - 2017 - crc - 5/6/16
Driving and Operating 191
appropriate messages will bedisplayed in the DIC. SeeRideControl System Messages011 6.
To t u r n S t a b i l i T r a k a n d T C S b a c k
on, pressgagain. StabiliTrak will
automatically turn back on when thevehicle speed exceeds 40 km/h(25 mph).
When the StabiliTrak system hasbeen turned off, system noises maystill be heard as a result of thebrake-traction control coming on.
It is recommended to leave thesystem on for normal drivingconditions, but it may be necessaryto turn the system off if the vehicleis stuck in sand, mud, ice, or snow,and you want to“rock”the vehicle toattempt to free it. SeeIf the VehicleIs Stuck0171.
StabiliTrak System Operation
The StabiliTrak system is normallyon, except when the system isinitializing or has been disabled withthe StabiliTrak button. TheStabiliTrak system will automaticallyactivate to assist the driver inmaintaining vehicle directional
control in most driving conditions.When activated, the StabiliTraksystem may reduce engine power tothe wheels and apply braking toindividual wheels as necessary toassist the driver with vehicledirectional control. If cruise controlis being used when StabiliTrakactivates, the cruise controlautomatically disengages. Thecruise control can be re-engagedwhen road conditions allow. SeeCruise Control0192.
The StabiliTrak system may alsoturn off automatically if it determinesthat a problem exists with thesystem. If the problem does notclear itself after restarting thevehicle, see your dealer for service.
Traction Control Operation
TCS is part of the StabiliTraksystem. TCS limits wheel spin byreducing engine power to thewheels and by applying brakes toeach individual wheel as necessary.
If the brake-traction control systemactivates constantly or if the brakeshave heated up due to high speedbraking, the brake-traction control
will be automatically disabled. Thesystem will come back on after thebrakes have cooled. This can takeup to two minutes or longerdepending on brake usage.
TCS may activate on dry or roughroads or under conditions such asheavy acceleration while turning orabrupt upshifts/downshifts of thetransmission. When this reduction inacceleration occurs, it may benoticed, or a noise or vibration maybe heard. This is normal.
Adding non-dealer accessories canaffect the vehicle's performance.SeeAccessories andModifications0216.
Locking Rear Axle
Vehicles with a locking rear axle cangive more traction on snow, mud,ice, sand, or gravel. It works like astandard axle most of the time, butwhen traction is low, this feature willallow the rear wheel with the mosttraction to move the vehicle.
Page 202 of 346
Chevrolet Express Owner Manual (GMNA-Localizing-U.S./Canada/Mexico-9967827) - 2017 - crc - 5/6/16
Driving and Operating 201
Warning (Continued)
.Fuel can spray out if the fuelcap is opened too quickly.This spray can happen if thetank is nearly full, and ismore likely in hot weather.Open the fuel cap slowlyand wait for any hiss noiseto stop, then unscrew thecap all the way.
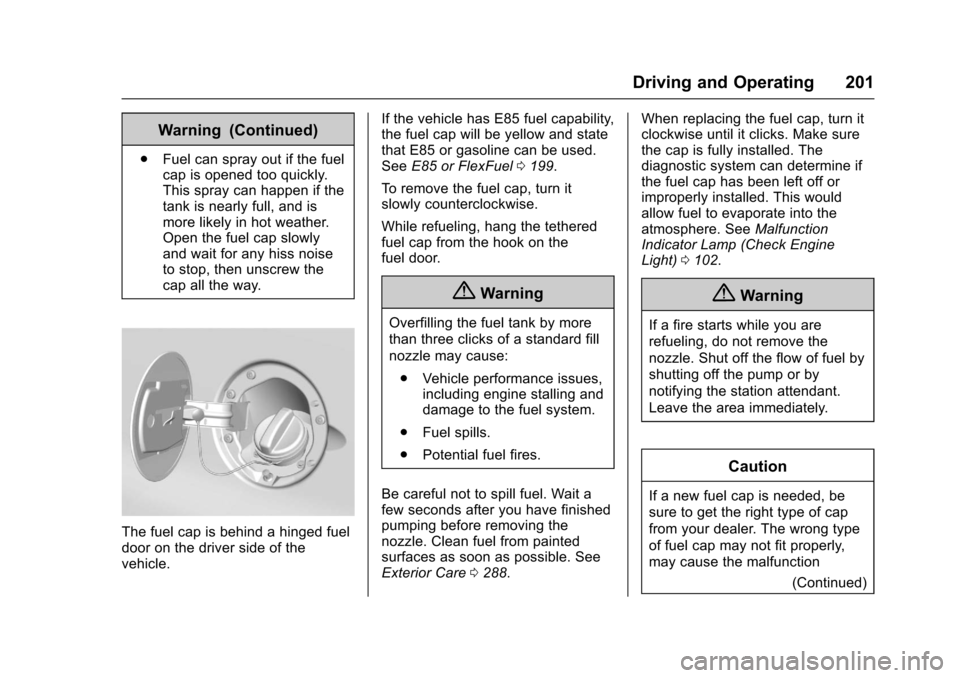
The fuel cap is behind a hinged fueldoor on the driver side of thevehicle.
If the vehicle has E85 fuel capability,the fuel cap will be yellow and statethat E85 or gasoline can be used.SeeE85 or FlexFuel0199.
To r e m o v e t h e f u e l c a p , t u r n i tslowly counterclockwise.
While refueling, hang the tetheredfuel cap from the hook on thefuel door.
{Warning
Overfilling the fuel tank by more
than three clicks of a standard fill
nozzle may cause:
.Vehicle performance issues,including engine stalling anddamage to the fuel system.
.Fuel spills.
.Potential fuel fires.
Be careful not to spill fuel. Wait afew seconds after you have finishedpumping before removing thenozzle. Clean fuel from paintedsurfaces as soon as possible. SeeExterior Care0288.
When replacing the fuel cap, turn itclockwise until it clicks. Make surethe cap is fully installed. Thediagnostic system can determine ifthe fuel cap has been left off orimproperly installed. This wouldallow fuel to evaporate into theatmosphere. SeeMalfunctionIndicator Lamp (Check EngineLight)0102.
{Warning
If a fire starts while you are
refueling, do not remove the
nozzle. Shut off the flow of fuel by
shutting off the pump or by
notifying the station attendant.
Leave the area immediately.
Caution
If a new fuel cap is needed, be
sure to get the right type of cap
from your dealer. The wrong type
of fuel cap may not fit properly,
may cause the malfunction
(Continued)
Page 215 of 346
Chevrolet Express Owner Manual (GMNA-Localizing-U.S./Canada/Mexico-9967827) - 2017 - crc - 5/2/16
214 Vehicle Care
Vehicle Care
General Information
General Information . . . . . . . . . . 215California Proposition65 Warning . . . . . . . . . . . . . . . . . 215California PerchlorateMaterials Requirements . . . . . 215Accessories andModifications . . . . . . . . . . . . . . . . 216
Vehicle Checks
Doing Your OwnService Work . . . . . . . . . . . . . . . 216Hood . . . . . . . . . . . . . . . . . . . . . . . . . 217Engine CompartmentOverview . . . . . . . . . . . . . . . . . . . . 218Engine Oil . . . . . . . . . . . . . . . . . . . . 219Engine Oil Life System . . . . . . . 221Automatic TransmissionFluid . . . . . . . . . . . . . . . . . . . . . . . . 222Engine Air Cleaner/Filter . . . . . . 225Cooling System . . . . . . . . . . . . . . 226Engine Coolant . . . . . . . . . . . . . . . 227Engine Overheating . . . . . . . . . . 230Engine Fan . . . . . . . . . . . . . . . . . . . 231Power Steering Fluid . . . . . . . . . 232Washer Fluid . . . . . . . . . . . . . . . . . 233Brakes . . . . . . . . . . . . . . . . . . . . . . . 233Brake Fluid . . . . . . . . . . . . . . . . . . . 234
Battery - North America . . . . . . 236Rear Axle . . . . . . . . . . . . . . . . . . . . 236Noise Control System . . . . . . . . 237Starter Switch Check . . . . . . . . . 238Automatic Transmission ShiftLock Control FunctionCheck . . . . . . . . . . . . . . . . . . . . . . . 238Ignition Transmission LockCheck . . . . . . . . . . . . . . . . . . . . . . . 239Park Brake and P (Park)Mechanism Check . . . . . . . . . . 239Wiper Blade Replacement . . . . 239
Headlamp Aiming
Headlamp Aiming . . . . . . . . . . . . 240
Bulb Replacement
Bulb Replacement . . . . . . . . . . . . 240Halogen Bulbs . . . . . . . . . . . . . . . . 240Headlamps . . . . . . . . . . . . . . . . . . . 241Front Turn Signal, Sidemarker,and Parking Lamps . . . . . . . . . 242Ta i l l a m p s . . . . . . . . . . . . . . . . . . . . . 2 4 3Center High-MountedStoplamp (CHMSL) . . . . . . . . . 244License Plate Lamp . . . . . . . . . . 244Replacement Bulbs . . . . . . . . . . . 245
Electrical System
Electrical System Overload . . . 245Fuses and Circuit Breakers . . . 246
Engine Compartment FuseBlock . . . . . . . . . . . . . . . . . . . . . . . . 246Floor Console Fuse Block . . . . 249
Wheels and Tires
Tires . . . . . . . . . . . . . . . . . . . . . . . . . . 252All-Season Tires . . . . . . . . . . . . . . 253Winter Tires . . . . . . . . . . . . . . . . . . 253All-Terrain Tires . . . . . . . . . . . . . . . 253Tire Sidewall Labeling . . . . . . . . 254Tire Designations . . . . . . . . . . . . . 256Tire Terminology andDefinitions . . . . . . . . . . . . . . . . . . 257Tire Pressure . . . . . . . . . . . . . . . . . 260Tire Pressure MonitorSystem . . . . . . . . . . . . . . . . . . . . . . 261Tire Pressure MonitorOperation . . . . . . . . . . . . . . . . . . . 262Tire Inspection . . . . . . . . . . . . . . . . 265Tire Rotation . . . . . . . . . . . . . . . . . 265Dual Tire Rotation . . . . . . . . . . . . 266When It Is Time for NewTires . . . . . . . . . . . . . . . . . . . . . . . . 267Buying New Tires . . . . . . . . . . . . . 268Different Size Tires andWheels . . . . . . . . . . . . . . . . . . . . . . 269Uniform Tire QualityGrading . . . . . . . . . . . . . . . . . . . . . 270Wheel Alignment and TireBalance . . . . . . . . . . . . . . . . . . . . . 271Wheel Replacement . . . . . . . . . . 271
Page 217 of 346
Chevrolet Express Owner Manual (GMNA-Localizing-U.S./Canada/Mexico-9967827) - 2017 - crc - 5/2/16
216 Vehicle Care
Accessories and
Modifications
Adding non-dealer accessories ormaking modifications to the vehiclecan affect vehicle performance andsafety, including such things asairbags, braking, stability, ride andhandling, emissions systems,aerodynamics, durability, andelectronic systems like antilockbrakes, traction control, and stabilitycontrol. These accessories ormodifications could even causemalfunction or damage not coveredby the vehicle warranty.
Damage to suspension componentscaused by modifying vehicle heightoutside of factory settings will not becovered by the vehicle warranty.
Damage to vehicle componentsresulting from modifications or theinstallation or use of non-GMcertified parts, including controlmodule or software modifications, isnot covered under the terms of thevehicle warranty and may affectremaining warranty coverage foraffected parts.
GM Accessories are designed tocomplement and function with othersystems on the vehicle. See yourdealer to accessorize the vehicleusing genuine GM Accessoriesinstalled by a dealer technician.
Also, seeAdding Equipment to theAirbag-Equipped Vehicle065.
Vehicle Checks
Doing Your Own
Service Work
{Warning
It can be dangerous to work on
your vehicle if you do not have
the proper knowledge, service
manual, tools, or parts. Always
follow owner manual procedures
and consult the service manual
for your vehicle before doing any
service work.
If doing some of your own servicework, use the proper servicemanual. It tells you much moreabout how to service the vehiclethan this manual can. To order theproper service manual, seeServicePublications OrderingInformation0321.
This vehicle has an airbag system.Before attempting to do your ownservice work, seeServicing theAirbag-Equipped Vehicle065.
Page 223 of 346
Chevrolet Express Owner Manual (GMNA-Localizing-U.S./Canada/Mexico-9967827) - 2017 - crc - 5/2/16
222 Vehicle Care
system might indicate that an oilchange is not necessary for up to ayear. The engine oil and filter mustbe changed at least once a yearand, at this time, the system mustbe reset. Your dealer has trainedservice people who will perform thiswork and reset the system. It is alsoimportant to check the oil regularlyover the course of an oil draininterval and keep it at the properlevel.
If the system is ever resetaccidentally, the oil must bechanged at 5 000 km (3,000 mi)since the last oil change.Remember to reset the oil lifesystem whenever the oil is changed.
How to Reset the Engine Oil
Life System
Reset the system whenever theengine oil is changed so that thesystem can calculate the nextengine oil change. To reset thesystem:
1. Turn the ignition key to ON/RUN with the engine off.
2. Fully press and release theaccelerator pedal slowly threetimes within five seconds.
3. Turn the key to LOCK/OFF.
If the CHANGE ENGINE OIL SOONmessage comes back on when thevehicle is started, the engine oil lifesystem has not reset. Repeat theprocedure.
Automatic Transmission
Fluid
When to Check and Change
Automatic Transmission Fluid
It is usually not necessary to checkthe transmission fluid level. The onlyreason for fluid loss is atransmission leak or overheatedtransmission. If a small leak issuspected, use the followingprocedures to check the fluid level.However, if there is a large leak, itmay be necessary to have thevehicle towed to a dealer and haveit repaired before driving the vehiclefurther.
Change the fluid and filter at theintervals listed inMaintenanceSchedule0297,andbesuretousethe transmission fluid listed inRecommended Fluids andLubricants0305.
How to Check Automatic
Transmission Fluid
Because this operation can bedifficult, it is recommended to havethis check done at your dealer,which can monitor the transmissiontemperature. The transmission fluidlevel increases with temperature. Toobtain a highly accurate fluid levelcheck, the transmission temperaturemust be measured.
If it is decided to check the fluidlevel, be sure to follow all theinstructions here, or a false readingon the dipstick may occur.
Caution
To o m u c h o r t o o l i t t l e f l u i d c a n
damage the transmission. Too
much can mean that some of the
(Continued)
Page 225 of 346
Chevrolet Express Owner Manual (GMNA-Localizing-U.S./Canada/Mexico-9967827) - 2017 - crc - 5/2/16
224 Vehicle Care
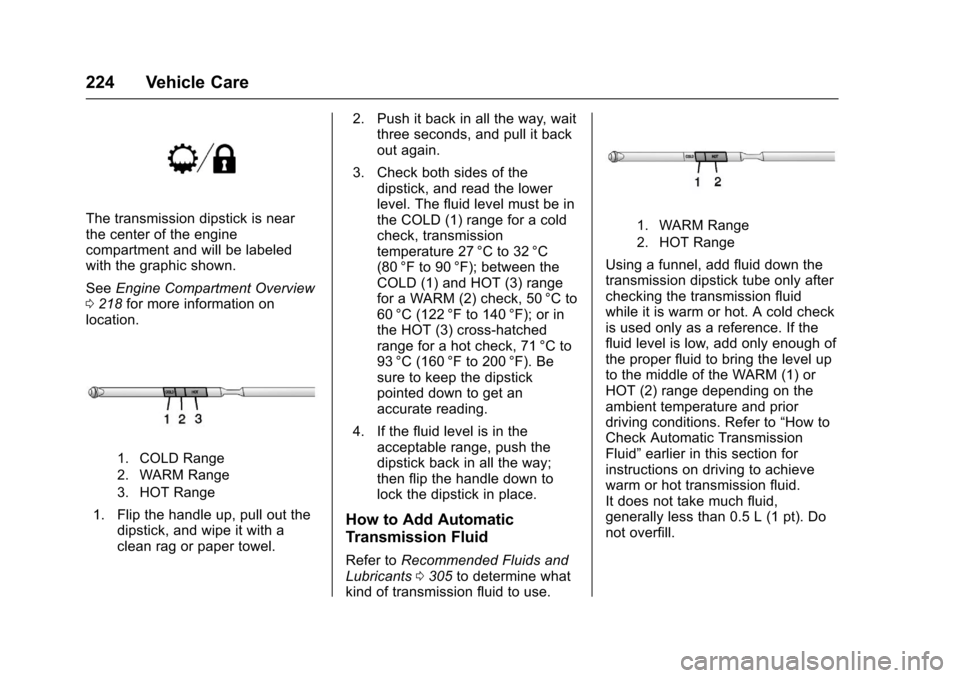
The transmission dipstick is nearthe center of the enginecompartment and will be labeledwith the graphic shown.
SeeEngine Compartment Overview0218for more information onlocation.
1. COLD Range
2. WARM Range
3. HOT Range
1. Flip the handle up, pull out thedipstick, and wipe it with aclean rag or paper towel.
2. Push it back in all the way, waitthree seconds, and pull it backout again.
3. Check both sides of thedipstick, and read the lowerlevel. The fluid level must be inthe COLD (1) range for a coldcheck, transmissiontemperature 27 °C to 32 °C(80 °F to 90 °F); between theCOLD (1) and HOT (3) rangefor a WARM (2) check, 50 °C to60 °C (122 °F to 140 °F); or inthe HOT (3) cross-hatchedrange for a hot check, 71 °C to93 °C (160 °F to 200 °F). Besure to keep the dipstickpointed down to get anaccurate reading.
4. If the fluid level is in theacceptable range, push thedipstick back in all the way;then flip the handle down tolock the dipstick in place.
How to Add Automatic
Transmission Fluid
Refer toRecommended Fluids andLubricants0305to determine whatkind of transmission fluid to use.
1. WARM Range
2. HOT Range
Using a funnel, add fluid down thetransmission dipstick tube only afterchecking the transmission fluidwhile it is warm or hot. A cold checkis used only as a reference. If thefluid level is low, add only enough ofthe proper fluid to bring the level upto the middle of the WARM (1) orHOT (2) range depending on theambient temperature and priordriving conditions. Refer to“How toCheck Automatic TransmissionFluid”earlier in this section forinstructions on driving to achievewarm or hot transmission fluid.It does not take much fluid,generally less than 0.5 L (1 pt). Donot overfill.