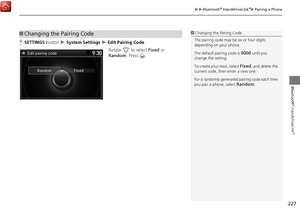
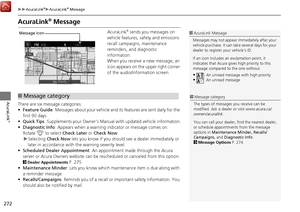
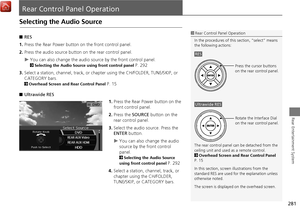
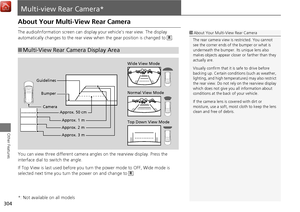
Page 9 of 369
8
Quick Reference GuideHow to Enter Information
You can enter information (e.g., city names, street names, personal names, and business names comprising letters, numbers, and symbols)
when prompted on input screens.
Using the Interface Dial
Rotate i to highlight a character.
Select to display upper/lower case characters.
Select to display symbols an d accented characters.
Select (or move e ) to edit the entered characters.
Press u to enter the highlighted character.
Move y to select Space to enter a space character.
Move w to select Delete to remove the last entered character.
You can also use the touch sc reen to enter information.
Certain screen functions are limited or inoperable while the vehicle is moving.
Number of Hits
On input search screens, the number of hits in the map database is
displayed. Move r to select OK to display a list of possible entries.
Page 10 of 369
9
Quick Reference GuideMap Screen Legend
Map orientation (P76)
GPS signal strength
North up
Heading up Best reception
Good reception
No icon: Poor/No reception
Current map scale
Current street name
Map scale (P80)
Current vehicle position
(P78)Feature areas
Streets Landmark icons
(P71)
Park
Hospital
Shopping Mall
Golf Course Airport
Body of Water
Cemetery
University
Highway
State routes
pedestrian street
State line
One-way Acura dealer
Honda dealer
ATM
Parking lot
Parking garage
Hotel/Lodging
Gas station
Hospital
Post office
Restaurant
Highway exit information
3D map
School
Grocery store
AcuraLink® Message
icon (P14)
AcuraLink® signal indicator
Industrial complex
Military Base
Road
Unverified road
Scenic road
Page 11 of 369

10
Quick Reference GuideDuring Route Guidance
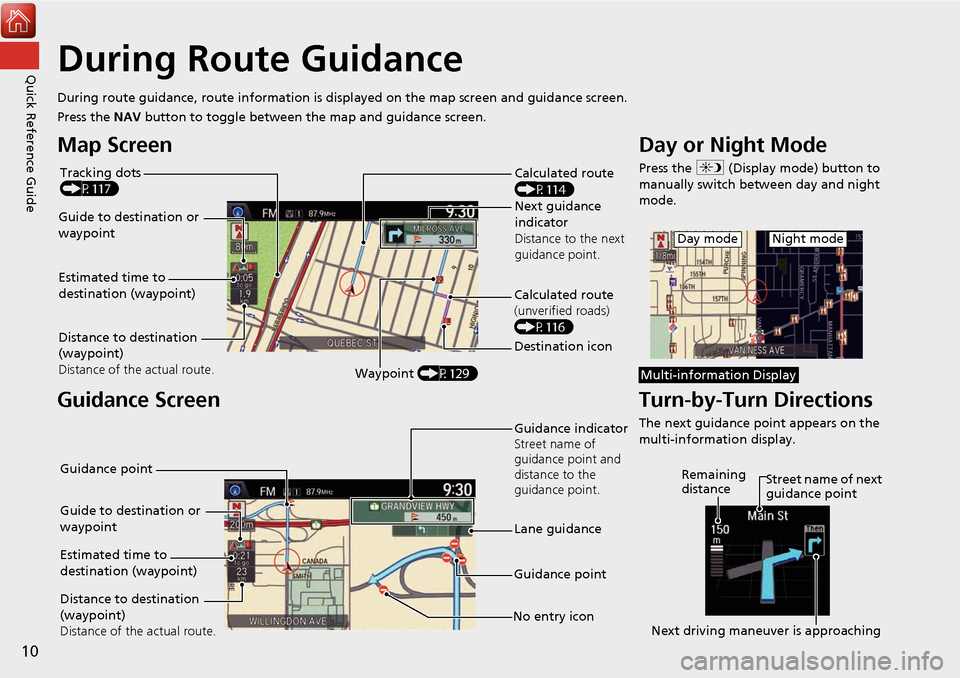
During route guidance, route information is displayed on the map screen and guidance screen.
Press the NAV button to toggle between the map and guidance screen.
Map Screen
Guidance Screen
Calculated route
(P114)
Guide to destination or
waypoint Next guidance
indicator
Distance to the next
guidance point.
Distance to destination
(waypoint)
Distance of the actual route. Estimated time to
destination (waypoint)
Waypoint (P129) Destination icon Calculated route
(unverified roads)
(P116)
Tracking dots
(P117)
Guidance indicator
Street name of
guidance point and
distance to the
guidance point.
Lane guidance
No entry icon
Guide to destination or
waypoint
Distance to destination
(waypoint)
Distance of the actual route. Estimated time to
destination (waypoint)
Guidance point
Guidance point
Day or Night Mode
Press the
a (Display mode) button to
manually switch between day and night
mode.
Turn-by-Turn Directions
The next guidance point appears on the
multi-information display.
Night modeDay mode
Multi-information Display
Street name of next
guidance point
Remaining
distance
Next driving maneuver is approaching
Page 12 of 369
11
Quick Reference GuideNavigation—Home Addresses and Going Home
The “Home” feature automatically routes you to your home address from any location simply by selecting Go Home.
Storing Your Home Address
aPress the SETTINGS
button.
b Rotate i to select Navi Settings .
Press u.
c Rotate i to select Edit Go Home.
Press u.
d Rotate i to select Name. Press u .
eEnter a name.
fRotate i to select Address. Press u.
g Enter an address.
h Rotate i to select Phone No . Press
u .
i Enter a phone number.
jMove r and rotate i to select OK .
Press u.
Going Home
a From the map screen,
press the MENU button.
bRotate i to select Go Home . Press
u .
c Rotate i to select Set as
Destination . Press u.
Page 13 of 369
12
Quick Reference GuideNavigation—Entering a Destination
Enter your destination using one of several methods, then follow route guidance on the map or guidance screen to your destination.
aFrom the map screen,
press the MENU button.
bRotate i to select Address. Press u.
c Rotate i to select Street . Press u.
dEnter the name of your destination
street.
e Rotate i to select your destination
street from the list. Press u.
f Enter the street number. Move r to
select OK when finished.
g If there is more than one city with the
specified street, a list of cities is
displayed. Rotate i to select the
desired city from the list. Press u.
h Rotate i to select Set as
Destination . Press u.
Route guidance to the destination
begins.
View Routes : Choose one of three
routes.
Route Preference: Choose Max or Min
for the five settings.
Page 14 of 369

13
Quick Reference GuideNavigation—Changing Route or Destination
You can alter your route by adding waypoints to visit, adding streets to avoid, or changing your destination during route guida nce.
Adding a Waypoint
(“Pit Stop”)
You can add up to four waypoints along
your route. (P129)
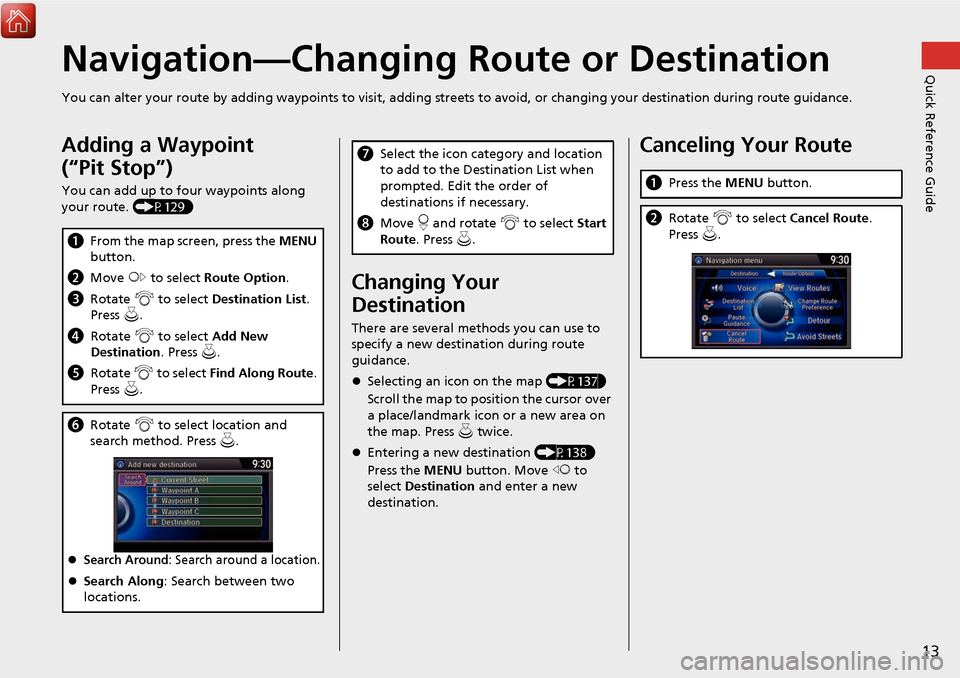
aFrom the map screen, press the MENU
button.
b Move y to select Route Option .
c Rotate i to select Destination List .
Press u.
d Rotate i to select Add New
Destination . Press u.
e Rotate i to select Find Along Route .
Press u.
f Rotate i to select location and
search method. Press u .
Search Around: Search around a location.
Search Along : Search between two
locations.
Changing Your
Destination
There are several methods you can use to
specify a new destination during route
guidance.
Selecting an icon on the map (P137)
Scroll the map to position the cursor over
a place/landmark icon or a new area on
the map. Press u twice.
Entering a new destination (P138)
Press the MENU button. Move w to
select Destination and enter a new
destination.
g Select the icon category and location
to add to the Destination List when
prompted. Edit the order of
destinations if necessary.
h Move r and rotate i to select Start
Route . Press u .Canceling Your Route
aPress the MENU button.
bRotate i to select Cancel Route.
Press u.
Page 15 of 369
14
Quick Reference GuideAcuraLink®
AcuraLink® Messages
AcuraLink® provides a direct communication link between you and Acura. It sends and receives several kinds of messages through the Acura
server.
AcuraLink Real-Time Traffic™
Displays continuously updated traffic information and recalculates your route in response to traffic flow, incidents, or road closures.
(P125) The following features are available:
Vehicle feature guide
Operating quick tips
Safety and maintenance information
Diagnostic information
Dealer appointment and maintenance reminders
Congestion
Incident
Weather
Construction
Road Closed Heavy
Moderate
Free-flow
Traffic incident icons
Traffic flow indicator
Traffic status indicator (P125)
Traffic information available
Traffic information off or map
scale too large
No icon: Out of coverage area
AcuraLink Real-Time Traffic™ is a subscription service. For more information, contact an Acura dealer or visit www.acura.ca/owners/acuralinkNOTE
Page 16 of 369

15
Quick Reference GuideRear Entertainment System (P277)
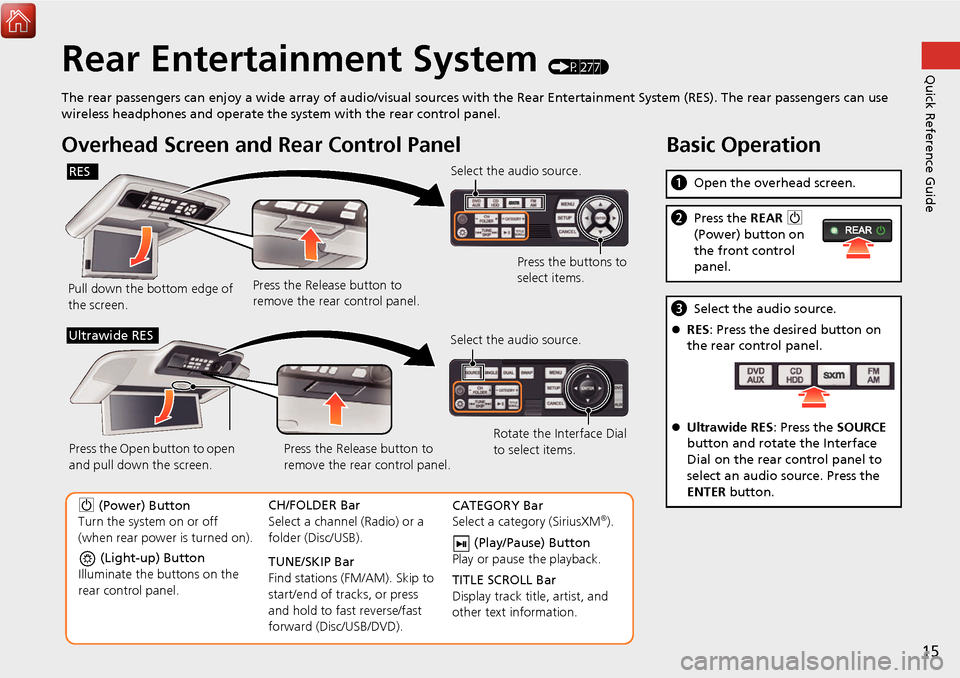
The rear passengers can enjoy a wide array of audio/visual sources with the Rear Entertainment System (RES). The rear passengers can use
wireless headphones and operate the system with the rear control panel.
Overhead Screen and Rear Control Panel
Pull down the bottom edge of
the screen. Select the audio source.
Press the buttons to
select items.
Press the Release button to
remove the rear control panel.
RES
(Light-up) Button
Illuminate the buttons on the
rear control panel.
9 (Power) Button
Turn the system on or off
(when rear power is turned on). CH/FOLDER Bar
Select a channel (Radio) or a
folder (Disc/USB).
TUNE/SKIP Bar
Find stations (FM/AM). Skip to
start/end of tracks, or press
and hold to fast reverse/fast
forward (Disc/USB/DVD).CATEGORY Bar
Select a category (SiriusXM®).
(Play/Pause) Button
Play or pause the playback.
TITLE SCROLL Bar
Display track title, artist, and
other text information.
Select the audio source.
Rotate the Interface Dial
to select items.
Press the Release button to
remove the rear control panel.
Press the Open button to open
and pull down the screen.
Ultrawide RES
Basic Operation
a
Open the overhead screen.
bPress the REAR 9
(Power) button on
the front control
panel.
c Select the audio source.
RES : Press the desired button on
the rear control panel.
Ultrawide RES : Press the SOURCE
button and rotate the Interface
Dial on the rear control panel to
select an audio source. Press the
ENTER button.