2016 VOLVO XC90 T8 ECO mode
[x] Cancel search: ECO modePage 49 of 546

INTRODUCTION
47
Symbols in the center display status bar
The following table provides an overview of the symbols used in the center display's status bar.
The status bar shows current vehicle activities and in certain cases, also their status. Due to lim-ited space in the status bar, not all symbols willbe displayed at all times.
SymbolMeaning
Roaming activated.
Cell phone network signal strength.
Bluetooth device connected.
Bluetooth activated but no device connected.
Connected to a Wi-Fi network.
Tethering activated. (Wi-Fi hotspot).
Vehicle modem activated.
Connected to the Internet via USB.
Type of cell phone connection (2G, 3G, etc.).
SymbolMeaning
Remote diagnostics active.
Action in progress.
Preconditioning A
in progress.
Audio source being played.
Audio source paused.
Phone call in progress.
Audio source muted.
News broadcasts from current radio station B
.
Traffic information being received B
.
Clock.
A Hybrid models only.
B Not available in all markets.
Related information
• Navigating in the center display's views (p. 42)
• Indicator symbols in the instrument panel(p. 125) •
Warning symbols in the instrument panel(p. 137)
• Messages in the instrument panel and centerdisplay (p. 151)
Page 53 of 546

INTRODUCTION
}}
51
Returning to Home view1. Press the Home button briefly.> The most recent Home view mode will bedisplayed.
2. Press again briefly. > All of the Home view's sub-views willreturn to standard mode.
NOTE
From Home view's standard mode, press the Home button to start animated on-screeninstructions describing how to display the var-ious views.
Moving apps and vehicle function buttons
Apps and function buttons can be moved and organized in their respective views.
1. Press and hold an app/button.
> The app/button will change size andbecome transparent. It can then be moved.
2. Drag the app/button to an available position in the view.
A maximum of 48 lines can be utilized for placingapps/buttons. To move an app/button outside ofthe visible view, drag it to the bottom of the view.A new line will then be added where the app/ button can be placed (this line may not be visi-ble). Swipe the screen to scroll up or down in theview to display information that may be outside ofthe view.
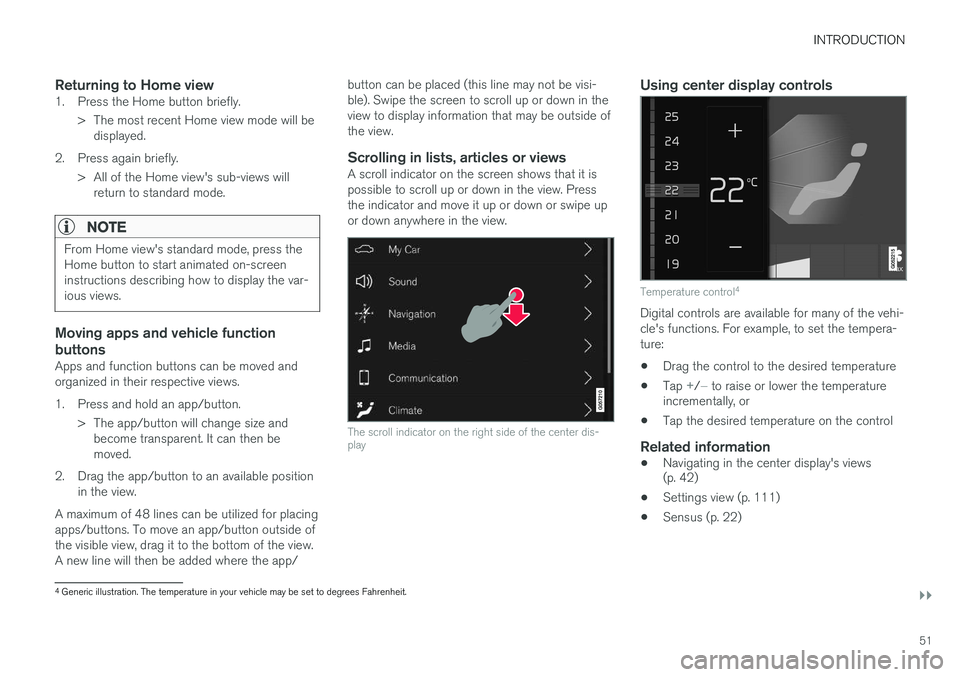
Scrolling in lists, articles or viewsA scroll indicator on the screen shows that it ispossible to scroll up or down in the view. Pressthe indicator and move it up or down or swipe upor down anywhere in the view.
The scroll indicator on the right side of the center dis- play
Using center display controls
Temperature control
4
Digital controls are available for many of the vehi- cle's functions. For example, to set the tempera-ture:
• Drag the control to the desired temperature
• Tap
+/− to raise or lower the temperature
incrementally, or
• Tap the desired temperature on the control
Related information
• Navigating in the center display's views (p. 42)
• Settings view (p. 111)
• Sensus (p. 22)
4
Generic illustration. The temperature in your vehicle may be set to degrees Fahrenheit.
Page 55 of 546

INTRODUCTION
}}
53
Using the owner's manualReading your owner's manual is a good way of familiarizing yourself with the features and sys-tems in your vehicle.
On-board owner's manualReading the owner's manual is a good way to become familiar with your vehicle and to learn toutilize the features and functions that it offers.Pay particular attention to the warnings provided. Volvo reserves the right to make model changes at any time, or to change specifications or designwithout notice and without incurring obligation. © Volvo Car Corporation
Printed owner's informationWe advise keeping printed owner's information in the vehicle for quick access to necessary infor-mation and how to contact Volvo if help isrequired.
IllustrationsSome of the illustrations used in your owner'sinformation may be generic and will give a gen-eral view of a certain feature or function. Forexample, some illustrations describing climatesystem functions may display a temperature indegrees Celsius but the same information appliesto Fahrenheit.
Options and accessoriesOptional or accessory equipment described inthis manual is indicated by an asterisk. Optional or accessory equipment may not be available in all countries or markets. Please notethat some vehicles may be equipped differently,depending on special legal requirements. Contact your Volvo retailer for additional informa- tion.
FootnotesCertain pages of this manual contain informationin the form of footnotes at the bottom of thepage. This information supplements the text thatthe footnote number refers to (a letter is used ifthe footnote refers to text in a table).
MessagesThere are several displays in the vehicle thatshow messages generated by various systemsand functions in the vehicle. The appearance ofthese texts differs slightly from normal texts (for example:
Phone, Accept).
DecalsThere are various types of decals in the vehicle whose purpose is to provide important informa-tion in a clear and concise way. The importanceof these decals is explained as follows, indescending order of importance.
Risk of injury
Black ISO symbols on a yellow warning back- ground, white text/image on a black background.Decals of this type are used to indicate potentialdanger. Ignoring a warning of this type couldresult in serious injury or death.
Page 62 of 546

SAFETY
60
General safety information The vehicle is equipped with a number of safety systems for the driver and passengers.
In the event of an accident, there are a number of sensors in the vehicle that react and triggersafety systems such as Roll Stability Control, air-bags, seat belt pretensioners, etc., depending onthe severity of the collision. There are alsomechanical systems such as the WhiplashProtection System.
Warning symbol in the instrument panelThe warning symbol in the instrumentpanel illuminates when the ignition is in mode II or higher. It will go out after
approx. 6 seconds if no faults are
detected in the airbag system.
WARNING
• If the SRS warning light stays on after the engine has started or if it illuminateswhile you are driving, have the vehicleinspected by a trained and qualified Volvoservice technician as soon as possible.
• Never try to repair any component or partof the SRS yourself. Any interference inthe system could cause malfunction andserious injury. All work on these systemsshould be performed by a trained andqualified Volvo service technician. If the dedicated warning symbol is not functioning, the general warning sym-bol will illuminate instead and the samemessage will be displayed in the instru-
ment panel.
Related information
• Safety during pregnancy (p. 62)
• Seat belts (p. 64)
• Airbag system (p. 89)
• Safety mode (p. 87)
• Whiplash protection system (p. 63)
• Child safety (p. 68)
Occupant safety Safety is Volvo's cornerstone.
Volvo's concern for safetyOur concern for safety dates back to 1927 when the first Volvo rolled off the production line.Three-point seat belts (a Volvo invention), safetycages, and energy-absorbing impact zones weredesigned into Volvo vehicles long before it wasfashionable or required by government regulation. We will not compromise our commitment to safety. We continue to seek out new safety fea-tures and to refine those already in our vehicles.You can help. We would appreciate hearing yoursuggestions about improving automobile safety.We also want to know if you ever have a safetyconcern with your vehicle. Call us in the U.S. at:1-800-458-1552 or in Canada at:1-800-663-8255.
Page 72 of 546

||
SAFETY
* Option/accessory, for more information, see Introduction.
70
WARNING
• Do not use child safety seats or child booster cushions/backrests in the frontpassenger's seat. We also recommendthat children under 4 feet 7 inches(140 cm) in height who have outgrownthese devices sit in the rear seat with theseat belt fastened.
• Sedan models: Keep vehicle doors andtrunk locked and keep remote controlsout of a child
Page 82 of 546

SAFETY
80
Top tether anchorsYour Volvo is equipped with child restraint top tether anchorages in the rear seat. They arelocated on the rear side of the backrests.
Child restraint anchorages
Top tether anchors and symbols on the rear side of the second row backrests. There is no symbol for the centeranchor position.
Securing a child seat
1. Place the child restraint on the rear seat.
2. Route the top tether strap under the head restraint and attach it to the anchor. 3. Attach lower tether straps to the lower ISO-
FIX/LATCH anchors. If the child restraint is not equipped with lower tether straps, or therestraint is used in the center seating posi-tion, follow instructions for securing a childrestraint using the Automatic LockingRetractor seat belt.
–Firmly tension all straps.
Refer also to the child seat manufacturer's instructions for information on securing the childseat.
NOTE
On models equipped with the optional cargo area cover, this cover should be removedbefore a child seat is attached to the childrestraint anchors.
WARNING
• Always refer to the recommendations made by the child restraint manufacturer.
• Volvo recommends that the top tetheranchors be used when installing a for-ward-facing child restraint.
• Never route a top tether strap over thetop of the head restraint. The strapshould be routed beneath the headrestraint.
• Child restraint anchorages are designedto withstand only those loads imposed bycorrectly fitted child restraints. Under nocircumstances are they to be used foradult seat belts or harnesses. The ancho-rages are not able to withstand excessiveforces on them in the event of collision iffull harness seat belts or adult seat beltsare installed to them. An adult who uses abelt anchored in a child restraint anchor-age runs a great risk of suffering severeinjuries should a collision occur.
• Do not install rear speakers that requirethe removal of the top tether anchors orinterfere with the proper use of the toptether strap.
Related information
•Child safety (p. 68)
Page 90 of 546

SAFETY
88
Starting or moving a vehicle in safety mode
If
Safety mode has been set, it may be possible
to start and move the vehicle, for example, if it is blocking traffic.
Starting the vehicle in safety mode1. Check the vehicle for damage, particularly for fuel leakage or the smell of gasoline fumes. If the damage to the vehicle is minor and there is no fuel leakage/fumes, you mayattempt to start the engine and move thevehicle.
WARNING
If you smell gasoline fumes or detect fuel leakage while Safety mode See Owner's
manual is displayed in the instrument panel,
do not attempt to start the vehicle . Leave
the vehicle immediately.
2. Turn the start knob to STOP and release it.
3. Try to start the vehicle. >
Vehicle start System check, wait will
be displayed in the instrument panel while the vehicle's electrical system attempts toreset to normal mode. This may take up toa minute. 4.
When
Vehicle start System check, wait is
no longer displayed, try to start the vehicle again.
WARNING
If the message Safety mode See Owner's
manual is still displayed, the vehicle should
not be driven and must be towed (lifted onto a flatbed tow truck. The vehicle may never betowed with the wheels on the ground). Con-cealed faults may make the vehicle difficult tocontrol.
Moving the vehicle after safety mode has been set
If the message Normal mode The vehicle is
now in normal mode is displayed, the vehicle
may be moved carefully from its present position if, for example, it is blocking traffic. It should, however, not be moved farther than is absolutely necessary.
WARNING
After Safety mode has been set, the vehicle
should not be driven or towed (pulled on the ground by another vehicle). It must be trans-ported on a flatbed tow truck to a trained andqualified Volvo service technician for inspec-tion/repairs.
Related information
• Safety mode (p. 87)
• Towing recommendations (p. 360)
Page 102 of 546

||
INSTRUMENTS AND CONTROLS
* Option/accessory, for more information, see Introduction.
100 systems, even home lighting. Additional informa- tion can be found on the Internet at,www.homelink.com/www.youtube.com/HomeLinkGentex or by phoning the hotline at 1–800–355–3515.
WARNING
•
If you use HomeLink ®
to open a garage
door or gate, be sure no one is near the gate or door while it is in motion.
• When programming a garage dooropener, it is advised to park outside of thegarage.
• Do not use HomeLink ®
with any garage
door opener that lacks safety stop andreverse features as required by U.S. fed-eral safety standards (this includes anygarage door opener model manufacturedbefore April 1, 1982). A garage door thatcannot detect an object - signaling thedoor to stop and reverse - does not meetcurrent U.S. federal safety standards. Formore information, contact HomeLink at:www.homelink.com.
Retain the original transmitter of the RF device you are programming for use in other vehicles aswell as for future HomeLink programming. It isalso suggested that upon the sale of the vehicle,the programmed HomeLink buttons be erasedfor security purposes. See the article "Program-ming HomeLink."
Related information
• Programming the HomeLink ®
Wireless Con-
trol System * (p. 100)Programming the HomeLink ®
Wireless Control System *
NOTE
Some vehicles may require the ignition to be switched on or be in the “accessories” posi-tion for programming and/or operation ofHomeLink. It is also recommended that a newbattery be placed in the hand-held transmitterof the device being programmed to Home-Link for quicker training and accurate trans-mission of the radio-frequency signal. TheHomeLink buttons must be reset first. Whenthis has been completed, Homelink is inlearning mode so that you can perform pro-gramming.
To program HomeLink®
1. Press the HomeLink ®
button to be pro-
grammed. The HomeLink ®
indicator will
begin flashing yellow once a second. You do not need to continue holding the button.
2. Point the hand-held transmitter toward the HomeLink ®
button to be programmed and
hold it approx. 6–12 inches (15–30 cm) away from the HomeLink ®
button. Do not
obstruct the HomeLink ®
indicator light.