Page 410 of 3641

REPAIRING MATERIALBRM-11
< PREPARATION >
C
DE
F
G H
I
J
L
M A
B
BRM
N
O P
PREPARATION
REPAIRING MATERIAL
Foam RepairINFOID:0000000012430795
During factory assembly, foam insulators are installed in certain body panels and locations around the vehicle.
Use the following procedure(s) to replace any factory-installed foam insulators.
URETHANE FOAM APPLICATIONS
Use commercially available Urethane foam for sealant (foam material) repair of material used on vehicle.
Read instructions on product for fill procedures.
NOTE:
Refer to the label on the urethane foam container for information on working times.
FILL PROCEDURES
Example of foaming agent filling operation procedure:
1. Fill procedures after installation of service part.
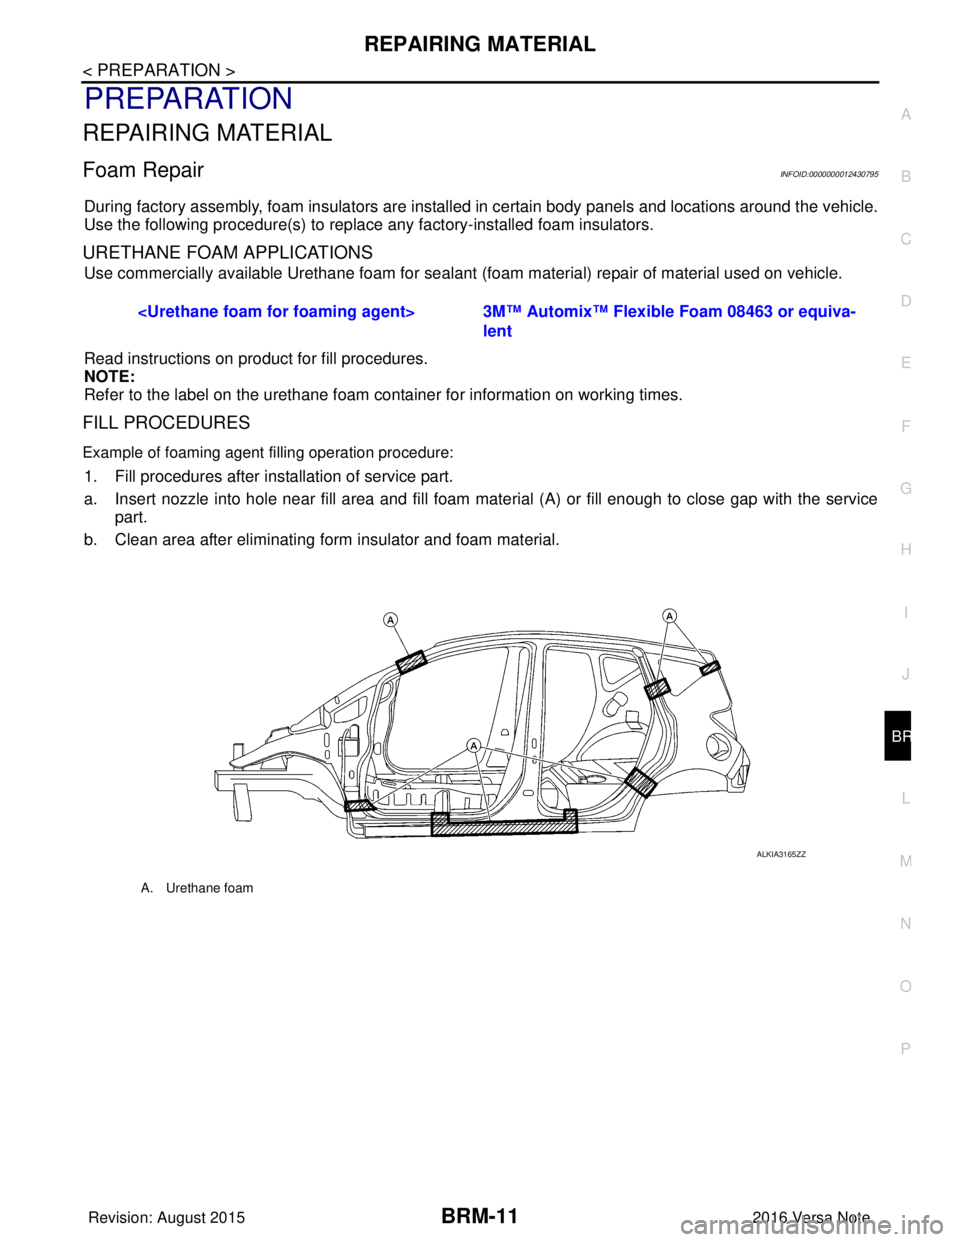
a. Insert nozzle into hole near fill area and fill foam material (A) or fill enough to close gap with the service
part.
b. Clean area after eliminating form insulator and foam material. 3M™
Automix™ Flexible Foam 08463 or equiva-
lent
A. Urethane foam
ALKIA3165ZZ
Revision: August 2015 2016 Versa Note
cardiagn.com
Page 415 of 3641

BRM-16
< REMOVAL AND INSTALLATION >
CORROSION PROTECTION
REMOVAL AND INSTALLATION
CORROSION PROTECTION
DescriptionINFOID:0000000012430798
To provide improved corrosion prevention, the following anti-corrosive measures have been implemented in
NISSAN production plants. When repairing or replacing body panels, it is necessary to use the same anti-cor-
rosive measures.
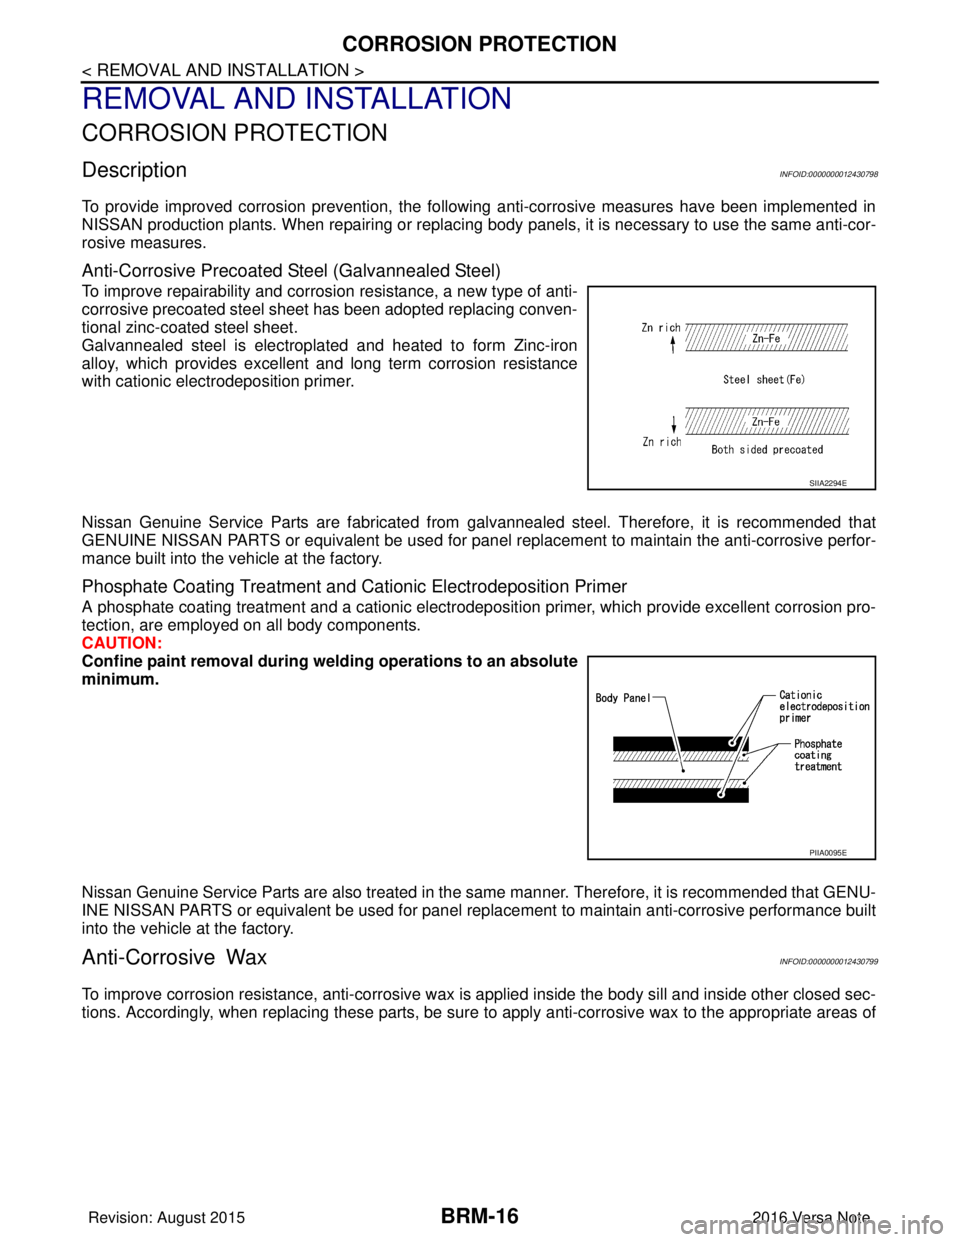
Anti-Corrosive Precoated Steel (Galvannealed Steel)
To improve repairability and corrosion resistance, a new type of anti-
corrosive precoated steel sheet has been adopted replacing conven-
tional zinc-coated steel sheet.
Galvannealed steel is electroplated and heated to form Zinc-iron
alloy, which provides excellent and long term corrosion resistance
with cationic electrodeposition primer.
Nissan Genuine Service Parts are fabricated from galvannealed steel. Therefore, it is recommended that
GENUINE NISSAN PARTS or equivalent be used for panel replacement to maintain the anti-corrosive perfor-
mance built into the vehicle at the factory.
Phosphate Coating Treatment and Cationic Electrodeposition Primer
A phosphate coating treatment and a cationic electrodepositi on primer, which provide excellent corrosion pro-
tection, are employed on all body components.
CAUTION:
Confine paint removal during weld ing operations to an absolute
minimum.
Nissan Genuine Service Parts are also treated in the same manner. Therefore, it is recommended that GENU-
INE NISSAN PARTS or equivalent be used for panel replacement to maintain anti-corrosive performance built
into the vehicle at the factory.
Anti-Corrosive WaxINFOID:0000000012430799
To improve corrosion resistance, anti-corrosive wax is applied inside the body sill and inside other closed sec-
tions. Accordingly, when replacing these parts, be sure to apply anti-corrosive wax to the appropriate areas of
SIIA2294E
PIIA0095E
Revision: August 2015 2016 Versa Note
cardiagn.com
Page 421 of 3641

BRM-22
< REMOVAL AND INSTALLATION >
REPLACEMENT OPERATIONS
REPLACEMENT OPERATIONS
DescriptionINFOID:0000000012430802
This section is prepared for technicians who have attained a high level of skill and experience in repairing col-
lision-damaged vehicles and also use modern service tools and equipment. Persons unfamiliar with body
repair techniques should not attempt to repair collision-damaged vehicles by using this section.
Technicians are also encouraged to read Body Repair M anual (Fundamentals) in order to ensure that the orig-
inal functions and quality of the vehicle can be mainta ined. The Body Repair Manual (Fundamentals) contains
additional information, including cautions and warning, that are not including in this manual. Technicians
should refer to both manuals to ensure proper repairs.
Please note that these information are prepared for wo rldwide usage, and as such, certain procedures might
not apply in some regions or countries.
Revision: August 2015 2016 Versa Note
cardiagn.com
Page 423 of 3641

BRM-24
< REMOVAL AND INSTALLATION >
REPLACEMENT OPERATIONS
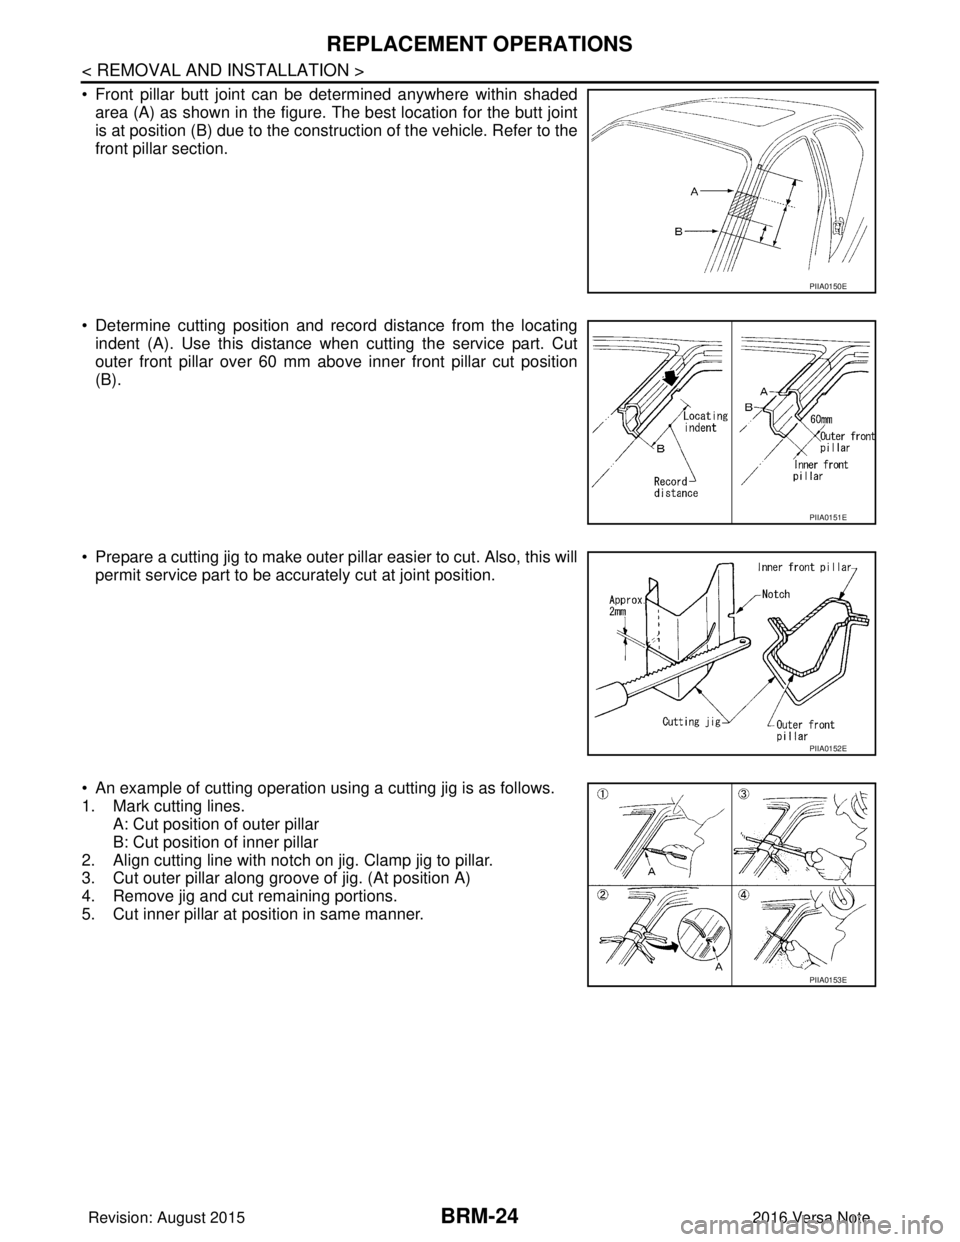
• Front pillar butt joint can be determined anywhere within shadedarea (A) as shown in the figure. The best location for the butt joint
is at position (B) due to the construc tion of the vehicle. Refer to the
front pillar section.
• Determine cutting position and record distance from the locating indent (A). Use this distance when cutting the service part. Cut
outer front pillar over 60 mm above inner front pillar cut position
(B).
• Prepare a cutting jig to make outer pillar easier to cut. Also, this will permit service part to be accurately cut at joint position.
• An example of cutting operation using a cutting jig is as follows.
1. Mark cutting lines. A: Cut position of outer pillar
B: Cut position of inner pillar
2. Align cutting line with notch on jig. Clamp jig to pillar.
3. Cut outer pillar along groove of jig. (At position A)
4. Remove jig and cut remaining portions.
5. Cut inner pillar at position in same manner.
PIIA0150E
PIIA0151E
PIIA0152E
PIIA0153E
Revision: August 2015 2016 Versa Note
cardiagn.com
Page 440 of 3641
BODY ALIGNMENTBRM-41
< SERVICE DATA AND SPECIFICATIONS (SDS)
C
DE
F
G H
I
J
L
M A
B
BRM
N
O P
SERVICE DATA AND SPECIFICATIONS (SDS)
BODY ALIGNMENT
Body Center MarksINFOID:0000000012430814
A mark has been placed on each part of the body to indi cate the vehicle center. When repairing parts dam-
aged by an accident which might affect the vehicle frame (me mbers, pillars, etc.), more accurate and effective
repair will be possible by using these marks t ogether with body alignment specifications.
Front
Point Portion Mark
A Cowl top extension Hole
B Front roof position mark for alignment Raised dimple
C Rear roof position mark for alignment Raised dimple
D Rear panel upper Cut out
AWKIA2546ZZ
Revision: August 2015 2016 Versa Note
cardiagn.com
Page 441 of 3641
BRM-42
< SERVICE DATA AND SPECIFICATIONS (SDS)
BODY ALIGNMENT
Description
INFOID:0000000012430815
• All dimensions indicated in the figures are actual.
• When using a tracking gauge, adjust both pointers to equal length. Then check the pointers and gauge itself
to make sure there is no free play.
• When a measuring tape is used, check to be sure there is no elongation, twisting or bending.
• Measurements should be taken at the center of the mounting holes.
• An asterisk (*) following the value at the measuring point indicates that the measuring point on the other side
is symmetrically the same value.
• The coordinates of the measurement points are the distances measured from the standard line of ″ X″, ″Y ″
and ″Z ″.
Engine CompartmentINFOID:0000000012430816
MEASUREMENTS
PIIA0104E
Revision: August 2015 2016 Versa Note
cardiagn.com
Page 442 of 3641
BODY ALIGNMENTBRM-43
< SERVICE DATA AND SPECIFICATIONS (SDS)
C
DE
F
G H
I
J
L
M A
B
BRM
N
O P
Unit: mm (in)
ALKIA3123ZZ
Position Description Measurement
A. Center of rear hood hinge hole to center of rear hood hinge hole 12 (0.47) 1407.0 (55.39)
B. Center shock hole to the center of the shock hole 52 (2.05) 1132.0 (44.57)
C. Center of front shock tower hole to the center of the front shock tower hole 12 (0.47) 1228.0 (48.35)
D. Hole for hood locator to the hole for hood locator 12 (0.47) 1346.0 (53.99)
E. Rear hole for radiator support to rear hole for radiator support 7 (0.28) 893.0 (35.16)
Revision: August 2015 2016 Versa Note
cardiagn.com
Page 443 of 3641
BRM-44
< SERVICE DATA AND SPECIFICATIONS (SDS)
BODY ALIGNMENT
Underbody
INFOID:0000000012430817
MEASUREMENT
F. Upper hole for front bumper reinforcement to upper hole front bumper reinforcement 8.2 (0.32) 948.0 (37.32)
G. Lower hole front radiator support to lower hole front lower radiator support 11 (0.43) 987.0 (38.86)
H. Rear hinge hole 12 (0.47) to front hole upper radiator support 12 (0.47) 1312.0 (51.65)
J. Rear hinge hole 12 (0.47) to hood locator hole 7 (0.28) 345.0 (13.58)
ALKIA3128ZZ
Revision: August 2015 2016 Versa Note
cardiagn.com