2016 MERCEDES-BENZ GLS SUV change wheel
[x] Cancel search: change wheelPage 231 of 397
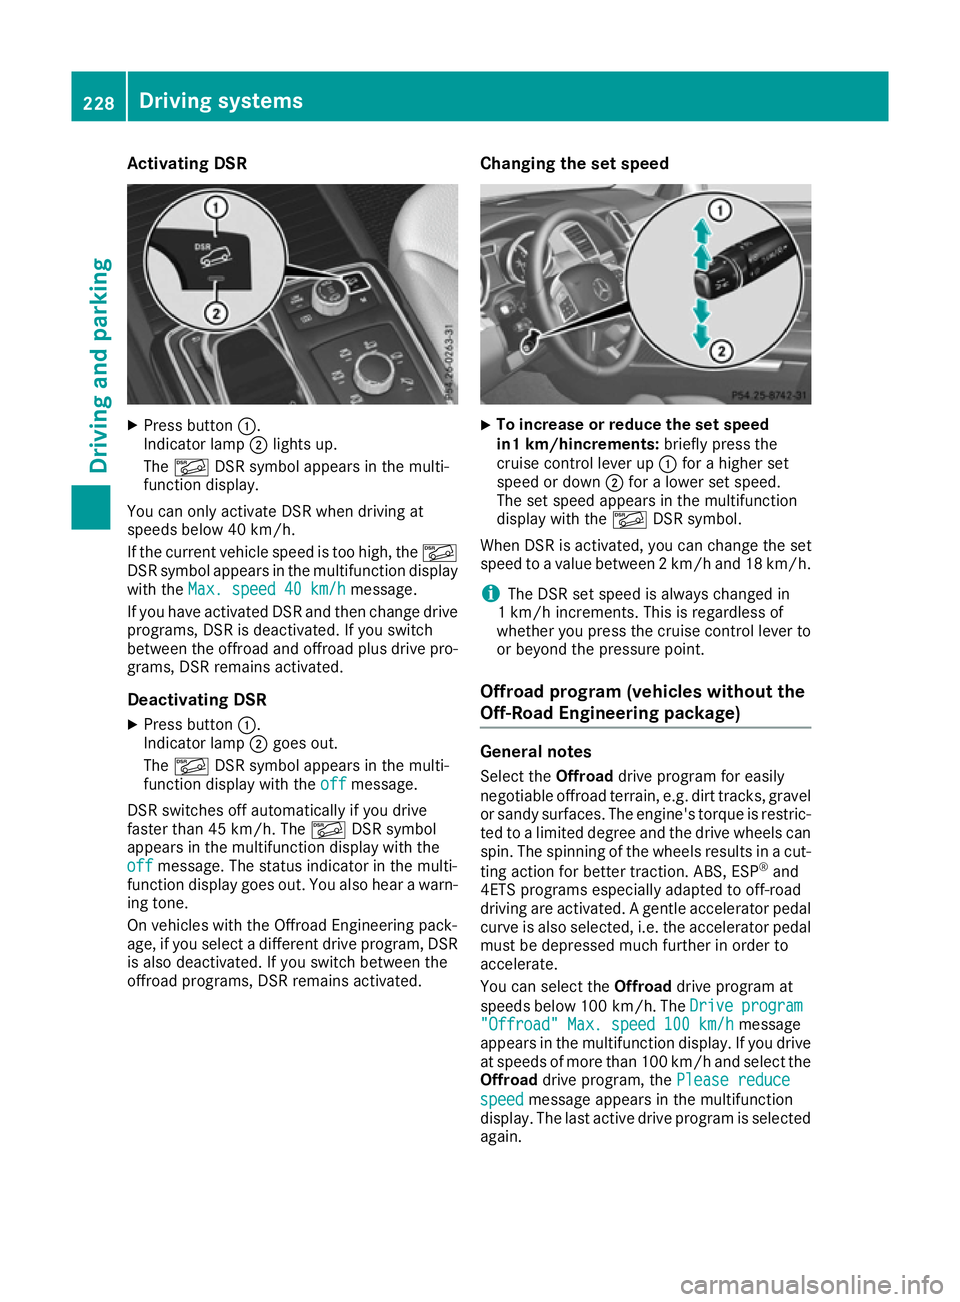
Activating DSR
X
Press button :.
Indicator lamp ;lights up.
The à DSR symbol appears in the multi-
function display.
You can only activate DSR when driving at
speeds below 40 km/h.
If the current vehicle speed is too high, the Ã
DSR symbol appears in the multifunction display
with the Max. speed 40 km/h
Max. speed 40 km/h message.
If you have activated DSR and then change drive programs, DSR is deactivated. If you switch
between the offroad and offroad plus drive pro- grams, DSR remains activated.
Deactivating DSR
X Press button :.
Indicator lamp ;goes out.
The à DSR symbol appears in the multi-
function display with the off offmessage.
DSR switches off automatically if you drive
faster than 45 km/h. The ÃDSR symbol
appears in the multifunction display with the
off
off message. The status indicator in the multi-
function display goes out. You also hear a warn-
ing tone.
On vehicles with the Offroad Engineering pack-
age, if you select a different drive program, DSR is also deactivated. If you switch between the
offroad programs, DSR remains activated. Changing the set speed X
To increase or reduce the set speed
in1 km/hincrements:
briefly press the
cruise control lever up :for a higher set
speed or down ;for a lower set speed.
The set speed appears in the multifunction
display with the ÃDSR symbol.
When DSR is activated, you can change the set
speed to a value between 2 km/h and 18 km/h.
i The DSR set speed is always changed in
1 km/h increments. This is regardless of
whether you press the cruise control lever to or beyond the pressure point.
Offroad program (vehicles without the
Off-Road Engineering package) General notes
Select the Offroaddrive program for easily
negotiable offroad terrain, e.g. dirt tracks, gravel
or sandy surfaces. The engine's torque is restric-
ted to a limited degree and the drive wheels can
spin. The spinning of the wheels results in a cut-
ting action for better traction. ABS, ESP ®
and
4ETS programs especially adapted to off-road
driving are activated. A gentle accelerator pedal
curve is also selected, i.e. the accelerator pedal
must be depressed much further in order to
accelerate.
You can select the Offroaddrive program at
speeds below 100 km/h. The Drive Driveprogram
program
"Offroad" Max. speed 100 km/h
"Offroad" Max. speed 100 km/h message
appears in the multifunction display. If you drive
at speeds of more than 100 km/h and select the
Offroad drive program, the Please reduce
Please reduce
speed speed message appears in the multifunction
display. The last active drive program is selected
again. 228
Driving systemsDriving and pa
rking
Page 232 of 397
Do not use the
Offroaddrive program on roads
that are snow-covered or icy, or if you have fitted
your vehicle with snow chains.
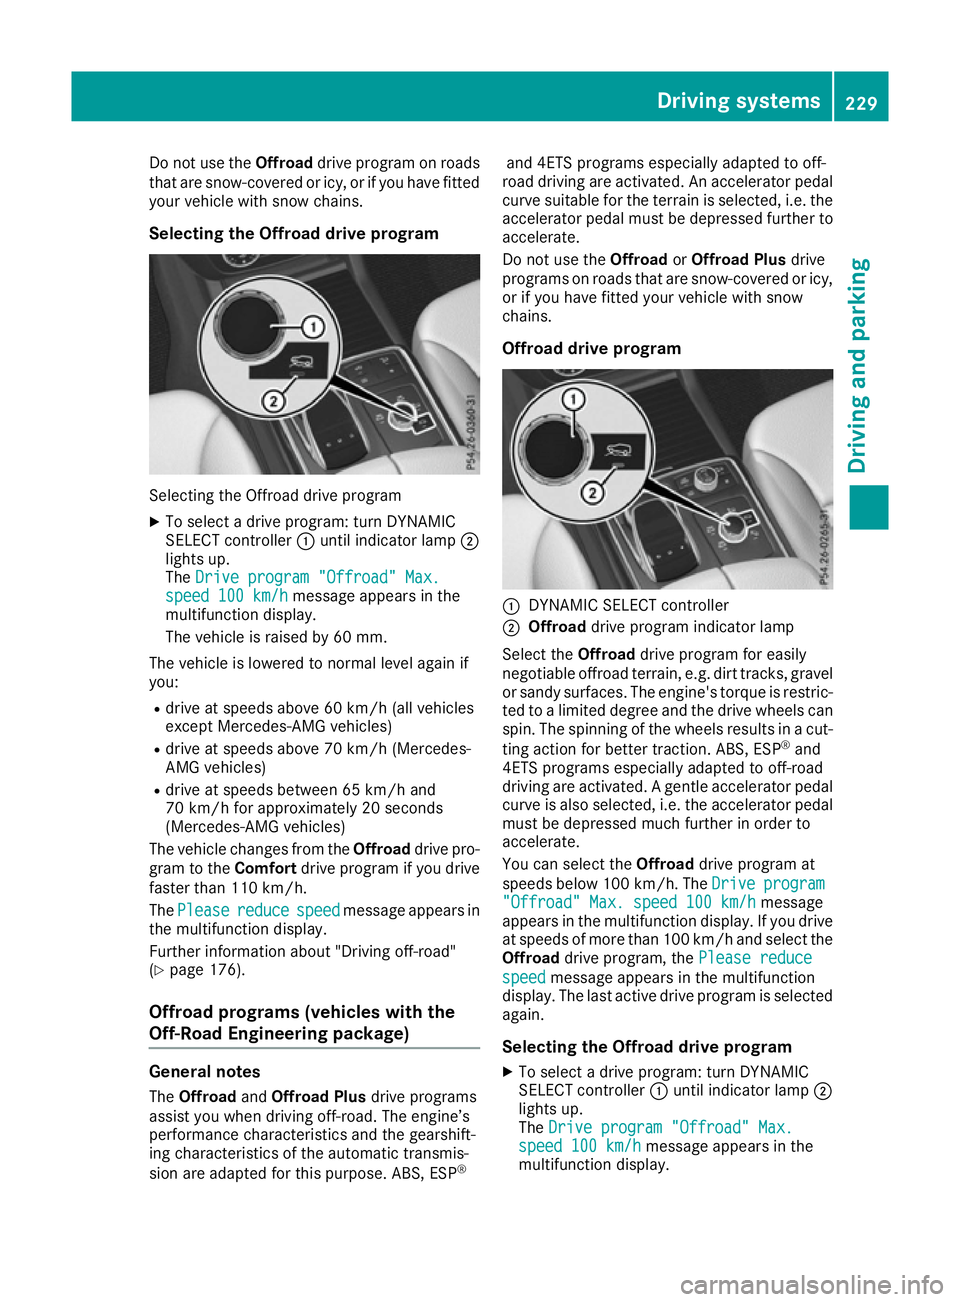
Selecting the Offroad drive program Selecting the Offroad drive program
X To select a drive program: turn DYNAMIC
SELECT controller :until indicator lamp ;
lights up.
The Drive program "Offroad" Max.
Drive program "Offroad" Max.
speed 100 km/h speed 100 km/h message appears in the
multifunction display.
The vehicle is raised by 60 mm.
The vehicle is lowered to normal level again if
you: R drive at speeds above 60 km/h (all vehicles
except Mercedes-AMG vehicles)
R drive at speeds above 70 km/h (Mercedes-
AMG vehicles)
R drive at speeds between 65 km/h and
70 km/h for approximately 20 seconds
(Mercedes-AMG vehicles)
The vehicle changes from the Offroaddrive pro-
gram to the Comfortdrive program if you drive
faster than 110 km/h.
The Please
Please reduce reducespeed
speedmessage appears in
the multifunction display.
Further information about "Driving off-road"
(Y page 176).
Offroad programs (vehicles with the
Off-Road Engineering package) General notes
The Offroad andOffroad Plus drive programs
assist you when driving off-road. The engine’s
performance characteristics and the gearshift-
ing characteristics of the automatic transmis-
sion are adapted for this purpose. ABS, ESP ®and 4ETS programs especially adapted to off-
road driving are activated. An accelerator pedal
curve suitable for the terrain is selected, i.e. the accelerator pedal must be depressed further to accelerate.
Do not use the OffroadorOffroad Plus drive
programs on roads that are snow-covered or icy,
or if you have fitted your vehicle with snow
chains.
Offroad drive program :
DYNAMIC SELECT controller
; Offroad drive program indicator lamp
Select the Offroaddrive program for easily
negotiable offroad terrain, e.g. dirt tracks, gravel
or sandy surfaces. The engine's torque is restric-
ted to a limited degree and the drive wheels can
spin. The spinning of the wheels results in a cut-
ting action for better traction. ABS, ESP ®
and
4ETS programs especially adapted to off-road
driving are activated. A gentle accelerator pedal curve is also selected, i.e. the accelerator pedal
must be depressed much further in order to
accelerate.
You can select the Offroaddrive program at
speeds below 100 km/h. The Drive
Drive program program
"Offroad" Max. speed 100 km/h
"Offroad" Max. speed 100 km/h message
appears in the multifunction display. If you drive
at speeds of more than 100 km/h and select the
Offroad drive program, the Please reduce
Please reduce
speed
speed message appears in the multifunction
display. The last active drive program is selected
again.
Selecting the Offroad drive program X To select a drive program: turn DYNAMIC
SELECT controller :until indicator lamp ;
lights up.
The Drive program "Offroad" Max. Drive program "Offroad" Max.
speed 100 km/h
speed 100 km/h message appears in the
multifunction display. Driving systems
229Driving and parking Z
Page 233 of 397
The vehicle is raised by 30 mm.
The vehicle changes from the Offroaddrive pro-
gram to the Comfortdrive program if you drive
faster than 110 km/h.
The Please Please reduce
reducespeed
speedmessage appears in
the multifunction display.
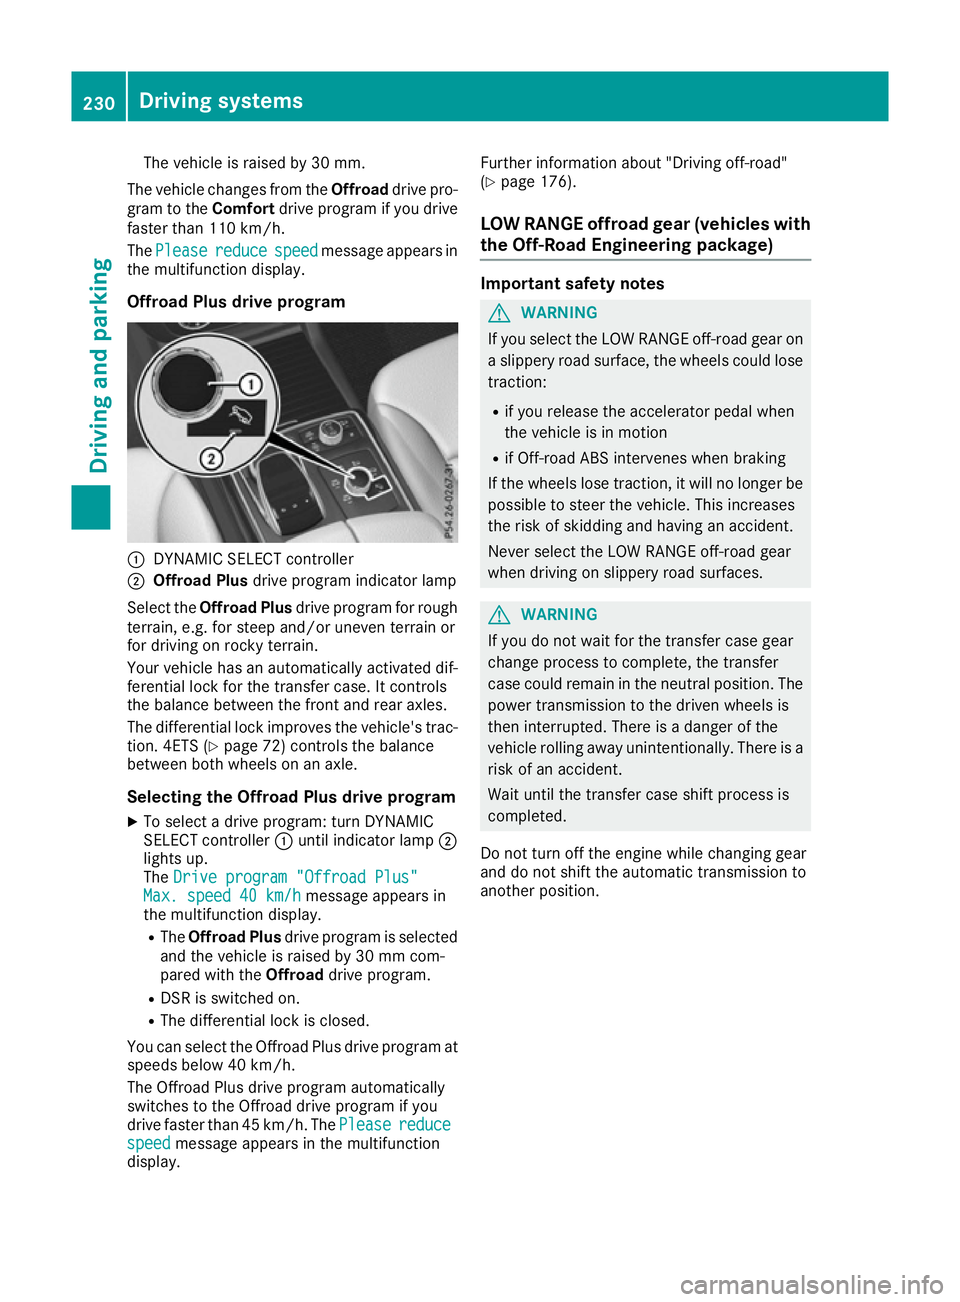
Offroad Plus drive program :
DYNAMIC SELECT controller
; Offroad Plus drive program indicator lamp
Select the Offroad Plus drive program for rough
terrain, e.g. for steep and/or uneven terrain or
for driving on rocky terrain.
Your vehicle has an automatically activated dif-
ferential lock for the transfer case. It controls
the balance between the front and rear axles.
The differential lock improves the vehicle's trac-
tion. 4ETS (Y page 72) controls the balance
between both wheels on an axle.
Selecting the Offroad Plus drive program X To select a drive program: turn DYNAMIC
SELECT controller :until indicator lamp ;
lights up.
The Drive program "Offroad Plus"
Drive program "Offroad Plus"
Max. speed 40 km/h
Max. speed 40 km/h message appears in
the multifunction display.
R The Offroad Plus drive program is selected
and the vehicle is raised by 30 mm com-
pared with the Offroaddrive program.
R DSR is switched on.
R The differential lock is closed.
You can select the Offroad Plus drive program at speeds below 40 km/h.
The Offroad Plus drive program automatically
switches to the Offroad drive program if you
drive faster than 45 km/h. ThePlease
Please reduce reduce
speed
speed message appears in the multifunction
display. Further information about "Driving off-road"
(Y
page 176).
LOW RANGE offroad gear (vehicles with
the Off-Road Engineering package) Important safety notes
G
WARNING
If you select the LOW RANGE off-road gear on a slippery road surface, the wheels could lose traction:
R if you release the accelerator pedal when
the vehicle is in motion
R if Off-road ABS intervenes when braking
If the wheels lose traction, it will no longer be
possible to steer the vehicle. This increases
the risk of skidding and having an accident.
Never select the LOW RANGE off-road gear
when driving on slippery road surfaces. G
WARNING
If you do not wait for the transfer case gear
change process to complete, the transfer
case could remain in the neutral position. The power transmission to the driven wheels is
then interrupted. There is a danger of the
vehicle rolling away unintentionally. There is a
risk of an accident.
Wait until the transfer case shift process is
completed.
Do not turn off the engine while changing gear
and do not shift the automatic transmission to
another position. 230
Driving systemsDriving and parking
Page 234 of 397
General notes
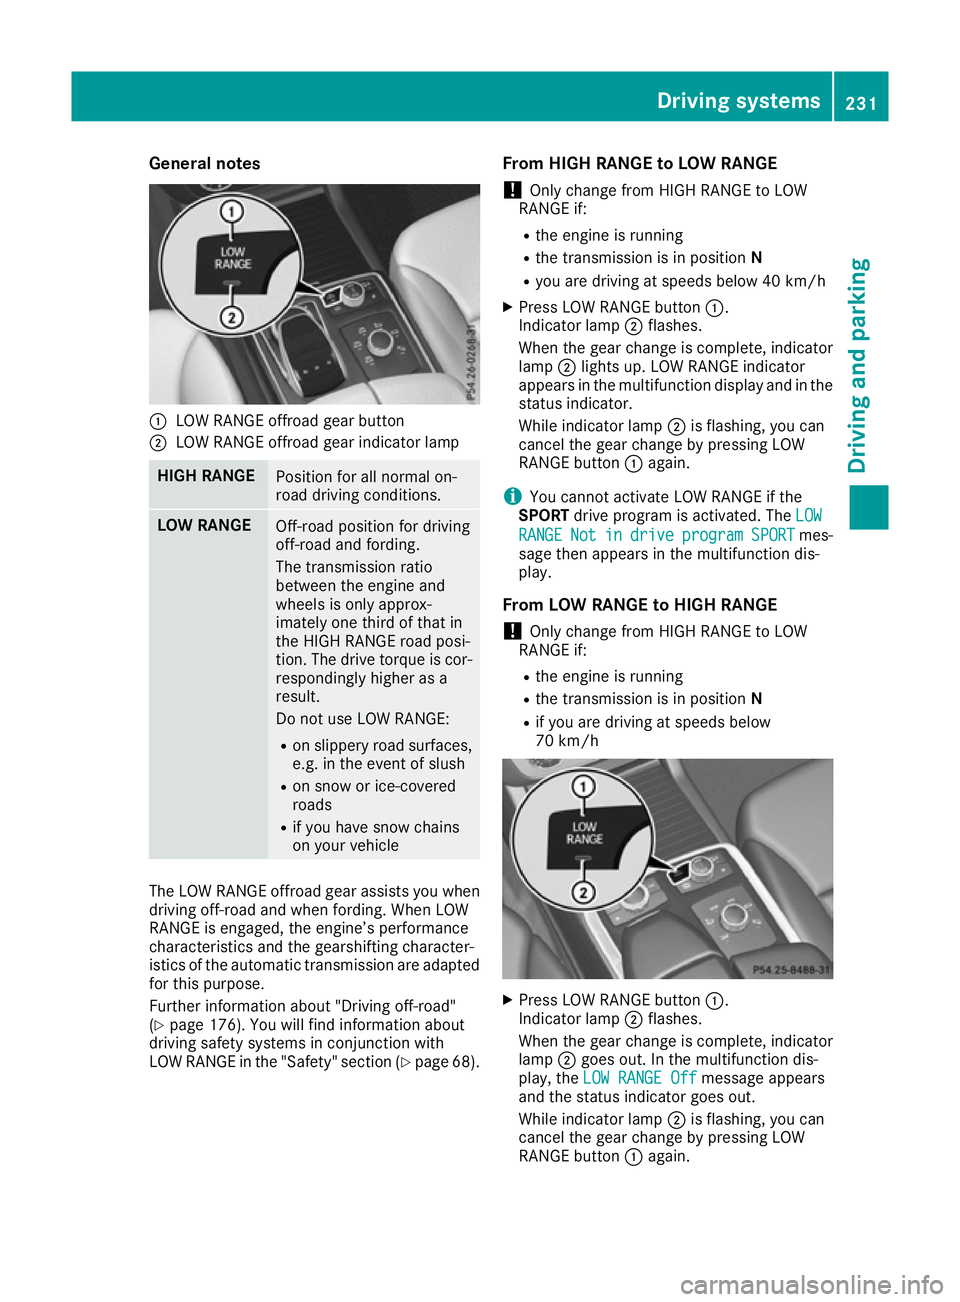
:
LOW RANGE offroad gear button
; LOW RANGE offroad gear indicator lamp HIGH RANGE
Position for all normal on-
road driving conditions.
LOW RANGE
Off-road position for driving
off-road and fording.
The transmission ratio
between the engine and
wheels is only approx-
imately one third of that in
the HIGH RANGE road posi-
tion. The drive torque is cor-
respondingly higher as a
result.
Do not use LOW RANGE:
R on slippery road surfaces,
e.g. in the event of slush
R on snow or ice-covered
roads
R if you have snow chains
on your vehicle The LOW RANGE offroad gear assists you when
driving off-road and when fording. When LOW
RANGE is engaged, the engine’s performance
characteristics and the gearshifting character-
istics of the automatic transmission are adapted
for this purpose.
Further information about "Driving off-road"
(Y page 176). You will find information about
driving safety systems in conjunction with
LOW RANGE in the "Safety" section (Y page 68).From HIGH RANGE to LOW RANGE
! Only change from HIGH RANGE to LOW
RANGE if:
R the engine is running
R the transmission is in position N
R you are driving at speeds below 40 km/h
X Press LOW RANGE button :.
Indicator lamp ;flashes.
When the gear change is complete, indicator
lamp ;lights up. LOW RANGE indicator
appears in the multifunction display and in the
status indicator.
While indicator lamp ;is flashing, you can
cancel the gear change by pressing LOW
RANGE button :again.
i You cannot activate LOW RANGE if the
SPORT drive program is activated. The LOW LOW
RANGE RANGE Not Notin
indrive
drive program
program SPORT
SPORTmes-
sage then appears in the multifunction dis-
play.
From LOW RANGE to HIGH RANGE ! Only change from HIGH RANGE to LOW
RANGE if:
R the engine is running
R the transmission is in position N
R if you are driving at speeds below
70 km/h X
Press LOW RANGE button :.
Indicator lamp ;flashes.
When the gear change is complete, indicator
lamp ;goes out. In the multifunction dis-
play, the LOW RANGE Off
LOW RANGE Off message appears
and the status indicator goes out.
While indicator lamp ;is flashing, you can
cancel the gear change by pressing LOW
RANGE button :again. Driving systems
231Driving and parking Z
Page 235 of 397
Messages in the multifunction display
If a gear change process has not been successful, the following messages may be displayed in the
multifunction display: Display messages
Possible causes/consequences and
M
MSolutions LOW RANGE Max.
LOW RANGE Max.
speed 40 km/h speed 40 km/h You have been driving faster than 40 km/h. Additionally, the indicator
lamp on the button in the centre console blinks.
X Drive more slowly to carry out the gear change process. LOW RANGE Shift to
LOW RANGE Shift to
position N briefly position N briefly The transmission is in position
Dand you are driving at below
40 km/h.
X Shift the transmission to Nto complete the gear change process. LOW RANGE Shifting
LOW RANGE Shifting
cancelled Please cancelled Please
reactivate reactivate The gear change process was not carried out.
X Maintain all gear change conditions and carry out the gear change
process again. LOW RANGE Stop
LOW RANGE Stop
Apply parking brake Apply parking brake A warning tone also sounds. The gear change process has not been
completed. LOW RANGE is in the neutral position. There is no con-
nection between the engine and the drive wheels.
! Do not drive any further. You could otherwise damage the vehi-
cle’s drive train.
X Stop the vehicle. Take into account the road and traffic conditions
when doing so.
X Apply the electric parking brake (Y page 170).
X Repeat the gear change process.
If the gear change process has been carried out, the LOW RANGE LOW RANGE
Stop Apply parking brake
Stop Apply parking brake message disappears.Driving dynamics display in the
COMAND display (vehicles with the Off-
Road Engineering-package) General notes
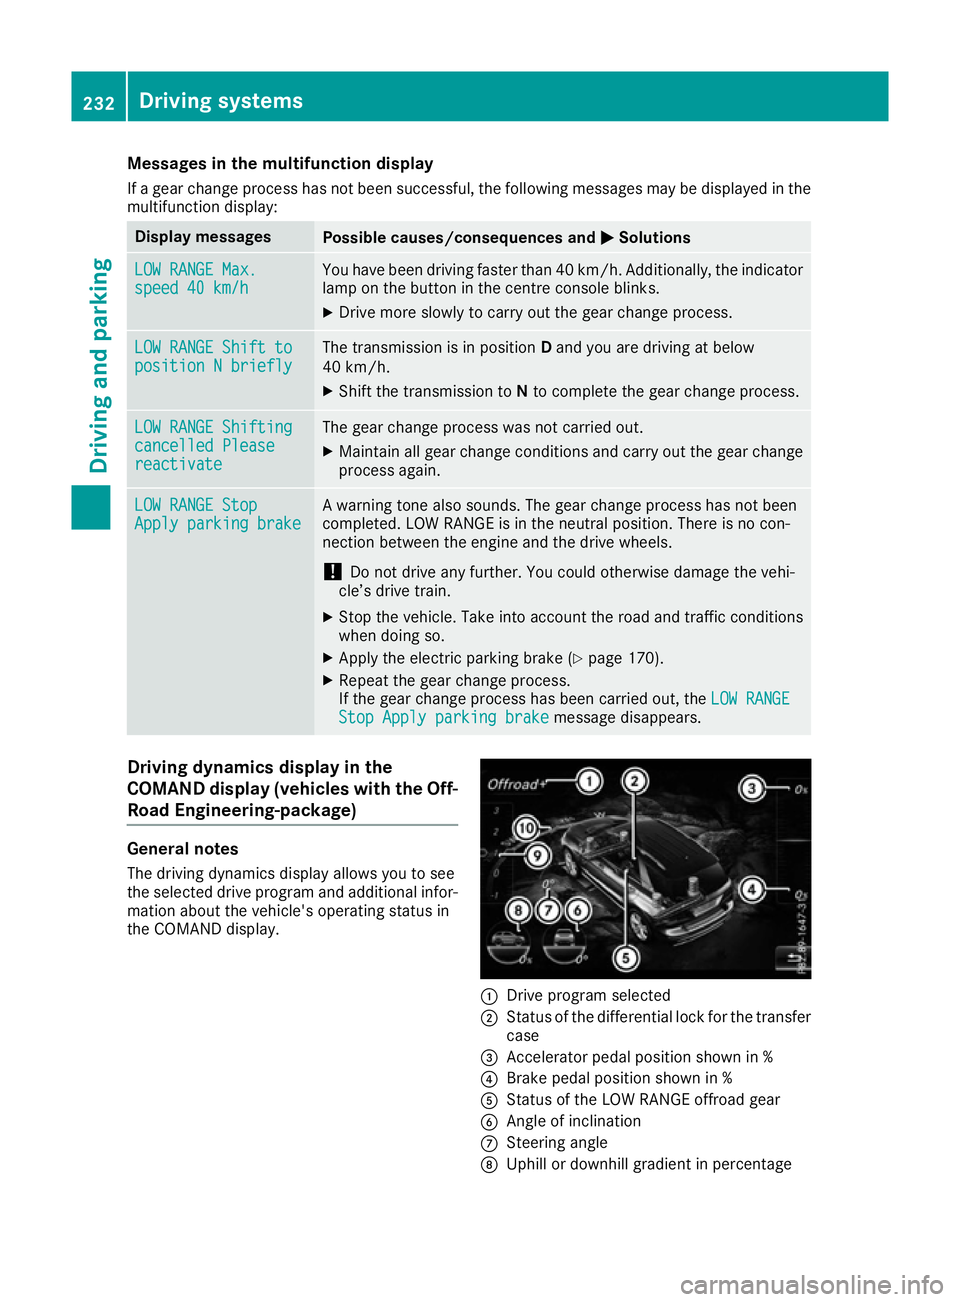
The driving dynamics display allows you to see
the selected drive program and additional infor-
mation about the vehicle's operating status in
the COMAND display. :
Drive program selected
; Status of the differential lock for the transfer
case
= Accelerator pedal position shown in %
? Brake pedal position shown in %
A Status of the LOW RANGE offroad gear
B Angle of inclination
C Steering angle
D Uphill or downhill gradient in percentage 232
Driving systemsDriving and parking
Page 236 of 397
E
Level control
F Compass with angle scale
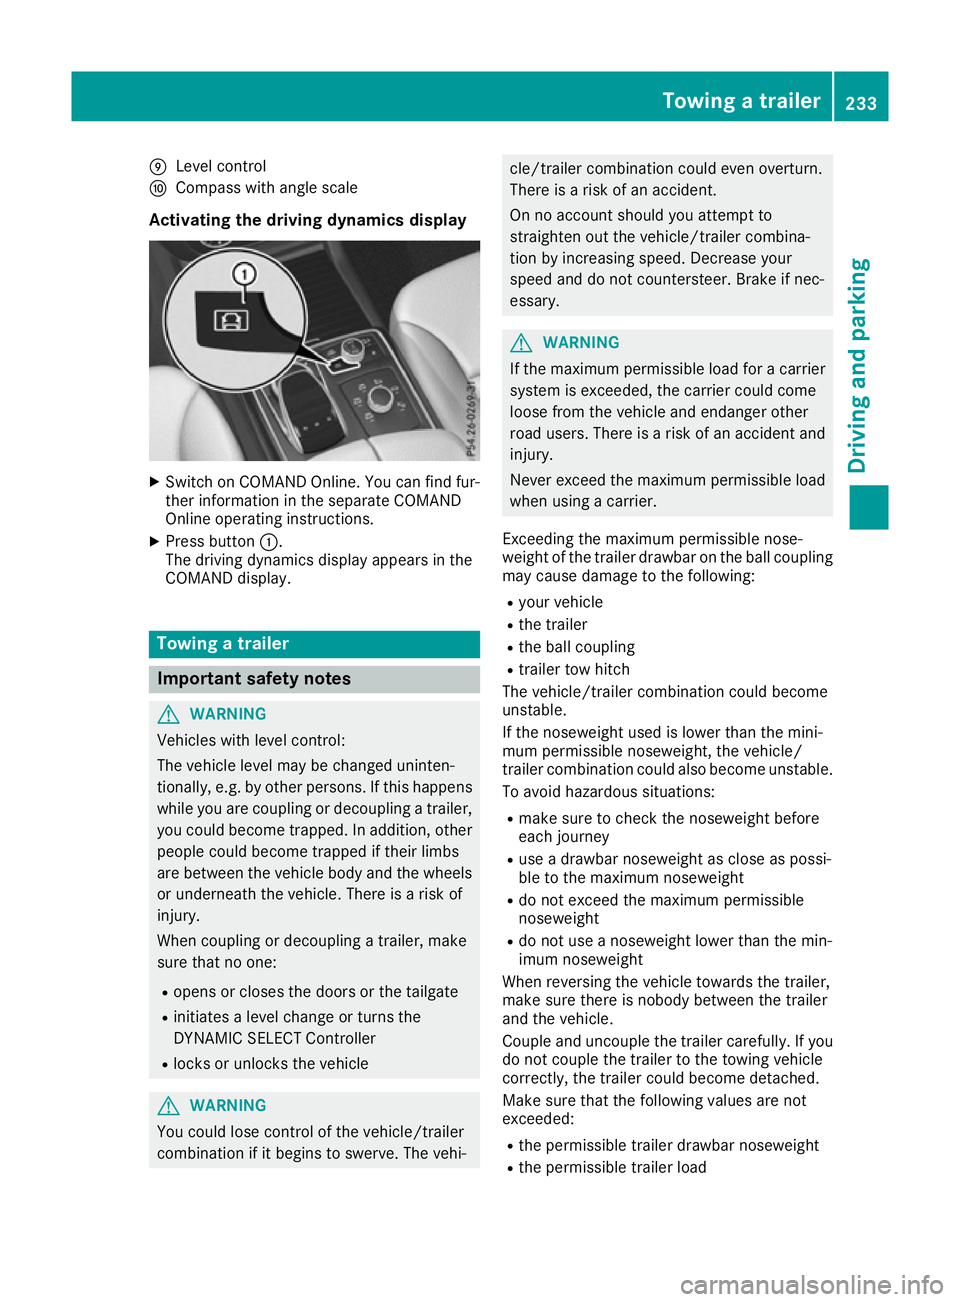
Activating the driving dynamics display X
Switch on COMAND Online. You can find fur-
ther information in the separate COMAND
Online operating instructions.
X Press button :.
The driving dynamics display appears in the
COMAND display. Towing a trailer
Important safety notes
G
WARNING
Vehicles with level control:
The vehicle level may be changed uninten-
tionally, e.g. by other persons. If this happens while you are coupling or decoupling a trailer,
you could become trapped. In addition, other
people could become trapped if their limbs
are between the vehicle body and the wheels or underneath the vehicle. There is a risk of
injury.
When coupling or decoupling a trailer, make
sure that no one:
R opens or closes the doors or the tailgate
R initiates a level change or turns the
DYNAMIC SELECT Controller
R locks or unlocks the vehicle G
WARNING
You could lose control of the vehicle/trailer
combination if it begins to swerve. The vehi- cle/trailer combination could even overturn.
There is a risk of an accident.
On no account should you attempt to
straighten out the vehicle/trailer combina-
tion by increasing speed. Decrease your
speed and do not countersteer. Brake if nec-
essary. G
WARNING
If the maximum permissible load for a carrier system is exceeded, the carrier could come
loose from the vehicle and endanger other
road users. There is a risk of an accident and injury.
Never exceed the maximum permissible load
when using a carrier.
Exceeding the maximum permissible nose-
weight of the trailer drawbar on the ball coupling
may cause damage to the following:
R your vehicle
R the trailer
R the ball coupling
R trailer tow hitch
The vehicle/trailer combination could become
unstable.
If the noseweight used is lower than the mini-
mum permissible noseweight, the vehicle/
trailer combination could also become unstable. To avoid hazardous situations:
R make sure to check the noseweight before
each journey
R use a drawbar noseweight as close as possi-
ble to the maximum noseweight
R do not exceed the maximum permissible
noseweight
R do not use a noseweight lower than the min-
imum noseweight
When reversing the vehicle towards the trailer,
make sure there is nobody between the trailer
and the vehicle.
Couple and uncouple the trailer carefully. If you do not couple the trailer to the towing vehicle
correctly, the trailer could become detached.
Make sure that the following values are not
exceeded:
R the permissible trailer drawbar noseweight
R the permissible trailer load Towing a trailer
233Driving and parking Z
Page 245 of 397
Bear in mind that the outside temperature dis-
play indicates the measured air temperature
and not the road surface temperature.
The outside temperature display is in the multi-
function display (Y page 243).
A change in the outside temperature is shown in
the multifunction display after a delay. Coolant temperature display
G
WARNING
If you open the bonnet while the engine is
overheating or while there is a fire in the
engine compartment, you could come into
contact with hot gases or other leaking ser-
vice products. There is a danger of injury.
Allow an overheating engine to cool down
before opening the bonnet. If there is a fire in the engine compartment, leave the bonnet
closed and notify the fire brigade.
The coolant temperature gauge is in the instru-
ment cluster on the right-hand side (Y page 35).
Under normal operating conditions and with the specified coolant level, the coolant temperature
may rise to 120 †.
At high outside temperatures and when driving
in mountainous terrain, the coolant temperature may rise to the end of the scale. Operating the on-board computer
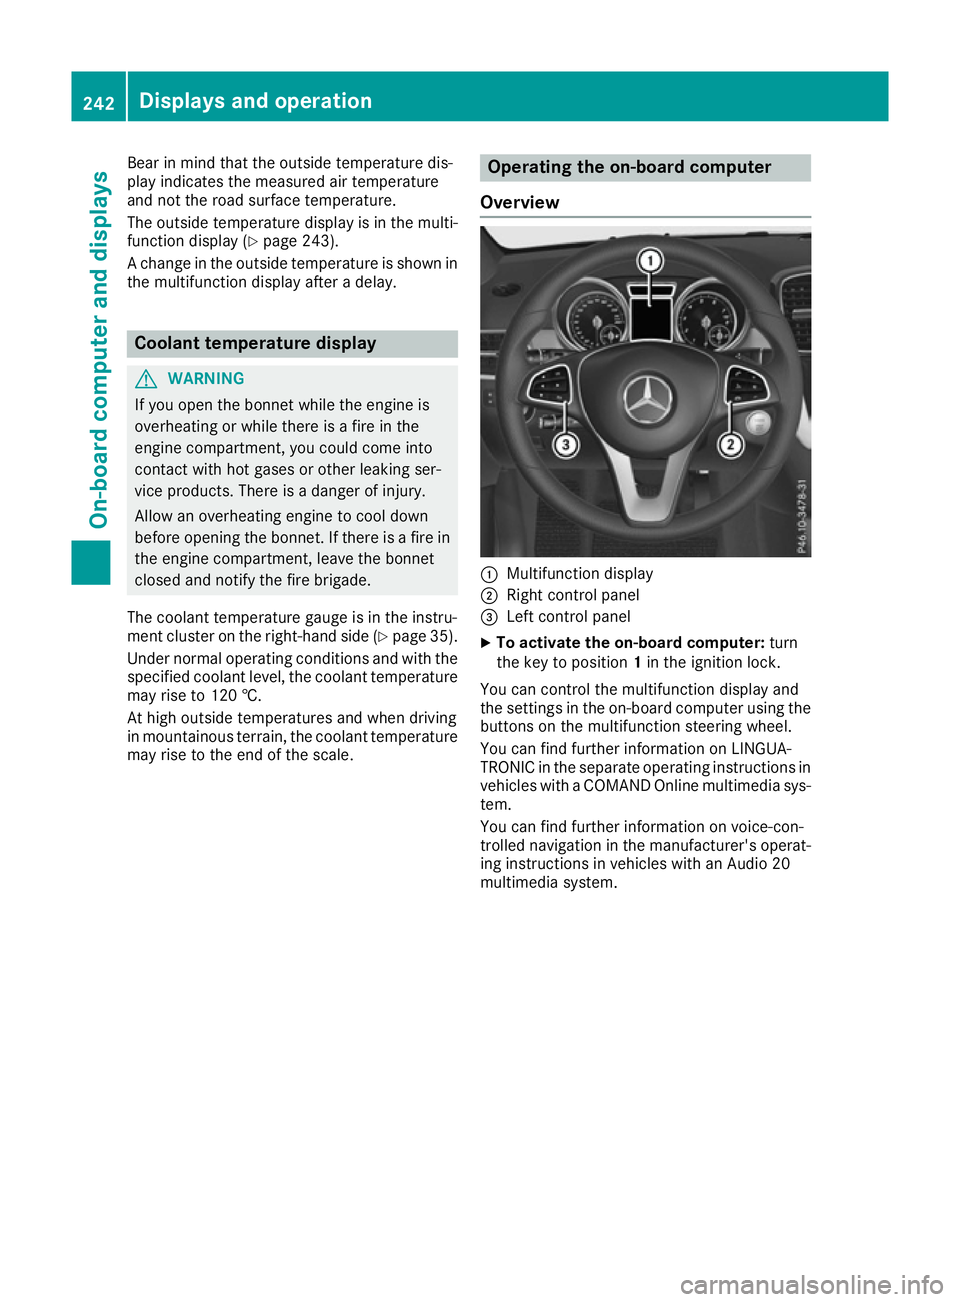
Overview :
Multifunction display
; Right control panel
= Left control panel
X To activate the on-board computer: turn
the key to position 1in the ignition lock.
You can control the multifunction display and
the settings in the on-board computer using the buttons on the multifunction steering wheel.
You can find further information on LINGUA-
TRONIC in the separate operating instructions in vehicles with a COMAND Online multimedia sys-
tem.
You can find further information on voice-con-
trolled navigation in the manufacturer's operat-
ing instructions in vehicles with an Audio 20
multimedia system. 242
Displays and operationOn-board computer and displays
Page 255 of 397
![MERCEDES-BENZ GLS SUV 2016 Owners Manual X
Press the :or9 button to select the
Permanent display:
Permanent display: function.
The current setting, outside temperature
outside temperature
or Dig. speedo [mph]:
Dig. speedo [mph]:, appears.
X MERCEDES-BENZ GLS SUV 2016 Owners Manual X
Press the :or9 button to select the
Permanent display:
Permanent display: function.
The current setting, outside temperature
outside temperature
or Dig. speedo [mph]:
Dig. speedo [mph]:, appears.
X](/manual-img/4/55577/w960_55577-254.png)
X
Press the :or9 button to select the
Permanent display:
Permanent display: function.
The current setting, outside temperature
outside temperature
or Dig. speedo [mph]:
Dig. speedo [mph]:, appears.
X To change the setting: pressaagain.
Light submenu Setting the daytime driving lights
The Daytime driving lights
Daytime driving lights function can
only be switched on with the engine turned off.
X Press the =or; button on the steering
wheel to select the Settings
Settings menu.
X Press the :or9 button to select the
Lights
Lights submenu.
X Press ato confirm.
X Press the :or9 button to select the
Daytime driving lights
Daytime driving lights function.
If the Daytime
Daytime driving
drivinglights
lightsfunction has
been switched on, the cone of light and the
W symbol in the multifunction display are
shown in orange.
X Press the abutton to save the setting.
Further information on daytime driving lights
(Y page 121).
Switching the Intelligent Light System
on/off
X Press the =or; button on the steering
wheel to select the Settings
Settings menu.
X Press the :or9 button to select the
Lights Lights submenu.
X Press ato confirm.
X Press the :or9 button to select the
Intell. Light System
Intell. Light System function.
If the Intell. Light System
Intell. Light System function has
been switched on, the cone of light and the
L symbol in the multifunction display are
shown in orange.
X Press the abutton to save the setting.
When you switch the Intell. Light System Intell. Light System
function on, you activate the following func-
tions:
R Motorway mode
R Active light function
R Cornering light function
R Extended range foglamps
R Off-road lights
If you set the dipped-beam headlamps for driv-
ing on the right/left, the multifunction display shows the
Intell. Light System: System
Intell. Light System: System
inoperative Inactive for left-side inoperative Inactive for left-side
traffic traffic orIntell.
Intell. Light
LightSystem:
System: System
System
inoperative Inactive for right-side
inoperative Inactive for right-side
traffic
traffic display message instead of the
Intell. Light Sys.
Intell. Light Sys. function in theLights
Lights
submenu (Y page 252). This display message
will only appear if the setting for driving on the
left/right is set opposite to your vehicle's coun-
try version.
Further information on the Intelligent Light Sys-
tem (Y page 123).
Setting the dipped-beam headlamps for
driving on the left/right
This function is only available in vehicles with
the Intelligent Light System.
You can use this function to switch between
symmetrical and asymmetrical dipped beam
(Y page 120).
X Press the =or; button on the steering
wheel to select the Settings
Settings menu.
X Press the :or9 button to select the
Lights Lights submenu.
X Press ato confirm.
X Press the :or9 button to select the
Dipped beams Setting for:
Dipped beams Setting for: function.
You will see the selected setting: Right-
Right-
side traffic
side traffic orLeft-side traffic
Left-side traffic.
X Press the abutton to save the setting.
If you change the setting, conversion does not take place until the next time the vehicle is
stationary.
If you set the dipped-beam headlamps for driv-
ing on the right/left, then motorway mode and
the extended range foglamps are unavailable.
These are only deactivated if the setting for driv-
ing on the left/right is set opposite to your vehi- cle's country version.
A qualified specialist workshop can set the
dipped-beam headlamps for driving on the left/
right.
Vehicle submenu Setting the permanent speed limiter
X Press the =or; button on the steering
wheel to select the Settings
Settings menu.
X Press the :or9 button to select the
Vehicle Vehicle submenu.
X Press ato confirm. 252
Menus and submenusOn-board computer and displays