2016 MERCEDES-BENZ GLS SUV buttons
[x] Cancel search: buttonsPage 122 of 397
G
WARNING
When the memory function adjusts the seat or steering wheel, you and other vehicle occu-
pants – particularly children – could become
trapped. There is a risk of injury.
While the memory function is making adjust-
ments, make sure that no one has any body
parts in the sweep of the seat or steering
wheel. If somebody becomes trapped, imme-
diately release the memory function position
button. The adjustment process is stopped. G
WARNING
If children activate the memory function, they
could become trapped, especially if they are
unattended. There is a risk of injury.
When leaving the vehicle, always take the key with you and lock the vehicle. Never leave
children unattended in the vehicle.
The memory function can be used at any time,
e.g. even when the key is not in the ignition lock. With the memory function, you can store up to
three different settings, e.g. for three different
people.
The following settings are stored as a single
memory preset:
R position of the seat, backrest and head
restraint
R driver's side: steering wheel position
R driver's side: position of the exterior mirrors
on the driver's and front-passenger sides X
Adjust the seat (Y page 104).
X On the driver's side, adjust the steering wheel
(Y page 114) and the exterior mirrors
(Y page 116).
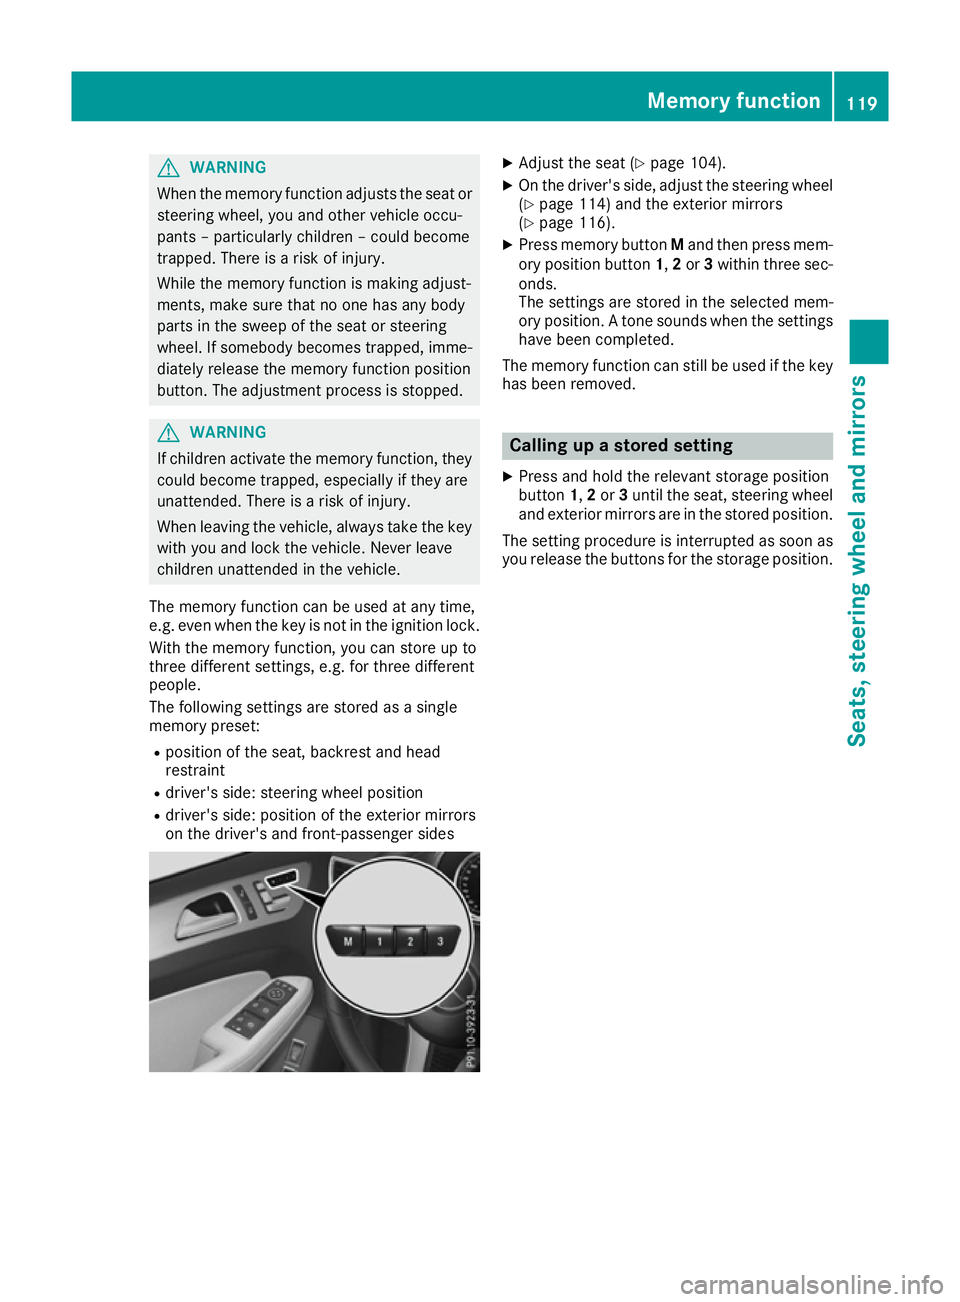
X Press memory button Mand then press mem-
ory position button 1,2or 3within three sec-
onds.
The settings are stored in the selected mem-
ory position. A tone sounds when the settings have been completed.
The memory function can still be used if the key
has been removed. Calling up a stored setting
X Press and hold the relevant storage position
button 1,2or 3until the seat, steering wheel
and exterior mirrors are in the stored position.
The setting procedure is interrupted as soon as
you release the buttons for the storage position. Memory function
119Seats, steering wheel and mirrors Z
Page 137 of 397
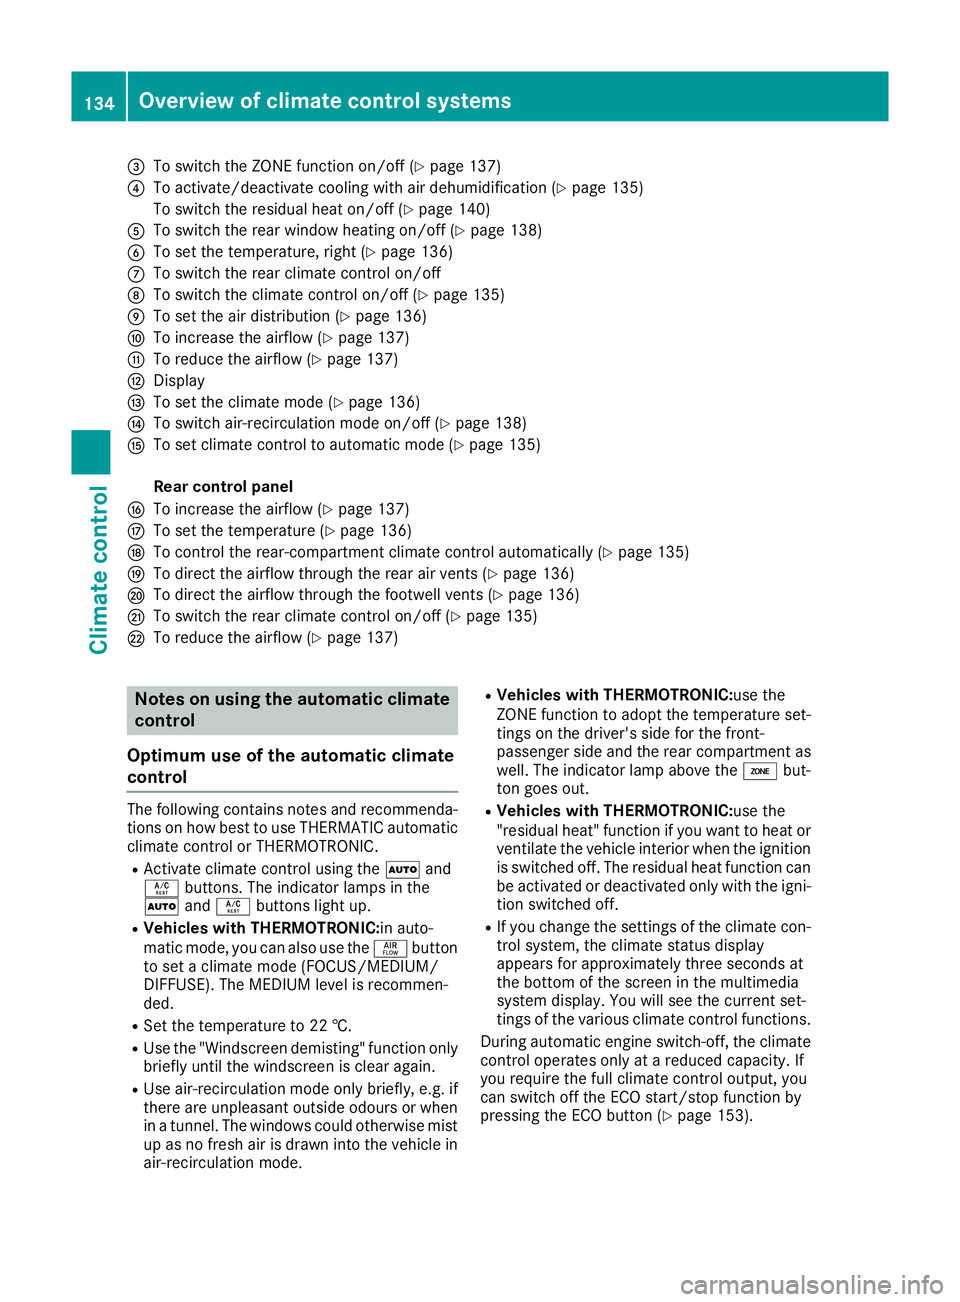
=
To switch the ZONE function on/off (Y page 137)
? To activate/deactivate cooling with air dehumidification (Y page 135)
To switch the residual heat on/off (Y page 140)
A To switch the rear window heating on/off (Y page 138)
B To set the temperature, right (Y page 136)
C To switch the rear climate control on/off
D To switch the climate control on/off (Y page 135)
E To set the air distribution (Y page 136)
F To increase the airflow (Y page 137)
G To reduce the airflow (Y page 137)
H Display
I To set the climate mode (Y page 136)
J To switch air-recirculation mode on/off (Y page 138)
K To set climate control to automatic mode (Y page 135)
Rear control panel
L To increase the airflow (Y page 137)
M To set the temperature (Y page 136)
N To control the rear-compartment climate control automatically (Y page 135)
O To direct the airflow through the rear air vents (Y page 136)
P To direct the airflow through the footwell vents (Y page 136)
Q To switch the rear climate control on/off (Y page 135)
R To reduce the airflow (Y page 137)Notes on using the automatic climate
control
Optimum use of the automatic climate
control The following contains notes and recommenda-
tions on how best to use THERMATIC automatic climate control or THERMOTRONIC.
R Activate climate control using the Ãand
Á buttons. The indicator lamps in the
à andÁ buttons light up.
R Vehicles with THERMOTRONIC:in auto-
matic mode, you can also use the ñbutton
to set a climate mode (FOCUS/MEDIUM/
DIFFUSE). The MEDIUM level is recommen-
ded.
R Set the temperature to 22 †.
R Use the "Windscreen demisting" function only
briefly until the windscreen is clear again.
R Use air-recirculation mode only briefly, e.g. if
there are unpleasant outside odours or when
in a tunnel. The windows could otherwise mist up as no fresh air is drawn into the vehicle in
air-recirculation mode. R
Vehicles with THERMOTRONIC:use the
ZONE function to adopt the temperature set-
tings on the driver's side for the front-
passenger side and the rear compartment as well. The indicator lamp above the ábut-
ton goes out.
R Vehicles with THERMOTRONIC:use the
"residual heat" function if you want to heat or
ventilate the vehicle interior when the ignitionis switched off. The residual heat function can
be activated or deactivated only with the igni- tion switched off.
R If you change the settings of the climate con-
trol system, the climate status display
appears for approximately three seconds at
the bottom of the screen in the multimedia
system display. You will see the current set-
tings of the various climate control functions.
During automatic engine switch-off, the climate
control operates only at a reduced capacity. If
you require the full climate control output, you
can switch off the ECO start/stop function by
pressing the ECO button (Y page 153).134
Overview of climate control systemsClimate control
Page 138 of 397
Operating the climate control system
Switching the climate control on/off
General notes When climate control is switched off, the air
supply and air circulation are also switched off.
The windows could mist up. Therefore, switch
off climate control only briefly.
Switch on climate control primarily using the
à button (Y page 135).
In the rear compartment, you can also switch
climate control on and off using the Ãand
^ buttons.
Activating/deactivating X
Turn the key to position 2in the ignition lock
(Y page 148).
X To switch on: press theÃbutton.
The indicator lamp in the Ãbutton lights
up. Airflow and air distribution are set to auto- matic mode.
X To switch off: press the^button.
The indicator lamp in the ^button lights
up. Activating/deactivating cooling with
air dehumidification
Activating/deactivating X
To activate: press the¿orÁ button.
The indicator lamp in the ¿orÁ button
lights up.
X To deactivate: press the¿orÁ but-
ton.
The indicator lamp in the ¿orÁ button
goes out. The cooling with air dehumidifica-
tion function has a delayed switch-off feature.
Problems with the "Cooling with air dehumidification" function Problem
Possible causes/consequences and
M MSolutions The indicator lamp in the
¿ orÁ button
flashes three times or
remains off. The cooling
with air dehumidification
function cannot be acti-
vated. The cooling with air dehumidification function has been deactivated
due to a malfunction.
X Consult a qualified specialist workshop. Setting climate control to automatic
mode
General notes In automatic mode, the set temperature is main-
tained automatically at a constant level. The
system automatically regulates the temperature of the dispensed air, the airflow and the air dis- tribution.
The "Cooling with air dehumidification" function
is activated automatically in automatic mode. In the rear compartment, you can also switch
climate control for the rear seats to automatic
mode using the
Ãbutton. Operating the climate control system
135Climate control
Page 140 of 397
a
Directs the airflow through the footwell
and demister vents
_ Directs the airflow through the demister,
centre and footwell air vents
Rear control panel
M Directs the airflow through the centre
and side air vents in the rear
O Directs the airflow through the footwell
air vents
i Using the rear control panel, you can also
activate both air distribution positions simul-
taneously. In order to do this, press both air
distribution buttons. The air is then routed
through all rear air vents.
i Regardless of the air distribution setting,
airflow is always directed through the side air vents. The side air vents can only be closed
when the controls on the side air vents are
turned downwards.
Setting X
Turn the key to position 2in the ignition lock
(Y page 148).
X Press the _button repeatedly until the
desired symbol appears in the display. Setting the airflow
X Turn the key to position 2in the ignition lock
(Y page 148).
X To increase: press theKbutton.
X To reduce: press theIbutton.
i You can use THERMOTRONIC automatic cli-
mate control to set the airflow in the rear
compartment separately. Switching the ZONE function on/off
X To activate: press theábutton.
The indicator lamp above the ábutton
lights up.
THERMATIC automatic climate control: the
temperature setting for the driver's side is not
adopted for the front-passenger side.
THERMOTRONIC automatic climate control:
the temperature setting for the driver's side is not adopted for the front-passenger side and
the rear compartment.
X To deactivate: press theábutton.
The indicator lamp above the ábutton
goes out.
THERMATIC automatic climate control: the
temperature setting for the driver's side is
adopted for the front-passenger side.
THERMOTRONIC automatic climate control:
the temperature setting for the driver's side is adopted for the front-passenger side and therear compartment. Demisting the windscreen
General notes You can use this function to defrost the wind-
screen or to demist the inside of the windscreen
and the front side windows.
Switch off the windscreen demisting function as
soon as the windscreen is clear again.
Activating/deactivating X
Turn the key to position 2in the ignition lock
(Y page 148).
X To activate: press the¬button.
The indicator lamp in the ¬button lights
up.
The climate control system switches to the
following settings:
R high airflow
R high temperature
R air distribution to the windscreen and front
side windows
R air-recirculation mode off
X To deactivate: press the¬button.
The indicator lamp in the ¬button goes
out. The previous settings are reactivated.
Air-recirculation mode remains deactivated. Operating the climate control system
137Climate control
Page 146 of 397
appears in the remote control display and the
running time is zero minutes.
Setting the departure time Make sure that the time set in the vehicle is
correct before setting the departure time (see
the separate operating instructions). Otherwise, the auxiliary heating may switch on at the wrong
time and at an unsuitable location. When setting
the departure time, also observe the important
safety notes (Y page 140).
X Briefly press the ubutton.
X Press the ,or. button repeatedly
until the time to be changed appears in the
display.
X Press the uand^ buttons simultane-
ously.
The Îsymbol in the remote control display
flashes.
X Press the ,or. button to set the
desired departure time.
i The longer you press the
,or. but-
ton, the faster the time changes.
X Press the uand^ buttons simultane-
ously.
The new departure time is stored.
Activating the set departure time
X Briefly press the ubutton.
X Press the ,or. button repeatedly
until the desired departure time appears in
the display.
X Press the ubutton.
The Ísymbol, the departure time and,
depending on the selected departure time,
the letter A, BorCappear in the display.
Deactivating the set departure time
X Briefly press the ubutton.
The status of the auxiliary heating is shown in the display.
X Press the .button.
The first departure time stored appears in the
display.
X Press the ^button.
OFF is shown in the remote control display. Replacing the remote control battery Important safety notes
G
WARNING
Batteries contain toxic and corrosive substan- ces. If batteries are swallowed, it can result in
severe health problems. There is a risk of fatal injury.
Keep batteries out of the reach of children. If
a battery is swallowed, seek medical attention immediately. H
Environmental note Batteries contain pollutants.
It is illegal to dispose of them
with the household rubbish.
They must be collected sep-
arately and disposed of in anenvironmentally responsible
recycling system. Dispose of batteries in an
environmentally responsible
manner. Take discharged
batteries to a qualified spe-
cialist workshop or to a col-
lection point for used batter-
ies.
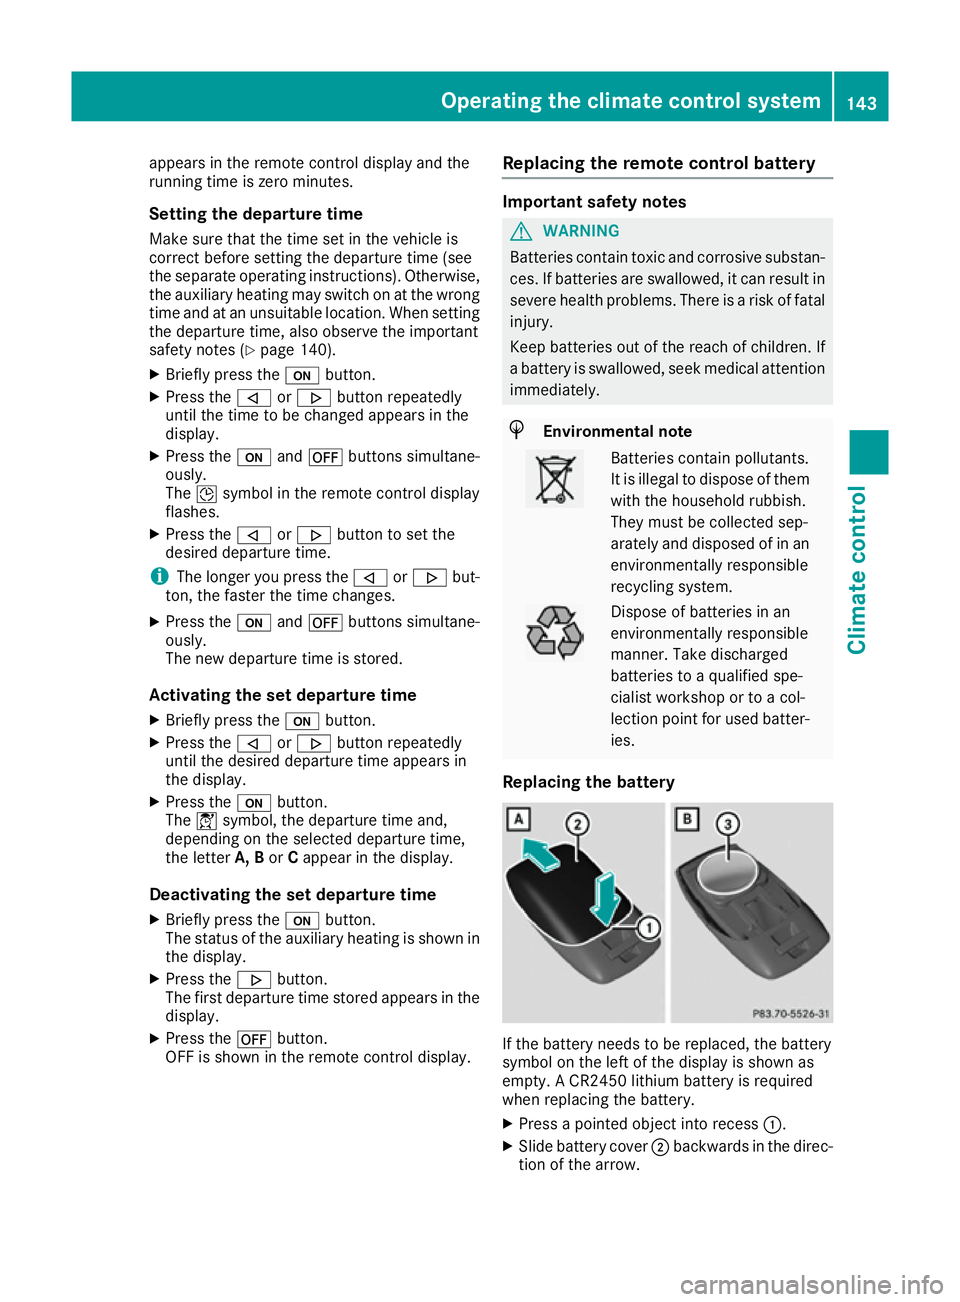
Replacing the battery If the battery needs to be replaced, the battery
symbol on the left of the display is shown as
empty. A CR2450 lithium battery is required
when replacing the battery.
X Press a pointed object into recess :.
X Slide battery cover ;backwards in the direc-
tion of the arrow. Operating the climate control system
143Climate control Z
Page 245 of 397
Bear in mind that the outside temperature dis-
play indicates the measured air temperature
and not the road surface temperature.
The outside temperature display is in the multi-
function display (Y page 243).
A change in the outside temperature is shown in
the multifunction display after a delay. Coolant temperature display
G
WARNING
If you open the bonnet while the engine is
overheating or while there is a fire in the
engine compartment, you could come into
contact with hot gases or other leaking ser-
vice products. There is a danger of injury.
Allow an overheating engine to cool down
before opening the bonnet. If there is a fire in the engine compartment, leave the bonnet
closed and notify the fire brigade.
The coolant temperature gauge is in the instru-
ment cluster on the right-hand side (Y page 35).
Under normal operating conditions and with the specified coolant level, the coolant temperature
may rise to 120 †.
At high outside temperatures and when driving
in mountainous terrain, the coolant temperature may rise to the end of the scale. Operating the on-board computer
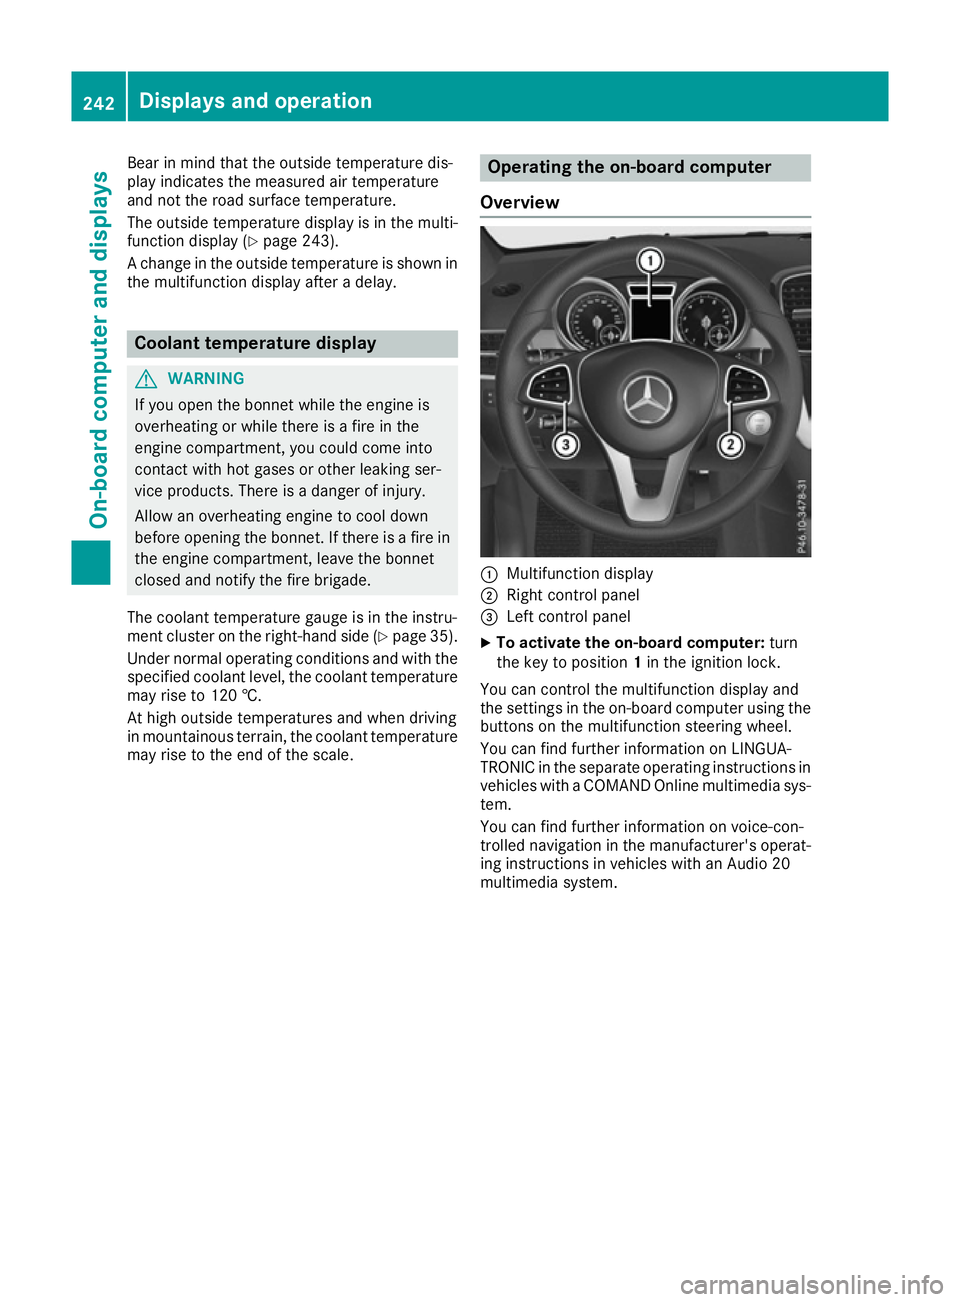
Overview :
Multifunction display
; Right control panel
= Left control panel
X To activate the on-board computer: turn
the key to position 1in the ignition lock.
You can control the multifunction display and
the settings in the on-board computer using the buttons on the multifunction steering wheel.
You can find further information on LINGUA-
TRONIC in the separate operating instructions in vehicles with a COMAND Online multimedia sys-
tem.
You can find further information on voice-con-
trolled navigation in the manufacturer's operat-
ing instructions in vehicles with an Audio 20
multimedia system. 242
Displays and operationOn-board computer and displays
Page 246 of 397
Left control panel
=
; R
Calls up the menu and menu bar 9
: Press briefly:
R Scrolls through lists
R Selects a submenu or function
R In the Audio Audio menu: selects the
previous or next station, when the preset list or station list is active,
or an audio track or video scene
R In the Tel
Tel(telephone) menu:
switches to the phone book and
selects a name or telephone num-
ber 9
: Press and hold:
R
In the Audio Audio menu: selects a pre-
set list or a station list in the
desired frequency range, or an
audio track or video scene using
rapid scrolling
R In the Tel
Tel (Telephone) menu:
starts rapid scrolling if the phone
book is open a R
Confirms the selection or display
message
R In the Tel Tel(Telephone) menu:
switches to the telephone book
and starts dialling the selected
number % Press briefly:
R Back
R Switches off voice-operated con-
trol for navigation or LINGUA-
TRONIC
R Hides display messages or calls up
the last Trip Tripmenu function used
R Exits the telephone book/redial
memory % Press and hold:
R
Calls up the standard display in the
Trip Trip menu Right control panel
~ R
Rejects or ends a call
R Exits the telephone book/redial
memory 6 R
Makes or accepts a call
R Switches to the redial memory W
X R
Adjusts the volume 8 R
Mute ? R
Switches on voice-operated con-
trol for navigation or LINGUA-
TRONIC Multifunction display
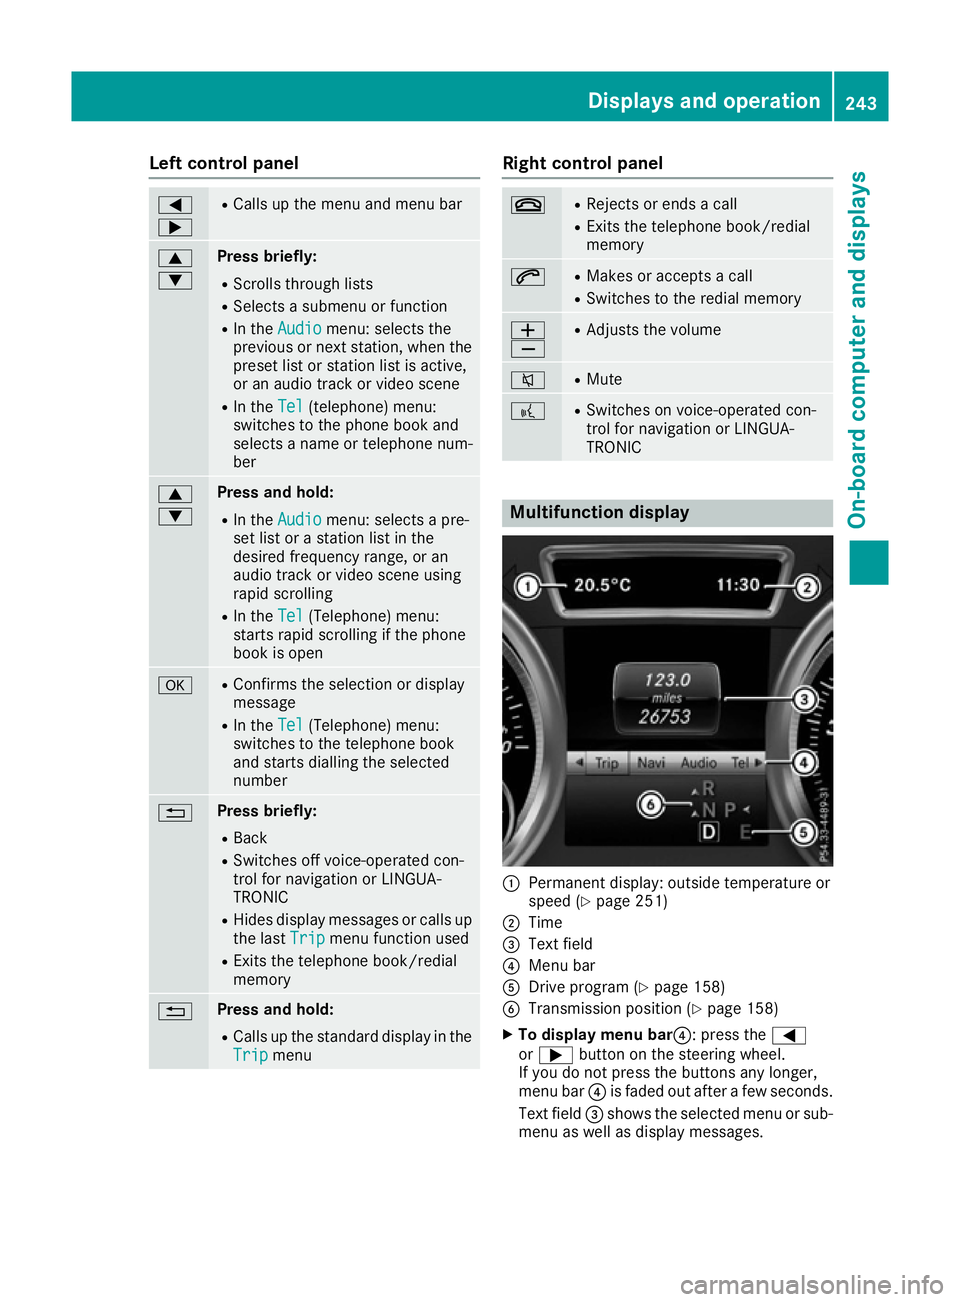
:
Permanent display: outside temperature or
speed (Y page 251)
; Time
= Text field
? Menu bar
A Drive program (Y page 158)
B Transmission position (Y page 158)
X To display menu bar?: press the =
or ; button on the steering wheel.
If you do not press the buttons any longer,
menu bar ?is faded out after a few seconds.
Text field =shows the selected menu or sub-
menu as well as display messages. Displays and operation
243On-board computer and displays Z
Page 257 of 397
In the
Heating
Heating submenu, you can select a
stored departure time or change a departure
time.
The auxiliary heating timer function calculates
the switch-on time according to the outside
temperature so that the vehicle is preheated by the departure time. When the departure time isreached, the auxiliary heating continues to heat
for a further five minutes and then switches off. The auxiliary heating adopts the THERMATIC or
THERMOTRONIC temperature setting.
You can switch off the auxiliary heating by using the remote control or the auxiliary heating but-
ton on the centre console.
i Switch the auxiliary heating on regularly
once a month for about ten minutes.
Further information on auxiliary heating
(Y page 140).
Selecting the departure time or deactivat- ing a selected departure time
X Press the =or; button on the steering
wheel to select the Settings
Settings menu.
X Press the :or9 button to select the
Heating
Heating submenu.
X Press ato confirm.
You will see the selected setting.
X Press ato confirm.
X Press the :or9 button to select one
of the three departure times or Timer
Timer off off(no
timer active).
X Press ato confirm.
If a departure time is selected, the yellow
indicator lamp lights up on the auxiliary heat-
ing button.
Changing the departure time
X Press the =or; button on the steering
wheel to select the Settings
Settings menu.
X Press the :or9 button to select the
Heating
Heating submenu.
X Press ato confirm.
You will see the selected setting.
X Press the :or9 button to select A A,B
B
or Change C
Change C.
X Press ato confirm.
You can now change the departure time.
X Press the =or; button to select the
display to be changed: hours, minutes. X
Press the :or9 button to set the
selected display.
X Press the abutton to store the entry.
The yellow indicator lamp on the auxiliary
heating button lights up.
Convenience submenu Activating/deactivating the EASY-
ENTRY/EXIT feature
G
WARNING
When the EASY-ENTRY/EXIT feature adjusts
the steering wheel, you and other vehicle
occupants – particularly children – could
become trapped. There is a risk of injury.
While the EASY-ENTRY/EXIT feature is mak-
ing adjustments, make sure that no one has
any body parts in the sweep of the steering
wheel.
If someone is trapped:
R press one of the memory function position
buttons, or
R move the switch for steering wheel adjust-
ment in the opposite direction to that in
which the steering wheel is moving.
The adjustment process is stopped.
X Press the =or; button on the steering
wheel to select the Settings Settingsmenu.
X Press the :or9 button to select the
Convenience
Convenience submenu.
X Press ato confirm.
X Using :or9, select the Easy
EasyEntry/
Entry/
Exit Exit function.
If the Easy Easy Entry/Exit
Entry/Exit function is activated,
the vehicle steering wheel is displayed in
orange in the multifunction display.
X Press the abutton to save the setting.
Further information on the EASY-ENTRY/EXIT
feature (Y page 115).
Switching belt adjustment on/off
X Press the =or; button on the steering
wheel to select the Settings Settingsmenu.
X Press the :or9 button to select the
Convenience
Convenience submenu.
X Press ato confirm. 254
Menus and submenusOn-board computer and displays