2016 MERCEDES-BENZ GLC-Class light
[x] Cancel search: lightPage 124 of 222

XTo call up the telephone menu: press the
%button.
XTo select Namein the telephone menu: turn
and press the controller.
If the phone book contains contacts, they
will be displayed in alphabetical order. The character bar at the bottom of the display is
active.
You can now search for a contact
(
Ypage 122).
Further information on the symbols shown
(
Ypage 122).
iYou can also call up the phone book with
the multifunction steering wheel; see the
separate operating instructions.
Symbol overview
Sym-
bolExplanation
ÆContact that has been entered, edi-
ted or saved on COMAND.
\Contact with voice tag
These contacts have also been
assigned a voice tag. Voice tags are
available in vehicles with the Voice
Control System (see the vehicle
Operator's Manual).
ÃContact that was called up from a
mobile phone
¯Contact imported from the SD
memory card or USB device.
®Contact imported via the Blue-
tooth®interface.
Find contact
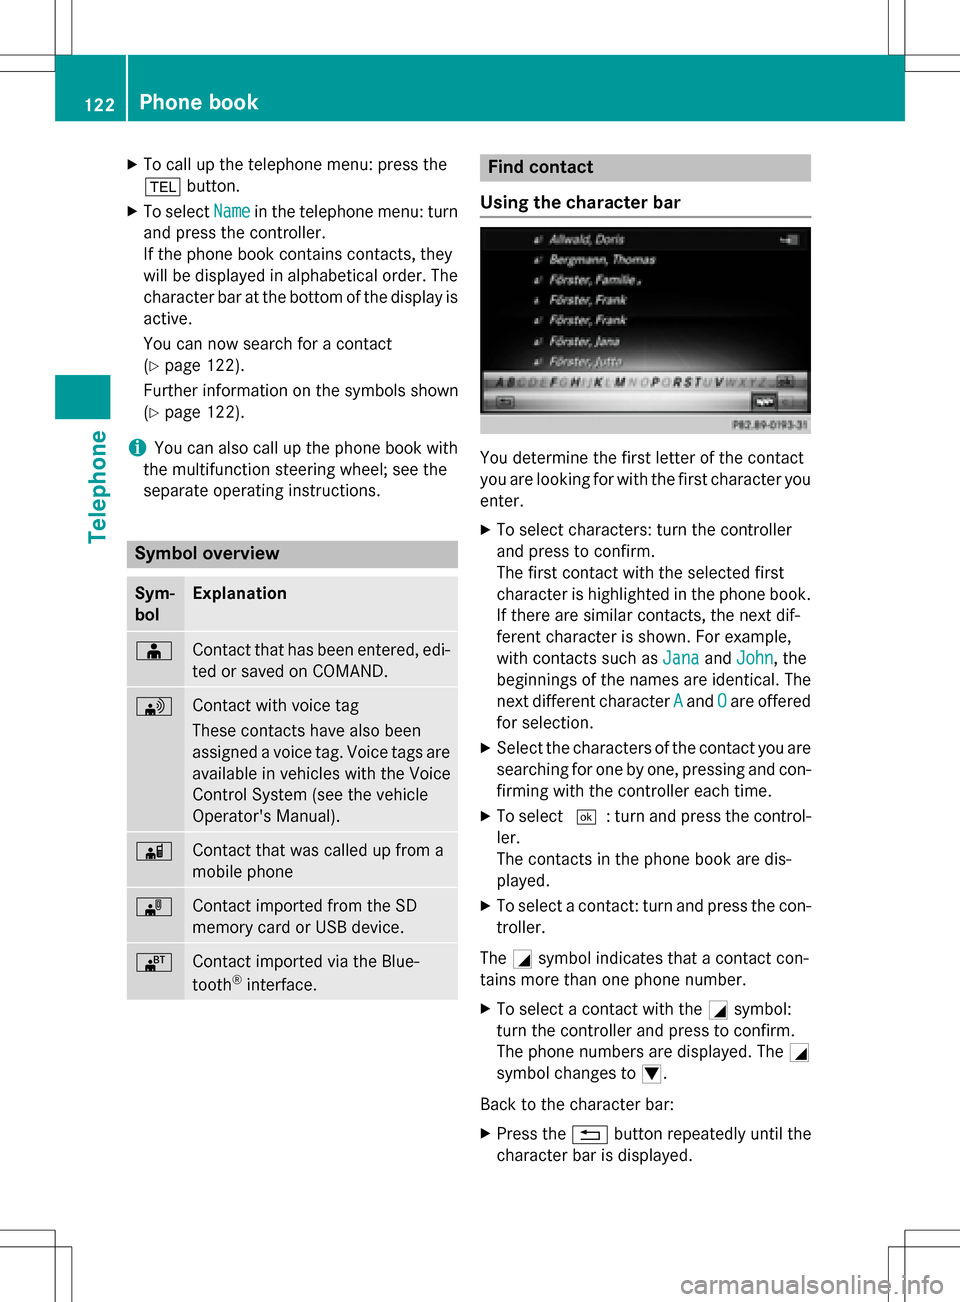
Using the character bar
You determine the first letter of the contact
you are looking for with the first character you
enter.
XTo select characters: turn the controller
and press to confirm.
The first contact with the selected first
character is highlighted in the phone book.
If there are similar contacts, the next dif-
ferent character is shown. For example,
with contacts such as Jana
andJohn, the
beginnings of the names are identical. The
next different character A
andOare offered
for selection.
XSelect the characters of the contact you are
searching for one by one, pressing and con- firming with the controller each time.
XTo select ¬: turn and press the control-
ler.
The contacts in the phone book are dis-
played.
XTo select a contact: turn and press the con-
troller.
The Gsymbol indicates that a contact con-
tains more than one phone number.
XTo select a contact with the Gsymbol:
turn the controller and press to confirm.
The phone numbers are displayed. The G
symbol changes to I.
Back to the character bar:
XPress the %button repeatedly until the
character bar is displayed.
122Phone book
Telephone
Page 125 of 222

Information about character entry
(
Ypage 31).
Using the touchpad
You determine the first letter of the contact
you are looking for with the first character you
enter.
XDraw the letter on the touchpad surface.
The first contact with the selected first
character is highlighted in the phone book.
Further information on handwriting recog-
nition on the touchpad (
Ypage 27).
XDraw additional letters on the touchpad
surface one after another.
XTo complete the search and return to the
phone book: press the touchpad.
XTo select and call the contact: glide up or
down and press.
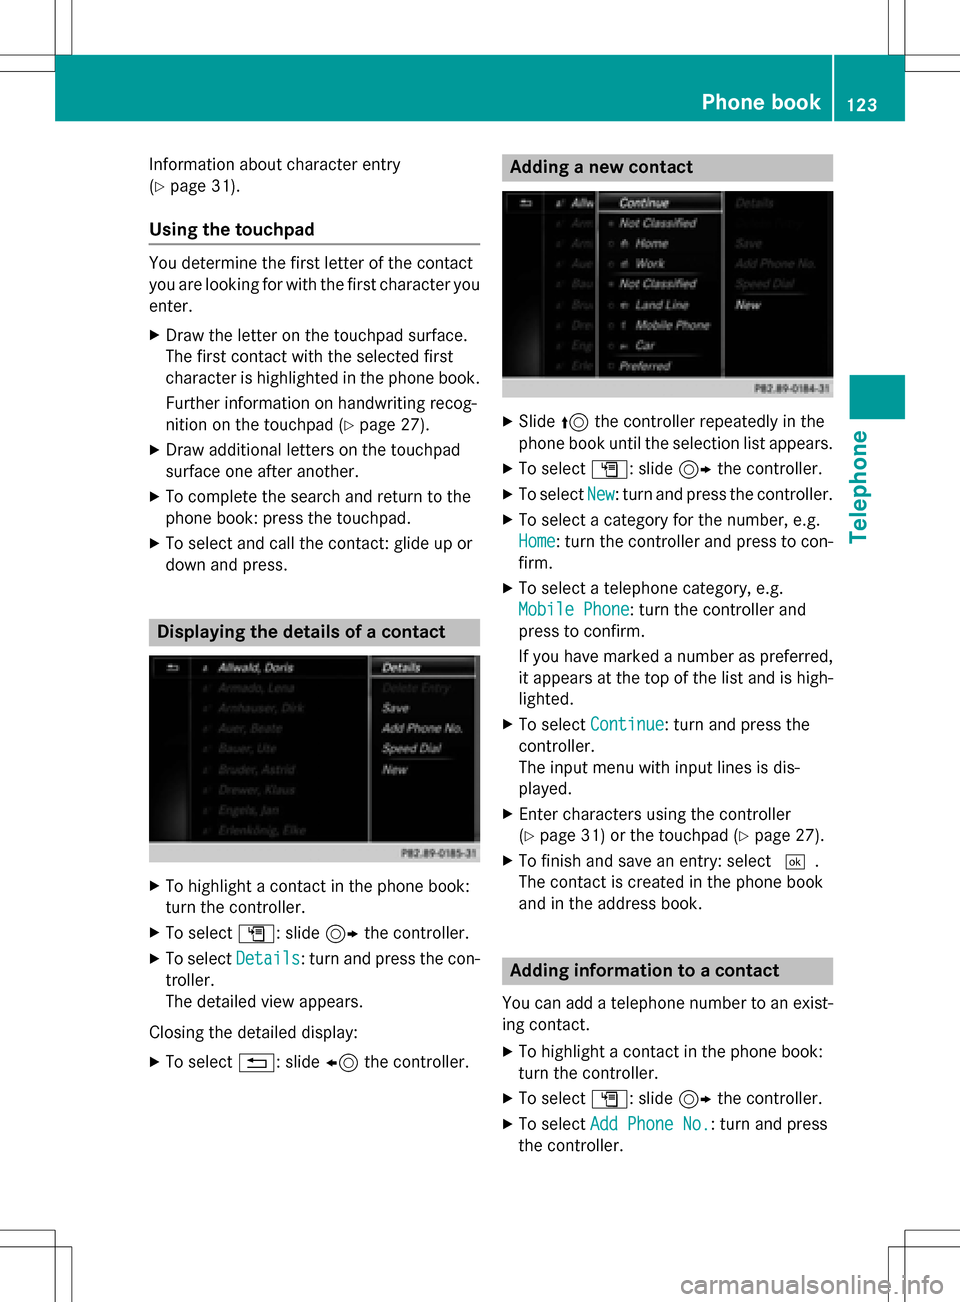
Displaying the details of a contact
XTo highlight a contact in the phone book:
turn the controller.
XTo select G: slide 9the controller.
XTo select Details: turn and press the con-
troller.
The detailed view appears.
Closing the detailed display:
XTo select %: slide 8the controller.
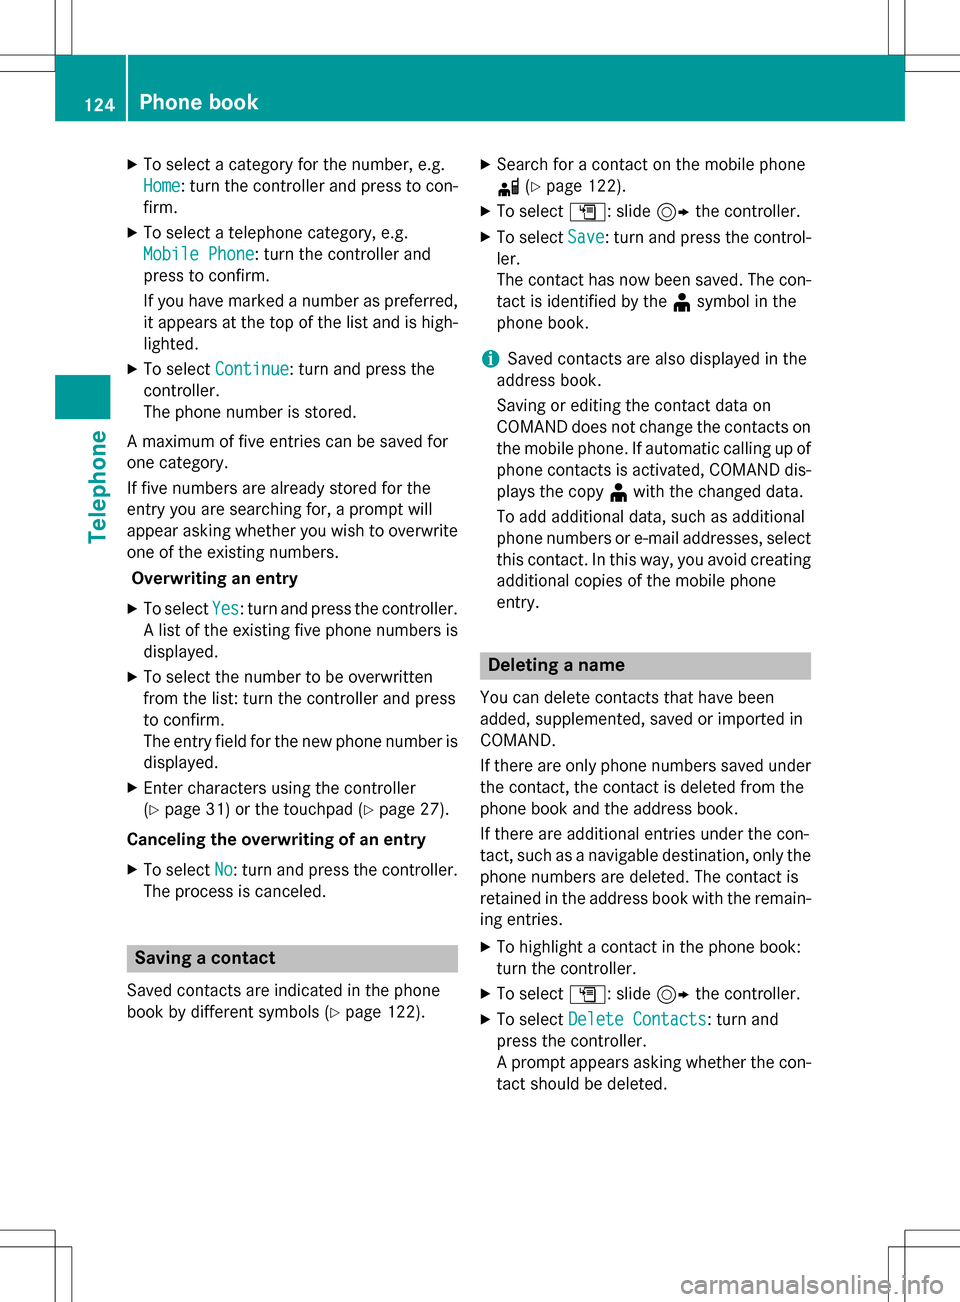
Adding a new contact
XSlide 5the controller repeatedly in the
phone book until the selection list appears.
XTo select G: slide 9the controller.
XTo select New: turn and press the controller.
XTo select a category for the number, e.g.
Home
: turn the controller and press to con-
firm.
XTo select a telephone category, e.g.
Mobile Phone
: turn the controller and
press to confirm.
If you have marked a number as preferred,
it appears at the top of the list and is high- lighted.
XTo select Continue: turn and press the
controller.
The input menu with input lines is dis-
played.
XEnter characters using the controller
(
Ypage 31) or the touchpad (Ypage 27).
XTo finish and save an entry: select ¬.
The contact is created in the phone book
and in the address book.
Adding information to a contact
You can add a telephone number to an exist- ing contact.
XTo highlight a contact in the phone book:
turn the controller.
XTo select G: slide 9the controller.
XTo select Add Phone No.: turn and press
the controller.
Phone book123
Telephone
Z
Page 126 of 222

XTo select a category for the number, e.g.
Home
: turn the controller and press to con-
firm.
XTo select a telephone category, e.g.
Mobile Phone
: turn the controller and
press to confirm.
If you have marked a number as preferred,
it appears at the top of the list and is high- lighted.
XTo select Continue: turn and press the
controller.
The phone number is stored.
A maximum of five entries can be saved for
one category.
If five numbers are already stored for the
entry you are searching for, a prompt will
appear asking whether you wish to overwrite
one of the existing numbers. Overwriting an entry
XTo select Yes: turn and press the controller.
A list of the existing five phone numbers is
displayed.
XTo select the number to be overwritten
from the list: turn the controller and press
to confirm.
The entry field for the new phone number is displayed.
XEnter characters using the controller
(
Ypage 31) or the touchpad (Ypage 27).
Canceling the overwriting of an entry
XTo select No: turn and press the controller.
The process is canceled.
Saving a contact
Saved contacts are indicated in the phone
book by different symbols (
Ypage 122).
XSearch for a contact on the mobile phone
d (
Ypage 122).
XTo select G: slide 9the controller.
XTo select Save: turn and press the control-
ler.
The contact has now been saved. The con-
tact is identified by the ¥symbol in the
phone book.
iSaved contacts are also displayed in the
address book.
Saving or editing the contact data on
COMAND does not change the contacts on
the mobile phone. If automatic calling up of
phone contacts is activated, COMAND dis-
plays the copy ¥with the changed data.
To add additional data, such as additional
phone numbers or e-mail addresses, select this contact. In this way, you avoid creating
additional copies of the mobile phone
entry.
Deleting a name
You can delete contacts that have been
added, supplemented, saved or imported in
COMAND.
If there are only phone numbers saved under
the contact, the contact is deleted from the
phone book and the address book.
If there are additional entries under the con-
tact, such as a navigable destination, only the
phone numbers are deleted. The contact is
retained in the address book with the remain-
ing entries.
XTo highlight a contact in the phone book:
turn the controller.
XTo select G: slide 9the controller.
XTo select Delete Contacts: turn and
press the controller.
A prompt appears asking whether the con-
tact should be deleted.
124Phone book
Telephone
Page 128 of 222

Find contact
Using the character bar
XCall up the address book (Ypage 125).
XToswit ch to the menu bar: slide 6the
controller.
XTo select Search: turn and press the con-
troller.
XTo select characters: turn the controller
and press to confirm.
The first contact with the selected first
character ishighlighted inthe phone book.
If there are similar contacts, the next dif-
ferent character is shown. For example,
wit h contacts such as Jana
andJohn, the
beginnings of the names are identical. The
next different character A
andOare offered
for selection.
XSe lect the characters of the contact you are
searching for one byone, pressing and con-
firming with the controller each time.
XTo co mplete the search: slide 5the con-
troller repeatedly unt ilthe character bar
disappears.
or
XTo select ¬: turn and press the control-
ler.
The contacts inthe address book are dis-
played.
XTo select a contact: turn and press the con-
troller.
In formation about character entry
(
Ypage 31).
Using the touchpad
XCall up the address book (Ypage 125).
XToswit ch to the menu bar: glide down.
XSelect Search.
XDraw the letter on the touchpad surface.
The first contact with the selected first
character ishighlighted inthe address
book.
Further information on handwriting recog-
nition on the touchpad (
Ypage 27).
XDraw additional letters on the touchpad
surface one after another.
XTo complete the search and return to the
phone book: press the touchpad.
XTo select and call the contact: glide up or
down and press.
Adding a new contact
You can enter address data directly into the
addr ess book. Ifyou store te lephone num-
bers inthe COMAND phone book, these are
also saved inthe address book. Ifyou store a
navigation destination, COMAND creates an
address book entry which includes the com-
plete nav igableaddress data.
XCall up the address book (Ypage 125).
XTo switch to the menu bar: slide 6the
controller.
XTo select New: turn and press the controller.
The surname and first name input lines are
disp layed.
XEnter characters using the controller
(
Ypage 31) or the touchpad (Ypage 27).
XTo save the surname and first name: select
¬.
The details for the contact are displayed.
XTo add a desired entry (e.g. Add E-Mail
Address):turn and press the controller.
Dependin g on the type of entry, the corre-
sponding input menu appears.
XEnter characters using the controller
(
Ypage 31) or the touchpad (Ypage 27).
XTo finish and save an entry: select ¬.
126Address book
Telephone
Page 130 of 222

Sending text messages
XCall up the address book (Ypage 125).
XTo select a contact: turn and press the con-
troller.
The details for the contact are displayed.
XTo highlight the telephone number: turn thecontroller.
XTo select G: slide 9the controller.
XTo select Send Text Message: turn and
press the controller.
The entry fields for a text message are dis-
played (
Ypage 139).
Observe the requirements for the message
function (
Ypage 135).
Sending an e-mail
XCall up the address book (Ypage 125).
XSelect an entry: turn and press the control-
ler.
The details for the contact are displayed.
XTo select an e-mail address: turn and press
the controller.
The entry fields for an e-mail are displayed
(
Ypage 140).
Observe the requirements for the message
function (
Ypage 135).
Displaying sub-entry information
XCall up the address book (Ypage 125).
XSelect an entry: turn and press the control-
ler.
The details for the contact are displayed.
XTo highlight the desired entry: turn the con-
troller.
XTo select G: slide 9the controller.
XTo select Details: turn and press the con-
troller.
The display is shown in full.
Editing a contact
XCall up the address book (Ypage 125).
XTo select a contact: turn and press the con-
troller.
The details for the contact are displayed.
XTo highlight the desired entry: turn the con-
troller.
XTo select G: slide 9the controller.
XTo select Edit: turn and press the control-
ler.
The entry field for the selected entry is dis-
played.
Information about character entry
(
Ypage 31).
Changing the category of an entry
XCall up the address book (Ypage 125).
XSelect an entry: turn and press the control-
ler.
The details for the contact are displayed.
XTo highlight the desired entry: turn the con-
troller.
XTo select G: slide 9the controller.
XTo select Change Category: turn and
press the controller.
XTo select a category: turn the controller and
press to confirm.
128Address book
Telephone
Page 131 of 222

Storing the phone number as a speed
dial number
XCall up the address book (Ypage 125).
XSelect an entry: turn and press the control-
ler.
The details for the contact are displayed.
XTo highlight the desired telephone number:
turn the controller.
XTo select G: slide 9the controller.
XTo select Speed Dial: turn and press the
controller.
XTo select Assign Speed Dial Preset:
turn and press the controller.
XTo select a memory position for the speed
dial: turn and press the controller.
The phone number has been saved as a
speed dial.
Voice tags
Introduction
You can enter voice tags via the Voice Control
System (see the separate operating instruc-
tions). Once you have assigned a voice tag to
an address book entry, you can call up this
entry with a voice command and dial a phone
number, for example. You can add one voice
tag per address book entry.
Adding a voice tag
XCall up the address book (Ypage 125).
XSearch for an address book entry with or
without a voice tag ¦(
Ypage 126).
XTo select G: slide 9the controller.
XTo select Voice Tag: turn and press the
controller.
XTo select Add: turn and press the controller.
Subsequent operation is voice-controlled.
The Voice Control System guides you
through the dialogs.
Deleting a voice tag
XCall up the address book (Ypage 125).
XSearch for an address book entry with a
voice tag (
Ypage 126).
XTo select G: slide 9the controller.
XTo select Voice Tag: turn and press the
controller.
XTo select Delete: turn and press the con-
troller.
XTo select Yes: turn and press the controller.
The voice tag is deleted.
or
XTo select No: turn and press the controller.
The process is canceled.
Listening to a voice tag
XSearch for an address book entry with a
voice tag (
Ypage 126).
XTo select G: slide 9the controller.
XTo select Voice Tag: turn and press the
controller.
XTo select Listen: turn and press the con-
troller.
You hear the voice tag.
Changing the display and sorting cri-
teria for contacts
XCall up the address book (Ypage 125).
XTo show the menu bar: slide 6the con-
troller.
XTo select Options: turn and press the con-
troller.
XTo select DisplayandSorting: turn and
press the controller.
You have the following options:
RLastName,FirstName(default setting)
The contacts are sorted by surname and
displayed with a comma.
RLast Name First Name
Address book129
Telephone
Z
Page 134 of 222

iIf you switch to another main function,
e.g. navigation, while receiving vCards, the reception of vCards will be terminated.
Deleting imported contacts
XTo change to the menu bar when in the
address book or the telephone menu: slide
6 the controller.
XTo select Options: turn and press the con-
troller.
XTo select Delete Contacts: turn and
press the controller.
XSelect one of the following options:
RInternal Contacts
RImported from Storage Device
RImported from Bluetooth Devices
RDownloaded from Phone
Turn and press the controller.
XTo select Yes: turn and press the controller.
The contacts are deleted.
or
XTo select No: turn and press the controller.
The process is canceled.
Closing the address book
XPress the %button one or more times.
Call lists
Introduction
If your mobile phone supports the PBAP Blue-
tooth®profile, the call lists from the mobile
phone are displayed in COMAND. When con- necting the mobile phone, you may have to
confirm the connection for the PBAP Blue-
tooth
®profile.
If your mobile phone does not support the
PBAP Bluetooth
®profile, COMAND generates
its own call lists. These are not the same as
the call lists in your mobile phone. The Call list option is not available unless a
mobile phone is connected to COMAND.
If the contact for an incoming call is not saved
in the address book, you can use the call list
to save the telephone number. You can save
this telephone number as a new contact in the
address book or add it to an existing contact
(
Ypage 133).
iIf you connect a different mobile phone to
COMAND, the call lists from the new mobile phone are displayed.
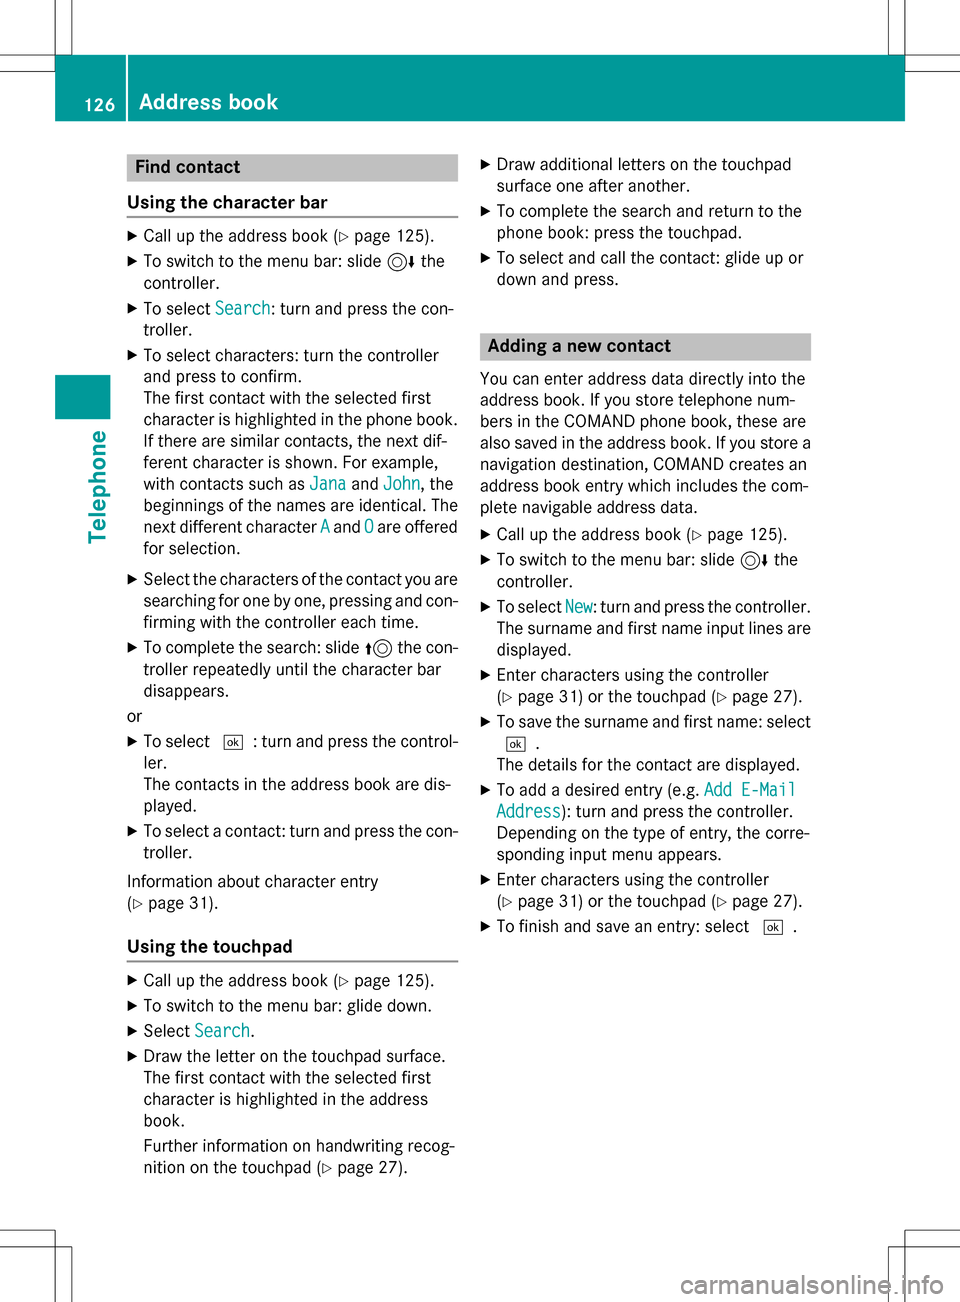
Opening the call list and selecting an
entry
List of selected phone numbers (example)
:
Date and time (if available)
;Telephone number of the highlighted
entry and symbols (if assigned)
XTo call up the telephone menu: press the
% button.
XTo switch to the menu bar: slide 6the
controller.
XTo select Call Lists: turn and press the
controller.
XTo select Calls ReceivedorCalls
Dialed: turn and press the controller.
The relevant list is displayed.
XTo select an entry and make a call: turn and
press the controller.
132Call lists
Telephone
Page 135 of 222

Closing the call list
XTo select&to the left of the list: slide
8 the controller.
or
XPress the %button.
The list is closed.
iYou can also call up the list of dialed num-
bers by pressing the 6button when the
telephone menu is shown. In this case, the
list will only show names or phone num-
bers.
Displaying details from a list entry
Abbreviated list entries can also be shown in
full.
XTo call up the telephone menu: press the
% button.
XTo switch to the menu bar: slide 6the
controller.
XTo select Call Lists: turn and press the
controller.
XTo select Calls ReceivedorCalls
Dialed: turn and press the controller.
The relevant list is displayed.
XTo highlight the desired entry: turn the con-
troller.
XTo select G: slide 9the controller.
XTo select Details: turn and press the con-
troller.
The details are displayed.
XTo go back to the list: slide 8the con-
troller repeatedly until the list is highligh-
ted.
Saving telephone numbers
Adding new entries to the address book
XTo call up the telephone menu: press the
% button.
XTo switch to the menu bar: slide 6the
controller.
XTo select Call Lists: turn and press the
controller.
XTo select Calls ReceivedorCalls
Dialed: turn and press the controller.
The relevant list is displayed.
XTo highlight the desired telephone number:
turn the controller.
XTo select G: slide 9the controller.
XTo select Save: turn and press the control-
ler.
XSelect New Entry.
XSelect a number category, e.g. Home.
XSelect a telephone category, e.g. Mobile
Phone.
The selected category is marked with #.
If you have marked a number as Prefer‐
red, it is shown at the top of the list and is
highlighted.
XSelect Continue.
The entry field for the name of the new con-
tact is displayed. The entry field for the
telephone number is filled in automatically.
XEnter characters using the controller
(
Ypage 31) or the touchpad (Ypage 27).
XTo finish and save an entry: select ¬.
The new contact has been created.
Call lists133
Telephone
Z