2016 MERCEDES-BENZ G-CLASS SUV ECO mode
[x] Cancel search: ECO modePage 175 of 261
Setting the date
X
Select ¯.
X Select Date/Time
Date/Time.
X Select the date.
An input men uappears.
X Set the date using the arrows.
Setting the time X
Select ¯.
X Select Date/Time
Date/Time.
X Select the time.
An input menu appears.
X Set the time using the arrows. Synchronisin
gthe time
The following functions are available:
R RDS RDS:ift his function is activated, the time will
be regularly compared with the RDS 5
time
signal and adjusted if necessary
R GPS
GPS:ift his function is activated, the time will
be regularly compared with the GPS 6
time
signal and adjusted if necessary
R Manually
Manually:ift his function is activated, the
time set manually is maintained
X Select ¯.
X Select Time synchronizing
Time synchronizing.
X Select the desired setting.
The #dot indicates the current setting. Adjusting the standby time
If this function is activated, the mul timedia sys-
te mr emain sinstandby mod efor th eset time
after th eignition has been switched off .Ifthe
ignition is switched on again during this set time,
th en avigation system, for example, is available
again immediately.
X Select ¯.
X Select Standby
Standby.
X Selec tthe desired setting, 5minutes
5m inutes, 15 15
minutes
minutes, 30 minutes
30 minutes orOff
Off .
The #dot indicates the curren tsetting. Switching the button tone on/off
X Select ¯.
X Select Key tone
Key tone.
X The #dot indicates that the function is acti-
vated. Switching the AM waveband on/off
In order to select the AM waveband in radio
operation, the AM-Tuner AM-Tunermust be activated in
the system settings.
X To switch the AM waveband on/off: select
¯.
X Select AM-Tuner
AM-Tuner.
The #dot indicates that the function is acti-
vated. Display settings
The mul timedia system includes an optimised
display design fo rday and night mode.
X Select ¯.
X Select Day/night mode
Day/night mode.
X Selec tthe desire dsetting.
The #dot indicates th ecurren tsetting.
Wit hthe Auto
Auto setting ,the display design is
automatically adapted to th ebrightness of
th ea mbien tlight.
Afte rselecting Custom
Custom,aday mode bright-
ness scale appears.
X Se tthe desire dbrightness usin gthe arrows.
X Selec tSave ý.
An ight mode brightness scale appears.
X Se tthe desire dbrightness usin gthe arrows.
X Selec tSave ý. Control settings
The function of th econtrol knob in navigation
mod ecan be set in amultimedia system with
navigation.
The control knob can be set so that turning:
R zooms in or out of th emap
R jumps to th enextorp revious statio nortrack
5 Radio Dat aSystem.
6 Global Positionin gSystem. 172
System settingsMultimedia system
Page 185 of 261
Switching to navigation mode
X Press the NAVI button.
The main menu appears. Entering the destination
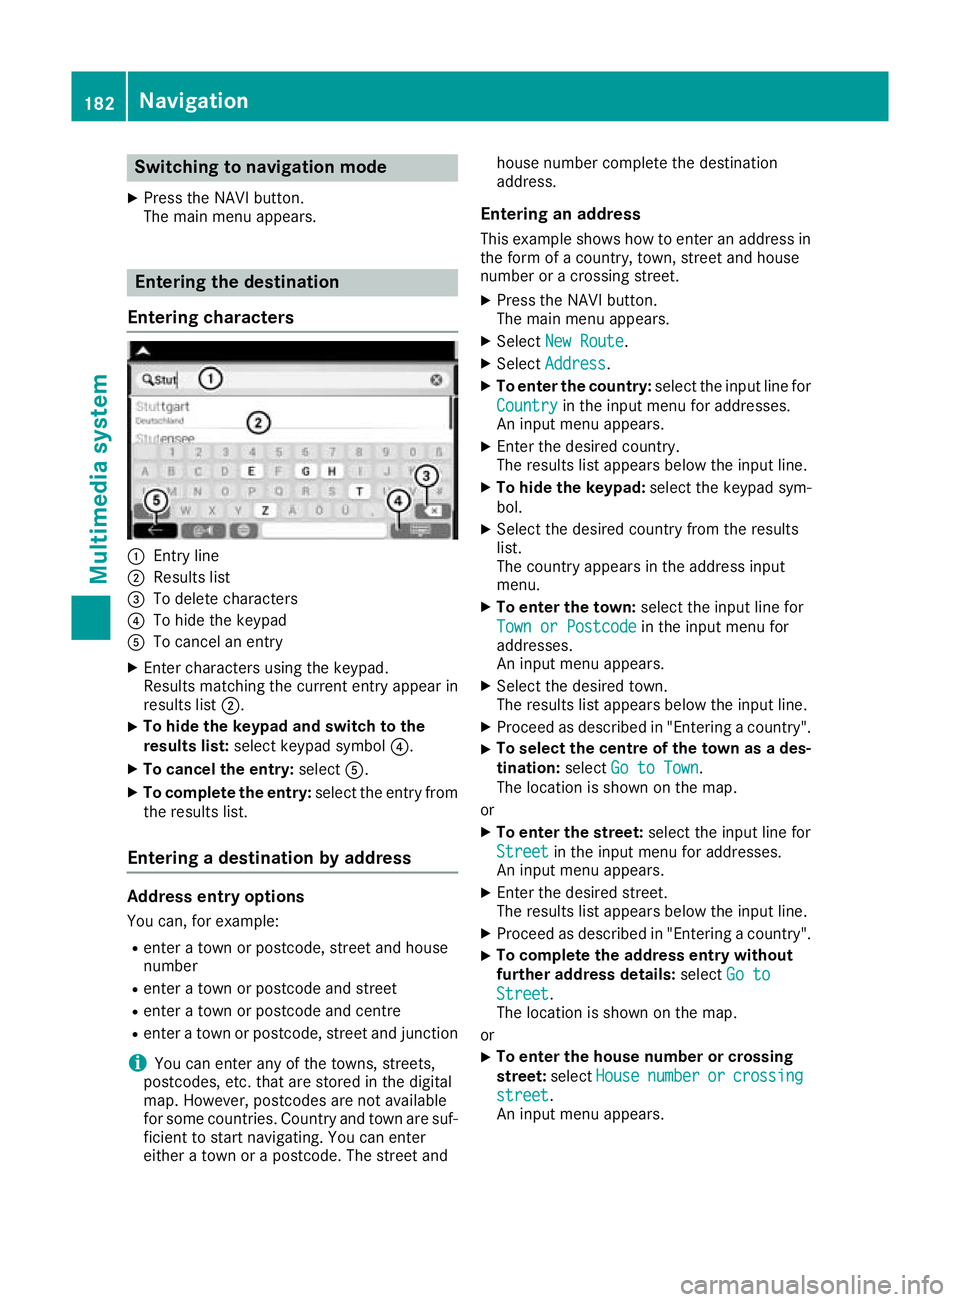
Entering characters :
Entry line
; Results list
= To delete characters
? To hide the keypad
A To cancel an entry
X Enter characters using the keypad.
Results matching the current entry appear in
results list ;.
X To hide the keypa
dand switc htothe
results list: select keypadsym bol ?.
X To cancel the entry: selectA.
X To complete the entry: select the entry from
the results list.
Entering adestinatio nbyaddress Address entry options
Yo uc an,for example:
R ente ratownorp ostcode, stree tand house
number
R ente ratownorp ostcode and street
R ente ratownorp ostcode and centre
R ente ratownorp ostcode, stree tand junction
i You can ente
rany of th etow ns,streets,
postcodes, etc. that are store dinthedigital
map. However, postcodes are no tavailable
for som ecountries .Countr yand town are suf-
ficien ttostart navigating .You can enter
either atow norap ostcode. The stree tand house number complete the destination
address.
Entering an addre ss
This example shows how to enter an address in the form of acountry, town, street and house
number or acrossing street.
X Press the NAVI button.
The main menu appears.
X Select New Route New Route.
X Select Address
Address.
X To enter the country: select the input line for
Country
Country in the input menu for addresses.
An input menu appears.
X Enter the desired country.
The results list appears below the input line.
X To hide the keypad: select the keypad sym-
bol.
X Select the desired countryf rom the results
list.
The countrya ppears in the address input
menu.
X To enter the town: select the input line for
Town or Postcode Town or Postcode in the input menu for
addresses.
An input menu appears.
X Select the desired town.
The results list appears below the input line.
X Proceed as described in "Entering acountry".
X To selectt
he centre of the town as ades-
tination: selectGo to Town Go to Town.
The location is shown on the map.
or
X To enter the street: select the input line for
Street
Street in the input menu for addresses.
An input menu appears.
X Enter the desired street.
The results list appears below the input line.
X Proceed as described in "Entering acountry".
X To complete the address entry without
further address details:
selectGo to
Go to
Street Street.
The location is shown on the map.
or X To enter the house number or crossing
street:
selectHouse House number
number or
orcrossing
crossing
street
street.
An input menu appears. 182
NavigationMultimedia system
Page 192 of 261
Adjusting navigation settings
Defining th eroute calculation settings Takin
gsettings into accoun tdurin groute
calculation
i Depending on local conditions, the multi-
media system ma ynot always be able to take
into account al lsettings. The calculate droute
ma yinclud eferry connections, for example,
eve nthough "Avoi dferries" is enabled.
Settin gthe vehicle profile
X Press the NAVI button.
The main menu appears.
X Select Settings
Settings.
X Select Route Preferences Route Preferences.
X Select Vehicle
Vehicle.
X Select the typ eofvehicle.
X To create anew profile: selectAdd Pro‐
Add Pro‐
file
file.
X Select the typ eofvehicle.
X Set the vehicl efactor.
Settin gthe route planning method
The following functions ar eavailable:
R Fast
Fast:t he multimedia system calculate sa
route with the shortes tpossibl ejourney time
R Easy
Easy:t he multimedia system calculate sthe
easiest possibl eroute, e.g .withasf ew turns
as possible
R Short
Short:t he multimedia system calculate sa
route covering the shortes tdistance
R Green
Green:t he multimedia system calculate sa
route covering the mos teconomical distance
X Press the NAVI button.
The main menu appears.
X Select Settings
Settings.
X Select Route Preferences
Route Preferences.
X Select Route Planning Method
Route Planning Method .
Am enu appears.
X Select the desired function.
The Ytick mark indicates the activated
function.
Settin gthe navigatio nmode
If the Off-road
Off-road functionisa ctivated ,astraight
line to the driving destination is calculate dwhen
driving off-road. X
Pres sthe NAVI button.
The main menu appears.
X Select Settings
Settings.
X Select Route Preferences Route Preferences.
X Select Navigation Mode
Navigation Mode.
Am enu appears.
X Select the desired function.
The Ytick mark indicates the activated
function.
Setting road types
The following functions are available:
R Motorways Motorways:w hen this function is activated,
motorways are taken into account during
route calculation
R Road Road With
WithPeriod
Period Charge
Charge:w hen this func-
tion is activated, roads for which there is a
time-dependent usage fee are taken into
account during route calculation
R Road With Per-use Toll
Road With Per-use Toll:w hen this func-
tion is activated, roads for which there is a
distance-dependen tusage fee are taken into
account during route calculation
R Ferries Ferries:w hen this function is activated, fer-
ries are taken into account during route cal-
culation
R Car Shuttle Trains Car Shuttle Trains:w hen this function is
activated, motorails are taken into account
during route calculation
R Unpaved Roads Unpaved Roads:w hen this function is acti-
vated, unpaved roads are taken into account
during route calculation
X Press the NAVI button.
The main menu appears.
X Select Settings
Settings.
X Select Route Preferences Route Preferences.
X Select the desired function.
The function is activated or deactivated.
Defining the sound output settings Adjusting the volume for sound output
Using this function, the volume of signal tones
and voice output can be adjusted in relation to
radi oand media volume.
The followin gfunction sare available:
R Master Master :adjust sthe volume of all soun dout-
put
R Voice
Voice:a djuststhe volume of voice outputs Navigation
189Multimedia system Z
Page 195 of 261
Setting warnings on the map
When the function is activated, warnings appear on the map.
X Press the NAVI button.
The main menu appears.
X Select Settings
Settings.
X Select Warnings
Warnings.
X Select Road Signs
Road Signs.
The function is activated or deactivated.
X Select the desired alert point.
X To set awarning: selectWarning Type Warning Type.
Am enu appears.
X Select the desired function.
The Ytick indicates the activated function.
X To set the distance: selectDistance
Distance.
Am enu appears.
X Set the desired distance from the alert point.
Defining the settings the navigation
view Setting the map display
Setting zoom and degree of inclination X Press the NAVI button.
The main menu appears.
X Select Settings
Settings.
X Select Navigation View
Navigation View.
X Select Map Appearance
Map Appearance.
X Select Viewpoint
Viewpoint.
Am enu appears.
X Select the desired setting.
The Ytick indicates the active function.
Setting the display colours
The multimedia system includes an optimised
display design for day and night mode.
X Press the NAVI button.
The main menu appears.
X Select Settings
Settings.
X Select Navigation View
Navigation View.
X Select Map Appearance
Map Appearance.
X Select Colour mode Colour mode.
X Select the desired setting.
The Ytick indicates the activated function.
With the Auto Autosetting, the display design is
automatically adapted to the brightness of
the ambient light. Setting the map colours
X Press the NAVI button.
The main menu appears.
X Select Settings Settings.
X Select Navigation View
Navigation View.
X Select Map Appearance
Map Appearance.
X Select Day Map Colours
Day Map Colours orNight Map
Night Map
Colours
Colours.
X Select the desired map colour using the
arrows.
Activating or deactivating 3D display of
objects on the map
The following types of 3D objects are available:
R Landmarks Landmarks:3Dd isplayofprominent or
known objects
R Buildings
Buildings:3Dd isplayofthe buildings in a
town
R 3D Terrain
3D Terrain:3Dd isplayofthe surrounding
area
X Press the NAVI button.
The main menu appears.
X Select Settings Settings.
X Select Navigation View Navigation View.
X Select Map Appearance Map Appearance.
X Select Landmarks
Landmarks, Buildings
Buildingsor3D Ter‐
3D Ter‐
rain
rain.
The function is activated or deactivated.
Activating or deactivating route recording
If this function is activated, the towns through
which the vehicle is driven are recorded.
X Press the NAVI button.
The main menu appears.
X Select Settings Settings.
X Select Navigation View
Navigation View.
X Select Map Appearance
Map Appearance.
X Select Track logs
Track logs.
The function is activated or deactivated.
Activating or deactivating the display of
POI symbols on the map
X Press the NAVI button.
The main menu appears.
X Select Settings Settings.
X Select Navigation View Navigation View.
X Select Map Appearance
Map Appearance. 192
NavigationMultimedia system
Page 255 of 261
AdBlue
®
is aw ater-soluble fluid for the exhaust
ga sa ftertreatment of diese lengines. It is:
R non-toxic
R colourless and odourless
R non-flammable
If yo uopent he AdBlue ®
tank, small amounts of
ammoni avapour mayber eleased.
Ammonia vapour shaveap ungent odou rand are
particularly irritating to the skin, mucou smem-
branes and eyes. Yo umayexperience aburning
sensation in your eyes, nose and throat. You
ma yalsoe xperience coughing and watery eyes.
Do not inhal eany ammoni avapours thatmaybe
released .Fillt he AdBlue ®
tank onl yinwell-ven-
tilate dareas.
Lo wo utside temperatures AdBlue
®
freeze satat emperature of approx-
imatel y-11 †. The vehicl eisdelivere dfrom the
factory equipped with an AdBlue ®
preheating
system .Winter operatio ncan thu sbeguaran-
tee devenatt emperature sbelow -11 †.
Additives !
Onl
yuse AdBlue ®
in accordance with ISO
22241. Do not use additives with AdBlue ®
and do not dilute AdBlue ®
with water. This
may destroy the BlueTEC exhaust gas after-
treatment system.
Purity !
Impurities in AdBlue ®
(e.g. due to other ser-
vice products, cleaning agents or dust) lead
to:
R increased emission values
R damage to the catalytic converter
R engine damage
R malfunctions in the BlueTEC ®
exhaust gas
aftertreatments ystem
Assuring the purity of AdBlue ®
is particularly
important with regard to avoiding malfunctions
in the BlueTEC exhaust gas aftertreatments ys-
tem.
If AdBlue ®
is pumped out of the AdBlue ®
tank,
e.g. during repair work, do not use this fluid to
refill the tank. The purity of the fluid can no lon-
ger be guaranteed. Fillin
gcapacities Model Tota
lcapacity G3
50dPROFES-
SIONAL 15.0 l
Engine oil
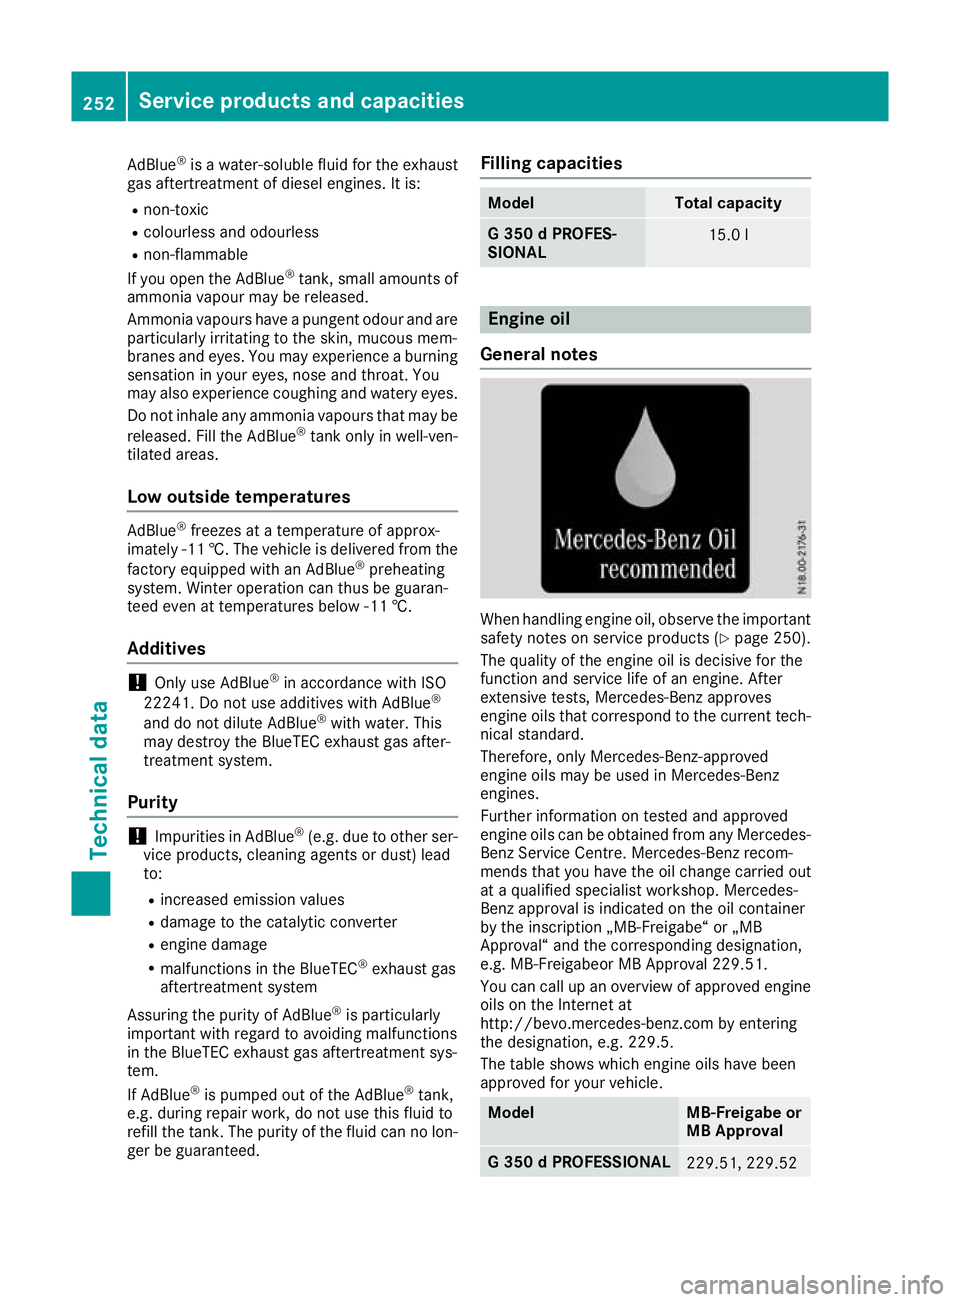
General notes When handling engin
eoil, observe the important
safety notes on service products (Y page 250).
The quality of the engine oil is decisive for the
function and service life of an engine. After
extensive tests, Mercedes-Benz approves
engine oils that correspond to the curren ttech-
nical standard.
Therefore, only Mercedes-Benz-approved
engine oils may be used in Mercedes-Benz
engines.
Further information on tested and approved
engine oils can be obtained from any Mercedes-
Benz Servic eCentre. Mercedes-Benz recom-
mends that you have the oil change carried out
at aq ualified specialist workshop. Mercedes-
Benz approval is indicated on the oil container
by the inscription „MB-Freigabe“ or „MB
Approval“ and the corresponding designation,
e.g. MB-Freigabeor MB Approval 229.51.
You can call up an overview of approved engine oils on the Internet at
http://bevo.mercedes-benz.com by entering
the designation ,e.g. 229.5.
The table shows which engine oils have been
approved for your vehicle. Model MB-Freigabe or
MB Approval
G3
50dPROFESSIONAL 229.51, 229.52252
Service products and capacitiesTechnical data
Page 259 of 261

Carefully depress th
eaccelerato rpedal and
mak esure that th ewheel sdon otspin when
driving on steep terrain.
i If th
eload on th efront axle is reduced when
pullin gaway on asteep uphill slope, th efront
wheel shave atendenc ytos pin .4ETSr ecog-
nises this and brakes th ewheel saccordingly.
The rear wheel torque is increased and it is
easie rtop ull away.
Further informatio nonthemaximum gradient
climbin gabilit y(Ypage 122). Trailer to
whitch Permissible trailer load, braked (at a
minimu mgradient-climbing capabil-
ity of 12% from astandstill) Model
G3
50dPROFES-
SIONAL 3200 kg
Permissible trailer load, unbraked
Model
G3
50dPROFES-
SIONAL 750 kg
Maximum drawbar load
! Use
adrawbar noseweight as close as pos-
sibl etot he maximu mpermissible nose-
weight. Do not use anoseweight of less than
50kg, otherwise the trailer may come loose.
Note that the payloada nd the rear axle load
are reduced by the actua lpayload.
The drawbar loadr educes the permissible over-
all loa dand rear axle load.
The drawbar loada cts from above onto the ball
hea dont he trailer tow hitch.
The drawbar loa disnot included in the trailer
load. Model Permissiblen
ose-
weight G3
50dPROFES-
SIONAL 140 kg You can secure carrier systems, e.g
.bicycle
rack sorl oad-bearing devices, to the ball cou-
pling. The maximum payload of 75 kg applies
when carrier systems are attached to the ball
coupling. Permissible rear axle load during
trailer towing
Model Permissibl
eaxle
load G3
50dPROFES-
SIONAL 1900 kg256
Trailer tow hitchTechnical data