2016 MERCEDES-BENZ G-CLASS SUV radio
[x] Cancel search: radioPage 63 of 261
X
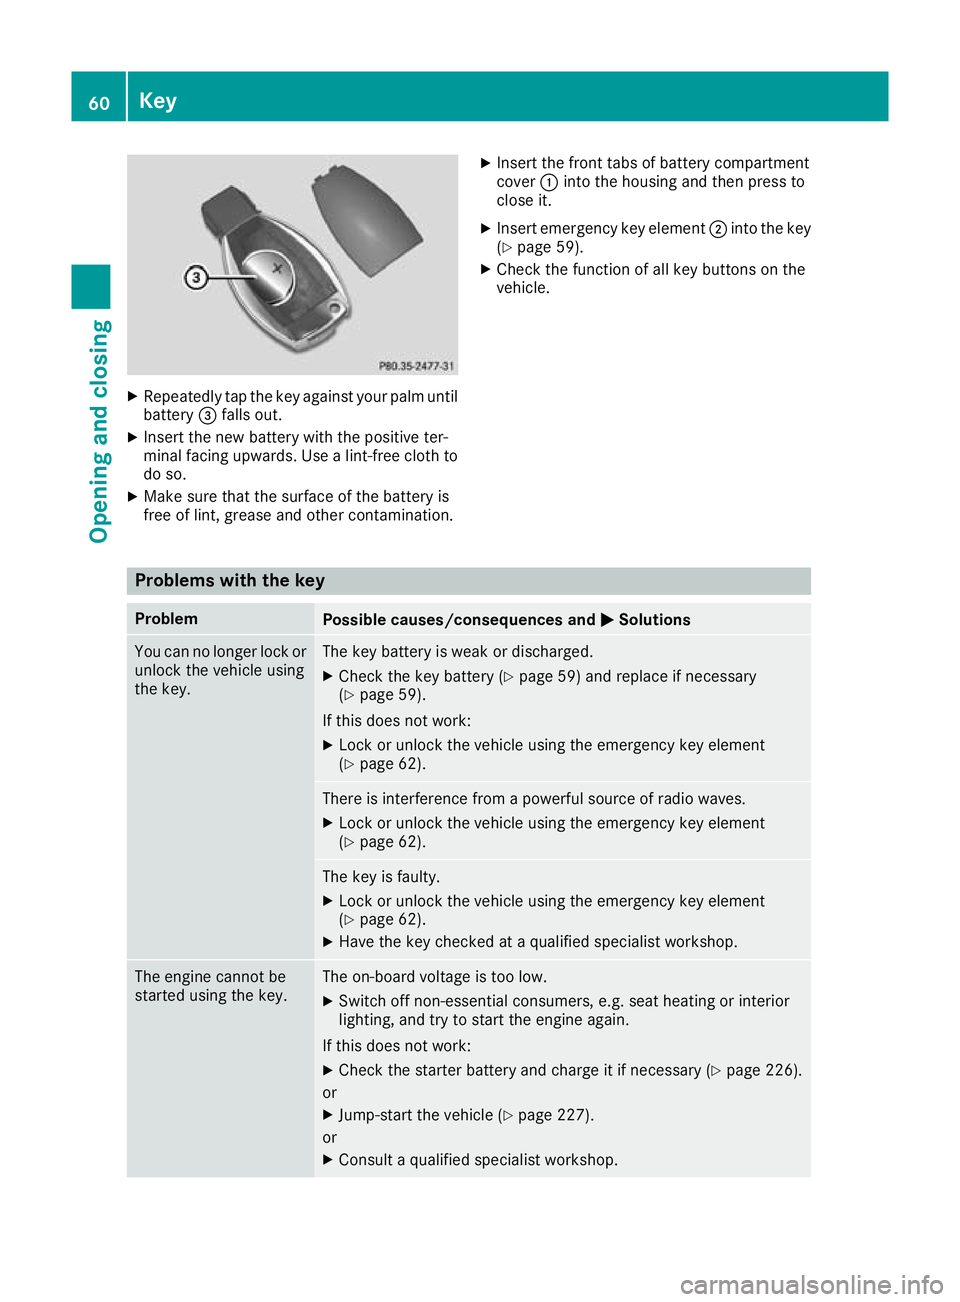
Repeatedly tap th ekeyagainst your palm until
battery =falls out.
X Inser tthe newb attery wit hthe positive ter-
minal facing upwards. Use alint-free cloth to
do so.
X Mak esuret hatthe surfac eofthebattery is
free of lint, grease and other contamination. X
Insert th efront tabs of battery compartment
cover :into the housing and then press to
close it.
X Insert emergency key element ;into the key
(Y page 59).
X Check the function of all key buttons on the
vehicle. Problem
swith the key Problem
Possible causes/consequences and
M MSolutions You can no longer lock or
unlock the vehicle using
the key. The key battery is weak or discharged.
X Check the key battery (Y page 59) and replace if necessary
(Y page 59).
If this does not work: X Lock or unlock the vehicle using the emergency key element
(Y page 62). There is interferenc
efrom apowerful source of radio waves.
X Lock or unlock the vehicle using the emergenc ykey element
(Y page 62). The key is faulty.
X Lock or unlock the vehicle using the emergenc ykey element
(Y page 62).
X Have the key checked at aqualified specialist workshop. The engine cannot be
started using the key. The on-board voltage is too low.
X Switch off non-essential consumers, e.g. seat heating or interior
lighting, and try to start the engine again.
If this does not work:
X Check the starter battery and charge it if necessary (Y page 226).
or X Jump-start the vehicle (Y page 227).
or X Consult aqualified specialist workshop. 60
KeyOpening and closing
Page 94 of 261
vated unintentionally. In particular, ensure that
the remote control for the auxiliary heating is
kept out of the reach of children.
The remote control has
arange of approximately
300 metres .This range is reduced by:
R source sofradioi nterference
R soli dobjects between the remote control and
the vehicle
R the remote control being in an unfavourable
position in relation to the vehicle
R transmitting from an enclosed space
If the remote control battery is low,t he battery
symbol on the left of the display is show nas
empty. Replace the remote control battery and
observe the important safety notes when doing so (Y page9 2).
Activating/deactivating the auxiliary
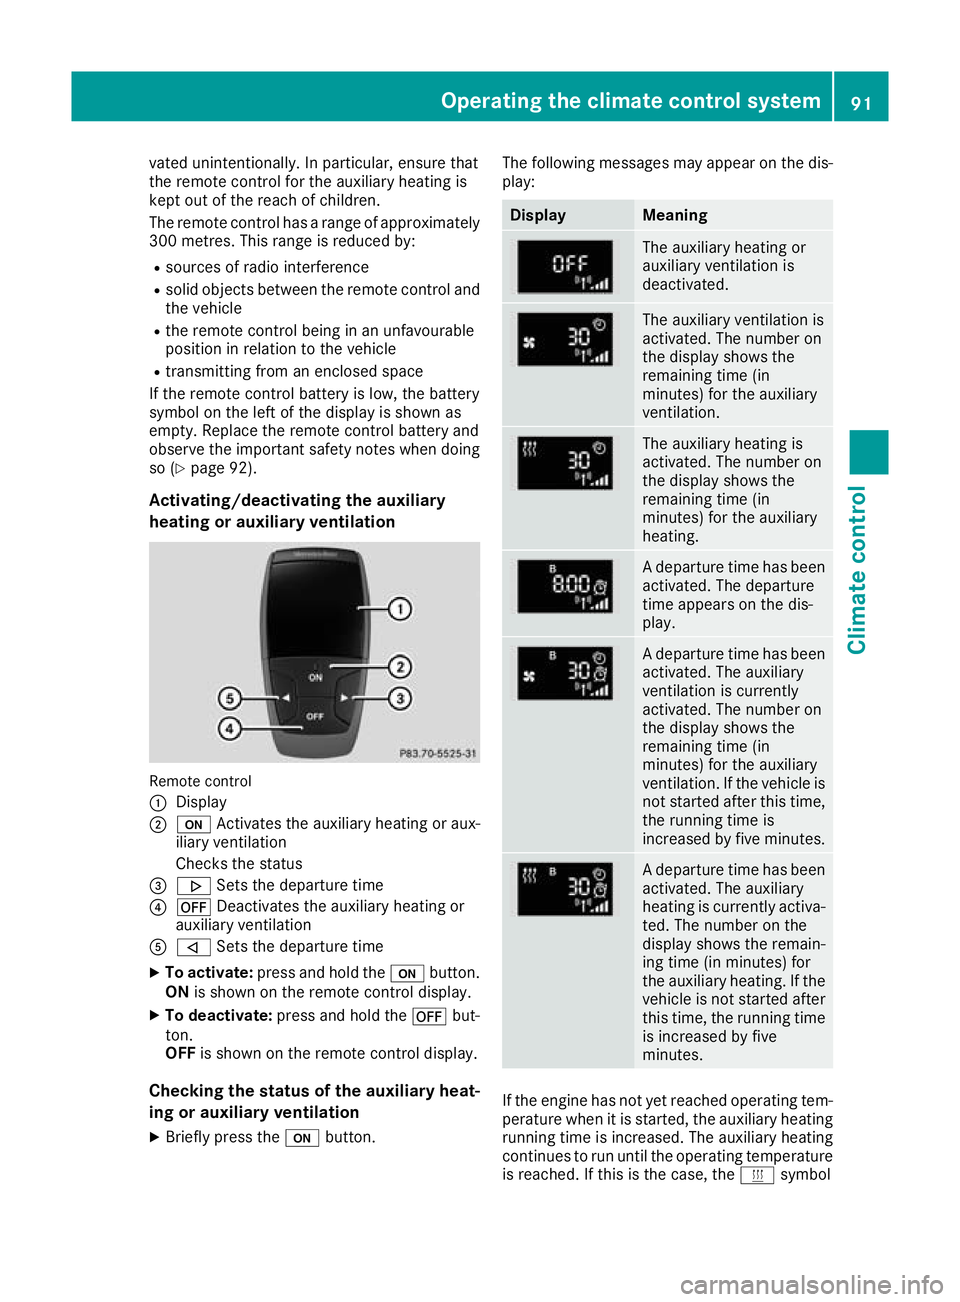
heating or auxiliary ventilation Remote control
: Display
; u Activates the auxiliaryh eating or aux-
iliary ventilation
Checks th estatus
= . Setsthe departur etime
? ^ Deactivates th eauxiliary heating or
auxiliary ventilation
A , Setsthe departur etime
X To activate: press and hold the ubutton.
ON is shown on th eremot econtro ldisplay.
X To deactivate: press and hold the ^but-
ton.
OFF is shown on th eremot econtro ldisplay.
Checking th estatus of theauxiliary heat-
ing or auxiliary ventilation
X Briefl ypress the ubutton. The followin
gmessages may appear on the dis-
play: Display Meaning
The auxiliary heating or
auxiliary ventilation is
deactivated.
The auxiliary ventilation is
activated. The number on
the display shows the
remaining time (in
minutes) for the auxiliary
ventilation.
The auxiliary heating is
activated. The number on
the display shows the
remaining time (in
minutes) for the auxiliary
heating.
Ad
epart uret ime ha sbeen
activated .The departure
time appear sonthe dis-
play. Ad
epart uret ime ha sbeen
activated .The auxiliary
ventilatio nisc urrently
activated .The numbe ron
the display shows the
remaining time (in
minutes) for the auxiliary
ventilation. If the vehicl eis
not started afte rthist ime,
the running time is
increased by fiv eminutes. Ad
epart uret ime ha sbeen
activated .The auxiliary
heating is currentl yactiva-
ted .The numbe ronthe
display shows the remain-
ing time (i nminutes) for
the auxiliary heating .Ifthe
vehicl eisnot started after
thi stime ,the running time
is increased by five
minutes. If the engine has not yet reached oper
ating tem-
perature when it is started, the auxiliary heating running time is increased .The auxiliary heating
continues to run until the operating temperature
is reached .Ifthis is the case, the ysymbol Operating the climate control system
91Climate control Z
Page 138 of 261
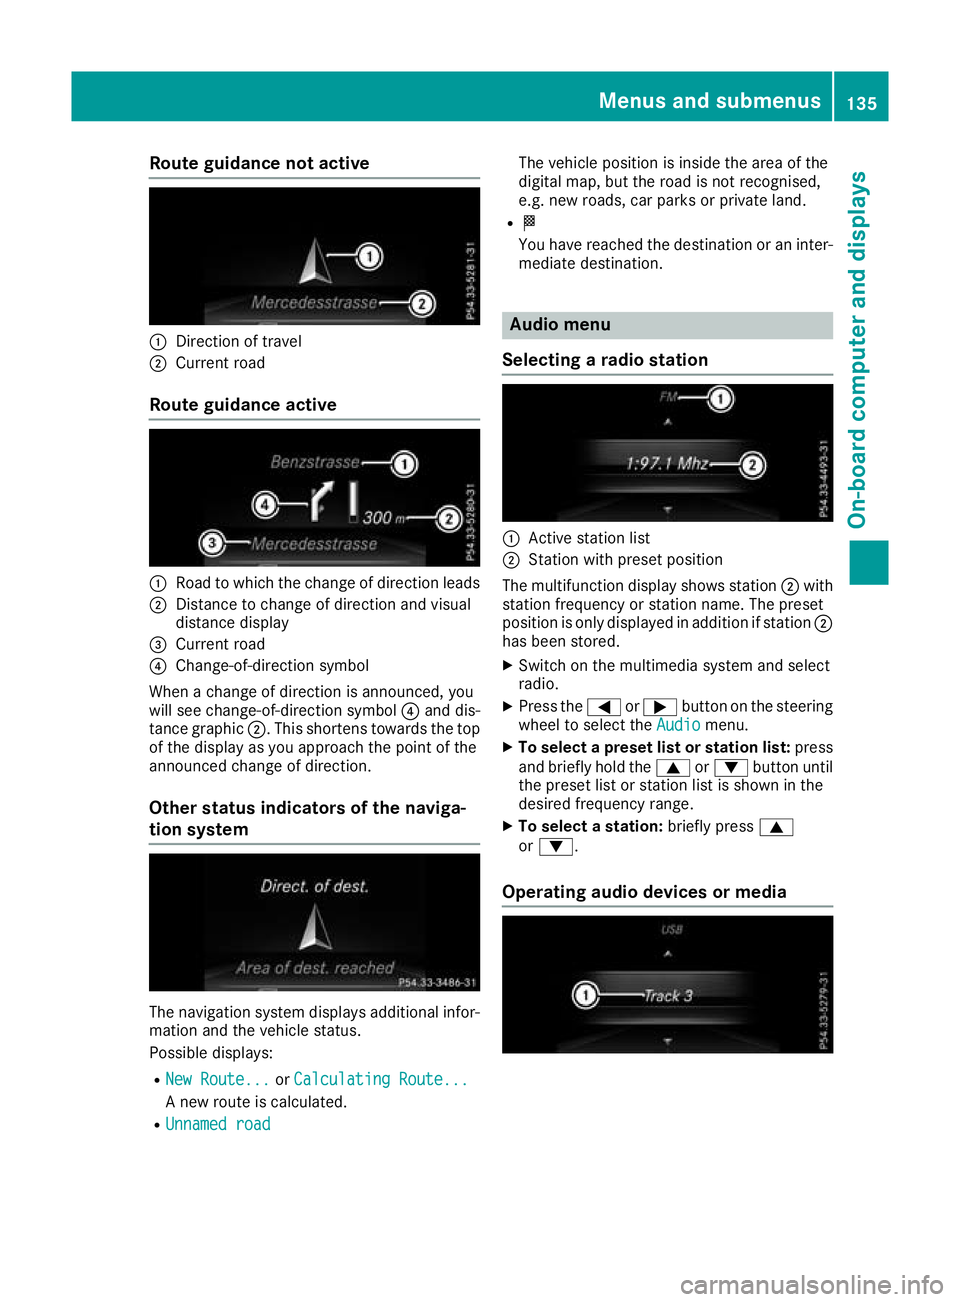
Route guidanc
enotactive :
Direction of travel
; Current road
Route guidanc eactive :
Road to which the change of direction leads
; Distance to change of direction an dvisual
distanc edisplay
= Curren troad
? Change-of-direction symbol
When achang eofd irection is announced, you
will see change-of-direction symbol ?and dis-
tance graphic ;.This shorten stow ards th etop
of th edisplay as you approac hthe poin toft he
announce dchang eofd irection.
Other status indicators of th enaviga-
tion system The navigation system displays additional infor-
mation and the vehicle status.
Possible displays:
R New Route... New Route... orCalculating Route...
Calculating Route...
An ew route is calculated.
R Unnamed road
Unnamed road The vehicle position is inside the area of the
digital map, but the road is not recognised,
e.g. new roads, car parks or private land.
R O
You have reached the destination or an inter-
mediate destination. Audio menu
Selecting aradio station :
Active station list
; Station wit hpreset position
The multifunctio ndisplay shows station ;with
statio nfrequency or statio nname. The preset
positio niso nlyd isplayed in additio nifstation ;
ha sb eens tored.
X Switch on the multimedia system and select
radio.
X Press the =or; button on the steering
whee ltoselect the Audio
Audio menu.
X To select apreset list or station list: press
and briefl yholdt he 9 or: button until
the preset list or statio nlistiss hown in the
desired frequency range.
X To select astation: brieflypress 9
or :.
Operatin gaudi odevices or media Menus and subme
nus
135On-boa rdcomputer and displays Z
Page 168 of 261
Introduction
Oper
ating safety
Important safet ynotes G
WARNING
Operating the integrated information systems and communications equipment in the vehicle
while driving will distract you from traffic con-
ditions. You could then lose control of the
vehicle. Ther eisarisk of an accident.
Only operate these devices if road traffic con-
ditions permit. If you are unsure about the
surrounding conditions, pullo ver toasafe
location and make entries only while the vehi-
cle is stationary.
Observe the lega lrequirements for the country
you are in.
The navigation system calculates the route to
the destination without taking account of the
following, for example:
R traffic lights
R stop and give way signs
R parking or stopping restrictions
R road narrowing
R other road and traffic rule sand regulations
The multimedi asystem may provid eincorrect
navigation announcements if the surroundings
do not correspond to the data on the digital map (for example, aroute may have been diverted or
the direction of aone-wa ystreet may have
changed).
For this reason, you must alwayso bserve road
and traffic rule sand regulations during your
journey .Roada nd traffic rule sand regulations
alwaysh ave priority over the system' sdriving
recommendations.
Remember that even at aspee dof50k m/h,
yourv ehiclecovers adistance of 14 mper sec-
ond.
When using the device please follow:
R the safety notes in this manual
R traffic rules and regulations
R laws and safety standards pertainin gtomotor
vehicles G
WARNING
Modifications to electronic components, their software as well as wiring could affect their
function and/or the oper ation of other net-
worked components. This coul dinparticular
alsobet he case for systems relevant to
safety .They might not function properly any-
more and/or jeopardise the operational
safety of the vehicle. There is an increased
risk of an accident and injury.
Do not attempt to modify the wiring as wellas
electronic components or their software.
Always have work on electrica land electronic
components carrie dout at aqualified special-
ist workshop. Correct use
Th em ultimedia system can be used for th efol-
lowing:
R to receive radio stations
R to play back audio file sonmemory cards and
other dat acarriers
R to mak ecalls via th eBluetooth ®
function
R for navigation Declaration of conformity
Radio type approval Introduction
165Multimedia system Z
Page 171 of 261
Function Page
K
TUNER
Selects th
eradio 176
Sets the waveband 176168
At
ag lanceMultimedia system
Page 173 of 261
Function Page
K
TUNER
Selects th
eradio 176
Sets the waveband 176
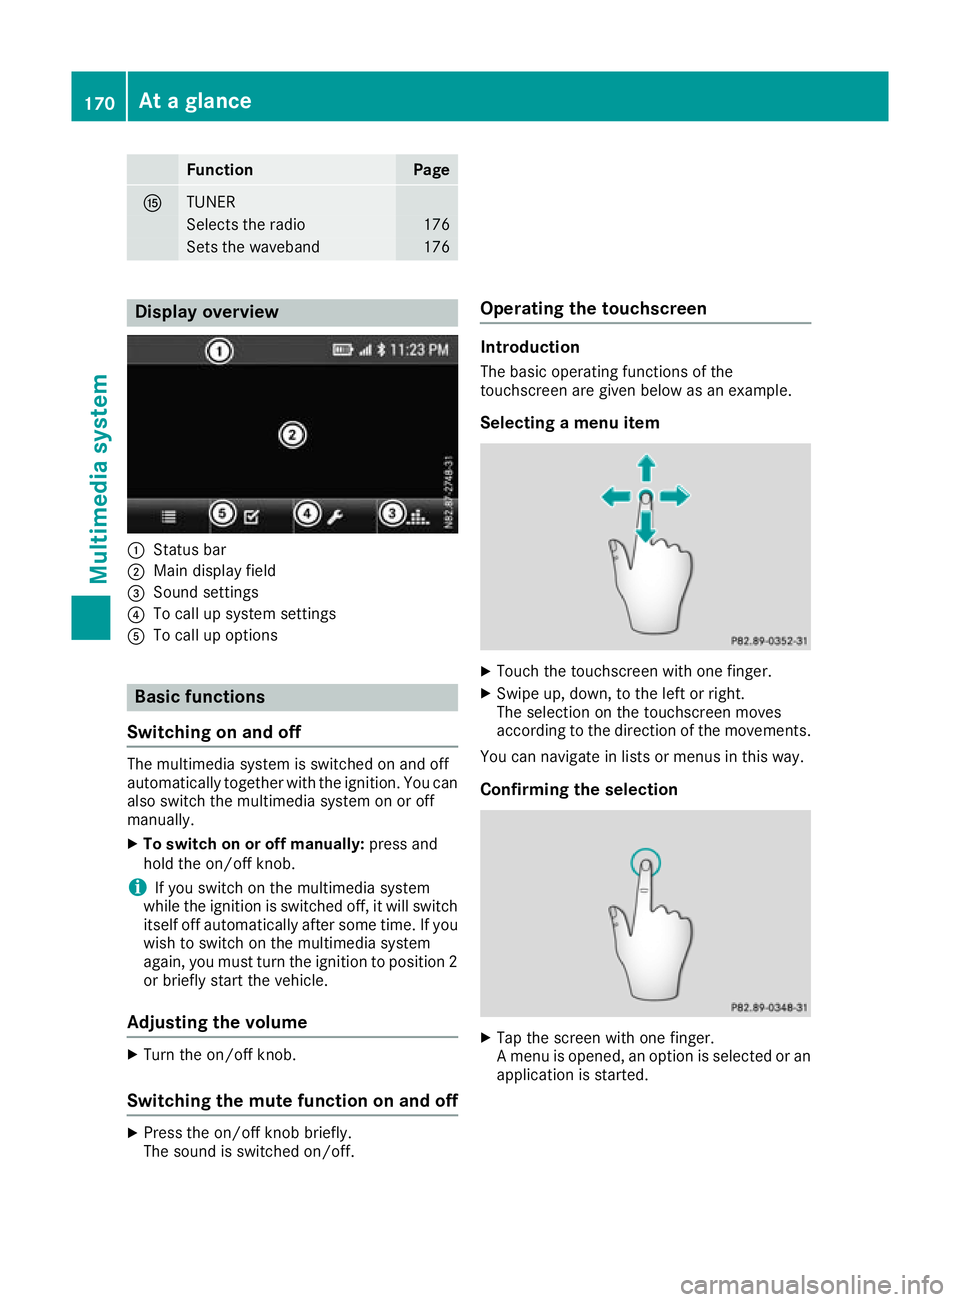
Display overview
:
Statu sbar
; Main display field
= Sound settings
? To cal lupsystem settings
A To cal lupoptions Basi
cfunctions
Switchin gonand off The multimedi
asystem is switched on and off
automatically together with the ignition. You can
also switch the multimedia system on or off
manually.
X To switch on or off manually: press and
hold the on/of fknob.
i If you switch on the multimedia system
while the ignition is switched off, it will switch
itself off automatically after some time. If you
wish to switch on the multimedia system
again, you must turn the ignition to position 2
or briefly start the vehicle.
Adjusting the volume X
Turn the on/of fknob.
Switching the mutef unction on and offX
Press the on/of fknobb riefly.
The sound is switched on/off. Operating the touchscreen Introduction
The basico perating function softhe
touchscree nare given below as an example.
Selecting amenui tem X
Touc hthe touchscreen with one finger.
X Swipe up, down, to the left or right.
The selection on the touchscreen moves
according to the direction of the movements.
You can navigate in lists or menus in this way.
Confirming the selection X
Tap the screen with one finger.
Am enu is opened, an option is selected or an
application is started. 170
At
ag lanceMultimedia system
Page 175 of 261
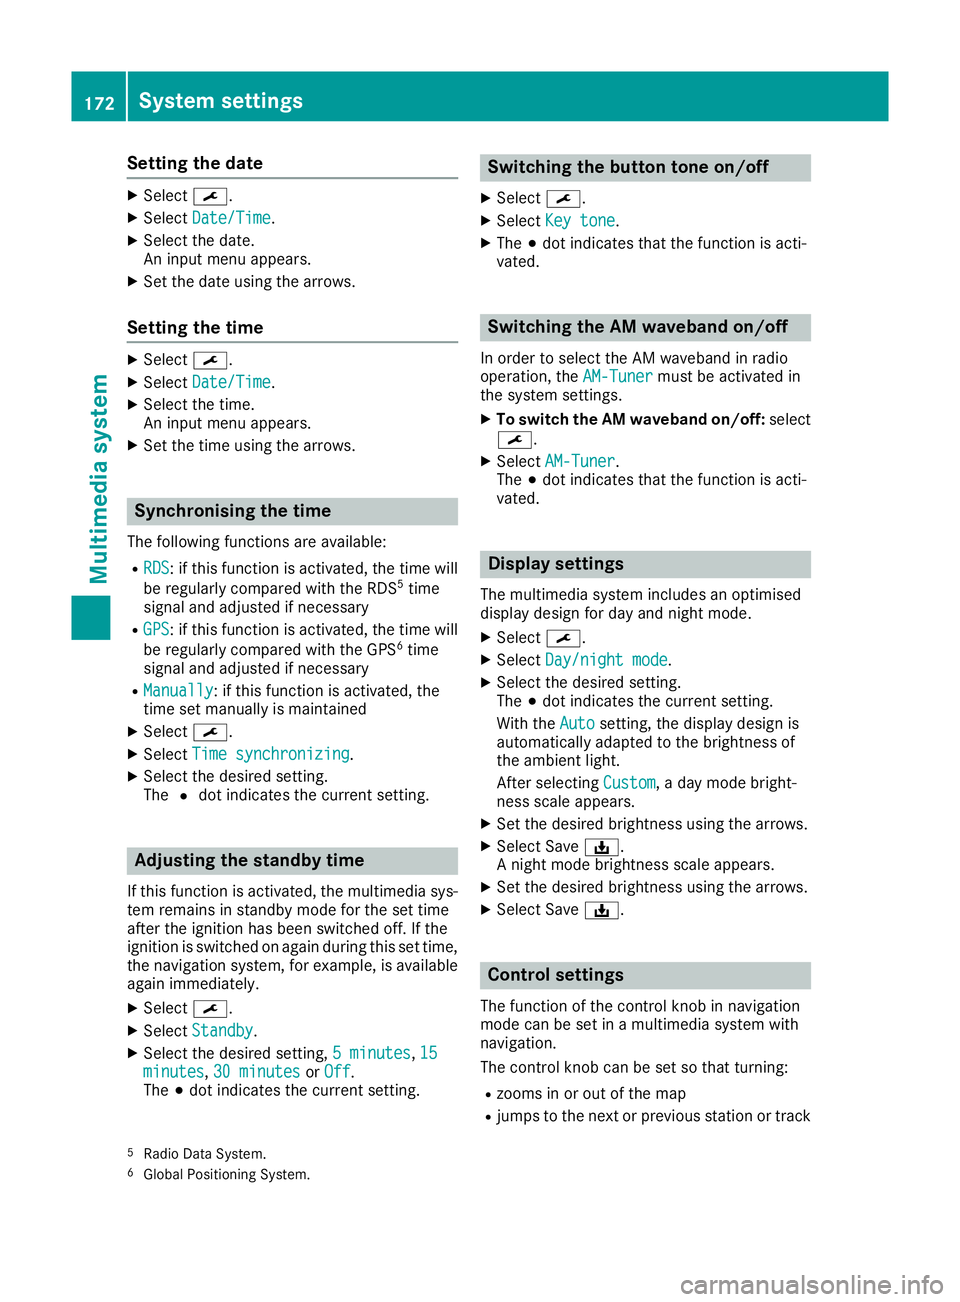
Setting the date
X
Select ¯.
X Select Date/Time
Date/Time.
X Select the date.
An input men uappears.
X Set the date using the arrows.
Setting the time X
Select ¯.
X Select Date/Time
Date/Time.
X Select the time.
An input menu appears.
X Set the time using the arrows. Synchronisin
gthe time
The following functions are available:
R RDS RDS:ift his function is activated, the time will
be regularly compared with the RDS 5
time
signal and adjusted if necessary
R GPS
GPS:ift his function is activated, the time will
be regularly compared with the GPS 6
time
signal and adjusted if necessary
R Manually
Manually:ift his function is activated, the
time set manually is maintained
X Select ¯.
X Select Time synchronizing
Time synchronizing.
X Select the desired setting.
The #dot indicates the current setting. Adjusting the standby time
If this function is activated, the mul timedia sys-
te mr emain sinstandby mod efor th eset time
after th eignition has been switched off .Ifthe
ignition is switched on again during this set time,
th en avigation system, for example, is available
again immediately.
X Select ¯.
X Select Standby
Standby.
X Selec tthe desired setting, 5minutes
5m inutes, 15 15
minutes
minutes, 30 minutes
30 minutes orOff
Off .
The #dot indicates the curren tsetting. Switching the button tone on/off
X Select ¯.
X Select Key tone
Key tone.
X The #dot indicates that the function is acti-
vated. Switching the AM waveband on/off
In order to select the AM waveband in radio
operation, the AM-Tuner AM-Tunermust be activated in
the system settings.
X To switch the AM waveband on/off: select
¯.
X Select AM-Tuner
AM-Tuner.
The #dot indicates that the function is acti-
vated. Display settings
The mul timedia system includes an optimised
display design fo rday and night mode.
X Select ¯.
X Select Day/night mode
Day/night mode.
X Selec tthe desire dsetting.
The #dot indicates th ecurren tsetting.
Wit hthe Auto
Auto setting ,the display design is
automatically adapted to th ebrightness of
th ea mbien tlight.
Afte rselecting Custom
Custom,aday mode bright-
ness scale appears.
X Se tthe desire dbrightness usin gthe arrows.
X Selec tSave ý.
An ight mode brightness scale appears.
X Se tthe desire dbrightness usin gthe arrows.
X Selec tSave ý. Control settings
The function of th econtrol knob in navigation
mod ecan be set in amultimedia system with
navigation.
The control knob can be set so that turning:
R zooms in or out of th emap
R jumps to th enextorp revious statio nortrack
5 Radio Dat aSystem.
6 Global Positionin gSystem. 172
System settingsMultimedia system
Page 176 of 261
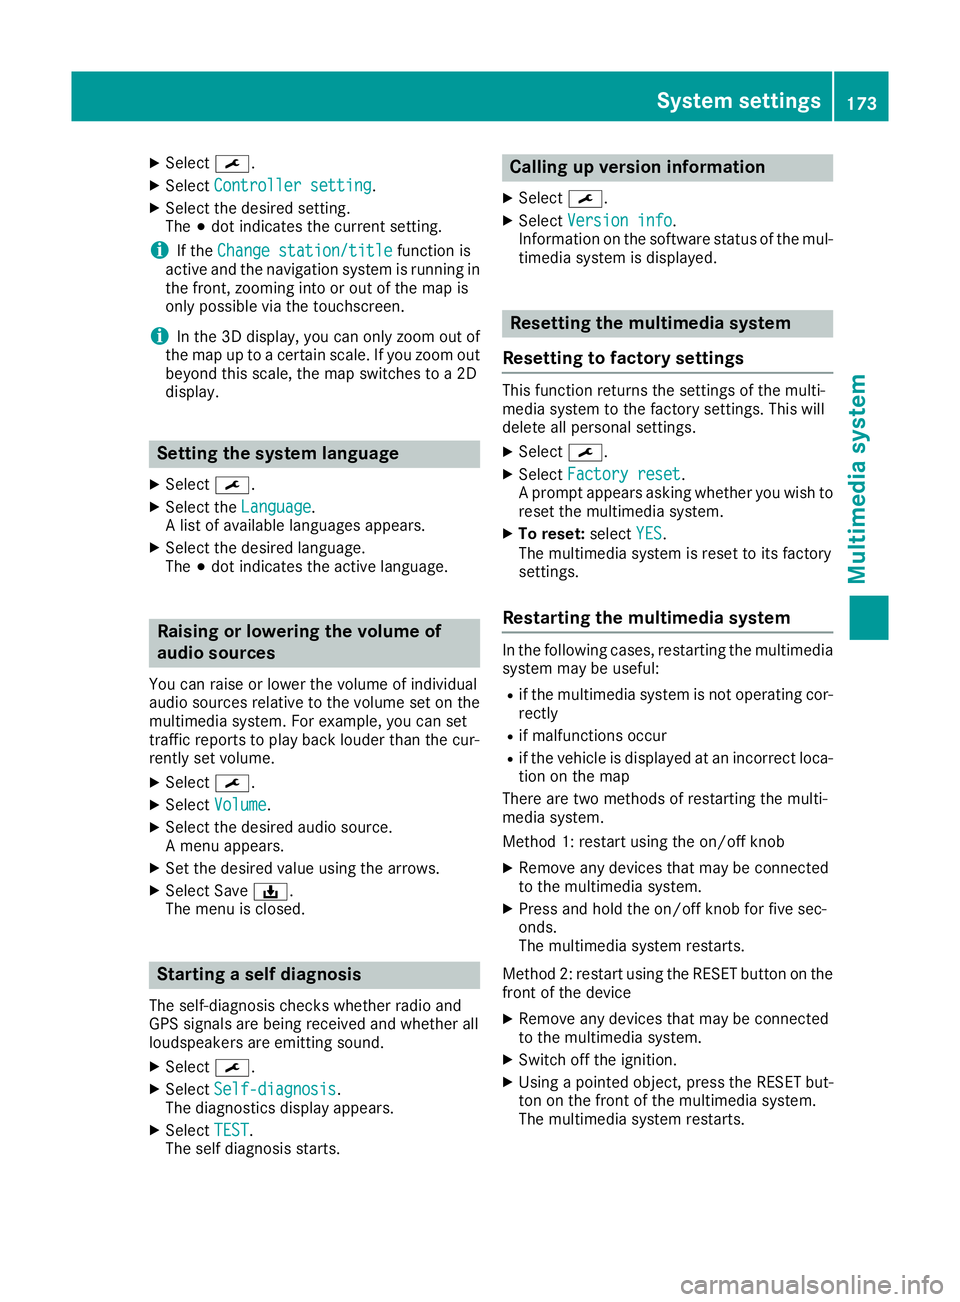
X
Select ¯.
X Select Controller setting
Controller setting.
X Select the desire dsetting.
The #dot indicates the current setting.
i If the
Change station/title
Change station/title function is
active and the navigation system is running in
the front, zooming into or ou tofthe map is
only possible via the touchscreen.
i In the 3D display
,you can only zoom ou tof
the map up to acertain scale .Ifyouzoom out
beyond this scale ,the map switches to a2D
display. Settin
gthe system language
X Select ¯.
X Select the Language
Language.
Al ist of available languages appears.
X Select the desired language.
The #dot indicates the active language. Raisin
gorlowering the volume of
audio sources
Yo uc an raise or lowe rthe volume of individual
audi osources relative to the volume set on the
multimedi asystem. For example, yo ucan set
traffic reports to play back louder than the cur-
rentl yset volume.
X Select ¯.
X Select Volume
Volume.
X Select the desire daudio source.
Am enu appears.
X Set the desire dvalue using the arrows.
X Select Save ý.
The menu is closed. Starting
aself diagnosis
The self-diagnosis checksw hether radio and
GPS signals are being received and whether all
loudspeakers are emittings ound.
X Select ¯.
X Select Self-diagnosis Self-diagnosis.
The diagnostics display appears.
X Select TEST
TEST.
The self diagnosis starts. Calling up version info
rmation
X Select ¯.
X Select Versio ninfo
Versio ninfo.
Information on th esoftwar estatus of th emul-
timedia system is displayed. Resettin
gthe multimedi asystem
Resetting to factory settings Thi
sfunction return sthe settings of the multi-
media system to the factor ysettings. This will
delete all personal settings.
X Select ¯.
X Select Factory reset Factory reset.
Ap rompt appears asking whether you wish to
reset the multimedia system.
X To reset: selectYES
YES.
The multimedia system is reset to its factory
settings.
Restarting the multimedia system In the following cases, restarting the multimedia
system may be useful:
R if the multimedia system is not operating cor-
rectly
R if malfunctions occur
R if the vehicl eisdisplayedatani ncorrect loca-
tion on the map
There are two methods of restarting the multi-
media system.
Method 1: restart using the on/off knob
X Remove any devices that may be connected
to the multimedia system.
X Press and hold the on/off knob for five sec-
onds.
The multimedia system restarts.
Method 2: restart using the RESET button on the
front of the device
X Remove any devices that may be connected
to the multimedia system.
X Switch off the ignition.
X Using apointed object, press the RESET but-
ton on the front of the multimedia system.
The multimedia system restarts. System settings
173Multimedia system Z