2016 MERCEDES-BENZ G-CLASS SUV air filter
[x] Cancel search: air filterPage 10 of 261

Setting the airflow ........................... 87
Setting the temperature .................. 86
Switching air-recirculation mode
on/of
f.............................................. 89
Switching on/of f.............................. 85
Switching residua lheato n/of f........ 89
Switching the rea rwindow heat-
ing on/of f........................................ 88
Switching the ZONE function
on/of f.............................................. 87
THERMATI Cautomatic climate
control (2-zone) ............................... 84
Cloc k(on-board computer) ............... 138
Cockpit
Overview .......................................... 25
COMAND display
Cleaning ......................................... 220
Combination switch ............................ 76
Constant headlamp mode
see Daytime driving lights
Consumptio nstatistics (on-board
computer) .......................................... 134
Coolant (engine)
Checking the level ......................... 215
Displa ymessage ............................ 146
Note s............................................. 253
Temperature gaug e........................ 131
Warning lamp ................................. 162
Cooling
see Climate control
Copyright ............................................. 24
Correc tuse ........................................ 165
Cup holder
Important safety notes .................. 206 D
Data seeT echnica ldata
Dat e(on-board computer) ................ 138
Daytime drivin glights
Displa ymessage ............................ 145
Switchin gon/of f(on-boar dcom-
puter) ............................................ .138
Switching on/off (switch) ................ 74
Declaration of conformity (multi-
media system) ................................... 165
Declarations of conformity ................. 22Delaye
dswitch-off
Exterio rlighting (on-boar dcom-
puter) ............................................ .138
Interior lighting .............................. 139
Destination
Entering ......................................... 182
Entering by address ....................... 182
Entering from destination mem-
ory ................................................. 183
Entering from the last destina-
tions .............................................. 183
Entering using the map .................. 184
Route guidance .............................. 187
Saving ............................................ 187
Selecting from points of interest ... 183
Diagnostic sconnection ..................... .23
Diesel .................................................. 251
Diesel particle filter .......................... 115
Differential lock
Disengaging .................................. .127
Front axle ...................................... 126
General notes ................................ 125
Rea raxle ........................................ 126
Transfe rcase ................................. 126
Differential locks ............................... 125
Engaging ........................................ 126
Terrain .......................................... .125
Digital speedometer ......................... 134
Dipped-beam headlamp
Switching on/off .............................. 74
Dipped-beam headlamps
Display message ............................ 145
Setting for driving abroad (sym-
metrical) .......................................... 74
Display message
ASSYST service interva ldispla y..... 215
Driving systems ............................ .149
Display messages
Calling up (on-board computer) ..... 141
Engine ............................................ 146
General information ....................... 141
Hiding (on-board computer) ........... 141
Key ................................................ 155
Lights ............................................. 145
Safety systems .............................. 142
Tyres .............................................. 150
Vehicle .......................................... .153 Index
7
Page 87 of 261
Overview of the climat
econtrol sys-
tem General notes
Observe the settings recommended on the fol-
lowing pages. Otherwise, the windows could
mist up.
To prevent the windows from misting up:
R switch off climate control only briefly
R activate air-recirculation mode only briefly
R activate the "Cooling with dehumidification"
function
R activate the "Windscreen demisting" function
briefly, if required
Climate control regu lates the temperature and
the humidity in the vehicle interior and filters
undesirables ubstances out of the air. The "Cooling with air dehumidification" function
is available only when the engin eisrunning.
Optimum operation is only achieved when the
side windows and the sliding sunroof are closed.
Climate comfor tmay be adversely affected if the
sliding sunroof is open for along period of time.
Set the temperature manually if the sliding sun-
roof is open.
The "Residual heat" function can be switched on or off only when the ignition is switched off
(Y page 89).
The integrated filter can filter out most particles of dust and completely filters out pollen. Aclog-
ged filter reduces the amount of air supplied to
the vehicle interior. Dependin gonthe operating
conditions and environmental influences, the
interval for replacing the filter may be shorter
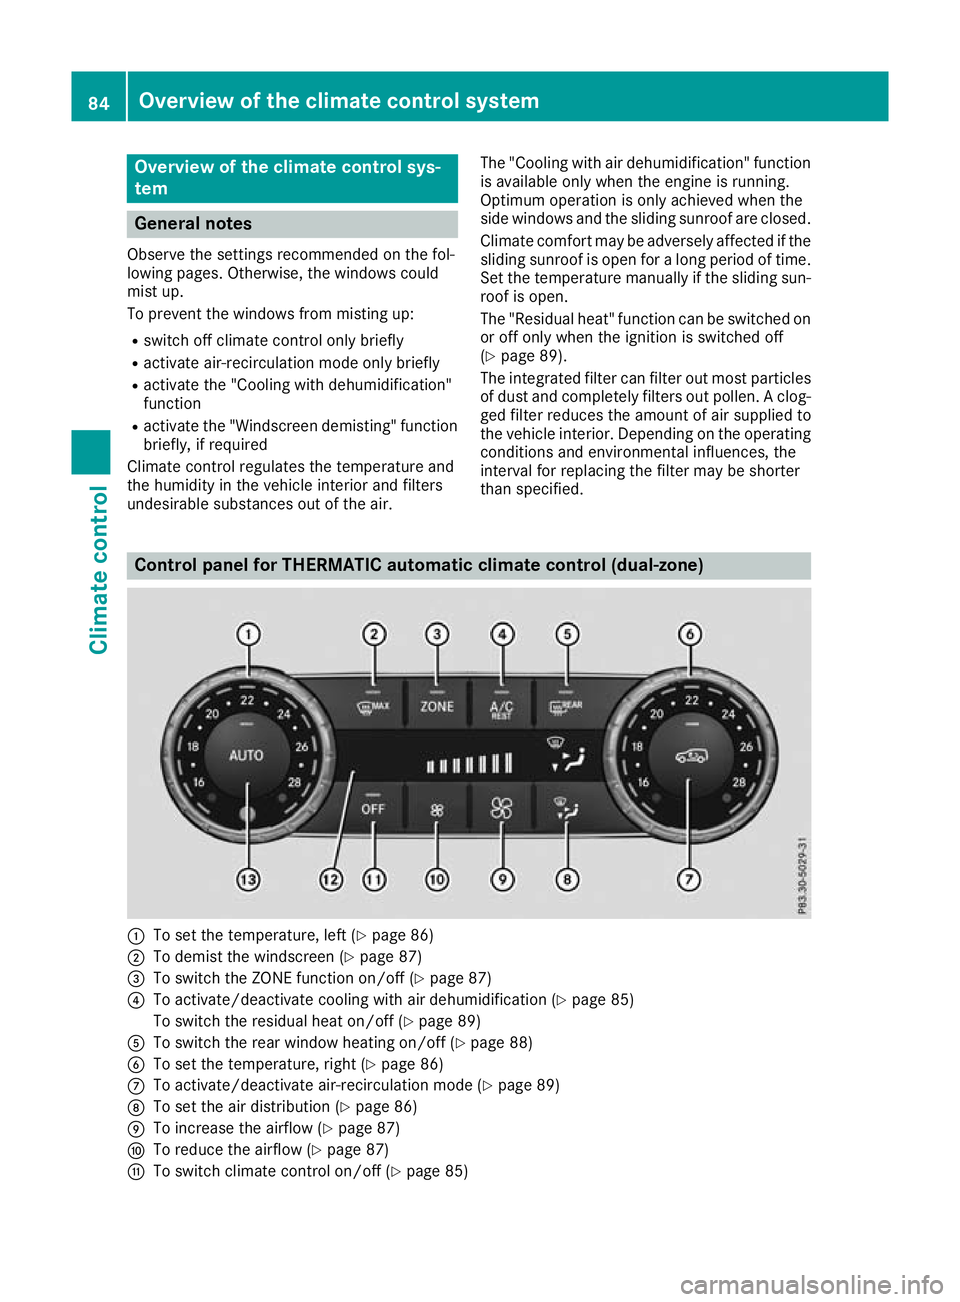
than specified. Control panel for THERMATIC automatic climate control (dual-zone)
:
To set the temperature, left (Y page 86)
; To demist the windscreen (Y page 87)
= To switch the ZONE function on/of f(Y page 87)
? To activate/deactivate cooling with air dehumidification (Y page 85)
To switch the residual heat on/of f(Ypage 89)
A To switch the rear window heating on/of f(Y page 88)
B To set the temperature, right (Y page 86)
C To activate/deactivate air-recirculation mode (Y page 89)
D To set the air distribution (Y page 86)
E To increase the airflow (Y page 87)
F To reduce the airflow (Y page 87)
G To switch climate control on/of f(Y page 85) 84
Overview of the climate control systemClimate
control
Page 112 of 261
nozzle. Thi
sdischarge sany electrostatic
charge tha tmayhave buil tup.
Do not get back into the vehicl eduring the refu-
elling process ;otherwise, electrostatic charge
could buil dupagain. G
WARNING
If yo umix diesel fuel with petrol, the flash
point of this fuel mixture is lower than that of pure diesel fuel .When the engine is running,
components in the exhaust system may over-
heatu nnoticed. There is arisk of fire.
Never refue lwith petrol. Never add petrol to
diesel fuel.
! Do not use petrol to refue
lvehicles with a
diesel engine. Do not switch on the ignitio nif
you accidentally refue lwith the wrong fuel.
Otherwise, fuel can enter the fuel system.
Even smal lamounts of the wrong fuel could
result in damage to the fuel system and the
engine. The repair costs are high .Notify a
qualified specialist worksho pand have the
fuel tank and fuel lines drained completely.
! Overfilling the fuel tank coul
ddamage the
fuel system.
! Take care not to spil
lany fuel on painted
surfaces. You coul dotherwise damage the
paintwork.
! Use
afilter when adding fuel from afuel can.
The fuel lines and/or the fuel injection system coul dotherwise be blocked by particles from
the fuel can.
If you overfil lthe fuel tank, some fuel may spray
out when you remove the fuel pump nozzle.
Further information on fuel and fuel quality
(Y page2 50). Refuelling
General information Observe the important safety notes
(Y
page 108).
If you unlock/lock the vehicle from the outside, the fuel filler flap also unlocks/locks.
The positio nofthe8 fuel filler cap is dis-
played on the instrument cluster. The arrow next to the filling pump indicates the side of the vehi-
cle.
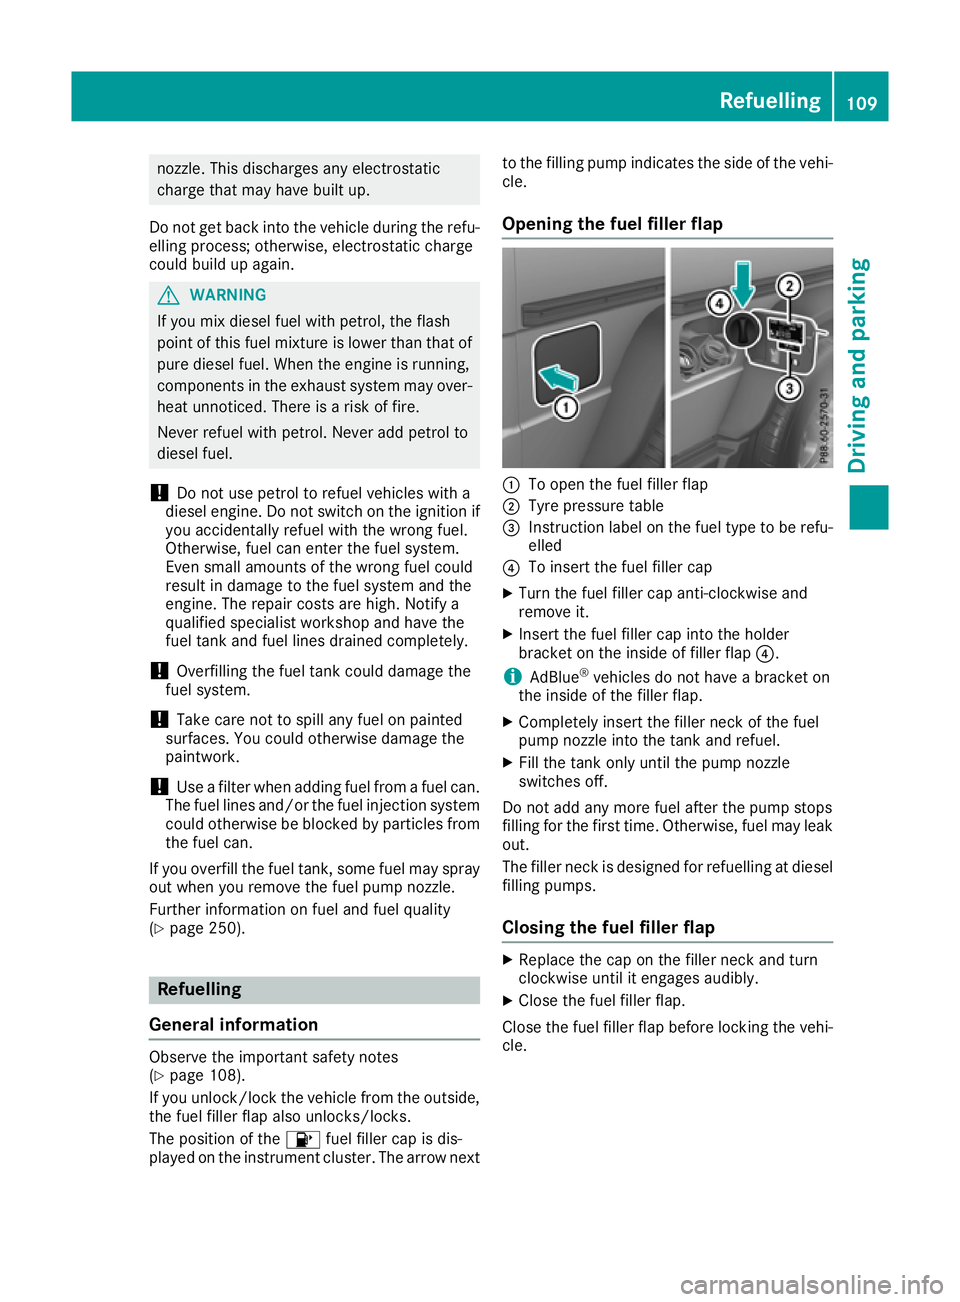
Opening the fuel filler flap :
To open the fuel filler flap
; Tyre pressure table
= Instruction label on the fuel type to be refu-
elled
? To insert the fuel filler cap
X Turn the fuel filler cap anti-clockwise and
remove it.
X Insert the fuel filler cap into the holder
bracket on the inside of filler flap ?.
i AdBlue ®
vehicles do not have abracket on
the inside of the filler flap.
X Completely insert the filler neck of the fuel
pump nozzle into the tank and refuel.
X Fill the tank only until the pump nozzle
switches off.
Do not add any more fuel after the pump stops
filling for the first time. Otherwise, fuel may leak out.
The filler neck is designed for refuelling at diesel
filling pumps.
Closing the fuel filler flap X
Replace the cap on the filler neck and turn
clockwise until it engages audibly.
X Clos ethe fuel filler flap.
Close th efuel filler flap before lockin gthe vehi-
cle. Refuelling
109Driving and parking Z
Page 151 of 261
Display messages
Possible causes/consequence
sand M
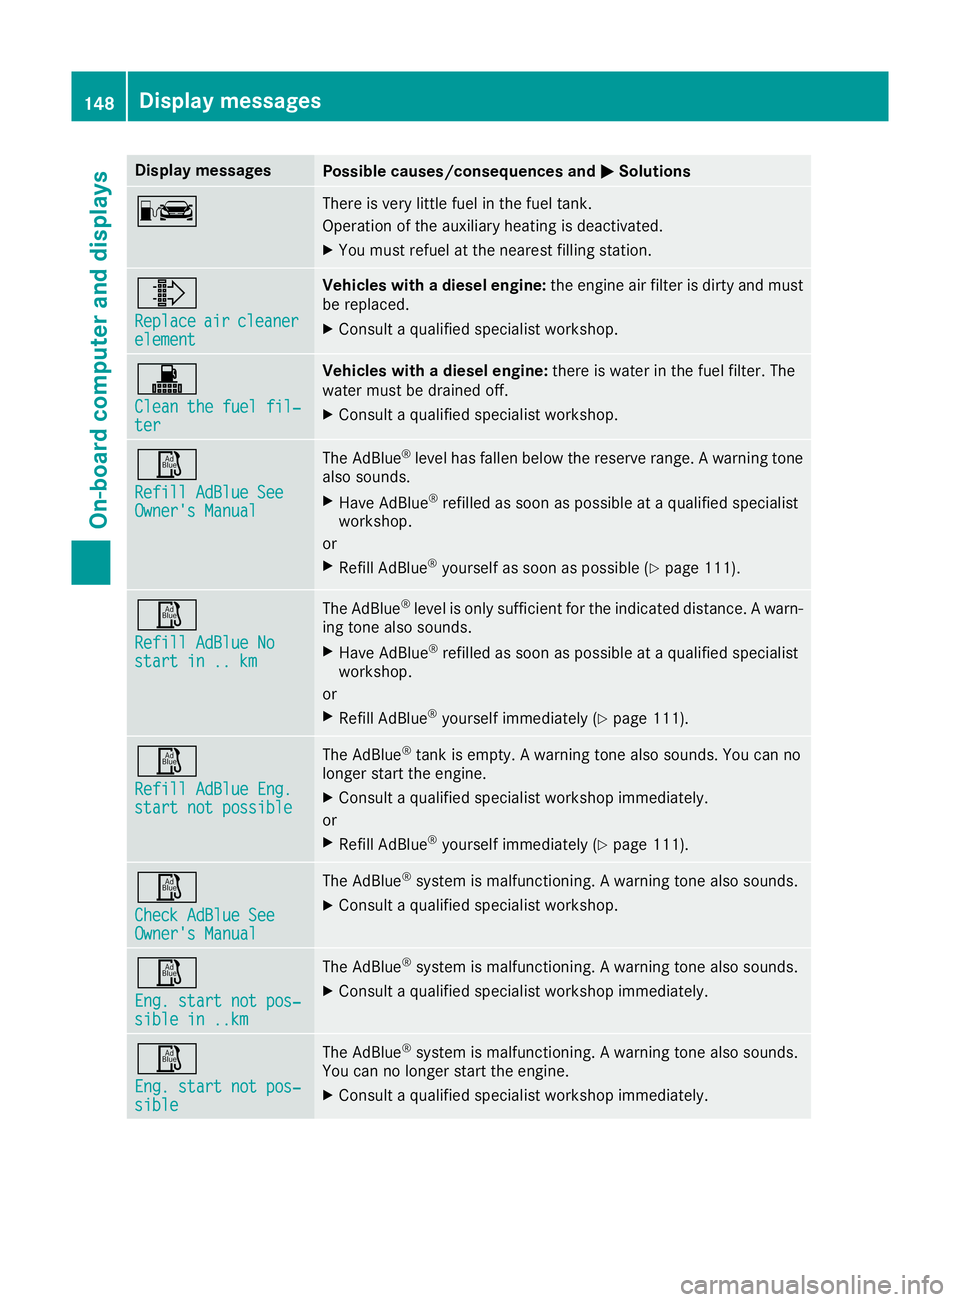
MSolutions C There is very little fuel in the fuel tank.
Operation of the auxiliary heating is deactivated.
X You must refuel at the nearest filling station. ¸
Replace Replace
air
aircleaner
cleaner
element
element Veh
icleswithad ieselengine: the engine ai rfilter is dirty and must
be replaced.
X Consult aquali fied specialist workshop. !
Clean the fue
lfil‐
Clean the fuel fil‐
ter ter Veh
icleswithad ieselengine: there is water in the fue lfilter. The
water mus tbed raine doff.
X Consult aquali fied specialist workshop. Ø
Refill AdBlue See Refill AdBlue See
Owner'
sManual
Owner's Manual The AdBlue
®
level has fallen below the reserve range. Awarning tone
also sounds.
X Have AdBlue ®
refilled as soon as possible at aqualified specialist
workshop.
or X Refill AdBlue ®
yourself as soon as possible (Y page 111).Ø
Refill AdBlue No Refill AdBlue No
start in .. km start in .. km The AdBlue
®
level is only sufficient for the indicated distance. Awarn-
ing tonea lso sounds.
X Have AdBlue ®
refilled as soon as possible at aqualified specialist
workshop.
or
X Refill AdBlue ®
yourself immediately (Y page 111).Ø
Refill AdBlue Eng. Refill AdBlue Eng.
start not possible start not possible The AdBlue
®
tank is empty. Awarning tonea lso sounds. You can no
longer start the engine.
X Consult aqualified specialist workshop immediately.
or X Refill AdBlue ®
yourself immediately (Y page 111).Ø
Check AdBlue See Check AdBlue See
Owner's Manual Owner's Manual The AdBlue
®
system is malfunctioning. Awarning tonea lso sounds.
X Consult aqualified specialist workshop. Ø
Eng. start not pos‐ Eng. start not pos‐
sible in ..km sible in ..km The AdBlue
®
system is malfunctioning. Awarning tonea lso sounds.
X Consult aqualified specialist workshop immediately. Ø
Eng. start not pos‐ Eng. start not pos‐
sible sible The AdBlue
®
system is malfunctioning. Awarning tonea lso sounds.
You can no longer start the engine.
X Consult aqualified specialist workshop immediately. 148
Display messagesOn-board computer and displays
Page 217 of 261
The following cause engine failure or damage
to the exhaust system:
R Use of engine oils and oil filters that have
not been expressly approved for the service
system
R Replacement of engine oil and oil filter after
the replacement interval specified by the
service system has expired
R Use of engine oil additives
! Do not add too much oil. If the oil level is
above the "max" mark on the dipstick ,too
much oil has been added. This can lead to
damage to the engine or the catalytic con-
verter .Have excess oil siphoned off. H
Environmental note
When topping up the oil, take care not to spill
any. If oil enters the soil or waterways, it is
harmful to the environment. X
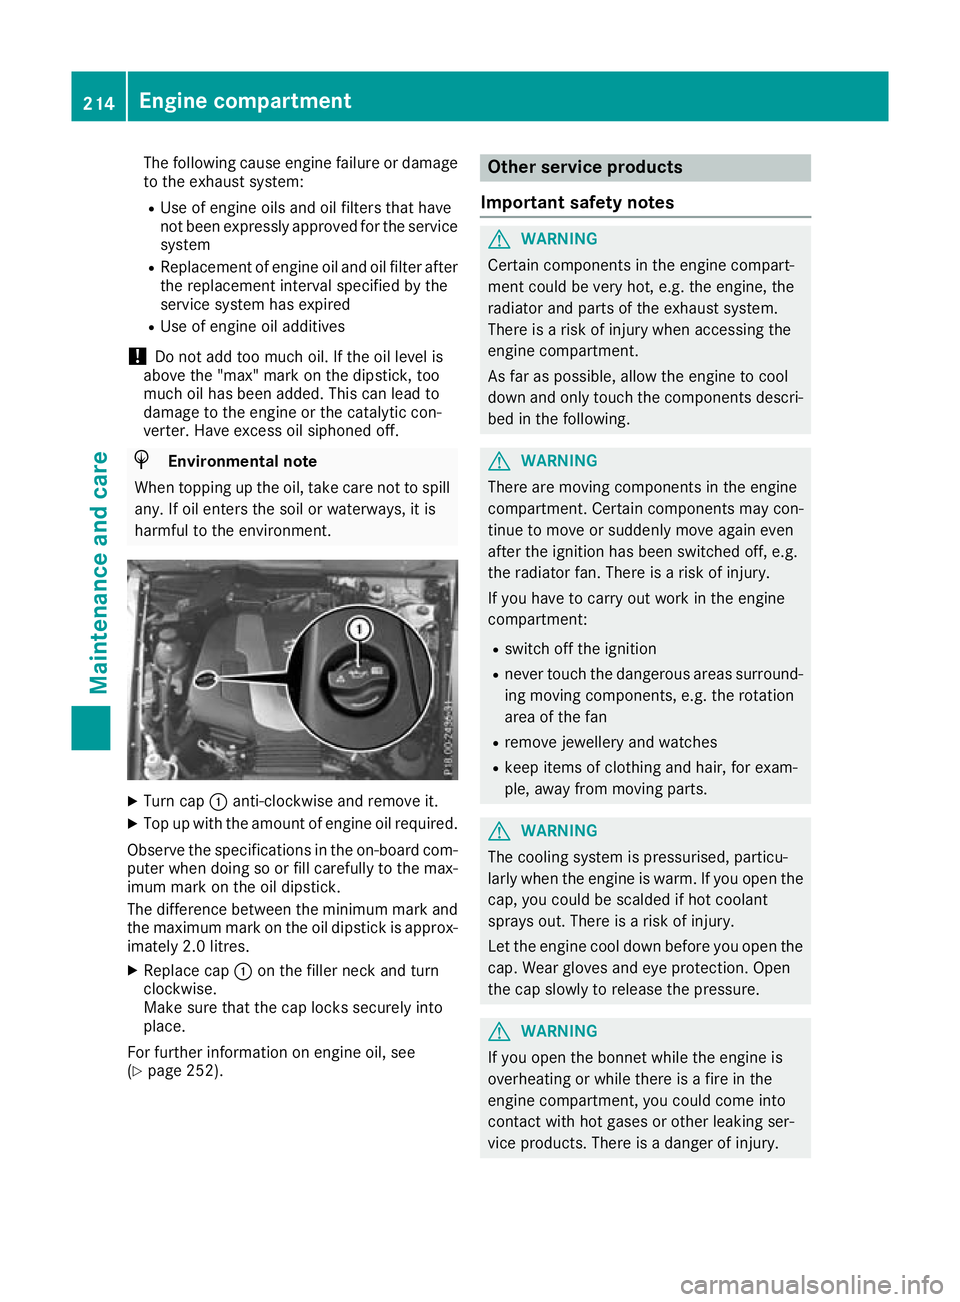
Turn cap :anti-clockwise and remove it.
X Top up with the amount of engine oil required.
Observe the specification sinthe on-board com-
puter when doing so or fill carefully to the max- imum mark on the oil dipstick.
The differenc ebetween the minimum mark and
the maximum mark on the oil dipstick is approx- imately 2.0 litres.
X Replace cap :on the filler neck and turn
clockwise.
Make sure that the cap locks securely into
place.
For further information on engine oil, see
(Y page 252). Other service products
Important safety notes G
WARNING
Certain components in the engin ecompart-
ment coul dbevery hot, e.g. the engine, the
radiator and parts of the exhaust system.
There is arisk of injury when accessing the
engine compartment.
As far as possible,a llow the engine to cool
downa nd only touch the components descri-
bed in the following. G
WARNING
There are moving components in the engine
compartment. Certain components may con-
tinue to move or suddenly move again even
after the ignitio nhas been switched off, e.g.
the radiator fan. There is arisk of injury.
If you have to carry out work in the engine
compartment:
R switch off the ignition
R never touch the dangerous area ssurround-
ing moving components, e.g. the rotation
area of the fan
R remove jewellery and watches
R keep items of clothing and hair, for exam-
ple,a wayfrom moving parts. G
WARNING
The cooling system is pressurised ,particu-
larl yw hen the engine is warm .Ifyou open the
cap, you coul dbescalded if hot coolant
sprays out. There is arisk of injury.
Let the engine cool downb efore you open the
cap. Wearg lovesand eye protection. Open
the cap slowly to release the pressure. G
WARNING
If you open the bonnet while the engine is
overheating or while there is afire in the
engine compartment, you coul dcome into
contact with hot gase sorother leaking ser-
vice products. There is adange rofinjury. 214
Engine compartmentMaintenanc
eand care
Page 219 of 261
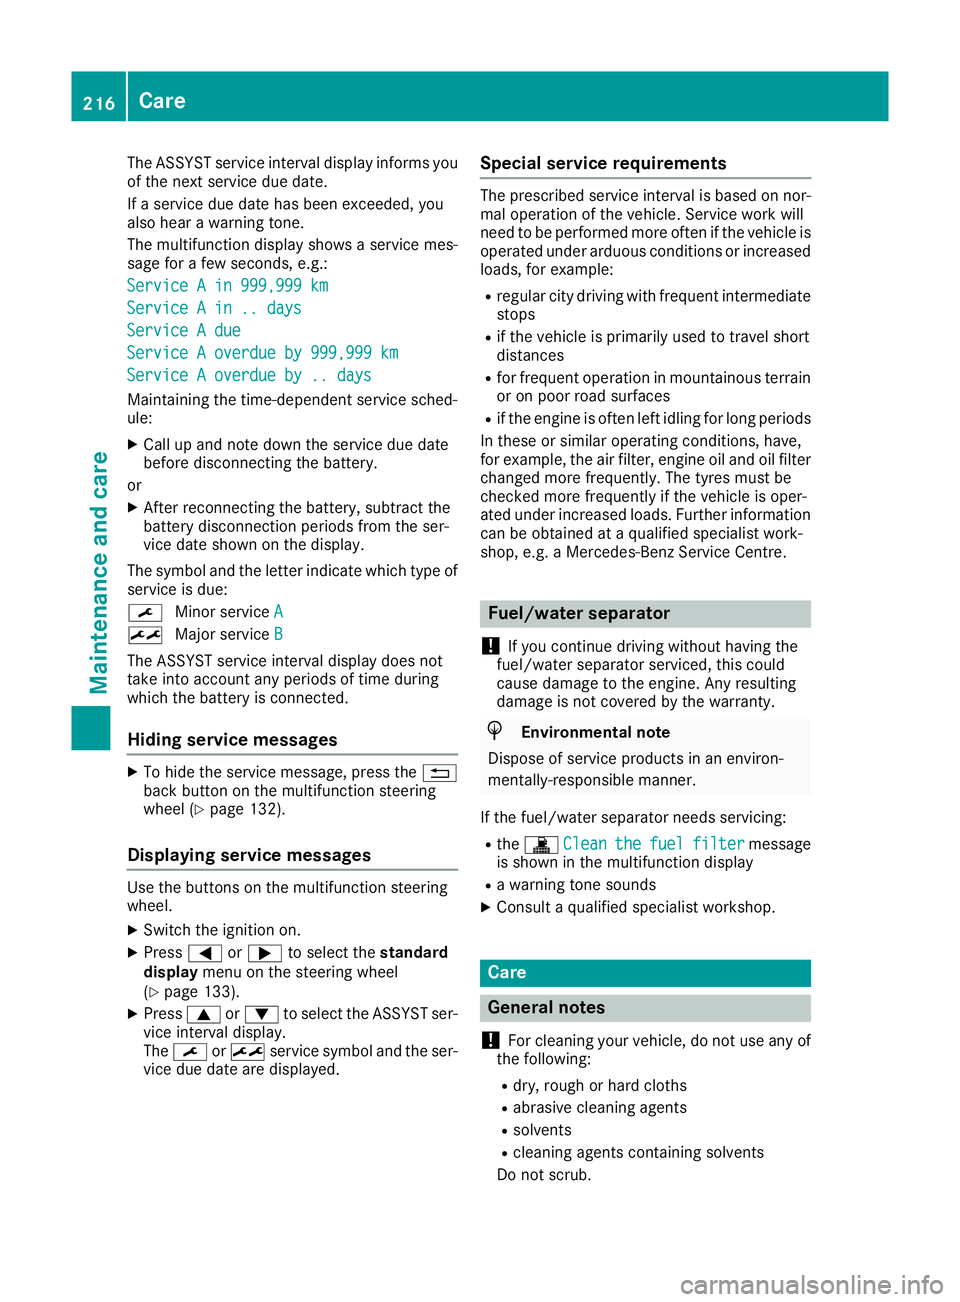
The ASSYST service interval display inform
syou
of the next service due date.
If as ervice due date has been exceeded, you
also hear awarning tone.
The multifunction display shows aservice mes-
sage for afew seconds, e.g.:
Service Ain999,999 km
Service Ain999,999 km
Service Ain..d ays
Service Ain..d ays
Service Adue
Service Adue
Service Aoverdue by 999,999 km
Service Aoverdue by 999,999 km
Service Aoverdue by .. days
Service Aoverdue by .. days
Maintaining the time-dependent service sched-
ule:
X Call up and noted own the service due date
before disconnectin gthe battery.
or X After reconnecting the battery, subtract the
battery disconnection periods from the ser-
vice date shown on the display.
The symbol and the letter indicate which type of service is due:
¯ Minor service A
A
± Major service B B
The ASSYST service interval display does not
take into account any periods of time during
which the battery is connected.
Hiding service messages X
To hide the service message, press the %
back button on the multifunction steering
wheel (Y page 132).
Displaying service messages Use the buttons on the multifunction steering
wheel.
X Switch the ignition on.
X Press =or; to select the standard
display menu on the steering wheel
(Y page 133).
X Press 9or: to select the ASSYST ser-
vice interval display.
The ¯ or± service symbol and the ser-
vice due date are displayed. Special service requirements The prescribed service interval is based on nor-
mal operation of the vehicle. Servic ework will
need to be performed more often if the vehicle is operated under arduous conditions or increased
loads, for example:
R regular city driving with frequent intermediate
stops
R if the vehicle is primarily used to travel short
distances
R for frequent operation in mountainous terrain
or on poor road surfaces
R if the engine is often left idling for long periods
In these or similar operating conditions, have,
for example, the air filter, engine oil and oil filter changed more frequently. The tyres must be
checked more frequently if the vehicle is oper-
ated under increased loads. Further information can be obtained at aqualified specialist work-
shop, e.g. aMercedes-Benz Servic eCentre. Fuel/water separator
! If you continue driving without having the
fuel/wate rseparato rserviced, this could
caus edamag etotheengine. An yresulting
damag eisnotcovered by th ewarranty. H
Environmenta
lnote
Dispose of servic eproduct sinane nviron-
mentally-responsible manner.
If th efuel/water separator needs servicing:
R the ! Clean
Clean the thefuel
fuel filter
filter message
is shown in th emultifunction display
R aw arning tone sounds
X Consult aqualifie dspecialist workshop. Care
General notes
! For cleaning your vehicle, do not use any of
the following:
R dry ,rough or hard cloths
R abrasive cleaning agents
R solvents
R cleaning agents containing solvents
Do not scrub. 216
CareMaintenanc
eand care
Page 256 of 261
i
If the engine oils listed on the table are not
available, you may top up with the following
engine oils until the next oil change:
R MB-Freigabe or MB-Approval 229.3, 229.5
or ACEA C3
It may be used only once and the topping-up
quantity must not exceed 1.0 l.
Fillin gcapaciti es Th
ef ollowing values refer to an oil change,
including the oil filter. Model Replacement
amount G3
50dPROFESSIONAL 12.5 l
Ad
diti ves !
Do not use any additives wit
hthe engine oil.
This could damage the engine. Brake fluid
G
WARNING
The brake fluid continuously absorbs mois-
ture from the air. This results in the boiling
point of the brake fluid lowering. If the boiling
point of the brake fluid is too low, vapour
pockets may form when the brakes are sub-
jected to aheavy load. This would impair brak-
ing efficiency. There is arisk of an accident.
Have the brake flui drenewe datthe prescri-
bed intervals.
Comply with the important safety notes for ser- vice products when handling brake fluid
(Y page2 50).
Only use brake flui dapproved by Mercedes-
Benz according to MB-Freigabe or MB-Approval
331.0.
Information about approved brake flui dcan be
obtained at any qualified specialist worksho por
on the Internet at
http://bevo.mercedes-benz.com.
i Have the brake flui
dregularl yreplaced at a
qualified specialist worksho pinaccordance
with the replacement interval sand the
replacement confirmed in the service report. Coolant
Im portant safety notes G
WARNING
If antifreeze come sinto contact with hot com-
ponents in the engine compartment, it may
ignite. There is arisk of fire and injury.
Let the engine cool downb efore you top up
the antifreeze .Make sure that antifreeze is
not spilled next to the filler neck. Thoroughly
clea nthe antifreeze from components before
starting the engine.
! Only add coolant that has been premixed
with the desired antifreeze protection. You
coul dotherwise damage the engine.
Further information on coolants can be found in the Mercedes-Benz Specifications for Ser-
vice Products, MB Specifications for Service
Products 310.1, e.g. on the Internet at
http://bevo.mercedes-benz.com .Orcontact
aq ualified specialist workshop.
! Always use
asuitable coolant mixture, even
in countries where high temperatures prevail.
Otherwise, the engine cooling system is not
sufficiently protected from corrosio nand
overheating.
i Have the coolant regularl
yreplaced at a
qualified specialist worksho pand the replace-
ment confirmed in the service report.
Comply with the important safety notes for ser- vice products when handling coolant
(Y page2 50).
The coolant is amixture of water and anti-
freeze/anti-corrosion additive. It is responsible
for the following:
R anti-corrosion protection
R antifreeze protection
R raising the boiling point
If antifreeze/corrosio ninhibitor is present in the
correct concentration, the boiling point of the
coolant willbea round 130 †. Service products and capacities
253Technical data Z