2016 MERCEDES-BENZ G-Class automatic transmission
[x] Cancel search: automatic transmissionPage 203 of 302

Vehicle
Display messagesPossible causes/consequences andMSolutions
Shift to P or N toStart EngineYou have attempted to start the engine with the transmission in posi-
tionRor D.
XShift the transmission to position Por N.
Auxiliary BatteryMalfunctionThe auxiliary battery for the automatic transmission is no longer being
charged.
XVisit a qualified specialist workshop at the next opportunity.
XUntil then, set the automatic transmission to position Pbefore you
switch off the engine.
XBefore leaving the vehicle, apply the parking brake.
Apply Brake toShift from PYou have attempted to move the transmission selector lever to posi-
tion D,R or Nwithout depressing the brake pedal.
XDepress the brake pedal.
AThe rear door is open.
GWARNING
When the engine is running, exhaust gases can enter the vehicle inte-
rior if the tailgate is open.
There is a risk of poisoning.
XClose the rear door.
?The hood is open.
GWARNING
The open hood may block your view when the vehicle is in motion.
There is a risk of an accident.
XPull over and stop the vehicle safely as soon as possible, paying
attention to road and traffic conditions.
XSecure the vehicle against rolling away (Ypage 130).
XClose the hood.
CAt least one door is open.
A warning tone also sounds.
XClose all the doors.
Display messages201
On-board computer and displays
Z
Page 244 of 302
cleaning agents. These cleaning agents can
damage the paintwork or plastic parts.
!Make sure that the automatic car wash is
suitable for the size of the vehicle. Fold in the
exterior mirrors before the vehicle is washed.
The exterior mirrors could otherwise be dam-
aged.
!Make sure that the automatic transmission
is in position Nwhen washing your vehicle in
a tow-through car wash. The vehicle could be
damaged if the transmission is in another
position.
!Make sure that:
Rthe side windows and sliding sunroof are
closed completely.
Rthe blower for the ventilation/heating is
switched off (airflow control is turned to
position 0/the à andÁ buttons are
switched off).
Rthe windshield wiper switch is at position 0.
The vehicle could otherwise be damaged.
You can wash the vehicle in an automatic car
wash from the very start.
If the vehicle is very dirty, pre-wash it before
cleaning it in an automatic car wash.
After using an automatic car wash, wipe off wax
from the windshield and the wiper blades. This
will prevent smears and reduce wiping noises
caused by residue on the windshield.
Washing by hand
In some countries, washing by hand is only
allowed at specially equipped washing bays.
Observe the legal requirements in all countries
concerned.
When using the vehicle in winter, remove all
traces of road salt deposits carefully and as
soon as possible.
When washing the vehicle underbody, also clean the inside of the wheels.
XDo not use hot water and do not wash the
vehicle in direct sunlight.
XUse a soft sponge to clean.
XUse a mild cleaning agent, such as a car
shampoo approved by Mercedes-Benz.
XThoroughly hose down the vehicle with a gen-
tle jet of water.
XDo not point the water jet directly towards the
air inlets.
XUse plenty of water and rinse out the sponge
frequently.
XRinse the vehicle with clean water and dry
thoroughly with a chamois.
XDo not let the cleaning agent dry on the paint-
work.
Power washers
GWARNING
The water jet from a circular jet nozzle (dirt
blasters) can cause invisible exterior damage
to the tires or chassis components. Compo-
nents damaged in this way may fail unexpect-
edly. There is a risk of an accident.
Do not use power washers with circular jet
nozzles to clean the vehicle. Have damaged
tires or chassis components replaced imme-
diately.
!Always maintain a distance of at least
11.8 in (30 cm) between the vehicle and the
power washer nozzle. Information about the
correct distance is available from the equip-
ment manufacturer.
Move the power washer nozzle around when
cleaning your vehicle.
Do not aim directly at any of the following:
Rtires
Rdoor gaps, roof gaps, joints, etc.
Relectrical components
Rbattery
Rconnectors
Rlights
Rseals
Rtrim
Rventilation slots
Damaged seals or electrical components can
lead to leaks or failures.
Cleaning the wheels
!Do not use acidic wheel cleaning products
to remove brake dust. This could damage
wheel bolts and brake components.
!Do not park the vehicle for an extended
period straight after cleaning it, particularly
after having cleaned the wheels with wheel
cleaner. Wheel cleaners could cause
242Care
Maintenance and care
Page 253 of 302

should have all work involving the battery car-ried out at a qualified specialist workshop.
If ABS malfunctions, the wheels can lock during braking. This limits the steerability of the vehicle
when braking and may increase the braking dis-
tance.
If ESP
®malfunctions, the vehicle will not be sta-
bilized if it starts to skid or a wheel starts to spin.
iFor further information about ABS and
ESP®, see (Ypage 55) and (Ypage 57).
GWARNING
During the charging process, a battery produ-
ces hydrogen gas. If a short circuit occurs or
sparks are created, the hydrogen gas can
ignite. There is a risk of an explosion.
RMake sure that the positive terminal of a
connected battery does not come into con- tact with vehicle parts.
RNever place metal objects or tools on a bat-
tery.
RIt is important that you observe the descri-
bed order of the battery terminals when
connecting and disconnecting a battery.
RWhen jump-starting, make sure that the
battery poles with identical polarity are
connected.
RIt is particularly important to observe the
described order when connecting and dis-
connecting the jumper cables.
RNever connect or disconnect the battery
terminals while the engine is running.
GWARNING
Electrostatic build-up can lead to the creation of sparks, which could ignite the highly explo-
sive gases of a battery. There is a risk of an
explosion.
Before handling the battery, touch the vehicle
body to remove any existing electrostatic
build-up.
The highly flammable gas mixture forms when
charging the battery as well as when jump-start-
ing. Always make sure that neither you nor the bat-
tery is electrostatically charged. A build-up of
electrostatic charge can be caused, for exam-
ple:
Rby wearing clothing made from synthetic
fibers
Rdue to friction between clothing and seats
Rif you push or pull the battery across the car-
pet or other synthetic materials
Rif you wipe the battery with a cloth
GWARNING
Battery acid is caustic. There is a risk of injury.
Avoid contact with skin, eyes or clothing. Do
not inhale any battery gases. Do not lean over
the battery. Keep children away from batter-
ies. Wash away battery acid immediately with
plenty of clean water and seek medical atten-
tion.
!Have the battery checked regularly at a
qualified specialist workshop.
Observe the service intervals in the Mainte-
nance Booklet or contact a qualified specialist
workshop for more information.
!You should have all work involving the bat-
tery carried out at a qualified specialist work-
shop. In the exceptional case that it is neces-
sary for you to disconnect the battery your-
self, make sure that:
Ryou switch off the engine and remove the
SmartKey. Check that all the indicator
lamps in the instrument cluster are off.
Otherwise, electronic components, such as
the alternator, may be damaged.
Ryou first remove the negative terminal
clamp and then the positive terminal
clamp. Never swap the terminal clamps.
Otherwise, the vehicle's electronic system
may be damaged.
Ron vehicles with automatic transmission,
the transmission is locked in position P
after disconnecting the battery. The vehicle
is secured against rolling away. You can
then no longer move the vehicle.
The battery and the cover of the positive ter-
minal clamp must be installed securely during
operation.
Battery (vehicle)251
Breakdown assistance
Z
Page 258 of 302

XLift up cover:of positive terminal ;in the direction of the arrow.
XConnect positive terminal ;on your vehicle to positive terminal ?of donor battery Busing the
jumper cable. beginning with your own battery.
XStart the engine of the donor vehicle and run it at idling speed.
XConnect negative terminal Aof donor battery Bto ground point =of your vehicle using the
jumper cable, connecting the jumper cable to donor battery Bfirst.
XStart the engine.
XFirst, remove the jumper cables from ground point =and negative terminal A, then from pos-
itive clamp ;and positive terminal ?. Each time beginning with your vehicle's battery.
XHave the battery checked at a qualified specialist workshop.
iJump-starting is not considered to be a normal operating condition.
iJumper cables and further information regarding jump-starting can be obtained at any qualified
specialist workshop.
Towing and tow-starting
Important safety notes
GWARNING
Functions relevant to safety are restricted or
no longer available if:
Rthe engine is not running.
Rthe brake system or the power steering is
malfunctioning.
Rthere is a malfunction in the voltage supply or the vehicle's electrical system.
If your vehicle is being towed, much more
force may be necessary to steer or brake.
There is a risk of an accident.
In such cases, use a tow bar. Before towing,
make sure that the steering moves freely.
GWARNING
When towing or tow-starting another vehicle
and its weight is greater than the permissible
gross weight of your vehicle, the:
Rthe towing eye could detach itself
Rthe vehicle/trailer combination could roll-
over.
There is a risk of an accident.
When towing or tow-starting another vehicle,
its weight should not be greater than the per- missible gross weight of your vehicle.
!If DISTRONIC PLUS or the HOLD function is
activated, the vehicle brakes automatically in
certain situations. To prevent damage to the
vehicle, deactivate DISTRONIC PLUS and the
HOLD function in the following or other simi-
lar situations:
Rwhen towing the vehicle
Rin the car wash
!The vehicle can be towed a maximum of
30 miles (50km). The towing speed of 30 mph
(50 km/h) must not be exceeded.
If the vehicle has to be towed more than
30 miles (50km), the entire vehicle must be
raised and transported.
!Only secure the tow cable or tow bar to the
towing eyes. You could otherwise damage the
vehicle.
!Do not tow with sling-type equipment. This
could damage the vehicle.
!Do not use the towing eyes for recovery pur-
poses as this could damage the vehicle. If in
doubt, recover the vehicle with a crane.
!When towing, pull away slowly and
smoothly. If the tractive power is too high, the
vehicles could be damaged.
!Your vehicles is equipped with an automatic
transmission. Therefore, you must not have
the vehicle tow-started. The transmission
may otherwise be damaged.
iDetails on the permissible gross vehicle
weight of your vehicle can be found on the
vehicle identification plate (
Ypage 288).
256Towing and tow-starting
Breakdown assistance
Page 259 of 302
It is better to have the vehicle transported than
to have it towed away.
If the transfer case can be shifted into neutralN,
you can tow the vehicle.
If the transfer case cannot be shifted into neu-
tral N, you can tow the vehicle with one axle
raised. Please bear the following in mind:
Rremove the propeller shaft between the trans-
fer case and the rolling axle.
Rturn the SmartKey to position 1in the ignition
lock (Ypage 112).
The battery must be connected and charged.
Otherwise, you:
Rcannot turn the SmartKey to position 2in the
ignition lock (Ypage 112).
Rcannot shift the automatic transmission to
position N.
iDisarm the automatic locking feature before
the vehicle is towed (Ypage 66). You could
otherwise be locked out when pushing or tow-
ing the vehicle.
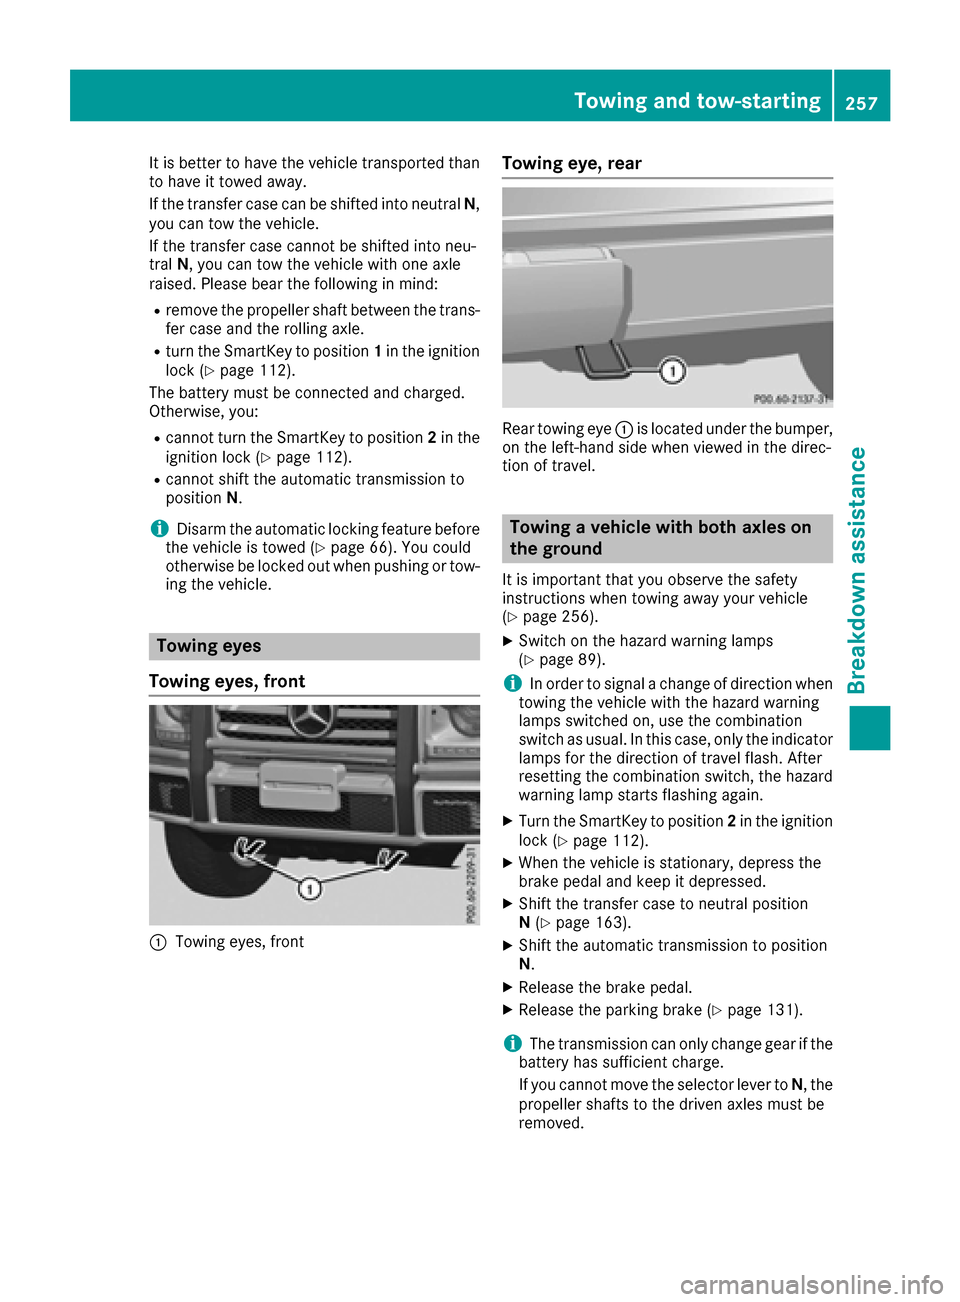
Towing eyes
Towing eyes, front
:Towing eyes, front
Towing eye, rear
Rear towing eye :is located under the bumper,
on the left-hand side when viewed in the direc-
tion of travel.
Towing a vehicle with both axles on
the ground
It is important that you observe the safety
instructions when towing away your vehicle
(
Ypage 256).
XSwitch on the hazard warning lamps
(Ypage 89).
iIn order to signal a change of direction when
towing the vehicle with the hazard warning
lamps switched on, use the combination
switch as usual. In this case, only the indicator
lamps for the direction of travel flash. After
resetting the combination switch, the hazard
warning lamp starts flashing again.
XTurn the SmartKey to position 2in the ignition
lock (Ypage 112).
XWhen the vehicle is stationary, depress the
brake pedal and keep it depressed.
XShift the transfer case to neutral position
N (Ypage 163).
XShift the automatic transmission to position
N.
XRelease the brake pedal.
XRelease the parking brake (Ypage 131).
iThe transmission can only change gear if the
battery has sufficient charge.
If you cannot move the selector lever to N, the
propeller shafts to the driven axles must be
removed.
Towing and tow-starting257
Breakdown assistance
Z
Page 260 of 302
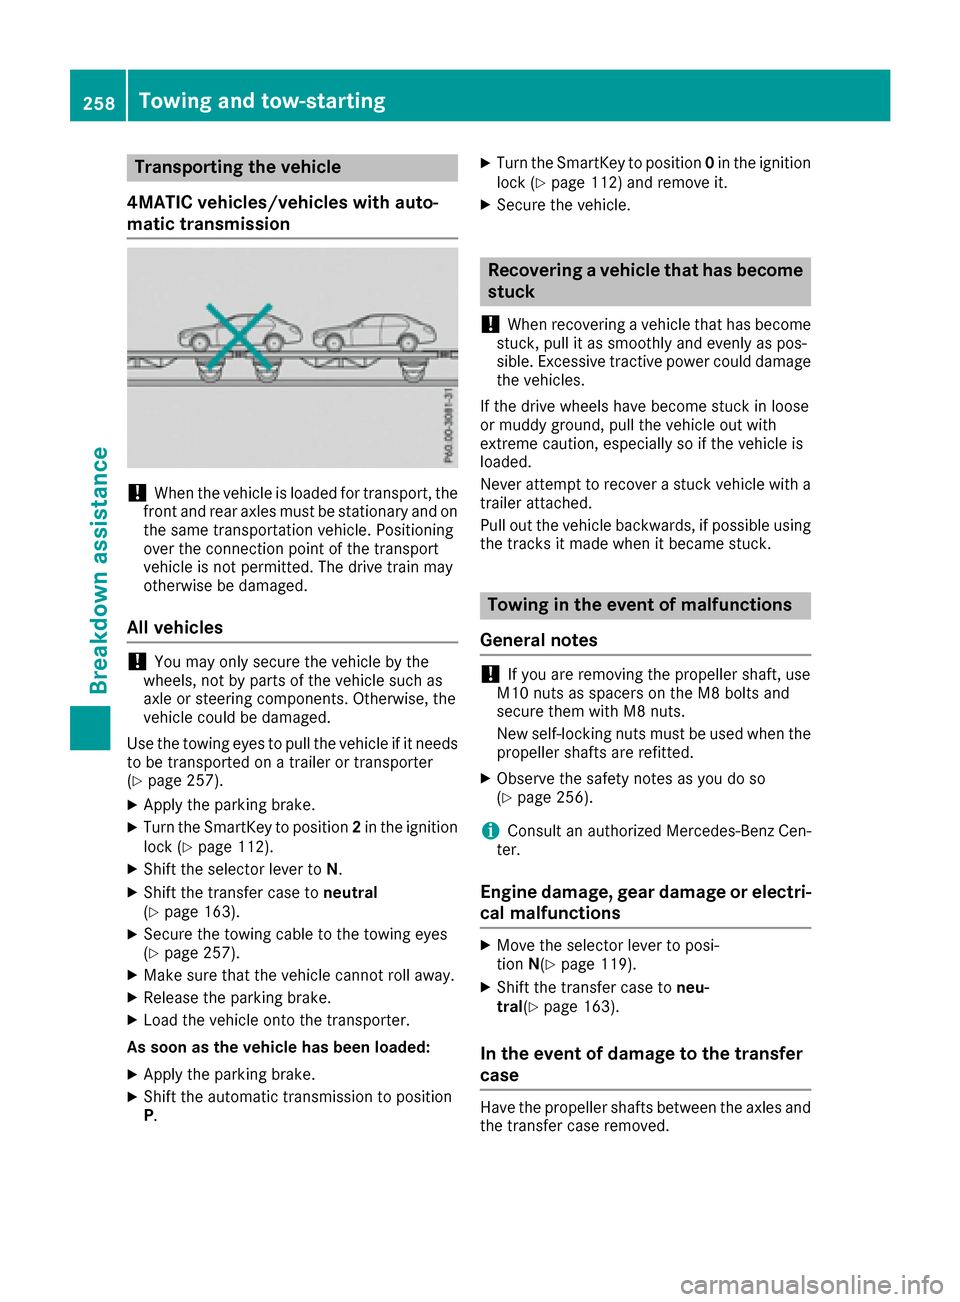
Transporting the vehicle
4MATIC vehicles/vehicles with auto-
matic transmission
!When the vehicle is loaded for transport, the
front and rear axles must be stationary and on the same transportation vehicle. Positioning
over the connection point of the transport
vehicle is not permitted. The drive train may
otherwise be damaged.
All vehicles
!You may only secure the vehicle by the
wheels, not by parts of the vehicle such as
axle or steering components. Otherwise, the
vehicle could be damaged.
Use the towing eyes to pull the vehicle if it needs
to be transported on a trailer or transporter
(
Ypage 257).
XApply the parking brake.
XTurn the SmartKey to position 2in the ignition
lock (Ypage 112).
XShift the selector lever to N.
XShift the transfer case toneutral
(Ypage 163).
XSecure the towing cable to the towing eyes
(Ypage 257).
XMake sure that the vehicle cannot roll away.
XRelease the parking brake.
XLoad the vehicle onto the transporter.
As soon as the vehicle has been loaded:
XApply the parking brake.
XShift the automatic transmission to position
P .
XTurn the SmartKey to position 0in the ignition
lock (Ypage 112) and remove it.
XSecure the vehicle.
Recovering a vehicle that has become
stuck
!
When recovering a vehicle that has become
stuck, pull it as smoothly and evenly as pos-
sible. Excessive tractive power could damage
the vehicles.
If the drive wheels have become stuck in loose
or muddy ground, pull the vehicle out with
extreme caution, especially so if the vehicle is
loaded.
Never attempt to recover a stuck vehicle with a
trailer attached.
Pull out the vehicle backwards, if possible using the tracks it made when it became stuck.
Towing in the event of malfunctions
General notes
!If you are removing the propeller shaft, use
M10 nuts as spacers on the M8 bolts and
secure them with M8 nuts.
New self-locking nuts must be used when the
propeller shafts are refitted.
XObserve the safety notes as you do so
(Ypage 256).
iConsult an authorized Mercedes-Benz Cen-
ter.
Engine damage, gear damage or electri-
cal malfunctions
XMove the selector lever to posi-
tion N(Ypage 119).
XShift the transfer case to neu-
tral (Ypage 163).
In the event of damage to the transfer
case
Have the propeller shafts between the axles and
the transfer case removed.
258Towing and tow-starting
Breakdown assistance
Page 261 of 302

In the event of damage to the front axle
Haveth epropelle rshaf tbetween th erear axl e
and th etransfer cas eremoved.
Hav eth evehicl etowed wit hth efron taxl e
raised.
In the event of damage to the rear axle
Hav eth epropelle rshaf tbetween th efron taxl e
and th etransfer cas eremoved.
Hav eth evehicl etowed wit hth erear axl eraised
and wit hwhee lroller sunder th efron taxle.
Tow-starting (emergency engine
starting)
!
Vehicles wit hautomatic transmission must
no tbe tow-started. You could otherwise dam-
age th eautomatic transmission .
You can fin dinformation on "Jump-starting "
under (
Ypage 254).
Fuses
Important safety notes
GWARNIN G
If you manipulat eor bridge afault yfus eor if
you replace it wit h afusewit h a higher amper-
age, th eelectric cables could be overloaded.
This could result in afire. Ther eis aris kof an
acciden tand injury.
Always replace fault yfuses wit hth especifie d
ne wfuses having th ecorrec tamperage .
!Only use fuses that hav ebeen approve dfor
Mercedes-Ben zvehicles and whic hhave th e
correc tfus erating for th esystem concerned.
Otherwise, component sor systems could be
damaged.
The fuses in your vehicl eserve to close down
fault ycircuits. If afus eblows ,all th ecompo -
nent son th ecircuit and their function sstop
operating .
Blown fuses must be replace dwit hfuses of th e
sam erating ,whic hyou can recognize by th e
color and value .The fus erating sare listed in th e
fus eallocation chart .
iIfafus ehas blown ,contact abreakdown
servic eor an authorize dMercedes-Ben zCen -
ter.
If anewly inserted fus ealso blows ,hav eth e
caus etrace dand rectifie dat aqualified special-
ist workshop, e.g. an authorize dMercedes-Ben z
Center.
Before changing a fuse
XPark th evehicl eand apply th eparking brake.
XSwitc hoff all electrical consumers.
XRemove th eSmartKey from th eignition lock.
All indicator lamp sin th einstrumen tcluste r
must be off .
The fuses are locate din various fus eboxes:
RMain fus ebox on th edriver' sside of th edash -
boar d
RFusebox in th efront-passenger footwell
RFus ebox in th etransmission tunne l
RFusebox in th ebattery cas e
RFusebox in th ecargo compartmen t
The fus eallocation chart and th espar efuses are
in th emain fus ebox on th edashboar d
(
Ypage 259).
You will fin dth efus eremoval device in th evehi-
cle tool kit (
Ypage 248).
Dashboard fuse box
!
Do no tuse apointe dobjec tsuc has ascrew-
driver to open th ecover in th edashboard. You
could damag eth edashboar dor th ecover .
!Makesur ethat no moisture can ente rth e
fus ebox when th ecover is open .
!When closingth ecover ,mak esur ethat it is
lyin gcorrectl yon th efus ebox .Moistur eseep -
ing in or dirt could otherwise impair th eoper -
ation of th efuses.
Fuses259
Breakdown assistance
Z