2016 MERCEDES-BENZ G-Class engine
[x] Cancel search: enginePage 90 of 302

the ignition, the automatic headlamp cleaning
system is reset and counting is resumed from 0.
Combination switch
Turn signal
:High-beam headlamps
;Turn signal, right
=High-beam flasher
?Turn signal, left
XTo indicate briefly: press the combination
switch briefly to the pressure point in the
direction of arrow ;or?.
The corresponding turn signal flashes three
times.
XTo indicate: press the combination switch
beyond the pressure point in the direction of
arrow ;or?.
High-beam headlamps
:High-beam headlamps
;Turn signal, right
=High-beam flasher
?Turn signal, left
XTo switch on the high-beam headlamps:
turn the SmartKey in the ignition lock to posi-
tion 2or start the engine.
XTurn the light switch to LorÃ.
XPress the combination switch beyond the
pressure point in the direction of arrow :.
In the Ãposition, the high-beam head-
lamps are only switched on when it is dark and
the engine is running.
The blue Kindicator lamp in the instru-
ment cluster lights up when the high-beam
headlamps are switched on.
XTo switch off the high-beam headlamps:
move the combination switch back to its nor-
mal position.
The blue Kindicator lamp in the instru-
ment cluster goes out.
High-beam flasher
:High-beam headlamps
;Turn signal, right
=High-beam flasher
?Turn signal, left
XTo switch on: turn the SmartKey in the igni-
tion lock to position 1or 2, or start the engine.
XPull the combination switch briefly in the
direction of arrow =.
88Exterior lighting
Lights andwindshield wiper s
Page 92 of 302
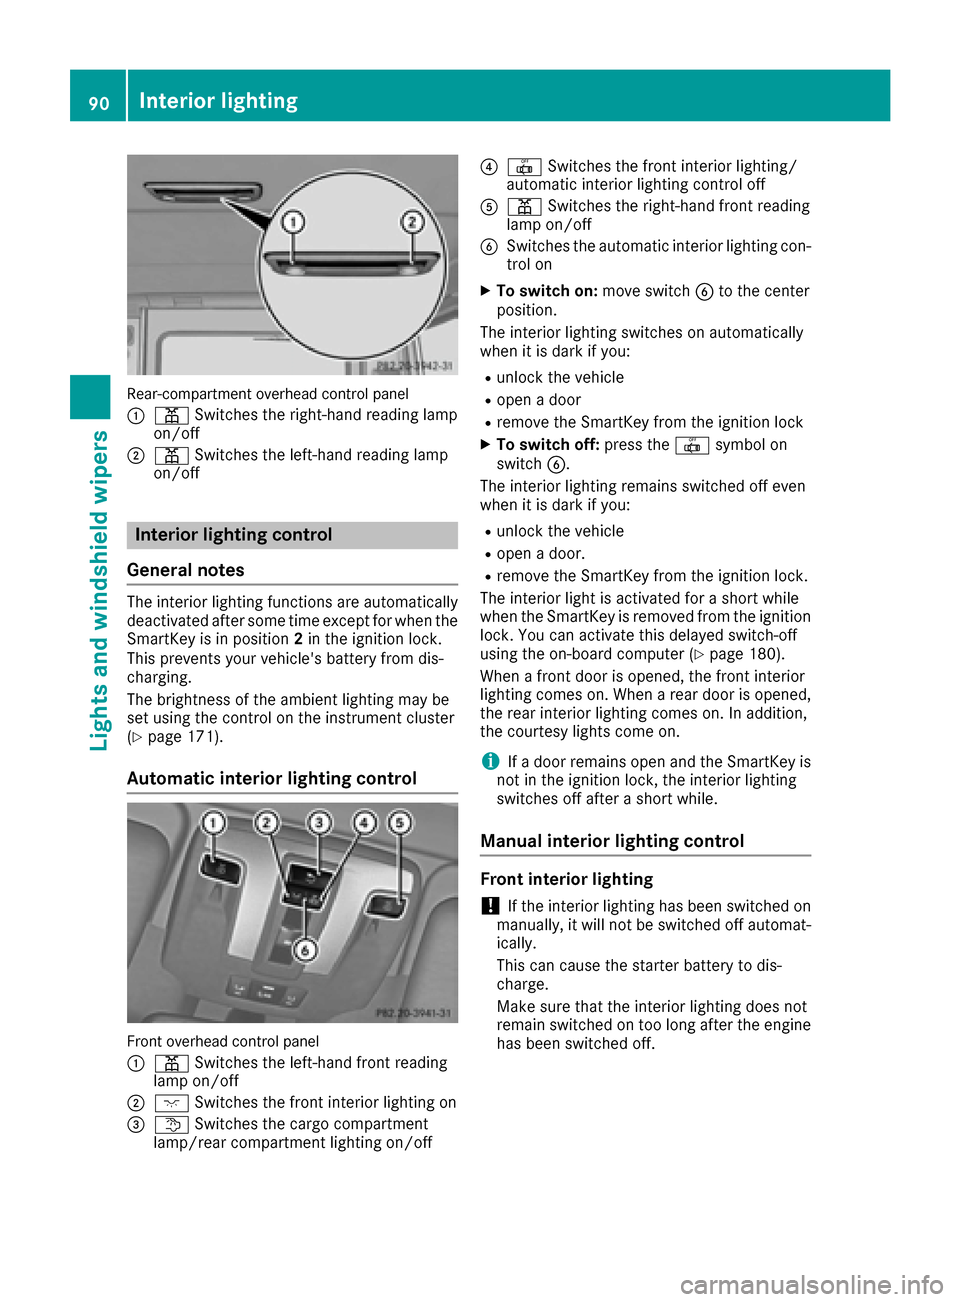
Rear-compartmentoverhead control panel
:
p Switches the right-hand read ing lamp
on/o ff
;p Switches the left-hand read ing lamp
on/o ff
Interior lighting control
General notes
The interior lighting functions are automatical ly
deactivated after some time except for whenthe
Sm artKey is in posi tion2in the igniti on lock.
This prevents your veh icle's battery fr om dis-
chargi ng.
The brightne ssofthe ambient lighting maybe
set using the co ntrol onthe instrument cluster
(
Ypage 171).
Automatic interior lighting control
Fron toverhead control panel
:
p Switches the left-hand fr ont read ing
lamp on/o ff
;cSwitches the fr ontint erior lighting on
=t Switches the cargo co mpartment
lamp/ rear co mpartment lighting on/o ff
?|Switches the fr ontint erior lighting /
automatic interior lighting control off
Ap Switches the rig ht-hand fr ont read ing
lamp on/off
BSwitches the automat icinterior lighting co n-
tr ol on
XTo switch on:mov e switch Bto the center
posi tion.
The interior lighting swit chesonautomatical ly
when it is darkifyou:
Runlock the vehicle
Ropen adoor
Rrem ove theSmartKey fr omthe igniti on lock
XToswitch off: press the|symbol on
switch B.
The interior lighting remains swit ched off even
when itis dark if you:
Runlo ck the vehicle
Ropen adoor .
Rremove theSmartKey fr omthe igniti on lock.
The interior light isactivated for a short while
when theSmartKey is rem oved from the igniti on
loc k.You can activate th isdelayed switch-off
using the on-board co mputer (
Ypage 180).
When a frontdoor isopen ed, the fr ontint erior
lighting comeson.When a rear door is open ed,
the rear interior lighting comeson.In addition ,
the courtesy lights co me on.
iIf adoor remains open and theSmartKey is
no t in the igniti onlock, the interior lighting
switches off after a short while.
Manual interior lighting control
Front interior lighting
!Ifthe interior lighting has been switched on
manually, it will notbe switched off automat-
ically.
This can cause the starter battery to dis-
charge.
Make sure that the interior lighting does not
remain switched ontoo long after the engine
has been switched off.
90Interior lighting
Lights and windshield wipers
Page 93 of 302
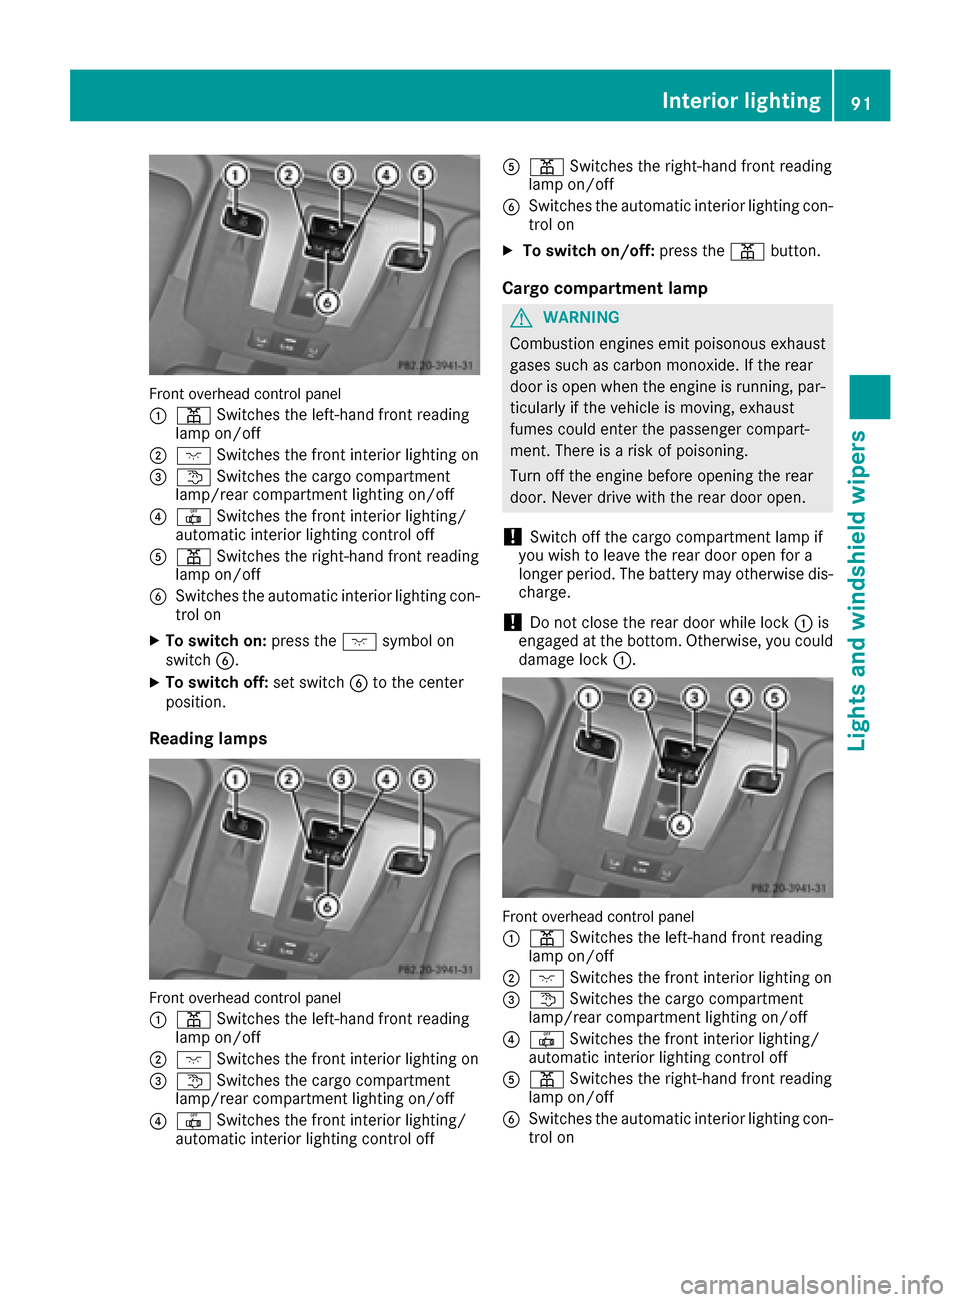
Front overhead control panel
:
pSwitches the left-hand front reading
lamp on/off
;c Switches the front interior lighting on
=tSwitches the cargo compartment
lamp/rear compartment lighting on/off
?| Switches the front interior lighting/
automatic interior lighting control off
Ap Switches the right-hand front reading
lamp on/off
BSwitches the automatic interior lighting con-
trol on
XTo switch on: press thecsymbol on
switch B.
XTo switch off: set switchBto the center
position.
Reading lamps
Front overhead control panel
:
p Switches the left-hand front reading
lamp on/off
;c Switches the front interior lighting on
=tSwitches the cargo compartment
lamp/rear compartment lighting on/off
?| Switches the front interior lighting/
automatic interior lighting control off
Ap Switches the right-hand front reading
lamp on/off
BSwitches the automatic interior lighting con-
trol on
XTo switch on/off: press thepbutton.
Cargo compartment lamp
GWARNING
Combustion engines emit poisonous exhaust
gases such as carbon monoxide. If the rear
door is open when the engine is running, par-
ticularly if the vehicle is moving, exhaust
fumes could enter the passenger compart-
ment. There is a risk of poisoning.
Turn off the engine before opening the rear
door. Never drive with the rear door open.
!Switch off the cargo compartment lamp if
you wish to leave the rear door open for a
longer period. The battery may otherwise dis-
charge.
!Do not close the rear door while lock :is
engaged at the bottom. Otherwise, you could
damage lock :.
Front overhead control panel
:
pSwitches the left-hand front reading
lamp on/off
;c Switches the front interior lighting on
=tSwitches the cargo compartment
lamp/rear compartment lighting on/off
?| Switches the front interior lighting/
automatic interior lighting control off
Ap Switches the right-hand front reading
lamp on/off
BSwitches the automatic interior lighting con-
trol on
Interior lighting91
Lights and windshield wipers
Z
Page 101 of 302
Useful information
i
This Operator's Manual describes all models
and all standard and optional equipment of
your vehicle available at the time of publica-
tion of the Operator's Manual. Country-spe-
cific differences are possible. Please note
that your vehicle may not be equipped with all
features described. This also applies to
safety-related systems and functions.
iRead the information on qualified specialist
workshops: (Ypage 23).
Overview of climate control systems
Important safety notes
Observe the settings recommended on the fol-
lowing pages. The windows could otherwise fog
up. This could prevent you from observing the
traffic conditions, thereby causing an accident.
Climate control regulates the temperature and
the humidity in the vehicle interior and filters
undesirable substances from the air.
Dual-zone automatic climate control is only
operational when the engine is running. Opti-
mum operation is only achieved if you drive with
the side windows and sliding sunroof closed.
The climatic comfort deteriorates whilst the slid-
ing sunroof is open. The automatic climate con-
trol cannot maintain the set temperature with
the sliding sunroof open. You have to adjust the
climate control manually.
iThe residual heat function can only be acti-
vated or deactivated with the ignition
switched off (
Ypage 108).
iVentilate the vehicle for a brief period during
warm weather, e.g. using the convenience
opening feature (
Ypage 68). This will speed
up the cooling process and the desired vehi-
cle interior temperature will be reached more
quickly.
iThe integrated filter can filter out most par-
ticles of dust, and completely filters out pol-
len. A clogged filter reduces the amount of air
supplied to the vehicle interior. For this rea-
son, you should always observe the interval
for replacing the filter, which is specified in
the Maintenance Booklet. As it depends on
environmental conditions, e.g. heavy air pol- lution, the interval may be shorter than stated
in the Maintenance Booklet.
Overview of climate control systems99
Climate control
Page 108 of 302
XTurn the SmartKey to position2(Ypage 112)
in the ignition lock.
XTo activate: press the¬button.
The indicator lamp in the ¬button lights
up.
The climate control system switches to the
following functions:
Rcooling with air dehumidification (only with
engine running)
Rhigh airflow (depending on the outside tem-
perature)
Rhigh temperature (depending on the out-
side temperature)
Rair distribution to the windshield and front
side windows
Rair-recirculation mode off
XTo deactivate: press the¬button.
The indicator lamp in the ¬button goes
out. The previously selected settings are
restored. The cooling with air dehumidifica-
tion function remains on. Air-recirculation
mode remains deactivated.
or
XPress the Ãbutton.
The indicator lamp in the ¬button goes
out. Airflow and air distribution are set to
automatic mode.
or
XTurn controls :orB clockwise or counter-
clockwise (Ypage 100).
or
XPress the KorI button.
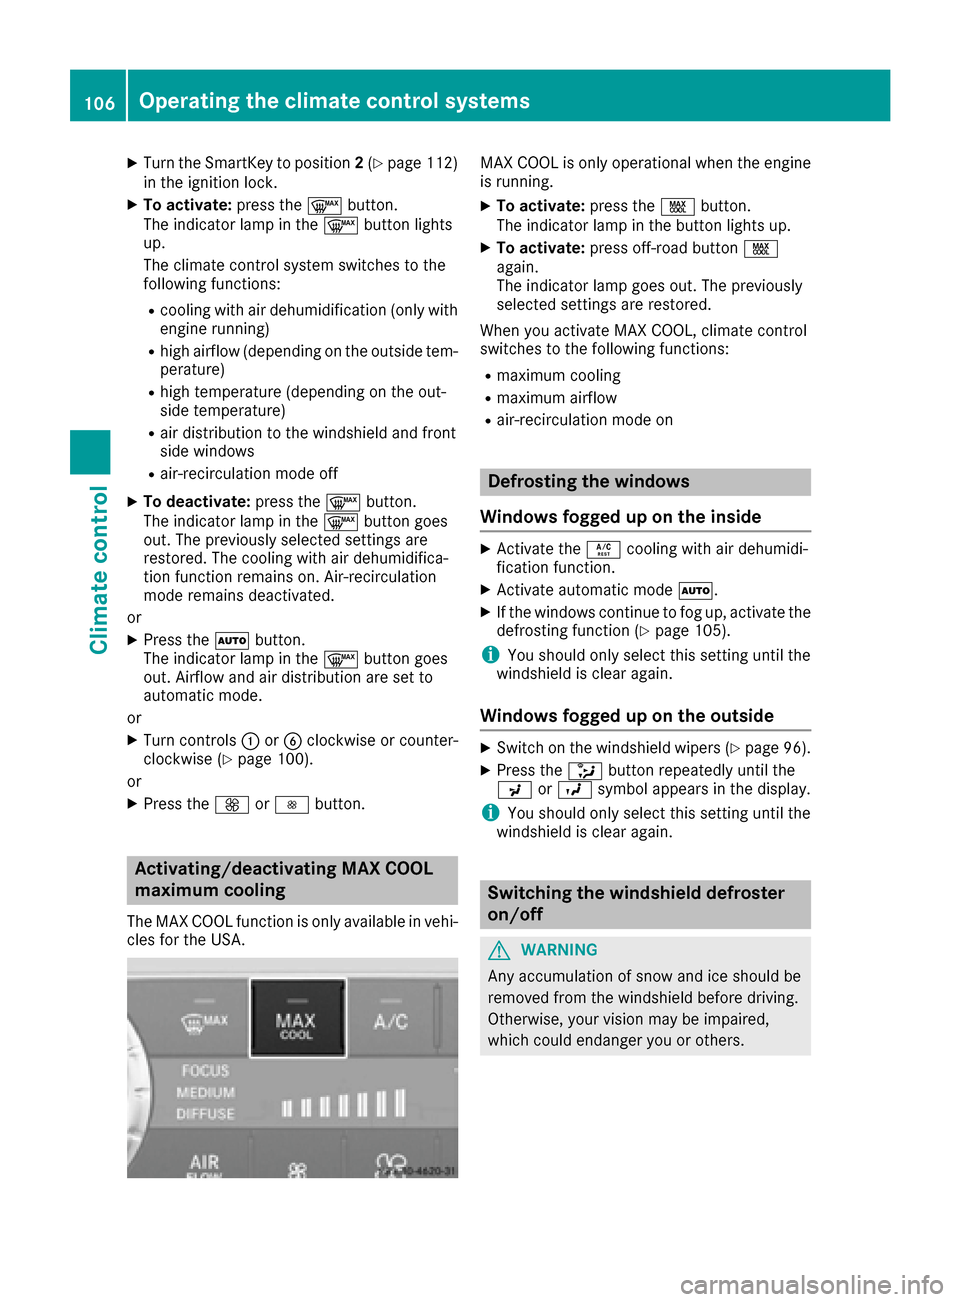
Activating/deactivating MAX COOL
maximum cooling
The MAX COOL function is only available in vehi-
cles for the USA.
MAX COOL is only operational when the engine
is running.
XTo activate: press theÙbutton.
The indicator lamp in the button lights up.
XTo activate: press off-road button Ù
again.
The indicator lamp goes out. The previously
selected settings are restored.
When you activate MAX COOL, climate control
switches to the following functions:
Rmaximum cooling
Rmaximum airflow
Rair-recirculation mode on
Defrosting the windows
Windows fogged up on the inside
XActivate the Ácooling with air dehumidi-
fication function.
XActivate automatic mode Ã.
XIf the windows continue to fog up, activate the
defrosting function (Ypage 105).
iYou should only select this setting until the
windshield is clear again.
Windows fogged up on the outside
XSwitch on the windshield wipers (Ypage 96).
XPress the _button repeatedly until the
P orO symbol appears in the display.
iYou should only select this setting until the
windshield is clear again.
Switching the windshield defroster
on/off
GWARNING
Any accumulation of snow and ice should be
removed from the windshield before driving.
Otherwise, your vision may be impaired,
which could endanger you or others.
106Operating the climate control systems
Climate control
Page 110 of 302

XTo deactivate:press thedbutton.
The indicator lamp in the dbutton goes
out.
iAir-recirculation mode switches off auto-
matically:
Rafter approximately five minutes at outside
temperatures below approximately 41 ‡
Rafter approximately five minutes if cooling
with air dehumidification is deactivated
Rafter approximately 30 minutes at outside
temperatures above approximately 41 ‡
(5 †)
Convenience opening or closing using
the air-recirculation button
GWARNING
When the convenience closing feature is oper- ating, parts of the body could become trapped
in the closing area of the side window and the
sliding sunroof. There is a risk of injury.
Observe the complete closing procedure
when the convenience closing feature is oper-
ating. Make sure that no body parts are in
close proximity during the closing procedure.
GWARNING
During convenience opening parts of the body could be drawn in or become trapped
between the side window and window frame.
There is a risk of injury.
Make sure that nobody touches the side win-
dow during the opening procedure. If some-
one becomes trapped, immediately press
the W switch in the door to stop the move-
ment of the side windows. To continue closing
the side window, pull on the Wswitch.
XConvenience closing feature: press and
hold the grocker switch up or down until
the side windows and the sliding sunroof start
to close automatically.
The indicator lamp above the grocker
switch lights up. Air-recirculation mode is
activated.
If you manually open the side windows or the
sliding sunroof after closing with the conve- nience closing feature, they will remain in this
position when opened.
If parts of the body are in the closing area during
convenience closing, proceed as follows:
XPress the Wbutton to stop the side win-
dows.
The side window stops.
XTo then open the side windows, press the
W button again.
XPress the 3switch to stop the sliding sun-
roof.
The sliding sunroof stops.
XTo then open the sliding sunroof, pull back on
the 3 switch.
XConvenience opening feature: press and
hold the grocker switch up or down until
the side windows and the sliding sunroof start
to open automatically.
The indicator lamp above the grocker
switch goes out. Air-recirculation mode is
deactivated.
Activating/deactivating the residual
heat function
The "residual heat" function is only available in
Canada.
It is possible to make use of the residual heat of
the engine to continue heating the stationary
vehicle for up to 30 minutes after the engine has
been switched off. The heating time depends on the coolant temperature and on the interior tem-
perature that has been set.
iThe blower will run at a low speed regardless
of the airflow setting.
iIf you activate the residual heat function at
high temperatures, only the ventilation will be
activated.
XTurn the SmartKey to position 0(Ypage 112)
in the ignition lock or remove it.
XTo activate: press theÁbutton.
The indicator lamp in the Ábutton lights
up.
108Operating the climate control systems
Climate control
Page 113 of 302
Useful information
i
This Operator's Manual describes all models
and all standard and optional equipment of
your vehicle available at the time of publica-
tion of the Operator's Manual. Country-spe-
cific differences are possible. Please note
that your vehicle may not be equipped with all
features described. This also applies to
safety-related systems and functions.
iRead the information on qualified specialist
workshops: (Ypage 23).
Notes on breaking-in a new vehicle
Important safety notes
New and replaced brake pads and discs only
reach their optimum braking effect after several
hundred kilometers of driving. Compensate for
this by applying greater force to the brake pedal.
The first 1000 miles (1500 km)
The more you look after the engine when it is
new, the more satisfied you will be with its per-
formance in the future.
RYou should therefore drive at varying vehicle
and engine speeds for the first 1,000 miles
(1,500 km).
RAvoid heavy loads, e.g. driving at full throttle, during this period.
RChange gear in good time, before the tach-
ometer needle is Ôof the way to the red area
of the tachometer.
RDo not manually shift to a lower gear to brake
the vehicle.
RTry to avoid depressing the accelerator pedal
beyond the point of resistance (kickdown).
ROnly select shift ranges 3,2or 1when driving
slowly, e.g. in mountainous terrain.
After 1,000 miles (1,500 km), you can increase
the engine speed gradually and bring the vehicle
to full speed.
Additional breaking-in notes for AMG vehicles:
RDo not drive faster than 85 mph (140 km/ h)
for the first 1,000 miles (1,500 km).
ROnly allow the engine to reach a maximum
engine speed of 4,500 rpm briefly.
RChange gear in good time.
RAvoid driving off-road before the differential
oil change at 2,000 miles (3,000 km).
RIdeally, for the first 1,000 miles (1,500 km),
drive in program C.
iYou should also observe these breaking-in
notes if the engine or parts of the drive train
on your vehicle have been replaced.
iAlways observe the respective speed limits.
AMG vehicles with self-locking rear
axle differential
Change the oil after a breaking-in period of
2,000 mile s(3,000 km) to improve protection of
the differential. This oil change prolongs the ser-
vice life of the differential. Have the oil change
carried out at a qualified specialist workshop.
Mercedes-Benz recommends that you use an
authorized Mercedes-Benz Center for this pur-
pose.
Driving
Important safety notes
GWARNING
Objects in the driver's footwell can restrict the pedal travel or obstruct a depressed pedal.
The operating and road safety of the vehicle is
jeopardized. There is a risk of an accident.
Make sure that all objects in the vehicle are
stowed correctly, and that they cannot enter
the driver's footwell. Install the floormats
securely and as specified in order to ensure
sufficient clearance for the pedals. Do not use
loose floormats and do not place floormats on
top of one another.
GWARNING
Unsuitable footwear can hinder correct usage of the pedals, e.g.:
Rshoes with thick soles
Rshoes with high heels
Rslippers
There is a risk of an accident.
Driving111
Driving and parking
Z
Page 114 of 302

Wear suitable footwear to ensure correct
usage of the pedals.
GWARNING
If you switch off the ignition while driving,
safety-relevant functions are only available
with limitations, or not at all. This could affect, for example, the power steering and the brake
boosting effect. You will require considerably
more effort to steer and brake. There is a risk
of an accident.
Do not switch off the ignition while driving.
GWARNING
If the parking brake has not been fully
released when driving, the parking brake can:
Roverheat and cause a fire
Rlose its hold function.
There is a risk of fire and an accident. Release
the parking brake fully before driving off.
!Warm up the engine quickly. Do not use the
engine's full performance until it has reached
operating temperature.
Only shift the automatic transmission to the
desired drive position when the vehicle is sta-
tionary.
Where possible, avoid spinning the drive
wheels when pulling away on slippery roads.
You could otherwise damage the drive train.
!Avoid high engine speeds when the engine
is cold. The engine's service life could other-
wise be significantly shortened. Do not use
the engine's full performance until it has
reached operating temperature.
!AMG vehicles: at low engine oil tempera-
tures below 68 ‡ (+20 †), the maximum
engine speed is restricted in order to protect the engine. To protect the engine and main-
tain smooth engine operation, avoid driving at
full throttle when the engine is cold.
SmartKey positions
gTo remove the SmartKey
1Power supply for some consumers, such as
the windshield wipers
2Ignition (power supply for all consumers)
and drive position
3To start the engine
As soon as the ignition is switched on, all the
indicator lamps in the instrument cluster light
up. If an indicator lamp does not go out after
starting the engine or lights up while driving, see
(
Ypage 205).
If the SmartKey is in position 0in the ignition
lock for an extended period of time, it can no
longer be turned in the ignition lock. The steer-
ing is then locked. To unlock, remove the Smart-
Key and reinsert it into the ignition lock.
The steering is locked when you remove the
SmartKey from the ignition lock.
XRemove the SmartKey when the engine is
switched off.
The starter battery could otherwise be dis-
charged.
If you cannot turn the SmartKey in the ignition
lock, the starter battery may not be charged
sufficiently.
XCheck the starter battery and charge it if nec-
essary (Ypage 252).
or
XJump-start the vehicle (Ypage 254).
iYou can only remove the SmartKey if:
Rthe SmartKey is in position 0in the ignition
lock.
Rthe automatic transmission selector lever
is in P.
112Driving
Driving and parking