2016 MERCEDES-BENZ AMG GT ROADSTER oil capacity
[x] Cancel search: oil capacityPage 13 of 289

Checking the oil level using the
dipstick .......................................... 233
Checking the oil level using the
on-board computer ........................ 234
Display message ............................ 184
Filling capacity .............................. .279
Notes about oil grades ................... 279
Notes on oil level/consumption .... 233
Temperature (on-board com-
puter) ............................................. 167
Topping up ..................................... 234
Entering an address
See also Digital Owner's Manual ... 205
Environmental protection
Returning an end-of-life vehicle ....... 22
ESP ®
(Electronic Stability Pro-
gram)
AMG menu (on-board computer) ... 168
Characteristics ................................. 58
Deactivating/activating ................... 58
Display message ............................ 172
Function/notes ................................ 57
General notes .................................. 57
Important safety guidelines ............. 58
Warning lamp ................................. 197
ETS/4ETS (Electronic Traction Sys-
tem) ...................................................... 58
Exhaust pipe (cleaning instruc-
tions) ................................................. .242
Exterior lighting
Cleaning ......................................... 241
see Lights
Exterior mirrors
Adjusting ......................................... 84
Anti-dazzle mode (automatic) .......... 85
Folding in/out (automatically) ......... 85
Folding in/out (electrically) ............. 85
Out of position (troubleshooting) ..... 85
Parking position ............................... 86
Resetting ......................................... 85
Storing settings (memory func-
tion) ................................................. 87 F
Fault message see Display messages Favourites
Overview ........................................ 208
Features ............................................. 220
Filler cap
see Fuel filler flap
Fire extinguisher ............................... 245
First-aid kit ......................................... 245
Fitting a wheel
Fitting a wheel ............................... 271
Lowering the vehicle ...................... 272
Preparing the vehicle ..................... 268
Raising the vehicle ......................... 269
Removing a whee l.......................... 270
Securing the vehicle against roll-
ing away ........................................ 268
Flat tyre
Changing a wheel/fitting the
spare whee l................................... 267
Preparing the vehicle ..................... 247
TIREFIT kit ...................................... 247
see Emergency spare wheel
Floormat ............................................. 230
Frequencies
Garage door opener ....................... 228
Mobile phone ................................. 275
Two-way radio ................................ 275
Front-passenger front airbag deac-
tivation system
Operation ......................................... 42
Problems ......................................... 45
System self-test ............................... 44
Fuel
Additives ........................................ 279
Consumption statistics .................. 158
Displaying the current consump-
tion ................................................ 158
Displaying the range ...................... 158
Driving tip s.................................... 123
E10 ................................................ 278
Fuel gauge ....................................... 29
Grade (petrol) ................................ 278
Important safety notes .................. 277
Problem (malfunction) ................... 119
Refuelling ....................................... 117
Tank content/reserve fue l............. 278
Fuel filler flap
Closing ........................................... 118
General information ....................... 118 10
Index
Page 272 of 289

If your vehicle is equipped with a wheel chock, it
can be found in the tyre-change tool kit
(Y page 246).
The folding wheel chock is an additional secur-
ing measure to safeguard the vehicle from roll-
ing away, for example when changing a wheel.
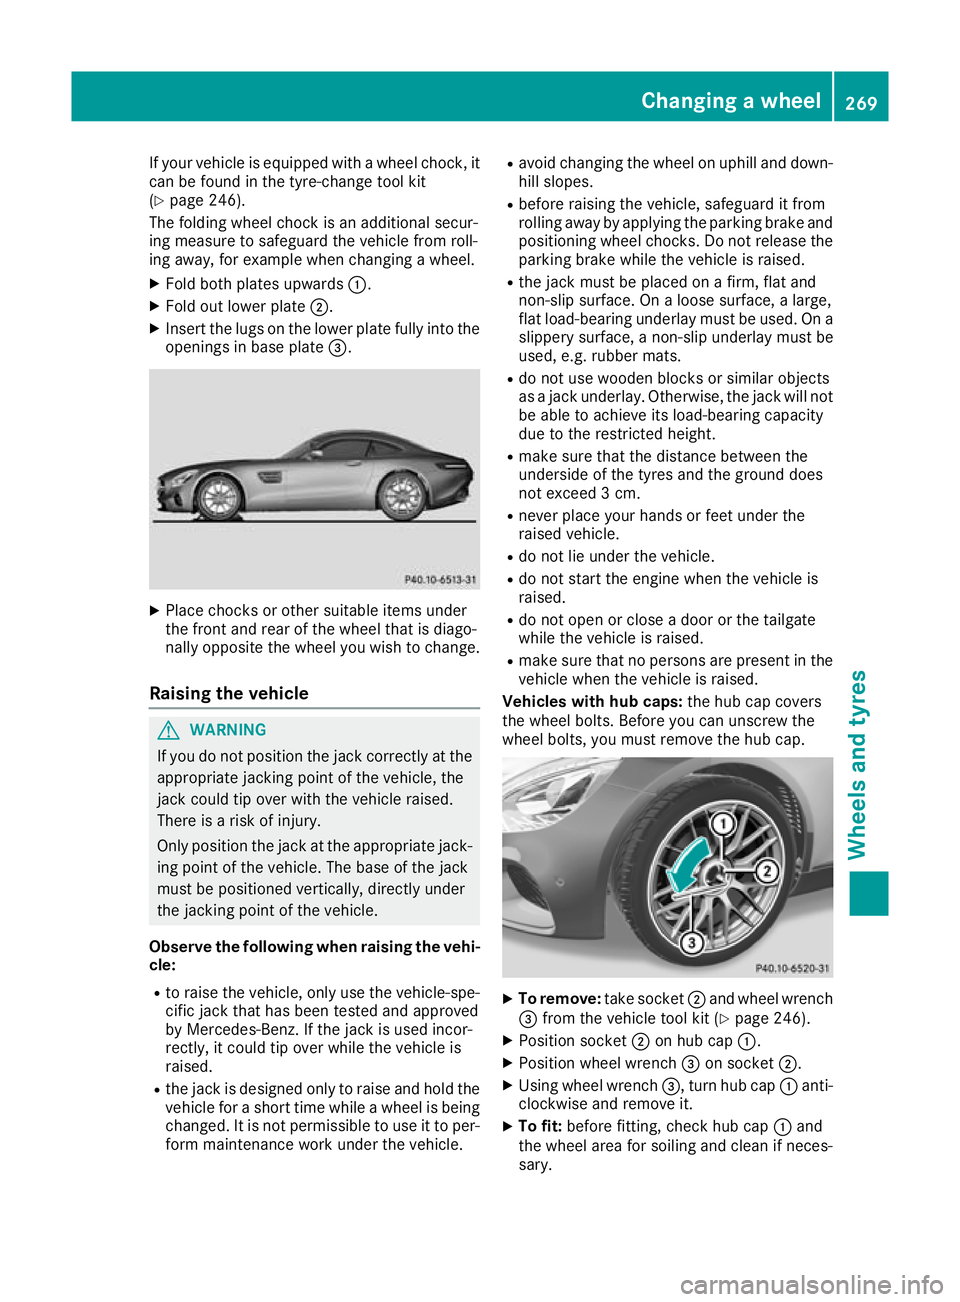
X Fold both plates upwards :.
X Fold out lower plate ;.
X Insert the lugs on the lower plate fully into the
openings in base plate =.X
Place chocks or other suitable items under
the front and rear of the wheel that is diago-
nally opposite the wheel you wish to change.
Raising the vehicle G
WARNING
If you do not position the jack correctly at the appropriate jacking point of the vehicle, the
jack could tip over with the vehicle raised.
There is a risk of injury.
Only position the jack at the appropriate jack-
ing point of the vehicle. The base of the jack
must be positioned vertically, directly under
the jacking point of the vehicle.
Observe the following when raising the vehi- cle:
R to raise the vehicle, only use the vehicle-spe-
cific jack that has been tested and approved
by Mercedes-Benz. If the jack is used incor-
rectly, it could tip over while the vehicle is
raised.
R the jack is designed only to raise and hold the
vehicle for a short time while a wheel is being
changed. It is not permissible to use it to per- form maintenance work under the vehicle. R
avoid changing the wheel on uphill and down-
hill slopes.
R before raising the vehicle, safeguard it from
rolling away by applying the parking brake and
positioning wheel chocks. Do not release theparking brake while the vehicle is raised.
R the jack must be placed on a firm, flat and
non-slip surface. On a loose surface, a large,
flat load-bearing underlay must be used. On a
slippery surface, a non-slip underlay must be
used, e.g. rubber mats.
R do not use wooden blocks or similar objects
as a jack underlay. Otherwise, the jack will not
be able to achieve its load-bearing capacity
due to the restricted height.
R make sure that the distance between the
underside of the tyres and the ground does
not exceed 3 cm.
R never place your hands or feet under the
raised vehicle.
R do not lie under the vehicle.
R do not start the engine when the vehicle is
raised.
R do not open or close a door or the tailgate
while the vehicle is raised.
R make sure that no persons are present in the
vehicle when the vehicle is raised.
Vehicles with hub caps: the hub cap covers
the wheel bolts. Before you can unscrew the
wheel bolts, you must remove the hub cap. X
To remove: take socket;and wheel wrench
= from the vehicle tool kit (Y page 246).
X Position socket ;on hub cap :.
X Position wheel wrench =on socket ;.
X Using wheel wrench =, turn hub cap:anti-
clockwise and remove it.
X To fit: before fitting, check hub cap :and
the wheel area for soiling and clean if neces-
sary. Changing a wheel
269Wheels and tyres Z