2016 MERCEDES-BENZ AMG GT ROADSTER ESP
[x] Cancel search: ESPPage 154 of 289
The speed limit no longer applies
:.
i The unit for the speed limit (km/h or mph)
depends on the country in which you are driv-
ing. It is generally neither shown on the traffic
sign nor on the instrument cluster but must be
taken into account when observing the max-
imum permitted speed.
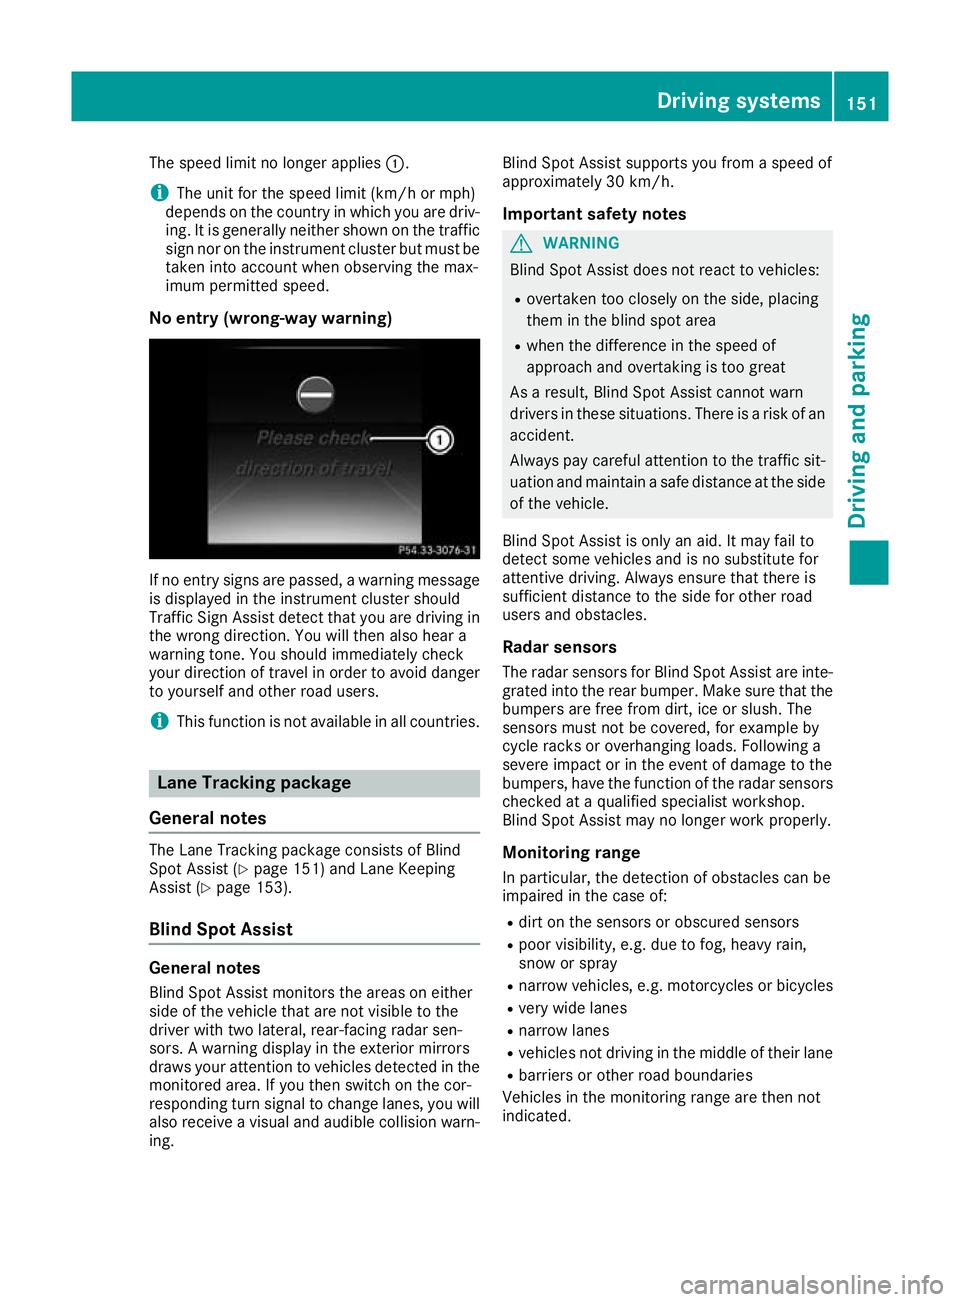
No entry (wrong-way warning) If no entry signs are passed, a warning message
is displayed in the instrument cluster should
Traffic Sign Assist detect that you are driving in the wrong direction. You will then also hear a
warning tone. You should immediately check
your direction of travel in order to avoid danger
to yourself and other road users.
i This function is not available in all countries. Lane Tracking package
General notes The Lane Tracking package consists of Blind
Spot Assist (Y page 151) and Lane Keeping
Assist (Y page 153).
Blind Spot Assist General notes
Blind Spot Assist monitors the areas on either
side of the vehicle that are not visible to the
driver with two lateral, rear-facing radar sen-
sors. A warning display in the exterior mirrors
draws your attention to vehicles detected in the
monitored area. If you then switch on the cor-
responding turn signal to change lanes, you will also receive a visual and audible collision warn-
ing. Blind Spot Assist supports you from a speed of
approximately 30 km/h.
Important safety notes G
WARNING
Blind Spot Assist does not react to vehicles:
R overtaken too closely on the side, placing
them in the blind spot area
R when the difference in the speed of
approach and overtaking is too great
As a result, Blind Spot Assist cannot warn
drivers in these situations. There is a risk of an accident.
Always pay careful attention to the traffic sit- uation and maintain a safe distance at the side
of the vehicle.
Blind Spot Assist is only an aid. It may fail to
detect some vehicles and is no substitute for
attentive driving. Always ensure that there is
sufficient distance to the side for other road
users and obstacles. Radar sensors
The radar sensors for Blind Spot Assist are inte-
grated into the rear bumper. Make sure that the bumpers are free from dirt, ice or slush. The
sensors must not be covered, for example by
cycle racks or overhanging loads. Following a
severe impact or in the event of damage to the
bumpers, have the function of the radar sensors
checked at a qualified specialist workshop.
Blind Spot Assist may no longer work properly.
Monitoring range In particular, the detection of obstacles can be
impaired in the case of:
R dirt on the sensors or obscured sensors
R poor visibility, e.g. due to fog, heavy rain,
snow or spray
R narrow vehicles, e.g. motorcycles or bicycles
R very wide lanes
R narrow lanes
R vehicles not driving in the middle of their lane
R barriers or other road boundaries
Vehicles in the monitoring range are then not
indicated. Driving systems
151Driving and parking Z
Page 155 of 289
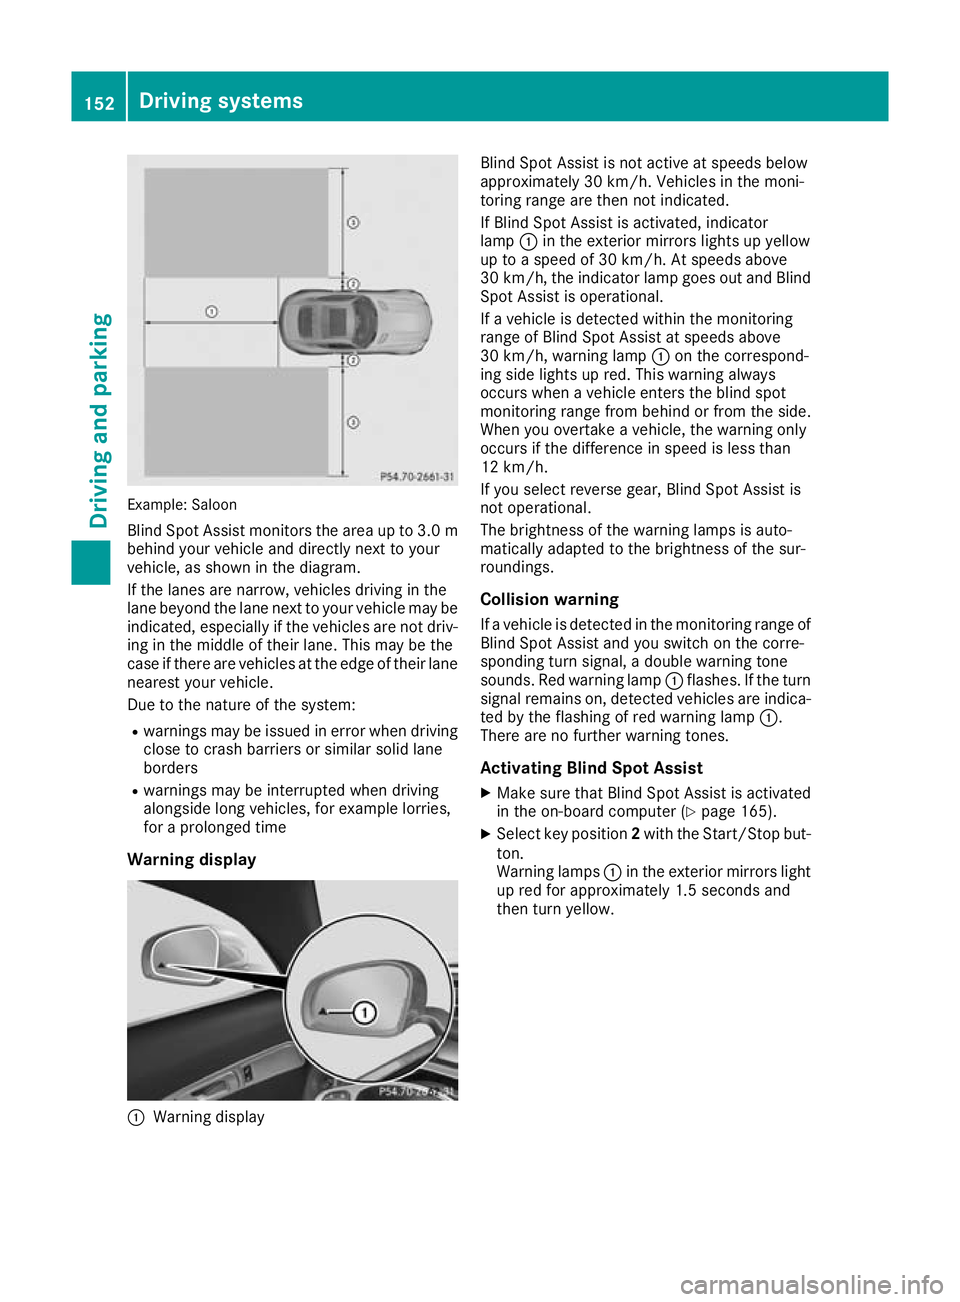
Example: Saloon
Blind Spot Assist monitors the area up to 3.0 m
behind your vehicle and directly next to your
vehicle, as shown in the diagram.
If the lanes are narrow, vehicles driving in the
lane beyond the lane next to your vehicle may be
indicated, especially if the vehicles are not driv-
ing in the middle of their lane. This may be the
case if there are vehicles at the edge of their lane nearest your vehicle.
Due to the nature of the system:
R warnings may be issued in error when driving
close to crash barriers or similar solid lane
borders
R warnings may be interrupted when driving
alongside long vehicles, for example lorries,
for a prolonged time
Warning display :
Warning display Blind Spot Assist is not active at speeds below
approximately 30 km/h. Vehicles in the moni-
toring range are then not indicated.
If Blind Spot Assist is activated, indicator
lamp :in the exterior mirrors lights up yellow
up to a speed of 30 km/h. At speeds above
30 km/h, the indicator lamp goes out and Blind
Spot Assist is operational.
If a vehicle is detected within the monitoring
range of Blind Spot Assist at speeds above
30 km/h, warning lamp :on the correspond-
ing side lights up red. This warning always
occurs when a vehicle enters the blind spot
monitoring range from behind or from the side.
When you overtake a vehicle, the warning only
occurs if the difference in speed is less than
12 km/h.
If you select reverse gear, Blind Spot Assist is
not operational.
The brightness of the warning lamps is auto-
matically adapted to the brightness of the sur-
roundings.
Collision warning
If a vehicle is detected in the monitoring range of
Blind Spot Assist and you switch on the corre-
sponding turn signal, a double warning tone
sounds. Red warning lamp :flashes. If the turn
signal remains on, detected vehicles are indica-
ted by the flashing of red warning lamp :.
There are no further warning tones.
Activating Blind Spot Assist X Make sure that Blind Spot Assist is activated
in the on-board computer (Y page 165).
X Select key position 2with the Start/Stop but-
ton.
Warning lamps :in the exterior mirrors light
up red for approximately 1.5 second s and
then turn yellow. 152
Driving systemsDriving an
d parking
Page 156 of 289
Lane Keeping Assist
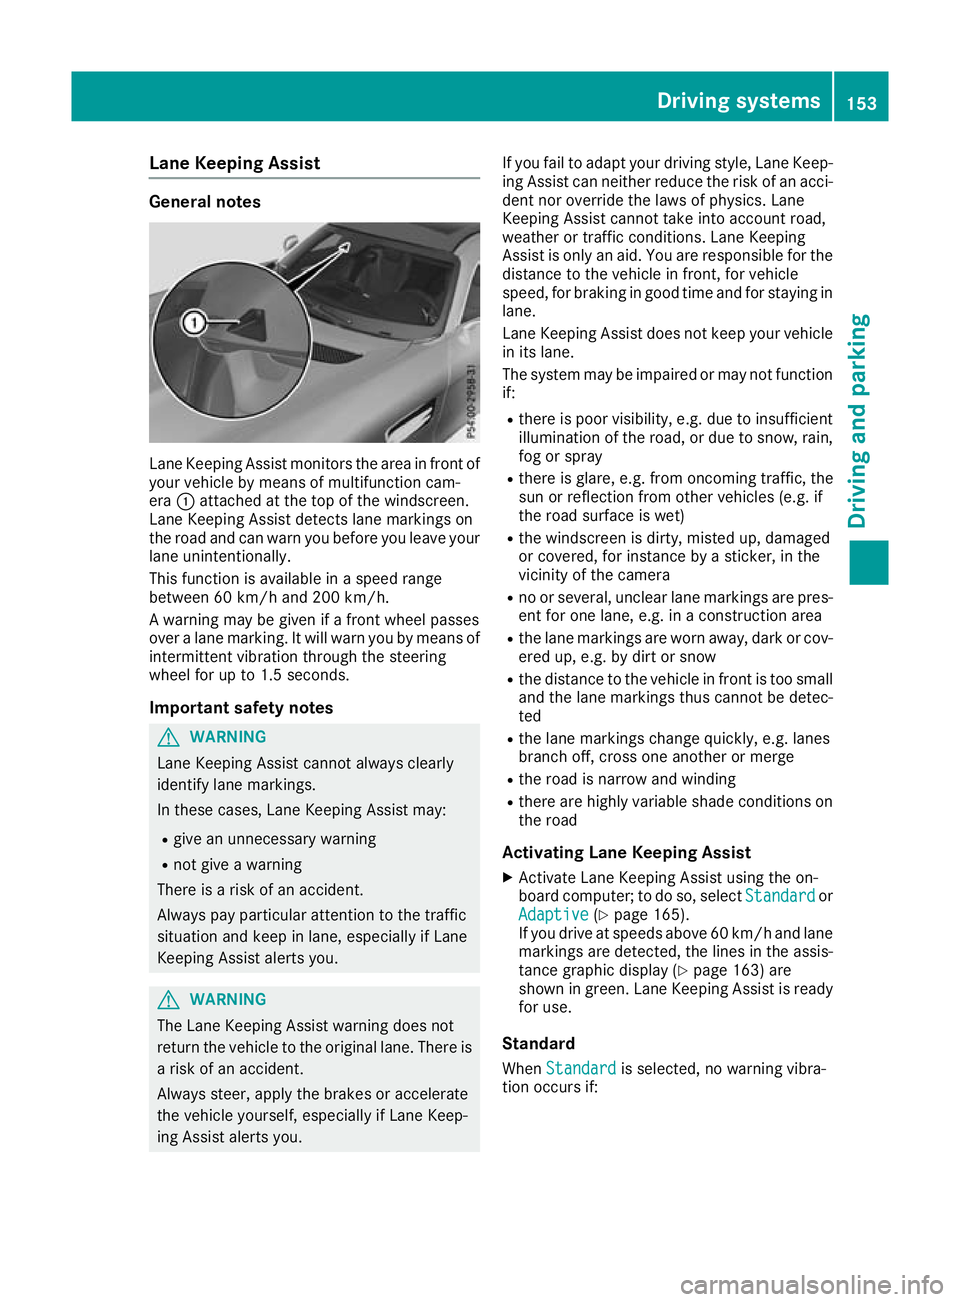
General notes
Lane Keeping Assist monitors the area in front of
your vehicle by means of multifunction cam-
era :attached at the top of the windscreen.
Lane Keeping Assist detects lane markings on
the road and can warn you before you leave your lane unintentionally.
This function is available in a speed range
between 60 km/h and 200 km/h.
A warning may be given if a front wheel passes
over a lane marking. It will warn you by means of intermittent vibration through the steering
wheel for up to 1.5 seconds.
Important safety notes G
WARNING
Lane Keeping Assist cannot always clearly
identify lane markings.
In these cases, Lane Keeping Assist may:
R give an unnecessary warning
R not give a warning
There is a risk of an accident.
Always pay particular attention to the traffic
situation and keep in lane, especially if Lane
Keeping Assist alerts you. G
WARNING
The Lane Keeping Assist warning does not
return the vehicle to the original lane. There is a risk of an accident.
Always steer, apply the brakes or accelerate
the vehicle yourself, especially if Lane Keep-
ing Assist alerts you. If you fail to adapt your driving style, Lane Keep-
ing Assist can neither reduce the risk of an acci-
dent nor override the laws of physics. Lane
Keeping Assist cannot take into account road,
weather or traffic conditions. Lane Keeping
Assist is only an aid. You are responsible for the distance to the vehicle in front, for vehicle
speed, for braking in good time and for staying in
lane.
Lane Keeping Assist does not keep your vehicle
in its lane.
The system may be impaired or may not function if:
R there is poor visibility, e.g. due to insufficient
illumination of the road, or due to snow, rain,fog or spray
R there is glare, e.g. from oncoming traffic, the
sun or reflection from other vehicles (e.g. if
the road surface is wet)
R the windscreen is dirty, misted up, damaged
or covered, for instance by a sticker, in the
vicinity of the camera
R no or several, unclear lane markings are pres-
ent for one lane, e.g. in a construction area
R the lane markings are worn away, dark or cov-
ered up, e.g. by dirt or snow
R the distance to the vehicle in front is too small
and the lane markings thus cannot be detec-
ted
R the lane markings change quickly, e.g. lanes
branch off, cross one another or merge
R the road is narrow and winding
R there are highly variable shade conditions on
the road
Activating Lane Keeping Assist
X Activate Lane Keeping Assist using the on-
board computer; to do so, select Standard Standardor
Adaptive
Adaptive (Ypage 165).
If you drive at speeds above 60 km/h and lane
markings are detected, the lines in the assis- tance graphic display (Y page 163) are
shown in green. Lane Keeping Assist is ready
for use.
Standard When Standard Standard is selected, no warning vibra-
tion occurs if: Driving systems
153Driving and parking Z
Page 157 of 289
R
you have switched on the turn signal. In this
case, the warnings are suppressed for a cer-
tain period of time.
R a driving safety system intervenes, such as
ABS, BAS or ESP ®
.
Adaptive When Adaptive
Adaptive is selected, no warning vibra-
tion occurs if:
R you have switched on the turn signal. In this
case, the warnings are suppressed for a cer-
tain period of time.
R a driving safety system intervenes, such as
ABS, BAS or ESP ®
.
R you accelerate hard, e.g. kickdown.
R you brake hard.
R you steer actively, e.g. swerve to avoid an
obstacle or change lane quickly.
R you cut the corner on a sharp bend.
In order that you are warned only when neces-
sary and in good time if you cross the lane mark-
ing, the system detects certain conditions and
warns you accordingly.
The warning vibration occurs earlier if:
R you approach the outer lane marking on a
bend
R the road has very wide lanes, e.g. a motorway
R the system detects solid lane markings
The warning vibration occurs later if:
R the road has narrow lanes
R you cut the corner on a bend 154
Driving systemsDriving and pa
rking
Page 164 of 289

position is displayed along with station
;only if
this has been stored.
You can store stations ;in the multimedia sys-
tem.
X Switch on the multimedia system; see sepa-
rate operating instructions.
X Press òon the steering wheel to open the
menu list.
X Press :or9 on the steering wheel to
select the Radio
Radio menu.
X Confirm by pressing aon the steering
wheel.
Currently set station ;appears in the multi-
function display.
X To open the station list: press:or9
briefly.
X To select a station in the station list:
press :or9 briefly.
X To select a station in the station list using
rapid scroll: press and hold :or9.
X To select the frequency range or station
memory: pressabriefly.
X Press :or9 to select the frequency
range or station memory.
X Press ato confirm your selection.
i DAB radio mode (Digital
AudioBroadcast-
ing) is an optimised digital transmission
standard designed for the mobile reception of
radio transmissions. Media menu
Changing the media source You can change the media source and playback
mode (audio or video) at any time in the Media Media
menu.
X Switch on the multimedia system (see sepa-
rate operating instructions).
X Press òon the steering wheel to open the
menu list.
X Press :or9 on the steering wheel to
select the Media
Media menu.
X Confirm by pressing aon the steering
wheel.
X To open/close the media sources
list:
press abriefly.
The list shows the following media sources,
for example: R
disc (CD/DVD) (DVD COMAND Online
only)
R SD card (COMAND Online)
R Media Register (COMAND Online)
R USB storage device
R Bluetooth ®
capable audio device
Please observe further information on media
support and media operation in the multimedia
system (see separate operating instructions).
Operating the audio player or audio
media :
Media source, e.g. name of USB memory
stick
; Current track
= Name of artist
? Name of album
A Folder name
Audio files from various audio players or media
can be played, depending on the equipment fit- ted in the vehicle.
X Switch on the multimedia system (see sepa-
rate operating instructions).
X Use ò on the steering wheel to call up the
list of menus.
X Press :or9 on the steering wheel to
select the Media Mediamenu.
X Confirm by pressing aon the steering
wheel.
X To select audio player or data carrier: press
a briefly, to open the list of media sour-
ces.
X Press :or9 to select the correspond-
ing audio player or media.
X Press ato confirm.
X To open the track list: press:or9
briefly. Menus and submenus
161On-board computer and displays Z
Page 165 of 289

X
To select the next or previous track in the
track list: press:or9 briefly.
X To select a track from the track list using
rapid scrolling: press and hold:or9
until the desired track is reached.
If you press and hold the button, the speed of rapid scroll increases after a short time. Not
all audio players or media support this func-
tion.
If the corresponding track information is stored
on the audio drive or audio media, the multi-
function display may display the following:
R track number
R track name
R artist
R album
DVD-Video operation X
Switch on the multimedia system (see sepa-
rate operating instructions).
X Use ò on the steering wheel to call up the
list of menus.
X Press :or9 on the steering wheel to
select the Media
Media menu.
X Confirm by pressing aon the steering
wheel.
X To select DVD single drive or data
medium:
pressabriefly, to open the list
of media sources.
X Press :or9 to select the correspond-
ing DVD single drive or disc.
X Press ato confirm.
X To open the scene list: press:or9
briefly.
X To select the next or previous scene in the
scene list: press:or9 briefly. X
To select a scene from the scene list using
rapid scrolling: press and hold:or9
until desired scene :is reached.
X Press ato confirm your selection. Telephone menu
Introduction G
WARNING
Operating the integrated information systems and communications equipment in the vehicle
while driving will distract you from traffic con-
ditions. You could then lose control of the
vehicle. There is a risk of an accident.
Only operate these devices if road traffic con-
ditions permit. If you are unsure about the
surrounding conditions, pull over to a safe
location and make entries only while the vehi-
cle is stationary.
When telephoning, you must observe the legal
requirements for the country in which you are
currently driving. X Switch on the mobile phone (see the manu-
facturer's operating instructions).
X Switch on the multimedia system (see sepa-
rate operating instructions).
X Insert the mobile phone into the bracket.
or X Establish a Bluetooth ®
connection to the mul-
timedia system; see the separate operating
instructions.
X Use ò on the steering wheel to call up the
list of menus.
X Press :or9 on the steering wheel to
select the Telephone
Telephone menu.
X Confirm by pressing aon the steering
wheel.
You will see one of the following display mes-
sages in the multifunction display: R Telephone ready
Telephone ready or the name of the net-
work provider: the mobile phone has found a network and is ready to receive.
R Telephone Telephone No
Noservice
service: there is no network
available or the mobile phone is searching for
a network. 162
Menus and submenusOn-board computer and displays
Page 168 of 289
Activating/deactivating Blind Spot Assist
X Press òon the steering wheel to open the
menu list.
X Press :or9 on the steering wheel to
select the Settings
Settings menu.
X Confirm by pressing aon the steering
wheel.
X Press :or9 to select the Assistance
Assistance
submenu.
X Press ato confirm.
X Press :or9 to select Blind Spot
Blind Spot
Assist
Assist .
X Press ato confirm.
The current selection appears.
X To activate/deactivate: pressaagain.
When Blind Spot Assist is activated, grey
radar waves propagating backwards appear
next to the vehicle in the Assistance
Assistance
graphic
graphic menu in the multifunction display.
Further information about Blind Spot Assist
(Y page 151).
Setting ATTENTION ASSIST X Press òon the steering wheel to open the
menu list.
X Press :or9 on the steering wheel to
select the Settings
Settings menu.
X Confirm by pressing aon the steering
wheel.
X Press :or9 to select the Assistance
Assistance
submenu.
X Press ato confirm.
X Press :or9 to select ATTENTION
ATTENTION
ASSIST ASSIST .
X Press ato confirm.
X Press :or9 to select Deactivated
Deactivated
Standard
Standard orSensitive
Sensitive .
X Press ato confirm the selection.
When ATTENTION ASSIST is deactivated, the
é symbol appears in the Assistance Assistance
graphic
graphic menu on the multifunction display.
Further information about ATTENTION ASSIST
(Y page 147).
Setting Lane Keeping Assist
X Press òon the steering wheel to open the
menu list.
X Press :or9 on the steering wheel to
select the Settings
Settings menu. X
Confirm by pressing aon the steering
wheel.
X Press :or9 to select the Assistance Assistance
submenu.
X Press ato confirm.
X Select Lane Keeping Assist Lane Keeping Assist with: or
9.
X Press ato confirm.
Press :or9 to select Deactivated
Deactivated
Standard
Standard orAdaptive
Adaptive.
X To change the setting: pressaagain.
Further information about Lane Keeping Assist
(Y page 153).
Instrument cluster submenu Setting the brightness for the display/
switches
You can use the Brightness Brightnessfunction to set the
brightness of the multifunction display and the
switches in the vehicle in increments.
X Press òon the steering wheel to open the
menu list.
X Press :or9 on the steering wheel to
select the Settings
Settings menu.
X Confirm by pressing aon the steering
wheel.
X Press :or9 to select the Instru‐
Instru‐
ment cluster
ment cluster submenu.
X Press ato confirm.
X Press :or9 to select the Brightness
Brightness
function.
X Press ato confirm.
You can see the selected setting Level
Levelwith a
value between 0 and 10. Level 0 corresponds to a dim light and level 10 corresponds to a
bright light.
X Press the :or9 button to change the
brightness. The brightness is set simultane-
ously with the selection.
X Press the aor% button to save the
setting.
Selecting the unit of measurement for dis-
tance
The Display unit Speed-/odometer: Display unit Speed-/odometer: func-
tion allows you to choose whether certain dis-
plays appear in kilometres or miles in the mul-
tifunction display. Menus and submenus
165On-board computer and displays Z
Page 171 of 289
The maximum values of the G-Meter are
saved.
X To reset the G-Meter: pressaagain.
X Using :or9 select Yes
Yes on the steer-
ing wheel.
X Press ato confirm.
The maximum values of the G-Meter are
deleted.
If the ignition remains switched off for longer
than four hours, the G-Meter will be automati-
cally reset.
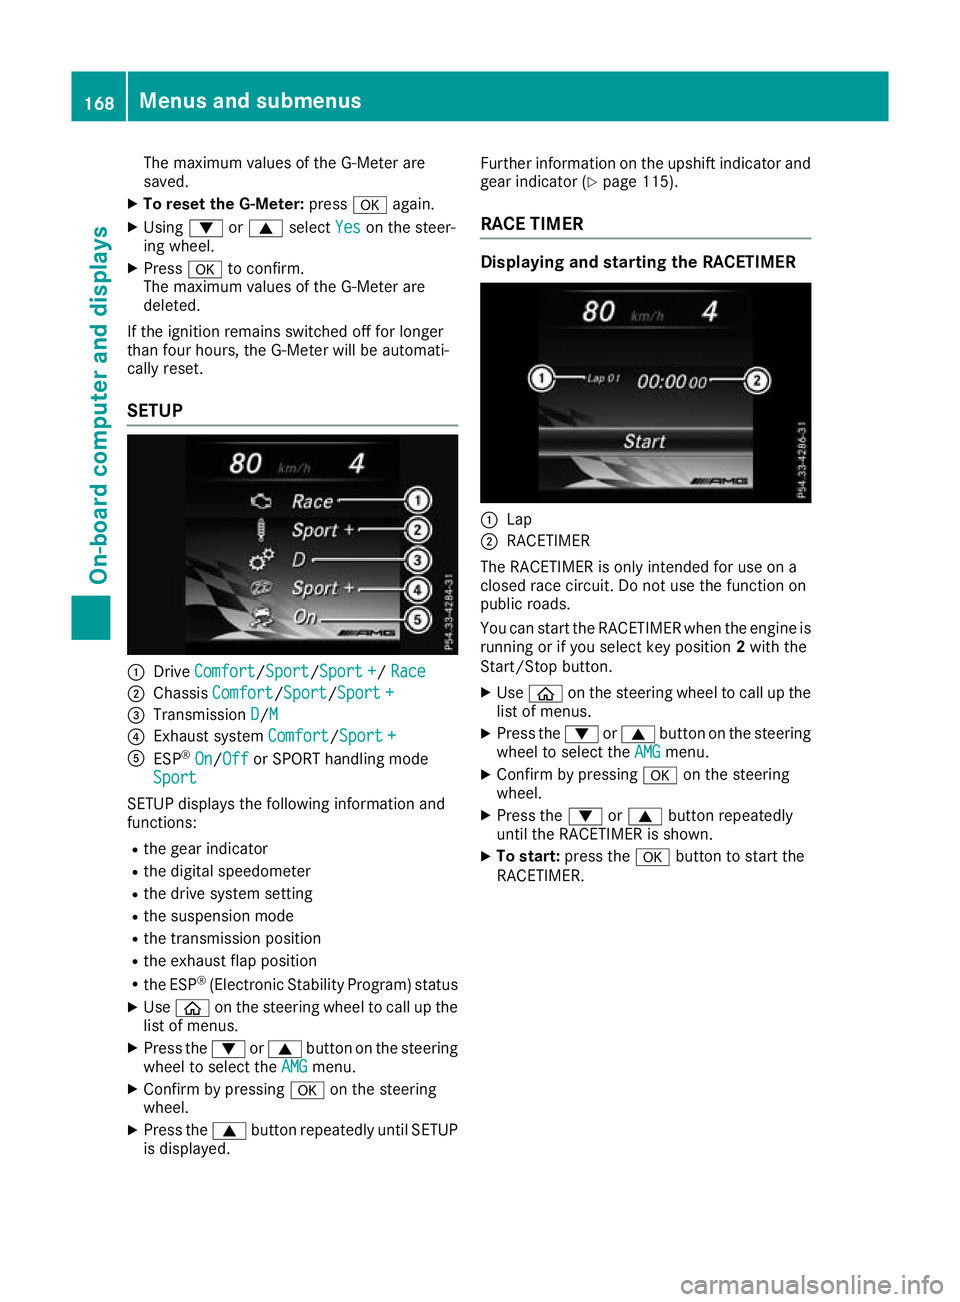
SETUP :
Drive Comfort
Comfort/Sport Sport/Sport +Sport +/ Race
Race
; Chassis Comfort
Comfort/ Sport
Sport/Sport +Sport +
= Transmission D
D/MM
? Exhaust system Comfort
Comfort/Sport +Sport +
A ESP ®
On
On/Off Off or SPORT handling mode
Sport
Sport
SETUP displays the following information and
functions:
R the gear indicator
R the digital speedometer
R the drive system setting
R the suspension mode
R the transmission position
R the exhaust flap position
R the ESP ®
(Electronic Stability Program) status
X Use ò on the steering wheel to call up the
list of menus.
X Press the :or9 button on the steering
wheel to select the AMG
AMGmenu.
X Confirm by pressing aon the steering
wheel.
X Press the 9button repeatedly until SETUP
is displayed. Further information on the upshift indicator and
gear indicator (Y page 115).
RACE TIMER Displaying and starting the RACETIMER
:
Lap
; RACETIMER
The RACETIMER is only intended for use on a
closed race circuit. Do not use the function on
public roads.
You can start the RACETIMER when the engine is running or if you select key position 2with the
Start/Stop button.
X Use ò on the steering wheel to call up the
list of menus.
X Press the :or9 button on the steering
wheel to select the AMG AMGmenu.
X Confirm by pressing aon the steering
wheel.
X Press the :or9 button repeatedly
until the RACETIMER is shown.
X To start: press the abutton to start the
RACETIMER. 168
Menus and submenusOn-board computer and displays