2016 MERCEDES-BENZ AMG GT ROADSTER fuel pressure
[x] Cancel search: fuel pressurePage 14 of 289
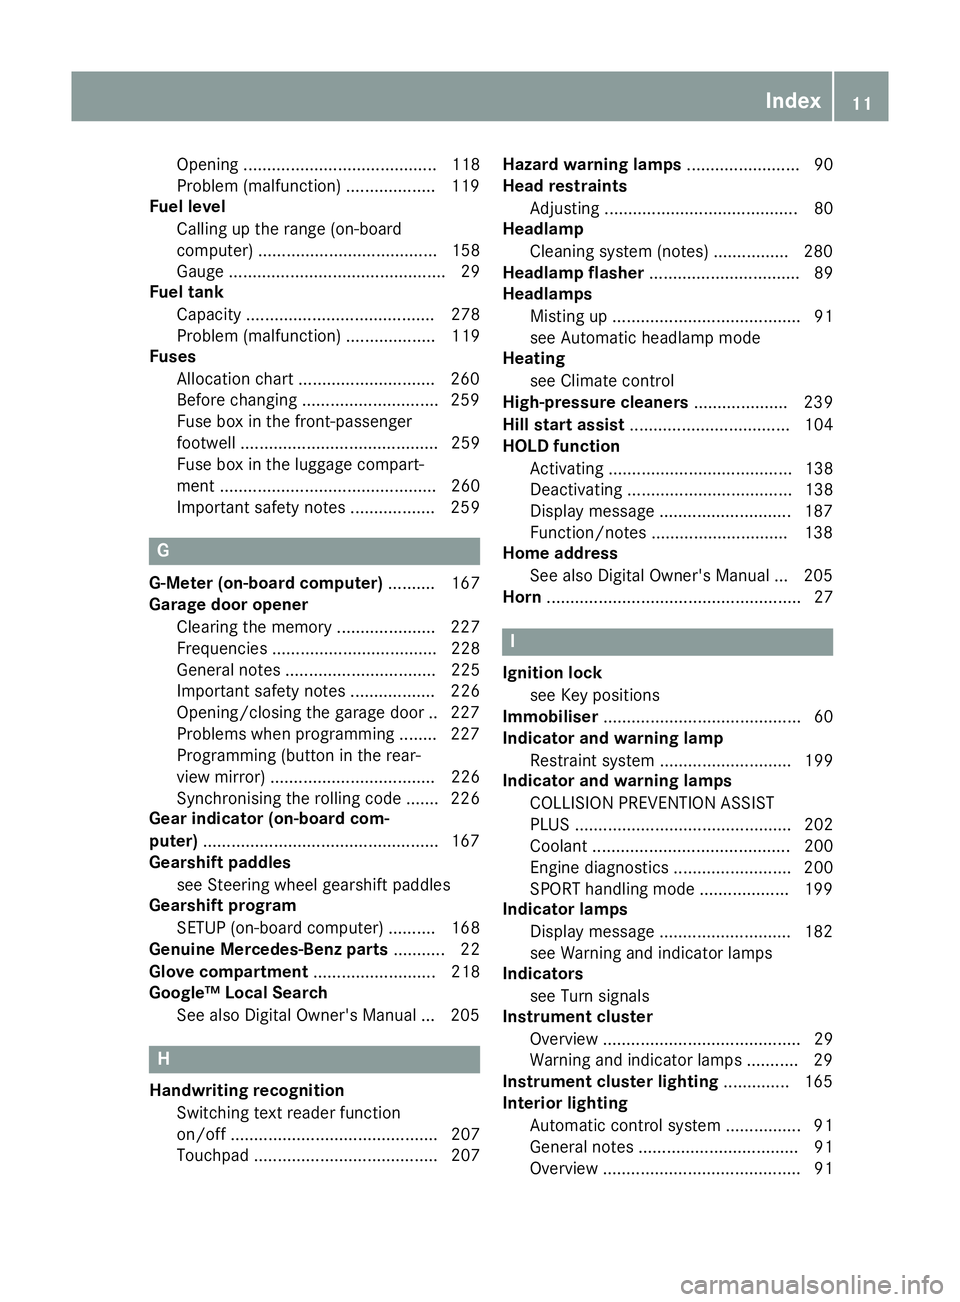
Opening ......................................... 118
Problem (malfunction) ...................1
19
Fuel level
Calling up the range (on-board
computer) ...................................... 158
Gauge .............................................. 29
Fuel tank
Capacity ........................................ 278
Problem (malfunction) ................... 119
Fuses
Allocation chart ............................ .260
Before changing ............................ .259
Fuse box in the front-passenger
footwell .......................................... 259
Fuse box in the luggage compart-
ment .............................................. 260
Important safety notes .................. 259 G
G-Meter (on-board computer) .......... 167
Garage door opener
Clearing the memory ..................... 227
Frequencies ................................... 228
General notes ................................ 225
Important safety notes .................. 226
Opening/closing the garage door .. 227
Problems when programming ....... .227
Programming (button in the rear-
view mirror) ................................... 226
Synchronising the rolling code ....... 226
Gear indicator (on-board com-
puter) ................................................. .167
Gearshift paddles
see Steering wheel gearshift paddles
Gearshift program
SETUP (on-board computer) .......... 168
Genuine Mercedes-Benz parts ........... 22
Glove compartment .......................... 218
Google™ Local Search
See also Digital Owner's Manual ... 205 H
Handwriting recognition Switching text reader function
on/off ............................................ 207
Touchpad ....................................... 207 Hazard warning lamps
........................ 90
Head restraints
Adjusting ......................................... 80
Headlamp
Cleaning system (notes) ................ 280
Headlamp flasher ................................ 89
Headlamps
Misting up ........................................ 91
see Automatic headlamp mode
Heating
see Climate control
High-pressure cleaners .................... 239
Hill start assist .................................. 104
HOLD function
Activating ....................................... 138
Deactivating ................................... 138
Display message ............................ 187
Function/notes ............................ .138
Home address
See also Digital Owner's Manual ... 205
Horn ...................................................... 27 I
Ignition lock see Key positions
Immobiliser .......................................... 60
Indicator and warning lamp
Restraint system ............................ 199
Indicator and warning lamps
COLLISION PREVENTION ASSIST
PLUS .............................................. 202
Coolant .......................................... 200
Engine diagnostics ......................... 200
SPORT handling mode ................... 199
Indicator lamps
Display message ............................ 182
see Warning and indicator lamps
Indicators
see Turn signals
Instrument cluster
Overview .......................................... 29
Warning and indicator lamps ........... 29
Instrument cluster lighting .............. 165
Interior lighting
Automatic control system ................ 91
General notes .................................. 91
Overview .......................................... 91 Index
11
Page 23 of 289
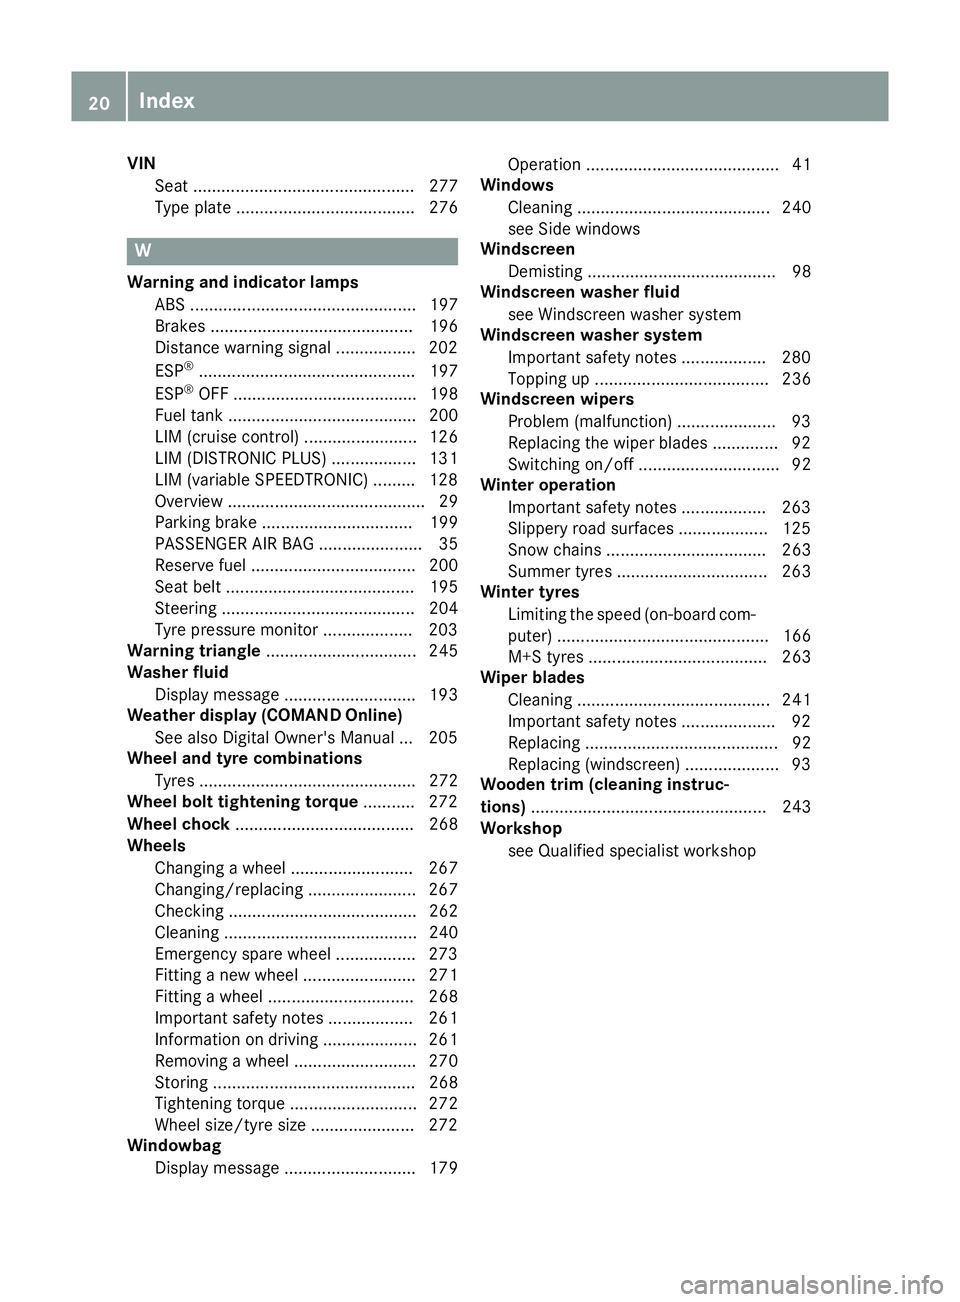
VIN
Seat ............................................... 277
Type plate ...................................... 276 W
Warning and indicator lamps ABS ................................................ 197
Brakes ........................................... 196
Distance warning signal ................. 202
ESP ®
.............................................. 197
ESP ®
OFF ....................................... 198
Fuel tank ........................................ 200
LIM (cruise control) ........................ 126
LIM (DISTRONIC PLUS) .................. 131
LIM (variable SPEEDTRONIC) ......... 128
Overview .......................................... 29
Parking brake ................................ 199
PASSENGER AIR BAG ...................... 35
Reserve fue l................................... 200
Seat belt ........................................ 195
Steering ......................................... 204
Tyre pressure monitor ................... 203
Warning triangle ................................ 245
Washer fluid
Display message ............................ 193
Weather display (COMAND Online)
See also Digital Owner's Manua l... 205
Wheel and tyre combinations
Tyres .............................................. 272
Wheel bolt tightening torque ........... 272
Wheel chock ...................................... 268
Wheels
Changing a whee l.......................... 267
Changing/replacing ....................... 267
Checking ........................................ 262
Cleaning ......................................... 240
Emergency spare whee l................. 273
Fitting a new wheel ........................ 271
Fitting a wheel ............................... 268
Important safety notes .................. 261
Information on driving .................... 261
Removing a whee l.......................... 270
Storing ........................................... 268
Tightening torque ........................... 272
Wheel size/tyre size ...................... 272
Windowbag
Display message ............................ 179 Operation ......................................... 41
Windows
Cleaning ......................................... 240
see Side windows
Windscreen
Demisting ........................................ 98
Windscreen washer fluid
see Windscreen washer system
Windscreen washer system
Important safety notes .................. 280
Topping up ..................................... 236
Windscreen wipers
Problem (malfunction) ..................... 93
Replacing the wiper blades .............. 92
Switching on/of f.............................. 92
Winter operation
Important safety notes .................. 263
Slippery road surfaces ................... 125
Snow chains .................................. 263
Summer tyres ................................ 263
Winter tyres
Limiting the speed (on-board com-
puter) ............................................. 166
M+S tyres ...................................... 263
Wiper blades
Cleaning ......................................... 241
Important safety notes .................... 92
Replacing ......................................... 92
Replacing (windscreen) .................... 93
Wooden trim (cleaning instruc-
tions) .................................................. 243
Workshop
see Qualified specialist workshop 20
Index
Page 25 of 289
Environmental protection
General notes
H
Environmental note
Daimler's declared policy is one of compre-
hensive environmental protection.
Our objectives are to use the natural resour-
ces which form the basis of our existence on
this planet sparingly and in a manner which
takes the requirements of both nature and
humanity into consideration.
You too can help to protect the environment
by operating your vehicle in an environmen-
tally-responsible manner.
Fuel consumption and the rate of engine,
transmission, brake and tyre wear depend on
the following factors:
R operating conditions of your vehicle
R your personal driving style
You can influence both factors. Therefore,
please bear the following in mind:
Operating conditions:
R avoid short trips, as these increase fuel
consumption.
R observe the correct tyre pressure.
R do not carry any unnecessary weight in the
vehicle.
R remove the roof rack once you no longer
need it.
R a regularly serviced vehicle will contribute
to environmental protection. You should
therefore adhere to the service intervals.
R all maintenance work should be carried out
at a qualified specialist workshop.
Personal driving style:
R do not depress the accelerator pedal when
starting the engine.
R do not warm up the engine when the vehicle
is stationary.
R drive carefully and maintain a safe distance
from the vehicle in front.
R avoid frequent, sudden acceleration and
braking. R
change gear in good time and use each gear
only up to Ôof its maximum engine speed.
R switch off the engine in stationary traffic.
R monitor the vehicle's fuel consumption. Returning an end-of-life vehicle
EU countries only:
Mercedes-Benz will take back your end-of-life
vehicle for environmentally friendly disposal in
accordance with the European Union (EU) End-
Of-Life Vehicles Directive.
A network of vehicle take-back points and dis-
mantlers has been established for you to return
your vehicle. You can leave it at any of these
points free of charge. This makes an important
contribution to closing the recycling circle and
conserving resources.
For further information about the recycling and
disposal of end-of-life vehicles, and the take-
back conditions, please visit the national
Mercedes-Benz website for your country. Genuine Mercedes-Benz parts
H
Environmental note
Daimler AG also supplies reconditioned
assemblies and parts which are of the same
quality as new parts. For these, the same war-
ranty applies as for new parts.
! Airbags and seat belt tensioners, as well as
control units and sensors for these restraint
systems, may be installed in the following
areas of your vehicle:
R doors
R door pillars
R door sills
R seats
R dashboard
R instrument cluster
R centre console
Do not install accessories such as audio sys-
tems in these areas. Do not carry out repairs
or welding. You could impair the operating
efficiency of the restraint systems. 22
Genuine Mercedes-Benz partsIntroduction
Page 32 of 289
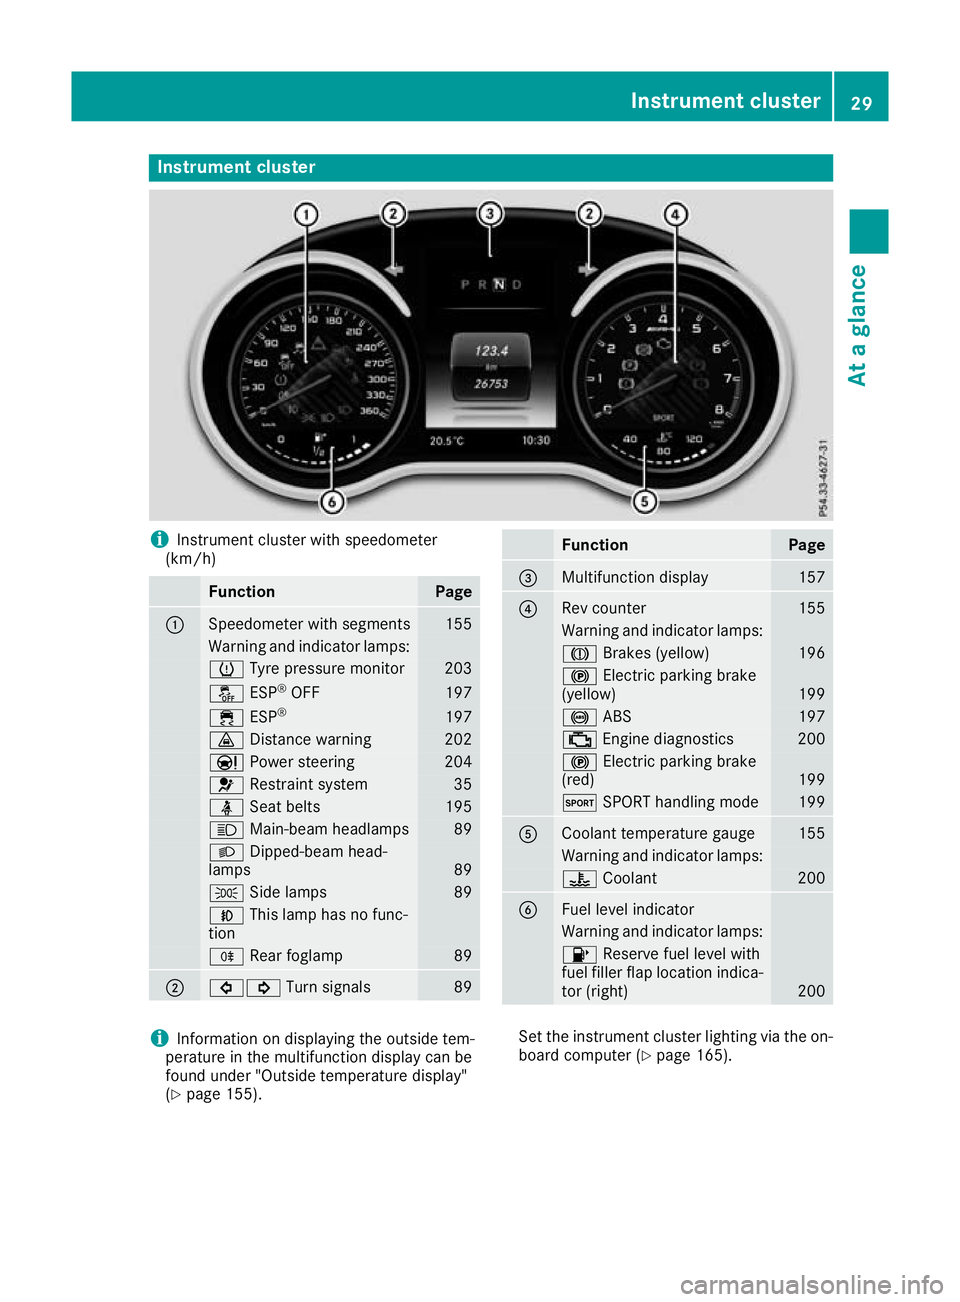
Instrument cluster
i
Instrument cluster with speedometer
(km/h) Function Page
:
Speedometer with segments 155
Warning and indicator lamps:
h
Tyre pressure monitor 203
å
ESP®
OFF 197
÷
ESP® 197
·
Distance warning 202
Ð
Power steering 204
6
Restraint system 35
ü
Seat belts 195
K
Main-beam headlamps 89
L
Dipped-beam head-
lamps 89
T
Side lamps 89
N
This lamp has no func-
tion R
Rear foglamp 89
;
#!
Turn signals 89 Function Page
=
Multifunction display 157
?
Rev counter 155
Warning and indicator lamps:
J
Brakes (yellow) 196
!
Electric parking brake
(yellow) 199
!
ABS 197
;
Engine diagnostics 200
!
Electric parking brake
(red) 199
M
SPORT handling mode 199
A
Coolant temperature gauge 155
Warning and indicator lamps:
?
Coolant 200
B
Fuel level indicator
Warning and indicator lamps:
8
Reserve fuel level with
fuel filler flap location indica-
tor (right) 200
i
Information on displaying the outside tem-
perature in the multifunction display can be
found under "Outside temperature display"
(Y page 155). Set the instrument cluster lighting via the on-
board computer (Y page 165). Instrument cluster
29At a glance
Page 108 of 289
Hill start assist is not active if:
R you are pulling away on a level road or a
downhill gradient
R the transmission is in position N
R the electric parking brake is applied
R ESP ®
is malfunctioning ECO start/stop function
Introduction The ECO start/stop function switches the
engine off automatically if the vehicle is stopped
under certain conditions.
When the vehicle pulls away again, the engine
starts automatically. The ECO start/stop func-
tion thereby helps you to reduce the fuel con-
sumption and emissions of your vehicle.
Important safety notes G
WARNING
If the engine is switched off automatically and you exit the vehicle, the engine is restarted
automatically. The vehicle may begin moving. There is a risk of accident and injury.
If you wish to exit the vehicle, always turn off
the ignition and secure the vehicle against
rolling away.
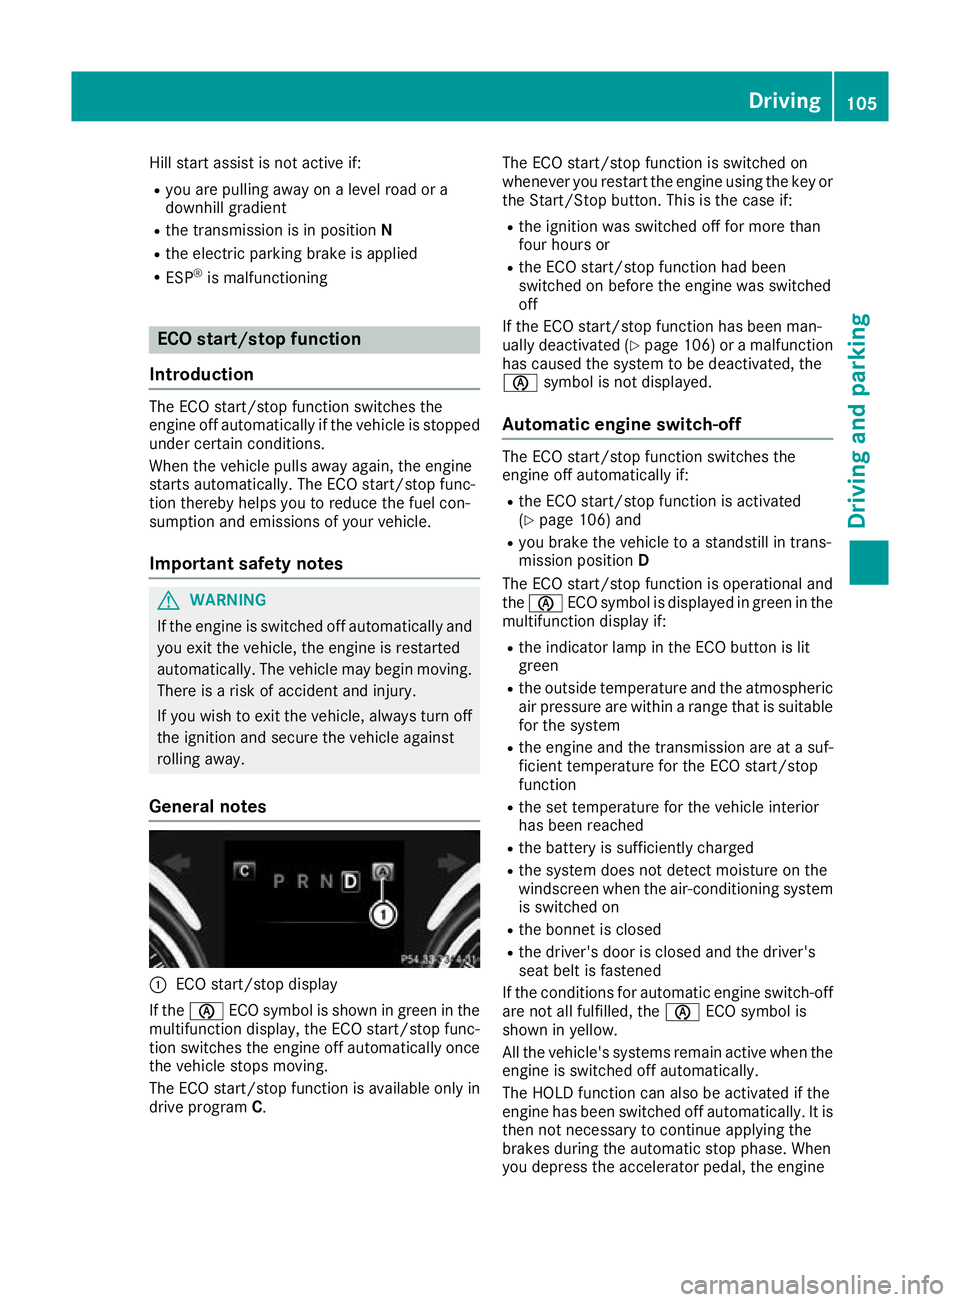
General notes :
ECO start/stop display
If the è ECO symbol is shown in green in the
multifunction display, the ECO start/stop func-
tion switches the engine off automatically once
the vehicle stops moving.
The ECO start/stop function is available only in
drive program C. The ECO start/stop function is switched on
whenever you restart the engine using the key or the Start/Stop button. This is the case if:
R the ignition was switched off for more than
four hours or
R the ECO start/stop function had been
switched on before the engine was switched
off
If the ECO start/stop function has been man-
ually deactivated (Y page 106) or a malfunction
has caused the system to be deactivated, the
è symbol is not displayed.
Automatic engine switch-off The ECO start/stop function switches the
engine off automatically if:
R the ECO start/stop function is activated
(Y page 106) and
R you brake the vehicle to a standstill in trans-
mission position D
The ECO start/stop function is operational and
the è ECO symbol is displayed in green in the
multifunction display if:
R the indicator lamp in the ECO button is lit
green
R the outside temperature and the atmospheric
air pressure are within a range that is suitable for the system
R the engine and the transmission are at a suf-
ficient temperature for the ECO start/stop
function
R the set temperature for the vehicle interior
has been reached
R the battery is sufficiently charged
R the system does not detect moisture on the
windscreen when the air-conditioning system
is switched on
R the bonnet is closed
R the driver's door is closed and the driver's
seat belt is fastened
If the conditions for automatic engine switch-off are not all fulfilled, the èECO symbol is
shown in yellow.
All the vehicle's systems remain active when the
engine is switched off automatically.
The HOLD function can also be activated if the
engine has been switched off automatically. It is then not necessary to continue applying the
brakes during the automatic stop phase. When
you depress the accelerator pedal, the engine Driving
105Driving and parking Z
Page 121 of 289
Further information on fuel and fuel quality
(Y page 277). Refuelling
General notes Observe the important safety notes
(Y
page 117).
If you unlock/lock the vehicle from the outside,
the fuel filler flap also unlocks/locks.
The position of the 8fuel filler cap is dis-
played in the instrument cluster. The arrow next to the filling pump indicates the side of the vehi-
cle.
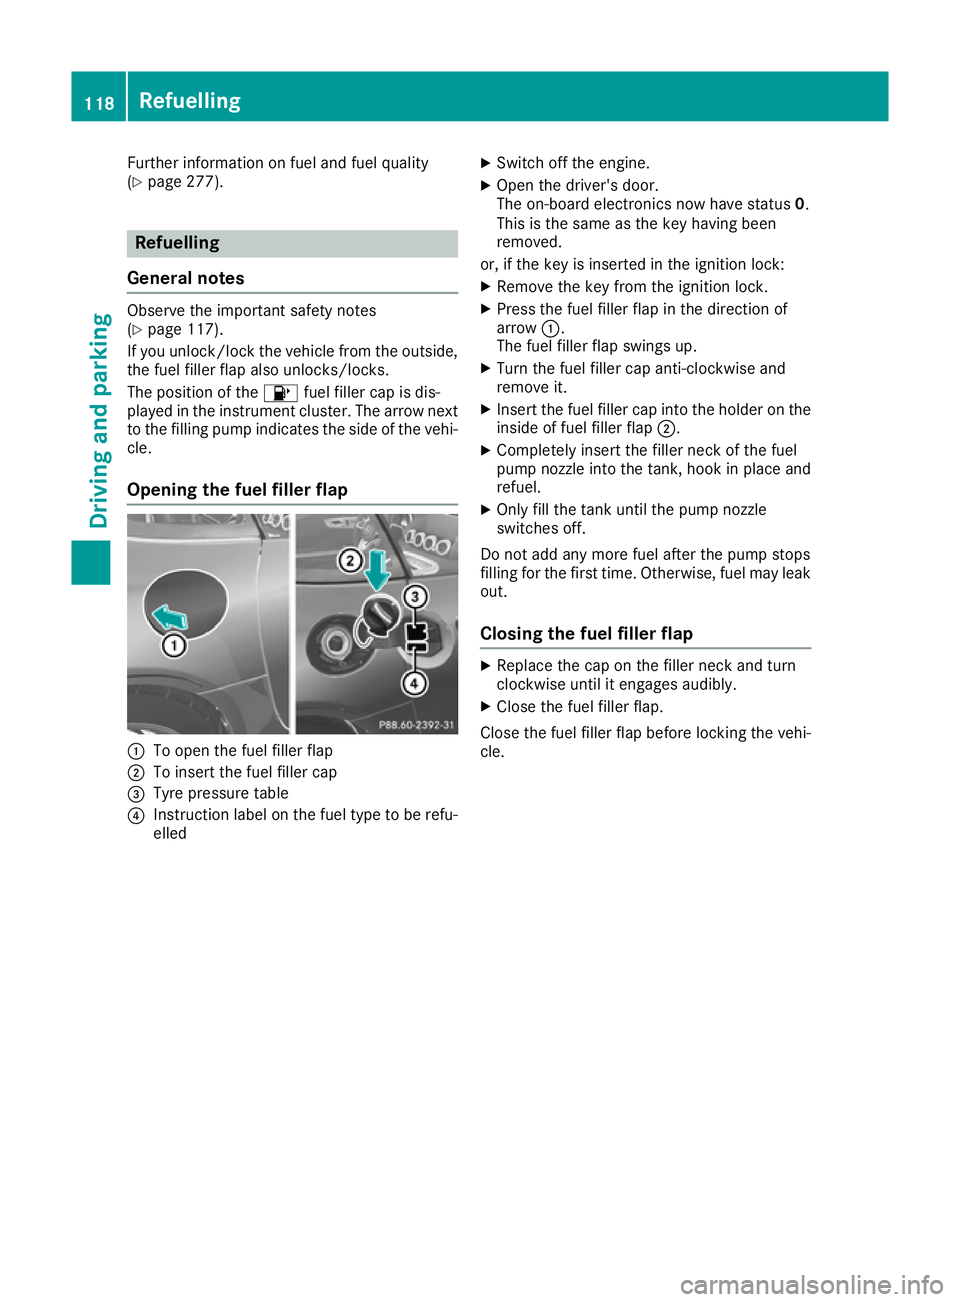
Opening the fuel filler flap :
To open the fuel filler flap
; To insert the fuel filler cap
= Tyre pressure table
? Instruction label on the fuel type to be refu-
elled X
Switch off the engine.
X Open the driver's door.
The on-board electronics now have status 0.
This is the same as the key having been
removed.
or, if the key is inserted in the ignition lock: X Remove the key from the ignition lock.
X Press the fuel filler flap in the direction of
arrow :.
The fuel filler flap swings up.
X Turn the fuel filler cap anti-clockwise and
remove it.
X Insert the fuel filler cap into the holder on the
inside of fuel filler flap ;.
X Completely insert the filler neck of the fuel
pump nozzle into the tank, hook in place and
refuel.
X Only fill the tank until the pump nozzle
switches off.
Do not add any more fuel after the pump stops
filling for the first time. Otherwise, fuel may leak out.
Closing the fuel filler flap X
Replace the cap on the filler neck and turn
clockwise until it engages audibly.
X Close the fuel filler flap.
Close the fuel filler flap before locking the vehi-
cle. 118
RefuellingDriving and parking
Page 126 of 289
X
Connect the cable provided in the luggage
compartment to the trickle charger.
X Connect the trickle charger to 12 V socket :.
Consult the manufacturer's operating instruc- tions on how to do so.
The tailgate can be closed, even if a trickle
charger is connected. Make sure that the con-
nector for both the connector cables is outside
of the vehicle.
The connector can then separate if the vehicle is
moved, even if you forget to disconnect the con- nector cables. This prevents damaging the
cables and the trickle charger.
A trickle charger connected to 12 V socket :
only maintains the current charge level of the
vehicle's electrical system battery. If the vehi-
cle's electrical system battery is discharged, it
needs to be charged with a battery charger. Driving tips
General driving tips
Important safety notes G
WARNING
If you switch off the ignition while driving,
safety-relevant functions are only available
with limitations, or not at all. This could affect, for example, the power steering and the brake
boosting effect. You will require considerably
more effort to steer and brake. There is a risk of an accident.
Do not switch off the ignition while driving.
Drive sensibly – save fuel Observe the following tips to save fuel:
X The tyres should always be inflated to the rec-
ommended tyre pressure.
X Remove unnecessary loads.
X Warm up the engine at low engine speeds.
X Avoid frequent acceleration or braking.
X Have all maintenance work carried out as
indicated by the service intervals in the Ser-
vice Booklet or by the service interval display.
Fuel consumption also increases when driving in
cold weather, in stop-start traffic, on short jour- neys and in hilly terrain. Brakes
Important safety notes G
WARNING
If you shift down on a slippery road surface in an attempt to increase the engine's braking
effect, the drive wheels could lose their grip.
This increases the risk of skidding and having
an accident.
Do not shift down for additional engine brak-
ing on a slippery road surface.
Downhill gradients Shift to a lower gear in good time on long and
steep downhill gradients. Take particular note of
this when driving a laden vehicle.
This also applies if cruise control, DISTRONIC
PLUS or SPEEDTRONIC are activated.
This will use the braking effect of the engine, so less braking will be required to maintain the
vehicle speed. This relieves the load on the
brake system and prevents the brakes from
overheating and wearing too quickly.
Heavy and light loads G
WARNING
The braking system can overheat if you leave your foot on the brake pedal while driving.
This increases the braking distance and could
even cause the braking system to fail. There is
a risk of an accident.
Never use the brake pedal as a footrest. Do
not simultaneously depress both the brake
pedal and the accelerator pedal while driving.
! Depressing the brake pedal constantly
results in excessive and premature wear to
the brake pads.
If heavy demands are made on the brakes, do
not park the vehicle immediately. Drive on for a
short while. This allows the airflow to cool the
brakes more quickly.
If the brakes have been used only moderately,
you should occasionally test their effectiveness.
To do this, brake more firmly from a higher
speed while paying attention to the traffic con-
ditions. This improves the grip of the brakes. Driving tips
123Driving and parking Z
Page 243 of 289
Scratches, corrosive deposits, areas affected by
corrosion and damage caused by inadequate
care cannot always be completely repaired. In
such cases, visit a qualified specialist workshop.
X Remove impurities immediately, where pos-
sible, whilst avoiding rubbing too hard.
X Soak insect remains with insect remover and
rinse off the treated areas afterwards.
X Soak bird droppings with water and rinse off
the treated areas afterwards.
X Remove coolant, brake fluid, tree resins, oils,
fuels and greases by rubbing gently with a
cloth soaked in petroleum ether or lighter
fluid.
X Use tar remover to remove tar stains.
X Use silicone remover to remove wax.
Care and treatment of matt paintwork !
Never polish the vehicle or the light alloy
wheels. Polishing makes the paintwork shiny.
! The following may cause the paint to
become shiny and thus reduce the matt
effect:
R vigorous rubbing with unsuitable materials
R frequent use of car washes
R washing the vehicle in direct sunlight
! Never use paint cleaner, buffing or polishing
products, or gloss preserver, e.g. wax, for the purpose of paintwork care. These products
are only suitable for high-gloss surfaces. Their
use on vehicles with matt paintwork leads to
considerable surface damage or, more spe-
cifically, to shiny, spotted areas.
Always have paintwork repairs carried out at a
qualified specialist workshop.
! Do not use wash programs with a hot wax
treatment under any circumstances.
Observe these notes if your vehicle has a clear
matt finish. This will help you to avoid damage to the paintwork due to incorrect treatment.
These notes also apply to light-alloy wheels with
a clear matt finish.
i The vehicle should preferably be washed by
hand using a soft sponge, car shampoo and
plenty of water.
i Use only insect remover and car shampoo
from the range of recommended and
approved Mercedes-Benz care products. Cleaning vehicle parts
Cleaning the wheels G
WARNING
The water jet of circular-jet nozzles (dirt grind- ers) can cause damage not visible from the
outside to tyres or chassis components. Com-
ponents damaged in this way can unexpect-
edly fail. There is a risk of an accident.
Do not use high-pressure cleaners with circu-
lar-jet nozzles to clean the vehicle. Have dam- aged tyres or chassis components replaced
immediately.
! Do not use acidic wheel cleaning products
to remove brake dust. This could damage
wheel bolts and brake components.
! Do not park up your vehicle for a long period
of time immediately after cleaning, particu-
larly after cleaning the wheel rim with wheel
cleaner. Wheel cleaner may lead to increased corrosion of the brake discs and pads. You
should therefore drive for a few minutes after
cleaning. By heating up the brakes, the brake
discs and pads dry. The vehicle can then be
parked up for a long period of time.
Cleaning the windows G
WARNING
If the windscreen wipers are set in motion
when cleaning the windscreen or wiper
blades, you could become trapped. There is a danger of injury.
Always switch off the windscreen wipers and
the ignition before cleaning the windscreen or wiper blades.
! Do not use dry cloths, abrasive cleaning
agents, solvents or solvent-based cleaning
agents to clean the inside of the windows/
windscreen. Do not touch the inside of the
windows/windscreen with hard items such
as an ice scraper or a ring. Otherwise, the
windows/windscreen could be damaged.
! Clean the water drainage channels of the
windscreen and the rear window at regular
intervals. Deposits such as leaves, petals and
pollen may under certain circumstances pre- 240
CareMaintenance and care