Page 461 of 648

4617-3. Do-it-yourself maintenance
AVENSIS_OM_OM20C20E_(EE)
7
Maintenance and care
■How to initialize the tire pressure warning systemPark the vehicle in a safe place and turn the engine switch to the
“LOCK” position (vehicles without smart entry & start system) or
off (vehicles with smart entry & start system).
Initialization cannot be performed while the vehicle is moving.
Adjust the tire inflation pressure to the specified cold tire inflation
pressure level. ( →P. 613)
Make sure to adjust the tire pressure to the specified cold tire inflation
pressure level. The tire pressure warning system will operate based on
this pressure level.
Turn the engine switch to the “ON” position (vehicles without
smart entry & start system) or IGNITION ON mode (vehicles with
smart entry & start system).
�XVehicles with monochrome display
Press the “DISP” switch until the settings screen appears.
(→ P. 108)
Press and hold the “DISP” switch to enter the adjustment mode.
Press the “DISP” switch until the menu of tire pressure warning
system appears.
Press and hold the “DISP” switch to display the menu.
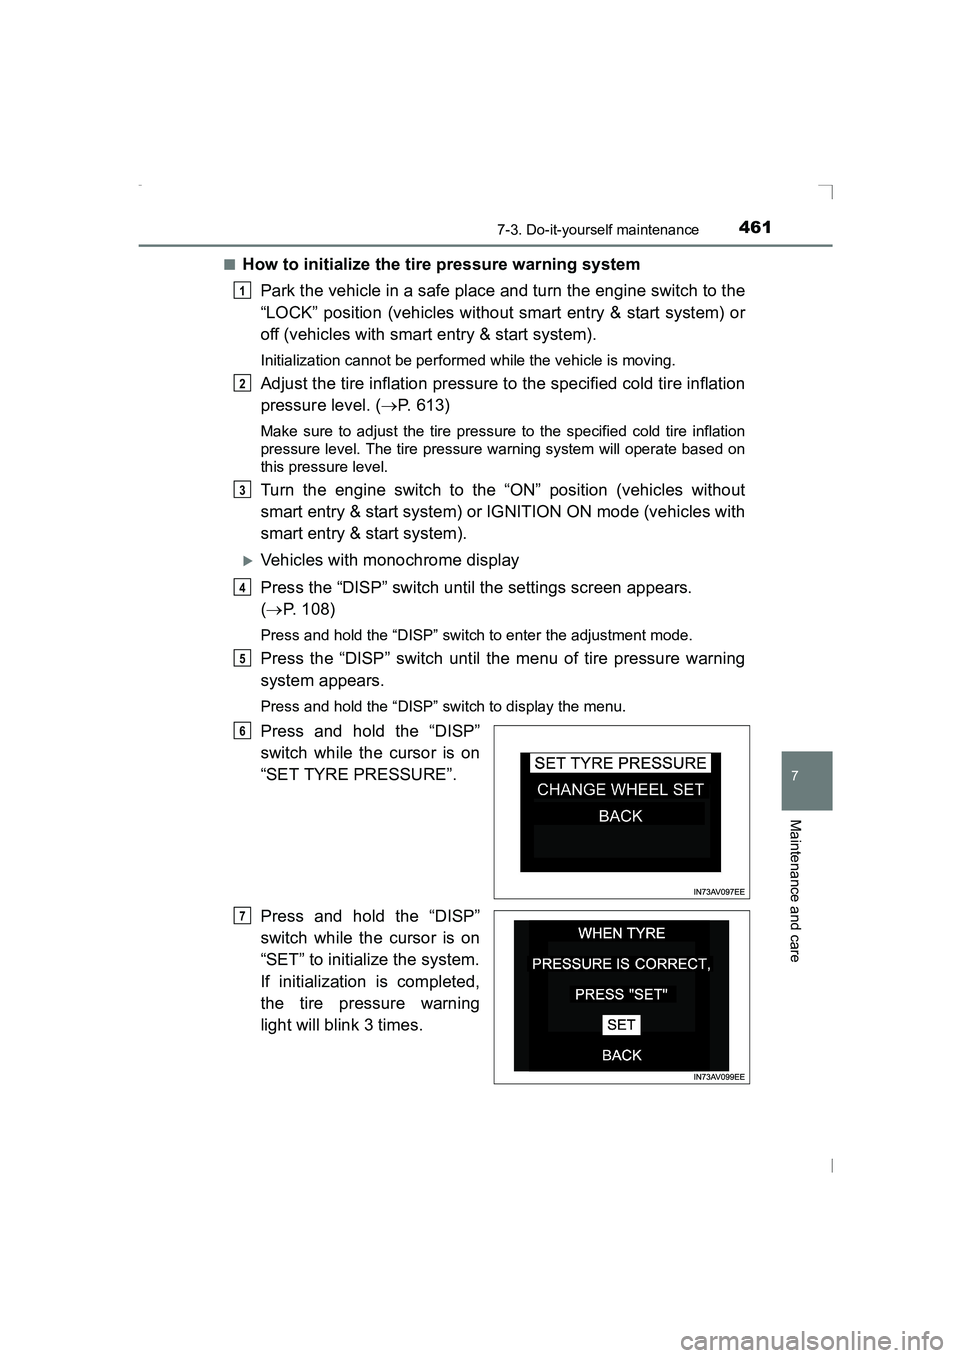
Press and hold the “DISP”
switch while the cursor is on
“SET TYRE PRESSURE”.
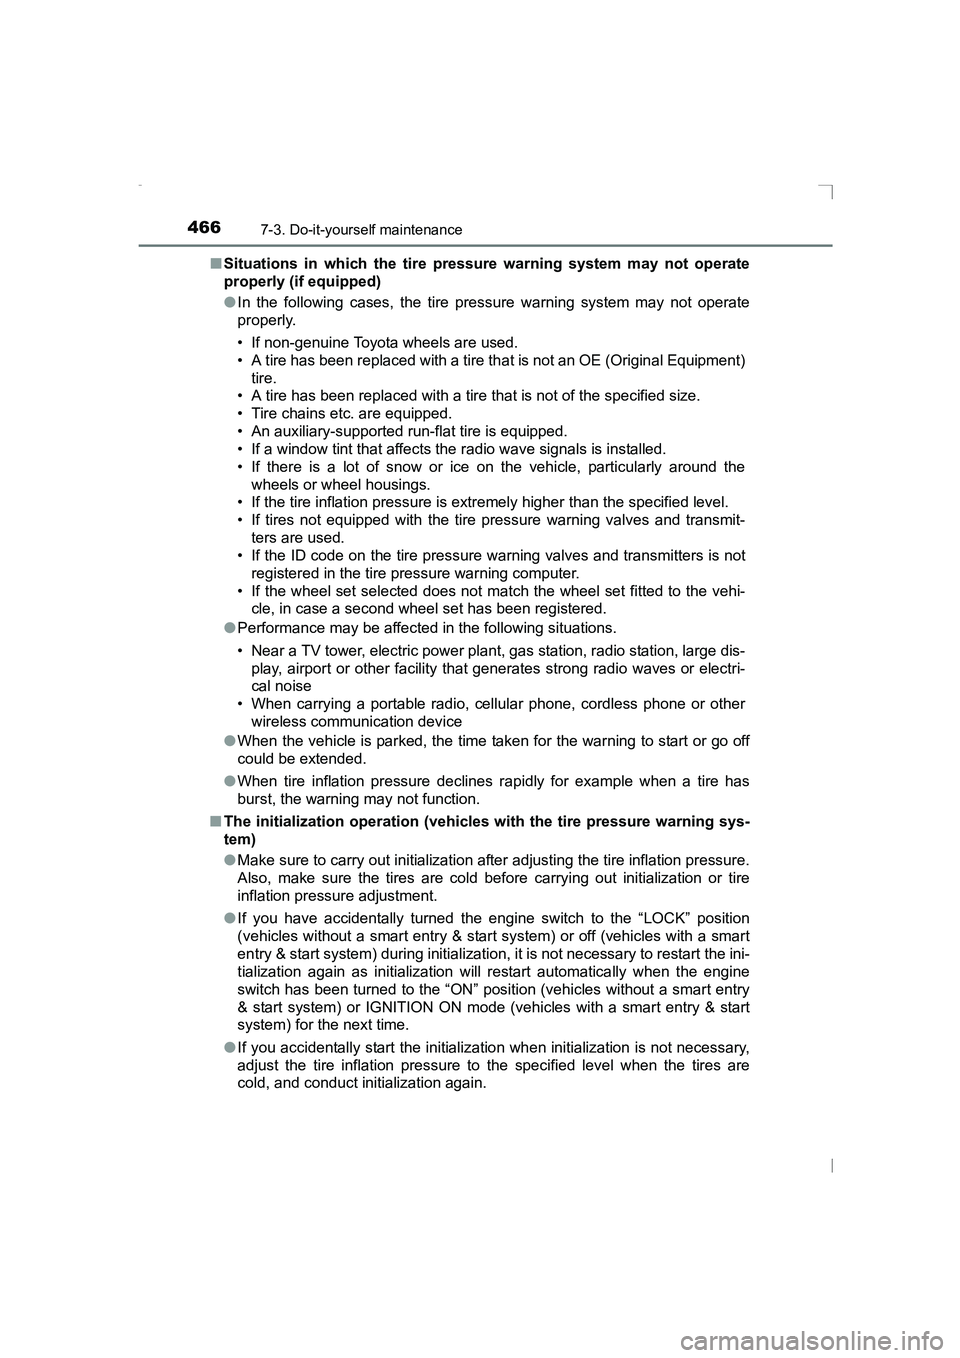
Press and hold the “DISP”
switch while the cursor is on
“SET” to initialize the system.
If initialization is completed,
the tire pressure warning
light will blink 3 times.
1
2
3
4
5
6
7
AVENSIS_OM_OM20C20E_(EE).book Page 461 Thursday, January 29, 2015 1:47 PM
Page 466 of 648

4667-3. Do-it-yourself maintenance
AVENSIS_OM_OM20C20E_(EE)■
Situations in which the tire pressure warning system may not operate
properly (if equipped)
●In the following cases, the tire pressure warning system may not operate
properly.
• If non-genuine Toyota wheels are used.
• A tire has been replaced with a tire t hat is not an OE (Original Equipment)
tire.
• A tire has been replaced with a tire that is not of the specified size.
• Tire chains etc. are equipped.
• An auxiliary-supported run-flat tire is equipped.
• If a window tint that affects the radio wave signals is installed.
• If there is a lot of snow or ice on the vehicle, particularly around the
wheels or wheel housings.
• If the tire inflation pressure is extremely higher than the specified level.
• If tires not equipped with the tire pr essure warning valves and transmit-
ters are used.
• If the ID code on the tire pressure warning valves and transmitters is not
registered in the tire pressure warning computer.
• If the wheel set selected does not match the wheel set fitted to the vehi- cle, in case a second wheel set has been registered.
● Performance may be affected in the following situations.
• Near a TV tower, electric power plant, gas station, radio station, large dis-
play, airport or other facility that generates strong radio waves or electri-
cal noise
• When carrying a portable radio, cellular phone, cordless phone or other wireless communication device
● When the vehicle is parked, the time taken for the warning to start or go off
could be extended.
● When tire inflation pressure declines rapidly for example when a tire has
burst, the warning may not function.
■ The initialization operation (vehicles with the tire pressure warning sys-
tem)
●Make sure to carry out initialization after adjusting the tire inflation pressure.
Also, make sure the tires are cold before carrying out initialization or tire
inflation pressure adjustment.
● If you have accidentally turned the engine switch to the “LOCK” position
(vehicles without a smart entry & start system) or off (vehicles with a smart
entry & start system) during initialization, it is not necessary to restart the ini-
tialization again as initialization will restart automatically when the engine
switch has been turned to the “ON” position (vehicles without a smart entry
& start system) or IGNITION ON mode (vehicles with a smart entry & start
system) for the next time.
● If you accidentally start the initialization when initialization is not necessary,
adjust the tire inflation pressure to the specified level when the tires are
cold, and conduct initialization again.
AVENSIS_OM_OM20C20E_(EE).book Page 466 Thursday, January 29, 2015 1:47 PM
Page 480 of 648
4807-3. Do-it-yourself maintenance
AVENSIS_OM_OM20C20E_(EE)
Air conditioning filter
Turn the engine switch to the “LOCK” position (vehicles without
smart entry & start system) or off (vehicles with smart entry & start
system).
Open the glove box. Slide off
the damper.
Push in each side of the glove
box to disconnect the claws.
The air conditioning filter must be changed regularly to maintain
air conditioning efficiency.
Removal method
1
2
3
AVENSIS_OM_OM20C20E_(EE).book Page 480 Thursday, January 29, 2015 1:47 PM
Page 485 of 648
4857-3. Do-it-yourself maintenance
AVENSIS_OM_OM20C20E_(EE)
7
Maintenance and care
Checking and replacing fuses
Turn the engine switch to the “LOCK” position (vehicles without
smart entry & start system) or off (vehicles with smart entry & start
system).
Open the fuse box cover.
�XEngine compartment
Push the tab in and lift the lid off.
�XDriver’s side instrument panel: type A fuse box (left-hand drive
vehicles)
Remove the lid.
If any of the electrical components do not operate, a fuse may
have blown. If this happens, check and replace the fuses as nec-
essary.
1
2
AVENSIS_OM_OM20C20E_(EE).book Page 485 Thursday, January 29, 2015 1:47 PM
Page 492 of 648
4927-3. Do-it-yourself maintenance
AVENSIS_OM_OM20C20E_(EE)■
Headlights (halogen bulbs)
For the right side only:
Remove the securing clip
and turn and pull off the
washer fluid filler opener.
For the left side only:
Remove the securing clip
and the upper part of the air
cleaner duct (if it is remov-
able).
Turn the bulb base counter-
clockwise.
Unplug the connector while
pressing the lock release.
Replacing light bulbs
1
2
3
AVENSIS_OM_OM20C20E_(EE).book Page 492 Thursday, January 29, 2015 1:47 PM
Page 494 of 648
4947-3. Do-it-yourself maintenance
AVENSIS_OM_OM20C20E_(EE)■
Front fog light (if equipped)
Remove the fender liner bolts
and clip. Partly remove the
fender liner.
Unplug the connector while
pushing the lock release.
Turn the bulb base counter-
clockwise.
Replace the light bulb, and
install the bulb base.
Align the 3 tabs on the light bulb
with the mounting, and insert.
1
2
3
4
AVENSIS_OM_OM20C20E_(EE).book Page 494 Thursday, January 29, 2015 1:47 PM
Page 495 of 648
4957-3. Do-it-yourself maintenance
AVENSIS_OM_OM20C20E_(EE)
7
Maintenance and care
Turn and secure the bulb
base.
Set the connector.
Shake the bulb base gently to
check that it is not loose, turn
the front fog light on once and
visually confirm that no light is
leaking through the mounting.
Reinstall the fender liner with bolts and clip by conducting in
reverse.
■Cornering/fog light (if equipped)Remove the fender liner bolts
and clip. Partly remove the
fender liner.
Unplug the connector while
pushing the lock release.
5
6
71
1
2
AVENSIS_OM_OM20C20E_(EE).book Page 495 Thursday, January 29, 2015 1:47 PM
Page 496 of 648
4967-3. Do-it-yourself maintenance
AVENSIS_OM_OM20C20E_(EE)
Turn the bulb base counter-
clockwise.
Replace the light bulb, and
install the bulb base.
Align the 3 tabs on the light bulb
with the mounting, and insert.
Turn and secure the bulb
base.
Set the connector.
Shake the bulb base gently to
check that it is not loose, turn
the cornering/fog light on once
and visually confirm that no light
is leaking through the mounting.
Reinstall the fender liner with bolts and clip by conducting in
reverse.
3
4
5
6
71
AVENSIS_OM_OM20C20E_(EE).book Page 496 Thursday, January 29, 2015 1:47 PM