Page 209 of 229

Adjust Audio Sound Quality
   209
INFO/SETTINGS SETTINGS
Setting Contents
BASS
Allows you to set the bass to one 
of 11 levels, from -5 to +5.
MID
Allows you to set the medium 
tone to one of 11 levels, from -5 
to +5.
TREBLE
Allows you to set the treble to one 
of 11 levels, from -5 to +5.
vehicles equipped with premium amp
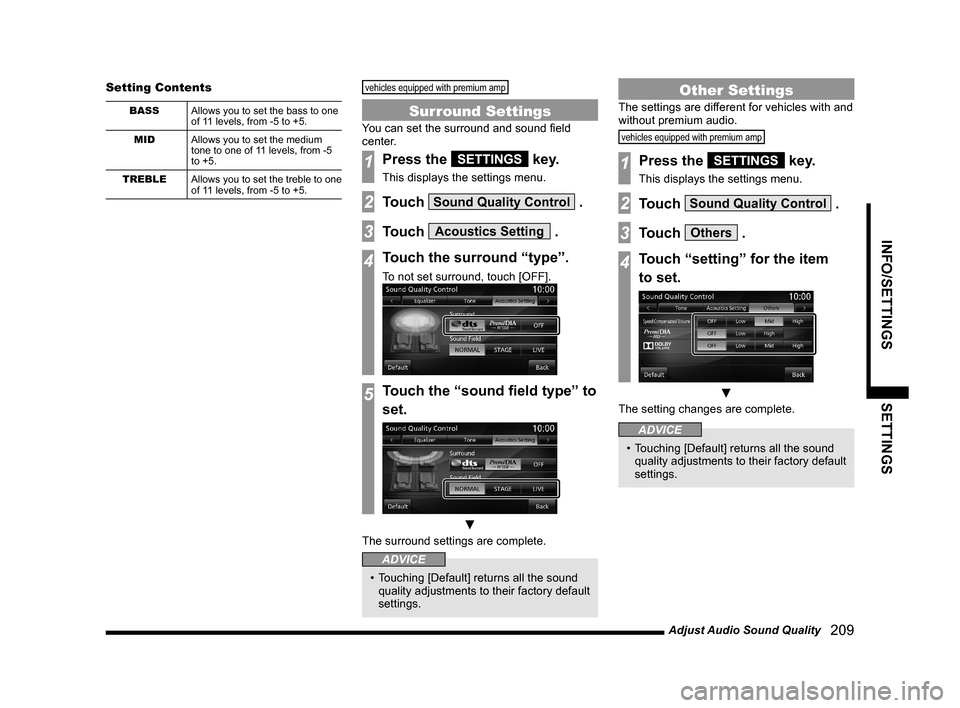
Surround Settings
You can set the surround and sound fi eld 
center.
1Press the SETTINGS key.
This displays the settings menu.
2Touch Sound Quality Control .
3Touch Acoustics Setting .
4Touch the surround “type”.
To not set surround, touch [OFF].
5Touch the “sound fi eld type” to 
set.
 ▼
The surround settings are complete.
ADVICE
•  Touching [Default] returns all the sound 
quality adjustments to their factory default 
settings.
Other Settings
The settings are different for vehicles with and 
without premium audio.
vehicles equipped with premium amp
1Press the SETTINGS key.
This displays the settings menu.
2Touch Sound Quality Control .
3Touch Others .
4Touch “setting” for the item
to set.
 ▼
The setting changes are complete.
ADVICE
•  Touching [Default] returns all the sound 
quality adjustments to their factory default 
settings. 


        Page 210 of 229

210   Adjust Audio Sound Quality Setting Contents
Speed 
Compensated 
VolumeSets the levels for when the 
volume is adjusted automatically 
according to the vehicle speed.
PremiDIA 
HD
*1,*2,*3Allows you to adjust the amount 
of compensation for reproducing 
the feeling of solidity and depth of 
the original sound by forecasting 
and supplementing for the high-
pass audio information lost during 
audio data compression.
* There is also an effect for non-
compressed sound sources.
DOLBY 
VOLUME
*2Allows you to select the level 
for the automatic real-time 
adjustment function, which 
provides the same output levels 
for the different volumes of 
different sources and songs.
*1  This is also effective for non-compressed sound 
sources.
*2  This is disabled when the audio source is radio.
*3  “DTS Neural” and “PremiDIA HD” cannot be set 
at the same time.
ADVICE
•  If you feel that the Dolby volume effect 
does not match the image of the music 
being played back, switch it OFF.
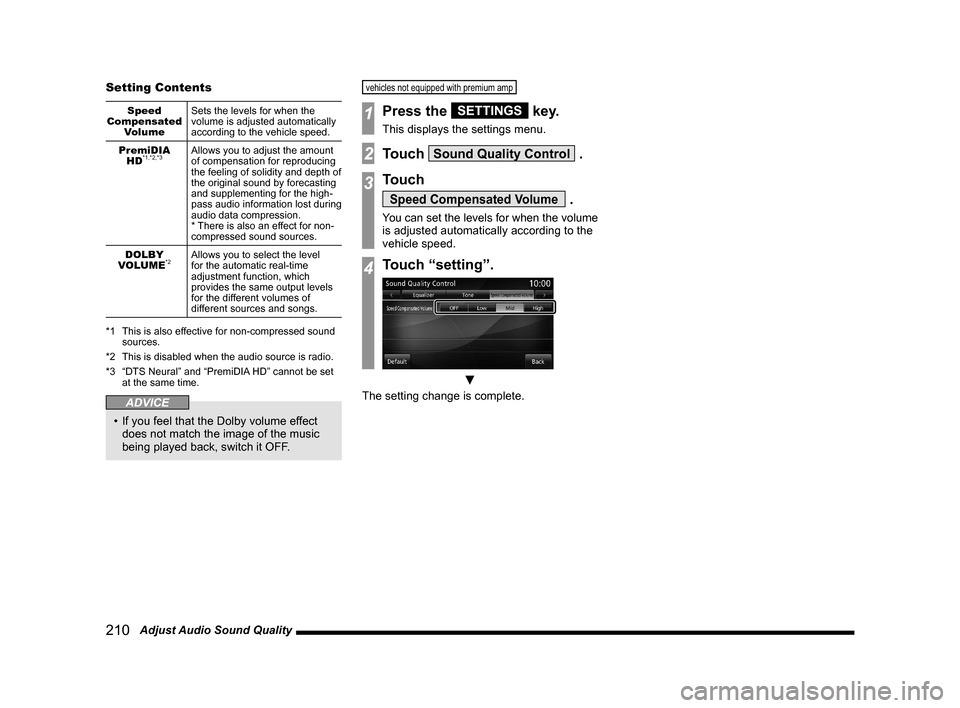
vehicles not equipped with premium amp
1Press the SETTINGS key.
This displays the settings menu.
2Touch Sound Quality Control .
3Touch 
Speed Compensated Volume .
You can set the levels for when the volume 
is adjusted automatically according to the 
vehicle speed.
4Touch “setting”.
 ▼
The setting change is complete. 


        Page 211 of 229

System Settings
   211
INFO/SETTINGS SETTINGS
System Settings
You can make system related settings, such 
as the time, language, units, and Bluetooth 
device.
Time
This changes the standard time settings and 
date and time display format.
1Press the SETTINGS key.
This displays the settings menu.
2Touch System , and then 
Time .
 ▼
You can make the settings concerning the 
time.
Time zone 
areaYou can make settings for the 
region.
[Newfoundland], [Atlantic], 
[Puerto Rico], [Eastern], [Central], 
[Mountain], [Pacifi c], [Alaska], 
[Hawaii], [Auto]
Daylight 
Saving TimeSets whether or not to adjust for 
summer time.
3Touch Format Change .
You can set the date and time display 
format.
4Touch the “date and time 
display format” to set.
5Touch 12h or 24h in “Time”.
 ▼
The time settings are complete.
Language
This changes the language used.
1Press the SETTINGS key.
This displays the settings menu.
2Touch System , and then 
Language .
3Touch the language to change to.
 ▼
The language change is complete. 


        Page 212 of 229
212   System Settings
Opening Setting
Enables/disables the opening animation.
Disabling the opening animation makes 
startup faster.
This function may not be available depending 
on the model.
1Press the SETTINGS key.
This displays the settings menu.
2Touch System , and then 
Opening Setting .
3Touch On or Off .
 ▼
The opening animation setting is complete.
A/C Cutin
This sets whether or not to display an interrupt 
for air conditioner operations.(Only on vehicles 
that support this function)
1Press the SETTINGS key.
This displays the settings menu.
2Touch System , and then 
A/C Cutin .
3Touch On or Off .
 ▼
The interrupt display setting is complete.
Units
This changes the unit.
1Press the SETTINGS key.
This displays the settings menu.
2Touch System , and then 
Units .
3Touch the “unit” to change.
 ▼
The unit change is complete.
NOTE
•  For some vehicle types, only the distance 
display is changed.


        Page 213 of 229

System Settings
   213
INFO/SETTINGS SETTINGS
Equipment by type 
(Vehicles with a Bluetooth® 2.0 interface). 
Bluetooth Setting
You can use the Bluetooth function to connect 
any commercially-available Bluetooth device 
to this product.
What Bluetooth is
Bluetooth is a wireless communications 
standard specialized for connecting devices 
over short distances (a few meters or less).
NOTE
•  This product supports Ver. 2.0 + EDR.
Supported profi les
Bluetooth 
AUDIOA2DP(v1.0)
AVRCP(v1.3)
Hands-free
HFP(v1.5)
Phonebook 
transferOPP(v1.1)
PBAP(v1.0)
NOTE
•  This function can be used on vehicles 
equipped with a Bluetooth® 2.0 interface.
•  Cancel functions such as the mobile 
phone “dial lock”, and connect while on 
the standby screen.
•  While connected, operations on the 
Bluetooth device (receiving calls, etc.) 
may not function correctly.
•  For details on how to enter the passkey 
for your Bluetooth device, refer to its user 
manual.
•  The connection fails sometimes. Register 
again.
•  Depending on the distance between this 
product and your Bluetooth device, the 
conditions within the vehicle, and types 
of screening, connection may not be 
possible. In this case, put your Bluetooth 
as close as possible to this product.
•  Even though a device is Bluetooth-
capable, its characteristics and 
specifi cations may mean that correct 
operation is not possible.
•  Some Bluetooth devices cannot be 
connected.
•  Depending on the Bluetooth device, 
connecting may take some time.
•  Up to 7 Bluetooth devices can be 
registered.
If 7 devices are already registered, you 
must delete one before you can register 
a new Bluetooth device.
Registering a Bluetooth 
Device
Register a Bluetooth device with this product.
1Press the SETTINGS key.
This displays the settings menu.
2Touch System .
3Touch Pairing .
4Touch Pair Device .
5Enter the pass key displayed 
on the screen into the Bluetooth 
device.
 ▼
When the connection is complete, the 
Bluetooth and signal strength icons are 
displayed.
NOTE
  [Pair Device] may change to [Register 
Device] depending on the model. 


        Page 214 of 229

214   System Settings
Selecting a Bluetooth Device
If you have registered multiple Bluetooth 
devices, you must select the one to connect.
(From then on, the Bluetooth device you set 
with this function is connected by you just 
bringing it into the vehicle.)
1Press the SETTINGS key.
This displays the settings menu.
2Touch System .
3Touch Pairing .
4Touch Select Device to Connect .
5Touch the “device name” to 
connect.
6Touch Connect Telephone or 
Connect Audio .
For hands-free operation of the Bluetooth 
device to connect, select [Connect 
Telephone], to use for Bluetooth audio, 
select [Connect Audio].
7Touch Connect .
 ▼
This completes selection of the Bluetooth 
device.
ADVICE
•  If the Bluetooth device is capable of 
both hands-free and Bluetooth audio 
operation, 
you can make the selection for one 
device.
In this case, the display is as follows.
 
Hands-free
Bluetooth AUDIO
Setting a Passkey
This sets whether to keep the same passkey 
(factory setting “1212”) or to set a different 
passkey each time is registered.
1Press the SETTINGS key.
This displays the settings menu.
2Touch System .
3Touch Pairing .
4Touch Set Passkey .
5Touch Fixed or Random .
ADVICE
•  If random is selected, no passkey input 
screen is displayed.
6Enter any four-digit passkey, 
then touch 
Enter .
 ▼
The passkey setting is complete.
ADVICE
•  If a passkey has already been set, touch 
[Erase] and delete the passkey, then 
input the new one. 


        Page 215 of 229
System Settings
   215
INFO/SETTINGS SETTINGS
Set Passcode
You can lock the telephone functions with a 
passcode.
1Press the SETTINGS key.
This displays the settings menu.
2Touch System .
3Touch Pairing .
4Touch Set Passcode .
5Input any “four-digit 
passcode”, then touch 
Enter .
 ▼
The passcode setting is complete.
Keyboard Layout
This changes the keyboard layout.
1Press the SETTINGS key.
This displays the settings menu.
2Touch System .
3Touch Keyboard Layout .
4Touch Alphabet or PC .
 ▼
The layout change is complete.
Voice control settings
Allows you to enable or disable the voice 
control guide and reset training data.
1Press the SETTINGS key.
This displays the settings menu.
2Touch System .
3Touch Voice control settings .
4Change the settings, then 
touch 
Back .
 ▼
The setting change is complete. 


        Page 216 of 229

216   Other Settings
Other Settings
You can make the settings concerning the 
screen and sound volume.
Display Off
This deletes the screen display.
1Press the SETTINGS key.
This displays the settings menu.
2Touch Display Off .
 ▼
This deletes the screen display.
ADVICE
•  To display it again, touch the screen 
or press the [DEST], [INFO], [AUDIO], 
[MAP], [NAVI MENU], [SETTINGS], 
[MODE], or [SOUND] key.
•  Hold down the [PWR/VOL] key to turn off 
the audio function and disable the screen 
display.
  This function may not operate depending 
on the model.
Picture Control
This adjusts the brightness, contrast, etc., for 
the menu screen, navigation screen, etc.
1Press the SETTINGS key.
This displays the settings menu.
2Touch Picture Control .
3Adjust items.
Settings name Settings content
Brightness
Adjusts the brightness.
Touching [+] makes the display 
brighter, touching [-] makes it 
dimmer. Allows you to adjust 
continuously by continuing the 
touch.
Contrast
Adjusts the contrast. Touching [+] 
increases the contrast, touching 
[-] decreases it. Allows you to 
adjust continuously by continuing 
the touch.
Black Level
Adjusts the black level.
Touching [+] increases the black 
level, touching [-] decreases it. 
Allows you to adjust continuously 
by continuing the touch.
Vehicle Settings
You can make settings for the vehicle 
equipment.(Only on vehicles that support this 
function)
1Press the SETTINGS key.
This displays the settings menu.
2Touch Vehicle Settings .
3Touch the “name of the 
equipment” to set.
4Touch the “item” to change.
5Touch the “set value”.
 ▼
The vehicle equipment setting is complete.