2015 MERCEDES-BENZ SLK-Class vehicle settings
[x] Cancel search: vehicle settingsPage 206 of 358

Activating/deactivating Blind Spot
Assist X
Press the 0059or0065 button on the steer-
ing wheel to select the DriveAssist
DriveAssist menu.
X Press the 0063or0064 button to select
Blind Spot Assist
Blind Spot Assist .
X Press the 0076button.
The current selection is displayed.
X To activate/deactivate: press the0076
button again.
Further information about Blind Spot Assist
(Y page 189)
Activating/deactivating Lane Keeping
Assist X
Press the 0059or0065 button on the steer-
ing wheel to select the DriveAssist DriveAssistmenu.
X Press 0063or0064 to select Lane Keep‐
Lane Keep‐
ing Assist
ing Assist .
X Press the 0076button.
The current selection is displayed.
X Press 0076to confirm.
X Press 0064or0063 to set Off
Off,Standard
Standard
or Adaptive
Adaptive.
X Press the 0076button to save the setting.
When Lane Keeping Assist is activated, the
multifunction display shows the lane mark- ings as bright lines in the assistance
graphic.
For further information about Lane Keeping
Assist, see (Y page 190). Maintenance menu
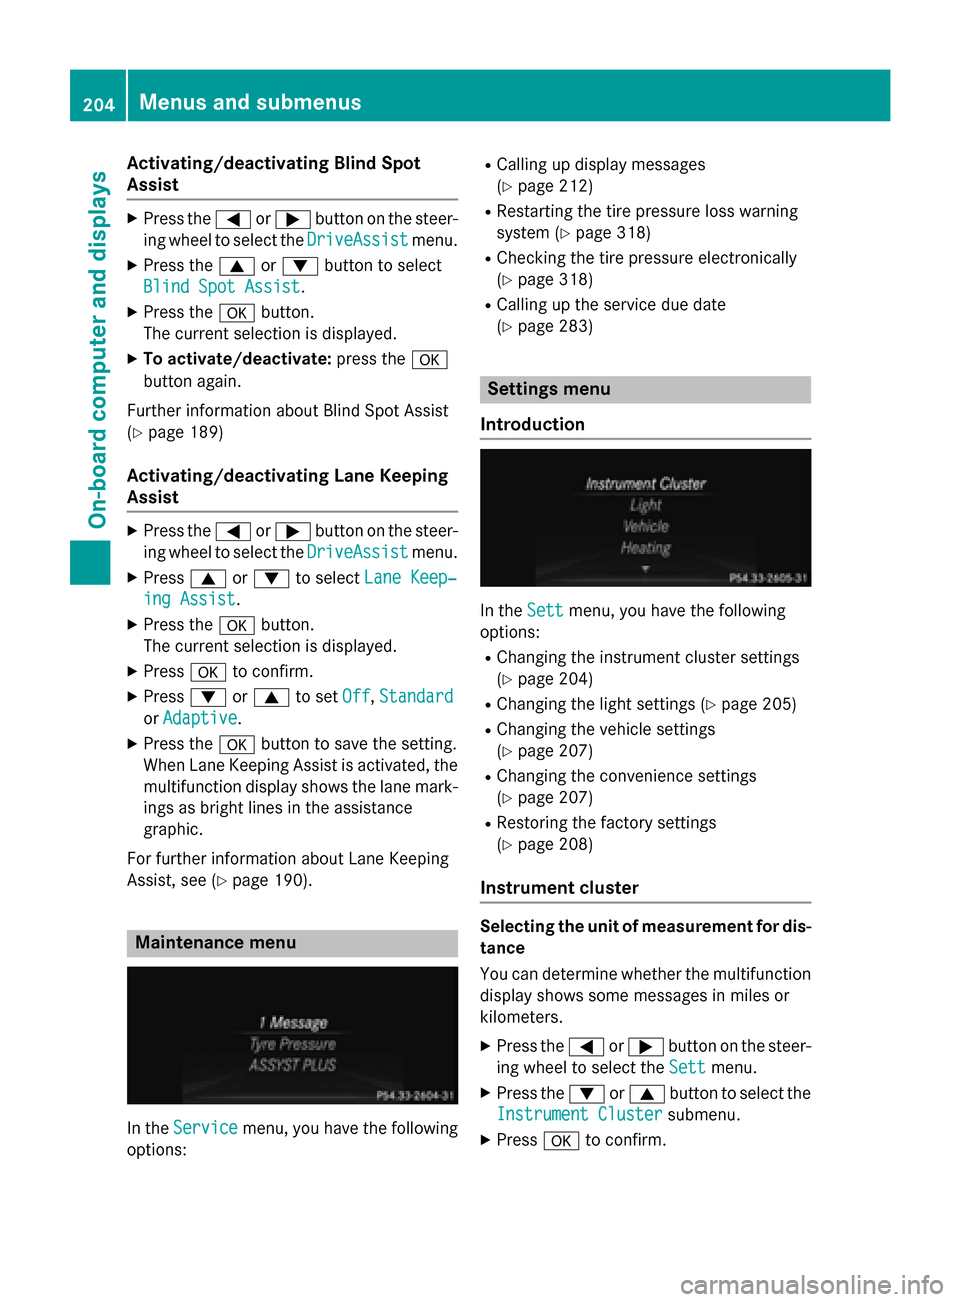
In the
Service
Service menu, you have the following
options: R
Calling up display messages
(Y page 212)
R Restarting the tire pressure loss warning
system (Y page 318)
R Checking the tire pressure electronically
(Y page 318)
R Calling up the service due date
(Y page 283) Settings menu
Introduction In the
Sett Settmenu, you have the following
options:
R Changing the instrument cluster settings
(Y page 204)
R Changing the light settings (Y page 205)
R Changing the vehicle settings
(Y page 207)
R Changing the convenience settings
(Y page 207)
R Restoring the factory settings
(Y page 208)
Instrument cluster Selecting the unit of measurement for dis-
tance
You can determine whether the multifunction display shows some messages in miles or
kilometers.
X Press the 0059or0065 button on the steer-
ing wheel to select the Sett Settmenu.
X Press the 0064or0063 button to select the
Instrument Cluster
Instrument Cluster submenu.
X Press 0076to confirm. 204
Menus and sub
menusOn-board computer and displays
Page 209 of 358

Vehicle
Activating/deactivating the automatic
door locking mechanism
X Press the 0059or0065 button on the steer-
ing wheel to select the Sett Settmenu.
X Press the 0064or0063 button to select the
Vehicle
Vehicle submenu.
X Press 0076to confirm.
X Press the 0064or0063 button to select the
Automatic Door Lock
Automatic Door Lock function.
When the Automatic
Automatic Door
DoorLock
Lockfunction
is activated, the left-hand vehicle door is
displayed in orange in the multifunction
display.
X Press the 0076button to save the setting.
If you activate the Automatic Door Lock
Automatic Door Lock
function, the vehicle is centrally locked above
a speed of around 9 mph (15 km/h).
For further information on the automatic lock- ing feature, see (Y page 79).
Activating/deactivating the acoustic
locking verification signal
If you switch on the Acoustic AcousticLock
Lockfunction,
an acoustic signal sounds when you lock the
vehicle.
X Press the 0059or0065 button on the steer-
ing wheel to select the Sett
Sett menu.
X Press the 0064or0063 button to select the
Vehicle
Vehicle submenu.
X Press 0076to confirm.
X Press the 0064or0063 button to select the
Acoustic Lock
Acoustic Lock function.
If the Acoustic
Acoustic Lock
Lockfunction is activated,
the 0037 symbol in the multifunction dis-
play lights up orange.
X Press the 0076button to save the setting.
Activating/deactivating the radar sensor
system
X Press the 0059or0065 button on the steer-
ing wheel to select the Settings
Settings menu.
X Press the 0064or0063 button to select the
Vehicle
Vehicle submenu. X
Press 0076to confirm.
X Press the 0063or0064 button to select
Radar Sensor (See Oper. Manual):
Radar Sensor (See Oper. Manual):.
You will see the selected setting: Enabled Enabled
or Disabled
Disabled.
X Press the 0076button to save the setting.
The following systems are switched off when
the radar sensor system is deactivated:
R DISTRONIC PLUS (Y page 171)
R BAS PLUS (Y page 62)
R PRE-SAFE ®
Brake (Y page 67)
Convenience Activating/deactivating the EASY-
ENTRY/EXIT feature G
WARNING
When the EASY-ENTRY/EXIT feature adjusts
the steering wheel, you and other vehicle
occupants – particularly children – could
become trapped. There is a risk of injury.
While the EASY-ENTRY/EXIT feature is mak-
ing adjustments, make sure that no one has
any body parts in the sweep of the steering
wheel.
If somebody becomes trapped:
R press one of the memory function position
buttons, or
R move the switch for steering wheel adjust-
ment in the opposite direction to that in
which the steering wheel is moving.
The adjustment process is stopped.
X Press the 0059or0065 button on the steer-
ing wheel to select the Sett Settmenu.
X Press the 0064or0063 button to select the
Convenience
Convenience submenu.
X Press 0076to confirm.
X Press the 0064or0063 button to select the
Easy Entry/Exit
Easy Entry/Exit function.
If the Easy Entry/Exit
Easy Entry/Exit function is activa-
ted, the vehicle steering wheel is displayed
in orange in the multifunction display.
X Press the 0076button to save the setting. Menus and submenus
207On-board computer and displays Z
Page 210 of 358

Further information on the EASY-ENTRY/EXIT
feature (Y page 101).
Switching the belt adjustment on/off
X Press the 0059or0065 button on the steer-
ing wheel to select the Sett
Sett menu.
X Press the 0064or0063 button to select the
Convenience
Convenience submenu.
X Press 0076to confirm.
X Press the 0064or0063 button to select the
Belt Adjustment
Belt Adjustment function.
When the Belt Adjustment
Belt Adjustment function is
activated, the vehicle seat belt is displayed in orange in the multifunction display.
X Press the 0076button to save the setting.
For further information on belt adjustment,
see (Y page 45).
Switching the fold-in mirrors when lock-
ing feature on/off
This function is only available on vehicles with
the memory function (Y page 106).
This function is only available in Canada.
When you activate the Auto.
Auto. Mirror Mirror Fold‐
Fold‐
ing
ing function, the exterior mirrors are folded
in when the vehicle is locked.
If you unlock the vehicle and then open a
door, the exterior mirrors fold out again.
If you have switched on the Auto. Mirror
Auto. Mirror
Folding
Folding function and you fold in the exterior
mirrors using the button on the door
(Y page 104), they will not fold out automat-
ically. The exterior mirrors can then only be
folded out using the button on the door.
X Press the 0059or0065 button on the steer-
ing wheel to select the Sett
Sett menu.
X Press the 0064or0063 button to select the
Convenience
Convenience submenu.
X Press 0076to confirm.
X Press the 0064or0063 button to select the
Auto. Mirror Folding Auto. Mirror Folding function.
If the Auto. Mirror Folding
Auto. Mirror Folding function is
activated, the vehicle's exterior mirror is displayed in orange in the multifunction
display.
X Press the 0076button to save the setting.
Restoring the factory settings X
Press the 0059or0065 button on the steer-
ing wheel to select the Sett. Sett.menu.
X Press the 0064or0063 button to select the
Factory Setting Factory Setting submenu.
X Press 0076to confirm.
The Reset All Settings? Reset All Settings? message
appears.
X Press the 0064or0063 button to select No
No
or Yes
Yes.
X Press the 0076button to confirm the selec-
tion.
If you have selected Yes Yes, the multifunction
display shows a confirmation message.
For safety reasons, the Daytime Running
Daytime Running
Lights
Lights function in the Light
Lightsubmenu is only
reset if the vehicle is stationary. AMG menu in AMG vehicles
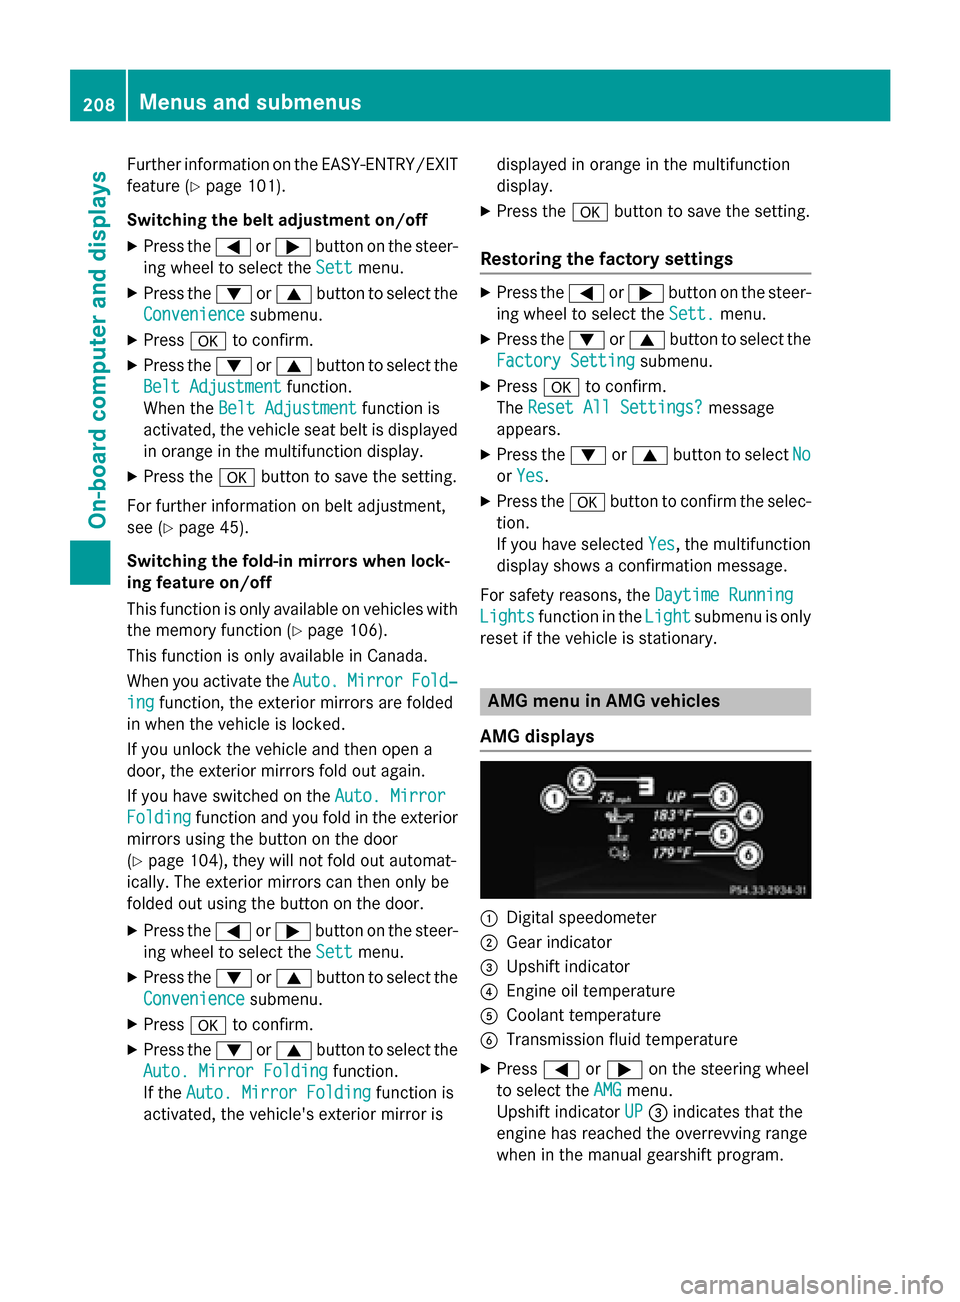
AMG displays 0043
Digital speedometer
0044 Gear indicator
0087 Upshift indicator
0085 Engine oil temperature
0083 Coolant temperature
0084 Transmission fluid temperature
X Press 0059or0065 on the steering wheel
to select the AMG AMGmenu.
Upshift indicator UP UP0087 indicates that the
engine has reached the overrevving range
when in the manual gearshift program. 208
Menus and submenusOn-board computer and displays
Page 272 of 358

beforehand. Possible options include text
message, e-mail or an automated call.
The area can be determined as either a circle
or a polygon with a maximum of ten corners. You can specify up to ten areas simultane-
ously. Different settings are possible for each
area.
USA only: these settings can be called up
under "Owners Online" at http://
www.mbusa.com.
Alternatively, you can trigger an MB Info call
and inform the customer service representa-
tive that you wish to activate geo fencing.
Currently inactive areas can be activated by
text message.
Triggering the vehicle alarm With this function, you can trigger the vehi-
cle's panic alarm via text message. An alarm
sounds and the exterior lighting flashes.
Depending on the setting, the panic alarm
lasts five or ten seconds. Afterwards, the
alarm switches off.
Garage door opener
General notes The HomeLink
®
garage door opener integra-
ted in the rear-view mirror allows you to oper-
ate up to three different door and gate sys-
tems.
Use the integrated garage door opener only
on garage doors that:
R have safety stop and reverse features and
R meet current U.S. federal safety standards
Once programed, the integrated garage door opener in the rear-view mirror will assume the
function of the garage door system's remote
control. Please also read the operating
instructions for the garage door system.
When programing a garage door opener, park the vehicle outside the garage. Do not run the
engine while programing. Certain garage door drives are incompatible
with the integrated garage door opener. If you
have difficulty programing the integrated
garage door opener, contact an authorized
Mercedes-Benz Center.
Alternatively, you can call the following tele-
phone assistance services:
R USA: Mercedes-Benz Customer Assistance
Center at 1-800-FOR-MERCedes
R Canada: Customer Service at
1-800-387-0100
R HomeLink ®
hotline 1-800-355-3515 (free
of charge)
More information on HomeLink ®
and/or
compatible products is also available online
at http://www.homelink.com.
Notes on the declaration of conformity
(Y page 25).
USA: FCC ID: CB2HMIHL4
Canada: IC: 279B-HMIHL4
Important safety notes G
WARNING
When you operate or program the garage door with the integrated garage door opener, per-
sons in the range of movement of the garage
door can become trapped or struck by the
garage door. There is a risk of injury.
When using the integrated garage door
opener, always make sure that nobody is
within the range of movement of the garage
door. G
WARNING
Combustion engines emit poisonous exhaust
gases such as carbon monoxide. Inhaling
these exhaust gases leads to poisoning. There is a risk of fatal injury. Therefore never leave
the engine running in enclosed spaces with-
out sufficient ventilation. 270
FeaturesStowage and features