2015 MERCEDES-BENZ E-CLASS CABRIOLET towing
[x] Cancel search: towingPage 24 of 349
Variable SPEEDTRONIC
see SPEEDTRONIC
Vehicle
Correct use ...................................... 27
Data acquisition ............................... 27
Display message ............................ 248
Electronics ..................................... 335
Equipment ....................................... 25
Implied warranty .............................. 27
Individual settings .......................... 223
Leaving parked up ......................... 159
Locking (in an emergency) ............... 82
Locking (key) ................................... 74
Lowering ........................................ 332
Pulling away ................................... 141
Raising ........................................... 330
Registration ..................................... 27
Securing from rolling away ............ 330
Tow-starting ................................... 315
Towing away .................................. 315
Transporting .................................. 317
Unlocking (in an emergency) ........... 82
Unlocking (key) ................................ 74
Vehicle data ................................... 342
Vehicle data ....................................... 342
Vehicle dimensions ........................... 342
Vehicle emergency locking ................ 82
Vehicle identification number
see VIN
Vehicle identification plate .............. 336
Vehicle tool kit .................................. 305
Video
Operating the DVD ......................... 218
See also Digital Owner's Manua l... 263
VIN
Seat ............................................... 337
Type plate ...................................... 336 W
Warning and indicator lamps ABS ................................................ 256
Brakes ........................................... 255
Distance warning signal ................. 261
ESP ®
.............................................. 256
ESP ®
OFF ....................................... 257
Fuel tank ........................................ 259
General notes ................................ 253 LIM (cruise control) ........................ 163
LIM (DISTRONIC PLUS) .................. 169
LIM (variable SPEEDTRONIC) ......... 166
Overview .......................................... 31
PASSENGER AIR BAG OFF ............... 38
Reserve fue l................................... 259
Seat belt ........................................ 254
Tyre pressure monitor ................... 262
Warning triangle ................................ 304
Washer fluid
Display message ............................ 252
Wheel and tyre combinations
Tyres .............................................. 333
Wheel bolt tightening torque ........... 332
Wheel chock ...................................... 330
Wheels
Changing a whee l.......................... 328
Changing/replacing ....................... 329
Checking ........................................ 321
Cleaning ......................................... 299
Emergency spare wheel ................. 333
Fitting a new wheel ........................ 332
Fitting a wheel ............................... 329
Important safety notes .................. 321
Information on driving .................... 321
Removing a whee l.......................... 331
Storing ........................................... 329
Tightening torque ........................... 332
Wheel size/tyre size ...................... 333
Wind deflector (cleaning instruc-
tions) .................................................. 298
Windows
Cleaning ......................................... 299
see Side windows
Windscreen
Demisting ...................................... 129
Windscreen washer fluid
see Windscreen washer system
Windscreen washer system
Important safety notes .................. 342
Topping up ..................................... 293
Windscreen wipers
Problem (malfunction) ................... 122
Replacing the wiper blades ............ 120
Switching on/of f........................... 120
Winter operation
Important safety notes .................. 323
Radiator cover ............................... 291 Index
21
Page 51 of 349

Important safety notes
!
Make sure that there are no objects in the
footwell or behind the seats. There is a risk
that the seats and/or the objects could be
damaged when PRE-SAFE ®
is activated.
Although your vehicle is equipped with PRE-
SAFE ®
, the possibility of injury in the event of an
accident cannot be ruled out. Always adapt your
driving style to suit the prevailing road and
weather conditions and maintain a safe distance from the vehicle in front. Drive carefully.
Function PRE-SAFE
®
intervenes:
R in emergency braking situations, e.g. when
BAS is activated
R in critical driving situations, e.g. when physi-
cal limits are exceeded and the vehicle under- steers or oversteers severely
R on vehicles with the Driving Assistance pack-
age: if BAS PLUS intervenes powerfully or the
radar sensor system detects an imminent
danger of collision in certain situations
PRE-SAFE ®
takes the following measures
depending on the hazardous situation detected:
R the front seat belts are pre-tensioned
R if the vehicle skids, the front side windows are
closed
R vehicles with the memory function: the front-
passenger seat is adjusted if it is in an unfav-
ourable position
R vehicles with a multicontour seat: the air pres-
sure in the side bolsters of the backrest is
increased
If the hazardous situation passes without result-
ing in an accident, PRE-SAFE ®
slackens the belt
pre-tensioning. On vehicles with multicontour
seats, the air pressure in the side bolsters is
reduced again. All settings made by PRE-SAFE ®
can then be reversed.
If the seat belt pre-tensioning is not reduced:
X Move the seat backrest or seat back slightly
when the vehicle is stationary.
Seat belt pre-tensioning is reduced and the
locking mechanism is released.
The seat-belt adjustment is an integral part of
the PRE-SAFE ®
convenience function. Informa-
tion about the convenience function can be
found under "Belt adjustment" (Y page 41). PRE-SAFE
®
PLUS (anticipatory occu-
pant protection PLUS)
Introduction PRE-SAFE
®
PLUS is only available in vehicles
with the Driving Assistance package.
Using the radar sensor system, PRE-SAFE ®
PLUS is able to detect that a head-on or rear-end collision is imminent. In certain hazardous sit-
uations, PRE-SAFE ®
PLUS takes pre-emptive
measures to protect the vehicle occupants.
Important safety notes The intervention of PRE-SAFE
®
PLUS cannot
prevent an imminent collision.
The driver is not warned before the intervention
of PRE-SAFE ®
PLUS.
PRE-SAFE ®
PLUS does not intervene:
R if the vehicle is reversing
R when the vehicle is towing a trailer and there
is a risk of a rear-end collision
When driving, or when parking or exiting a park- ing space with assistance from Active Parking
Assist, PRE-SAFE ®
PLUS will not apply the
brakes.
Function PRE-SAFE
®
PLUS intervenes in certain situa-
tions if the radar sensor system detects an
imminent head-on or rear-end collision.
PRE-SAFE ®
PLUS takes the following measures
depending on the hazardous situation detected:
R if the radar sensor system detects that a
head-on collision is imminent, the seat belts
are pre-tensioned
R if the radar sensor system detects that a rear-
end collision is imminent:
- the rear hazard warning lamps are activa-
ted and flash at a higher frequency
- the brake pressure is increased if the driver
applies the brakes when the vehicle is sta-
tionary
- the seat belts are pre-tensioned 48
Occupant safetySafety
Page 53 of 349
Child seat lock
G
WARNING
If the seat belt is released while driving, the
child restraint system will no longer be
secured properly. The child seat lock is disa-
bled and the inertia real draws in a portion of
the seat belt. The seat belt cannot be imme-
diately refastened. There is an increased risk
of injury, possibly even fatal.
Stop the vehicle immediately, paying atten-
tion to road and traffic conditions. Reactivate the child seat lock and secure the child
restraint system properly.
The rear seat belts are equipped with a child
seat lock. When enabled, the child seat lock
function ensures that the seat belt does not
slacken once the child restraint system is
secured.
Installing a child restraint system:
X Always comply with the child restraint system
manufacturer's installation instructions.
X Pull the seat belt smoothly out the belt outlet.
X Engage the seat belt tongue in the belt buckle.
Activating the child seat lock: X Pull the seat belt out fully and let the inertia
reel retract it again.
While the seat belt is retracting, you should
hear a ratcheting sound. The child seat lock
function is enabled.
X Push the child seat restraint system down so
that the seat belt is tight and does not loosen.
Removing a child restraint system and deacti-
vating the child seat lock:
X Always comply with the child restraint system
manufacturer's installation instructions.
X Press the release button of the belt buckle,
hold the belt tongue firmly and guide it back
towards the belt outlet.
The child seat lock function is deactivated. Child restraint system
Be sure to observe the correct use of the child
restraint system (Y page 55).
For safety reasons, Mercedes-Benz recom-
mends that you only use a child restraint system recommended by Mercedes-Benz
(Y
page 58). G
WARNING
If the child restraint system is incorrectly fit-
ted on the seat position suitable for this pur-
pose, it cannot perform its intended protec-
tive function. In the event of an accident,
sharp braking or a sudden change in direction, the child may not be held securely. There is an
increased risk of serious or even fatal injuries.
Observe the manufacturer's installation
instructions and the correct use for the child
restraint system. Make sure that the entire
surface of the child restraint system is resting
on the seat surface. Never place objects
under or behind the child restraint system,
e.g. cushions. Only use child restraint sys-
tems with the original cover designed for
them. Only replace damaged covers with gen- uine covers. G
WARNING
If the child restraint system is fitted incor-
rectly or is not secured, it can come loose in
the event of an accident, heavy braking or a
sudden change in direction. The child
restraint system could be thrown about, strik- ing vehicle occupants. There is an increased
risk of injury, possibly even fatal.
Always fit child restraint systems properly,
even if they are not being used. Make sure
that you observe the child restraint system
manufacturer's installation instructions.
You will find further information on stowing
objects, luggage and loads securely under
"Loading guidelines" (Y page 272). G
WARNING
Child restraint systems or their securing sys-
tems that have been damaged or subjected to a load in an accident cannot perform their
intended protective function. In the event of
an accident, sharp braking or a sudden
change in direction, the child may not be held securely. There is an increased risk of serious
or even fatal injuries. 50
Children in the vehicleSafety
Page 70 of 349

You can also switch off the hazard warning
lamps using the hazard warning button
(Y page 116). ESP
®
(Electronic Stability Program)
General notes i
Observe the "Important safety notes" sec-
tion (Y page 61).
ESP ®
monitors driving stability and traction, i.e.
power transmission between the tyres and the
road surface.
If ESP ®
detects that the vehicle is deviating from
the direction desired by the driver, one or more
wheels are braked to stabilise the vehicle. The
engine output is also modified to keep the vehi- cle on the desired course within physical limits.
ESP ®
assists the driver when pulling away on
wet or slippery roads. ESP ®
can also stabilise
the vehicle during braking.
ETS (Electronic Traction System) ETS traction control is part of ESP
®
.
Traction control brakes the drive wheels indi-
vidually if they spin. This enables you to pull
away and accelerate on slippery surfaces, for
example if the road surface is slippery on one
side. In addition, more drive torque is transfer-
red to the wheel or wheels with traction.
Traction control remains active if you deactivate ESP ®
.
Important safety notes i
Observe the "Important safety notes" sec-
tion (Y page 61). G
WARNING
If ESP ®
is malfunctioning, ESP ®
is unable to
stabilise the vehicle. In addition, other driving
safety systems are switched off. This increa-
ses the risk of skidding and an accident.
Drive on carefully. Have ESP ®
checked at a
qualified specialist workshop.
! Vehicles with 4MATIC: function or perform-
ance tests may only be carried out on a 2-axle dynamometer. Before operating the vehicle
on such a dynamometer, please consult a qualified specialist workshop. You could oth-
erwise damage the drive train or the brake
system.
Vehicles without 4MATIC: when towing your
vehicle with the rear axle raised, observe the
notes on ESP ®
(Y page 317).
If the å ESP®
OFF warning lamp lights up
continuously, then ESP ®
is deactivated.
If the ÷ ESP®
warning lamp and the å
ESP ®
OFF warning lamp are lit continuously,
ESP ®
is not available due to a malfunction.
Observe the information on warning lamps
(Y page 256) and display messages which may
be shown in the instrument cluster
(Y page 230).
i Only use wheels with the recommended tyre
sizes. Only then will ESP ®
function properly.
Characteristics of ESP ® General notes
If the ÷ ESP warning lamp goes out before
beginning the journey, ESP ®
is automatically
active.
If ESP ®
intervenes, the ÷ESP®
warning lamp
flashes in the instrument cluster.
If ESP ®
intervenes:
X Do not deactivate ESP ®
under any circum-
stances.
X When pulling away, only depress the acceler-
ator pedal as far as is necessary.
X Adapt your driving style to suit the prevailing
road and weather conditions.
ECO start/stop function
The ECO start/stop function switches the
engine off automatically if the vehicle stops
moving. When pulling away again, the engine
starts automatically. ESP ®
remains in its previ-
ously selected status. Example:if ESP®
was
deactivated before the engine was switched off,
ESP ®
remains deactivated when the engine is
switched on again. Driving safety systems
67Safety Z
Page 149 of 349

Problem
Possible causes/consequences and
M
MSolutions The coolant temperature
display is showing more
than 120 †. The coolant warning lamp may also
be on and a warning tone
may sound. The coolant level is too low. The coolant is too hot and the engine is no
longer being cooled sufficiently.
X Stop as soon as possible and allow the engine and the coolant to
cool down.
X Check the coolant level (Y page 292). Observe the warning notes
as you do so and top up the coolant if necessary. If the coolant level is correct, the engine radiator fan may be faulty. The
coolant is too hot and the engine is no longer being cooled sufficiently.
X If the coolant temperature is below 120 †, you can continue driving
to the nearest qualified specialist workshop.
X Avoid heavy loads on the engine as you do so, e.g. driving in moun-
tainous terrain and stop-start traffic. Manual transmission
Gear lever
! Only engage gear when the clutch pedal is
depressed.
! When shifting between
5thand 6thgear,
you should always push the gear lever all the way to the right. Otherwise, you could shift
unintentionally into 3rdor4th gear and dam-
age the transmission.
If you shift down at too high a speed (trans-
mission braking), this can cause the engine to
overrev, leading to engine damage.
Do not use the clutch bite point to keep the
vehicle stationary on uphill gradients. There is otherwise a risk of damaging the clutch.
! On long and steep downhill gradients, espe-
cially if the vehicle is laden or towing a trailer, you must shift into gear 1, 2or3in good time.
This uses the engine's braking effect. This
relieves the load on the brake system and
prevents the brakes from overheating and
wearing too quickly. k
Reverse gear
1 -6
Forward gears Engaging reverse gear
! Only shift into reverse gear
Rwhen the vehi-
cle is stationary. Otherwise, you could dam-
age the transmission.
X Move the gear lever firmly to the left, beyond
the point of resistance, then forwards.
The ECO start/stop function is not available
when reverse gear is engaged. For further infor-
mation on the ECO start/stop function; see
(Y page 142). 146
Manual transmissionDriving and parking
Page 151 of 349
Engaging park position P
!
If the engine speed is too high, do not shift
the automatic transmission directly from Dto
R, from Rto Dor directly to P. Otherwise, the
automatic transmission could be damaged.
X Push the DIRECT SELECT lever in the direction
of arrow P.
Transmission position display Pis shown in
the multifunction display.
Depressing the brake and pushing the DIRECT
SELECT lever up or down disengages the park-
ing lock. The transmission is in neutral N.
In order to shift from park position Pdirectly into
R or D:
R depress the brake pedal and
R push the DIRECT SELECT lever up or down
past the first point of resistance
Engaging park position P automatically Park position
Pis automatically engaged if:
R you switch off the engine using the key and
remove the key
R you switch off the engine using the key or
using the Start/Stop button and open the
driver's door or front-passenger door
R you open the driver's door when the vehicle is
stationary or when driving at a very low speed
and the transmission is in position Dor R
Under certain conditions, the automatic trans-
mission shifts automatically to transmission
position Pif the HOLD function or DISTRONIC
PLUS is activated. Observe the information on
the HOLD function (Y page 178) and on
DISTRONIC PLUS (Y page 172).
Engaging reverse gear R !
Only shift the automatic transmission to
R
when the vehicle is stationary.
X If the transmission is in position Dor N: push
the DIRECT SELECT lever up past the first
point of resistance.
X If the transmission is in position P: depress
the brake pedal and push the DIRECT SELECT
lever up past the first point of resistance.
The ECO start/stop function is not available
when reverse gear is engaged. Further informa-
tion on the ECO start/stop function
(Y page 142). Shifting to neutral N G
WARNING
If children are left unsupervised in the vehicle, they can:
R open doors and endanger other persons or
road users
R climb out and be injured by the traffic
R operate vehicle equipment and, for exam-
ple, trap themselves.
Children could also set the vehicle in motion, for example by:
R releasing the parking brake
R shifting the automatic transmission out of
park position P
R starting the engine.
There is a risk of an accident and injury.
When leaving the vehicle, always take the key
with you and lock the vehicle. Never leave
children unattended in the vehicle. Always
keep the key out of reach of children.
X If the transmission is in position Dor R: push
the DIRECT SELECT lever up or down to the
first point of resistance.
X If the transmission is in position P: depress
the brake pedal and push the DIRECT SELECT
lever up or down to the first point of resist-
ance.
If you switch the engine off with the transmis-
sion in position Ror D, the automatic transmis-
sion shifts to Nautomatically.
With the key: if you then open the driver's door
or the front-passenger door or remove the key
from the ignition, the automatic transmission
shifts to Pautomatically.
With KEYLESS-GO: if you then open the driver's
or front-passenger door, the automatic trans-
mission shifts to P.
If you want the automatic transmission to
remain in neutral N, e.g. when having the vehicle
cleaned in an automatic car wash with a towing system:
X Vehicles with KEYLESS-GO: remove the
Start/Stop button from the ignition lock.
X Insert the key into the ignition lock.
X All vehicles: switch the ignition on.148
Automatic transmissionDriving and parking
Page 153 of 349
Double-clutch function
E 500 only:
when shifting down, the double-
clutch function is active regardless of the cur-
rently selected drive program. The double-
clutch function reduces load change reactions
and is conducive to a sporty driving style. The
sound generated by the double-clutch function
depends on the drive program selected.
Kickdown Use kickdown for maximum acceleration:
X Depress the accelerator pedal beyond the
pressure point.
The transmission shifts to a lower gear
depending on the engine speed.
X Ease off the accelerator pedal once the
desired speed is reached.
The automatic transmission shifts back up.
Towing a trailer Towing a trailer is not possible with all models.
For further information, see (Y page 209).
X Drive in the middle of the engine speed range
on uphill gradients.
X Manual drive program: depending on the
uphill or downhill gradient, shift into a gear
(Y page 151) in which the engine will run in
the middle of the engine speed range. This
also applies if cruise control, DISTRONIC
PLUS or SPEEDTRONIC are activated. Program selector button
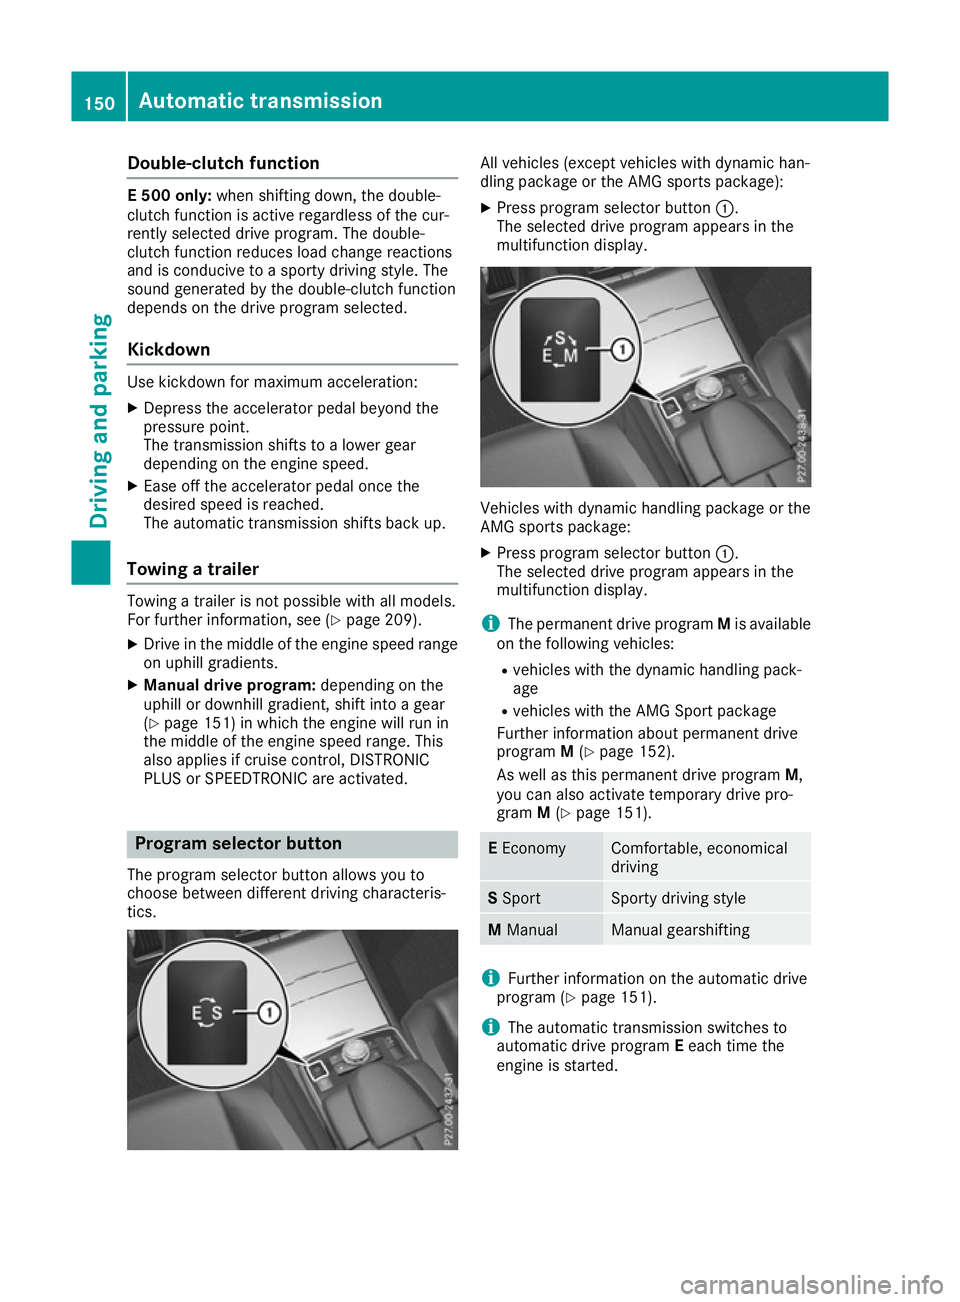
The program selector button allows you to
choose between different driving characteris-
tics. All vehicles (except vehicles with dynamic han-
dling package or the AMG sports package):
X Press program selector button :.
The selected drive program appears in the
multifunction display. Vehicles with dynamic handling package or the
AMG sports package:
X Press program selector button :.
The selected drive program appears in the
multifunction display.
i The permanent drive program Mis available
on the following vehicles:
R vehicles with the dynamic handling pack-
age
R vehicles with the AMG Sport package
Further information about permanent drive
program M(Y page 152).
As well as this permanent drive program M,
you can also activate temporary drive pro-
gram M(Y page 151). E
Economy Comfortable, economical
driving
S
Sport Sporty driving style
M
Manual Manual gearshifting
i
Further information on the automatic drive
program (Y page 151).
i The automatic transmission switches to
automatic drive program Eeach time the
engine is started. 150
Automatic transmissionDriving and pa
rking
Page 161 of 349
G
WARNING
If you leave children unattended in the vehi-
cle, they may be able to set the vehicle in
motion if, for example, they:
R release the parking brake
R shift the automatic transmission out of park
position Por shift manual transmission into
neutral
R start the engine
In addition, they may operate vehicle equip-
ment and become trapped. There is a risk of
an accident and injury.
When leaving the vehicle, always take the key with you and lock the vehicle. Never leave
children unattended in the vehicle.
! Always secure the vehicle correctly against
rolling away. Otherwise, the vehicle or its driv-
etrain could be damaged.
To ensure that the vehicle is safeguarded
against rolling away unintentionally:
R the parking brake must be applied
R on vehicles with manual transmission, engage
1st gear or reverse gear
R on vehicles with automatic transmission, the
transmission must be in position Pand the
key must be removed from the ignition lock
R the front wheels must be turned towards the
kerb on steep uphill or downhill gradients Switching off the engine
Important safety notes G
WARNING
The automatic transmission switches to neu-
tral position Nwhen you switch off the engine.
The vehicle may roll away. There is a risk of an
accident.
After switching off the engine, always switch
to parking position P. Prevent the parked vehi-
cle from rolling away by applying the parking
brake. Vehicles with manual transmission X
Shift to either 1st gear or reverse gear R.
X Turn the key to position 0in the ignition lock
and remove it.
The immobiliser is activated.
X Firmly depress the parking brake.
Vehicles with automatic transmission X
Firmly depress the parking brake.
X Shift the transmission to position P.
X With the key: turn the key to position 0in the
ignition lock and remove it.
The immobiliser is activated.
X With KEYLESS-GO: press the Start/Stop
button (Y page 139).
The engine stops and all the indicator lamps in the instrument cluster go out.
When the driver's door is closed, this corre-
sponds to key position 1. When the driver's
door is open, this corresponds to key position
0: "key removed".
If you switch the engine off with the transmis-
sion in position Ror D, the automatic transmis-
sion shifts to Nautomatically.
With the key: if you then open the driver's door
or the front-passenger door or remove the key
from the ignition, the automatic transmission
shifts to Pautomatically.
With KEYLESS-GO: if you then open the driver's
or front-passenger door, the automatic trans-
mission shifts to P.
If you want the automatic transmission to
remain in neutral N, e.g. when having the vehicle
cleaned in an automatic car wash with a towing
system:
X Vehicles with KEYLESS-GO: remove the
Start/Stop button from the ignition lock.
X Insert the key into the ignition lock.
X All vehicles: switch the ignition on.
X Depress the brake pedal and keep it
depressed.
X Shift to neutral N.
X Release the brake pedal.
X Release the parking brake.
X Switch off the ignition and leave the key in the
ignition lock. 158
ParkingDriving and parking