2015 MERCEDES-BENZ C-Class USB port
[x] Cancel search: USB portPage 170 of 214
poses an increased risk of injury or even fatal
injury.
Keep SD memory cards out of the reach of
children. If an SD memory card is swallowed,
seek immediate medical attention.
! If you are no longer using the SD memory
card, you should remove it. High tempera-
tures can damage the card.
COMAND supports SD memory cards
(Secure Digital), SDHC memory cards
(Secure DigitalHighCapacity), and SDXC
memory cards (Secure Digital eXtended
Capacity.
Inserting an SD memory card X
Insert the SD memory card into the SD card
slot in the stowage space under the arm-
rest until the SD memory card engages into
place. The side with the contacts must face
downwards.
The music is played while the files are
loaded in the background. If there are no
supported audio/video files, you will see a
message to this effect.
Ejecting an SD memory card X
Press the memory card.
The memory card is ejected.
X Remove the memory card. Connecting USB devices
There are two USB ports in the stowage space
under the armrest.
X Connect the USB device to the USB port.
The data medium will only be played and
the files will only be loaded in the back-
ground if the corresponding media display
is visible. Otherwise, the system does not
automatically switch to USB. If there are no
supported audio/video files, you will see a
message to this effect. i
MP3 players must support Media Transfer
Protocol (MTP). Activating media mode
Switching on automatically After an external media source has been con-
nected, COMAND will only activate the cor-
responding media mode automatically and
show the basic display in the case of CDs and
SD cards. If the CD/DVD is started using
another application (e.g. navigation), the dis-
play will not change.
When using USB devices, depending on the
vehicle's equipment, the relevant Media
Interface 1, 2 or USB 1, 2 basic display must
already be activated.
X Insert the CDs/DVDs (Y page 166)
or
X Insert a SD memory card: (Y page 168)
or
X Connect a USB device: (Y page 168)
COMAND loads the medium inserted and
starts to play it automatically.
Further options for switching on R
Using the number keypad: (Y page 165)
R Using the main function bar: (Y page 165)
R Using the device list: (Y page 165)
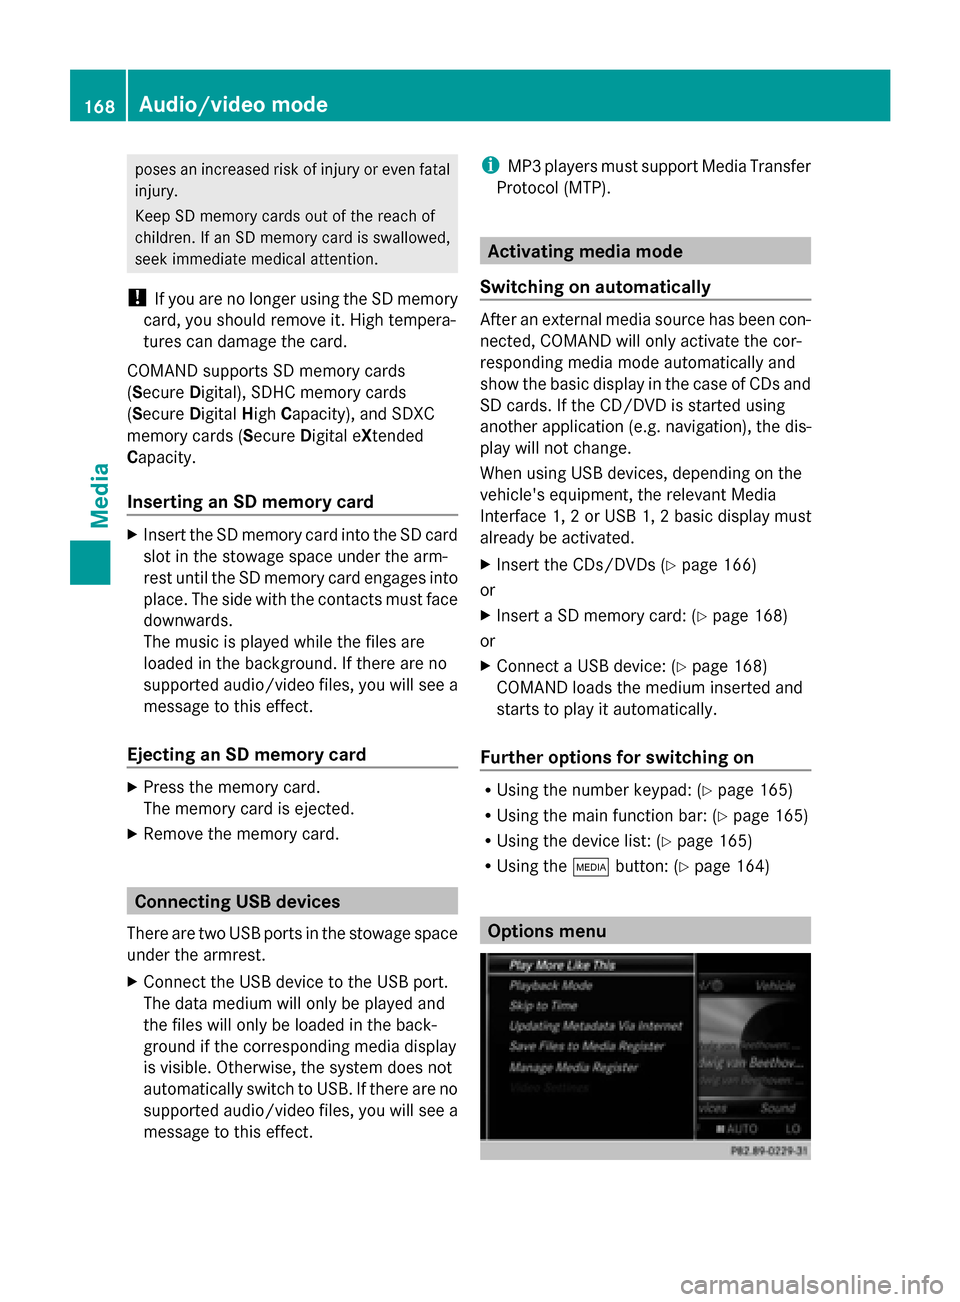
R Using the 00FDbutton: (Y page 164) Options menu168
Audio/video modeMedia
Page 171 of 214
X
In Media mode, slide 00520064the controller.
The media menu bar is shown.
X To select Options
Options: turn and press the con-
troller.
Playing similar tracks
X To select Play PlayMore
More Like
LikeThis
This: turn and
press the controller.
COMAND automatically creates and plays
a track list with similar tracks. If there are
no comparable tracks on the data carrier,
you will see a message to this effect.
X Select the required track. Play mode
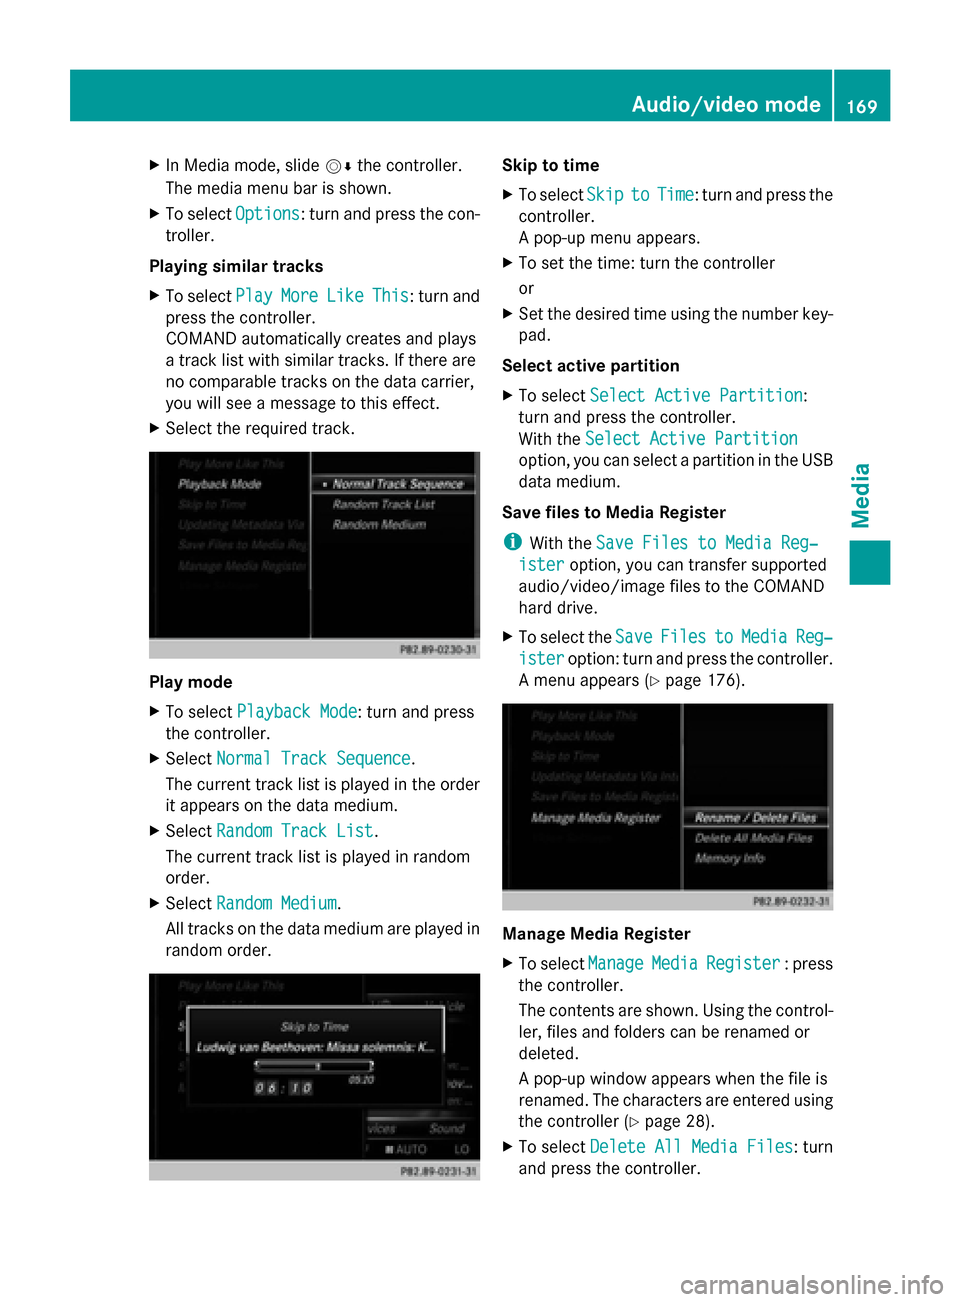
X
To select Playback Mode Playback Mode: turn and press
the controller.
X Select Normal Track Sequence
Normal Track Sequence.
The current track list is played in the order
it appears on the data medium.
X Select Random Track List
Random Track List.
The current track list is played in random
order.
X Select Random Medium
Random Medium.
All tracks on the data medium are played in
random order. Skip to time
X
To select Skip
Skip to toTime
Time : turn and press the
controller.
A pop-up menu appears.
X To set the time: turn the controller
or
X Set the desired time using the number key-
pad.
Select active partition
X To select Select Active Partition Select Active Partition:
turn and press the controller.
With the Select Active Partition Select Active Partition
option, you can select a partition in the USB
data medium.
Save files to Media Register
i With the Save Files to Media Reg‐ Save Files to Media Reg‐
ister
ister option, you can transfer supported
audio/video/image files to the COMAND
hard drive.
X To select the Save SaveFiles
Files to
toMedia
Media Reg‐
Reg‐
ister
ister option: turn and press the controller.
A menu appears (Y page 176). Manage Media Register
X
To select Manage ManageMedia
MediaRegister
Register : press
the controller.
The contents are shown. Using the control-
ler, files and folders can be renamed or
deleted.
A pop-up window appears when the file is
renamed. The characters are entered using
the controller (Y page 28).
X To select Delete All Media Files
Delete All Media Files : turn
and press the controller. Audio/video mode
169Media Z
Page 174 of 214
R
SD memory card
R USB storage device
Permissible file systems R
ISO 9660/Joliet standard for CDs
R UDF for video DVDs
R FAT16, FAT32, exFAT and NTFS for SD
memory card and USB storage media
Multisession CDs For multisession CDs, the content of the first
session determines how COMAND will proc-
ess the CD. COMAND plays only one session
and gives priority to the audio CD session.
File structure of a data carrier When you create a disc with compressed
music files, the tracks can be organized in
folders. A folder may also contain subfolders.
The disc may contain no more than eight
directory levels. Files beyond the eighth level
will not be recognized by the system.
i COMAND supports up to 50,000 files
from one data medium. For data media with
more than 64 GB, only files in the following
folders are supported: music, pictures, vid-
eos.
Track and file names When you create a disc with compressed
music files, you can assign names to the
tracks and folders.
If MP3 or WMA files are stored in the root
directory itself, the root directory will also be
treated as a folder. You should observe the following when
assigning track names:
R
track names must have at least one char-
acter.
R track names must have the ending of a
supported audio/video format, e.g. mp3,
aac or m4v.
R there must be a dot between the track
name and the extension.
Example of a correct track name:
"Track1.mp3".
Permissible formats COMAND supports the following audio for-
mats:
R
MP3
R WMA
R CD-A
R AAC formats: .aac, .mp4, .m4a and .m4b
Copy-protected iTunes music files with
the .m4p file ending are not supported.
COMAND supports the following video for-
mats:
R DVD-V
R MPEG
R wmv
R M4V
R AVI up to 720p.
Permissible bit and sampling rates COMAND supports MP3 files of the following
types:
R
fixed and variable bit rates from 32 kbit/s
to 320 kbit/s
R sampling rates of 8 kHz to 48 kHz
COMAND supports WMA files of the following
types:
R fixed bit rates from 5 kbit/s to 384 kbit/s
R sampling rates of 8 kHz to 48 kHz 172
Audio/video modeMedia
Page 175 of 214
COMAND does not support WMA files of the
following types:
R DRM (Digital Rights Management)
encrypted files
R variable bit rate
R WMA Pro
R 5.1 surround sound
i Only use tracks with a bit rate of at least
128 kbit/s and a sampling rate of at least
44.1 kH z.Lower rates can cause a notice-
able deterioration in quality. This is espe-
cially the case if you have activated a sur-
round sound function.
Selecting an active partition (USB mass
storage devices only) You can select this function for USB storage
devices when the storage device is parti-
tioned. Up to 9 partitions (primary or logical,
FAT, FAT32 and NTFS) are supported.
Select active partition
X To select Options
Options in the Media menu bar:
turn and press the controller.
X Select Select Active Partition
Select Active Partition.
Notes on copyright Audio/video files that you create or repro-
duce yourself for playback are generally sub-
ject to copyright protection.
In many countries, reproductions, even for
private use, are not permitted without the
prior consent of the copyright holder.
Make sure that you know about the applicable
copyright regulations and that you comply
with these.
Notes on CDs/DVDs !
COMAND is designed to play discs that
comply with the EN 60908 standard. There-
fore, you can only use discs with a maxi-
mum thickness of 1.3 mm.
If you insert thicker discs, e.g. those that
contain data on both sides (DVD on one side and audio data on the other), they can-
not be ejected and can damage the device.
Only use round discs with a diameter of
12 cm. Do not use discs with a diameter of
8 cm, even with an adapter.
Discs with copy protection are not compati-
ble with the audio CD standard and therefore
may not be able to be played by COMAND.
Playback problems may occur when playing
copied discs.
There may be playback problems if you play
CDs that you have copied yourself with a stor-
age capacity of more than 700 MB.
i COMAND is able to play back audio CDs
in multichannel audio format. Media search
Starting the media search
X In Media mode, slide 00520064the controller.
The media menu bar appears.
X To select Search Search: turn and press the con-
troller.
The category list appears. General information
COMAND plays back files from the following
data mediums:
R Disc (CD/DVD Audio)
R Memory card
R MEDIA REGISTER
R USB storage device
R Apple devices (folder, year and photos are
not available)
The categories are displayed according to the
data available. Media search
173Media Z
Page 188 of 214
Selecting playback options
If the Bluetooth ®
audio device supports the
corresponding function, the following options
are available:
R Normal Track Sequence
Normal Track Sequence: the tracks are
played in the normal order (e.g. track 1, 2,
3 etc.).
Audio data playback is determined by the
order in which the tracks are written to the
data medium. Alphabetical order is the
most common. Once all the tracks in a
folder have been played, the tracks in the
next folder are played.
R Random
Random Track TrackList
List: the current track list
is played in random order (e.g. 3, 8, 5 etc.).
R Random
Random Medium
Medium: all tracks on the data car-
rier are played in random order (e.g. track
3, 8, 5 etc.).
Playback options are optional functions
and are not, or only partially, supported by
Bluetooth ®
audio devices.
Selecting playback options
X To select Options
Options: turn and press the con-
troller.
X Select Playback Mode
Playback Mode.
A 003B dot indicates the current setting.
X Select the desired option.
If you select Random RandomTrack
Track List
List, you will
see a corresponding message in the dis-
play/selection window. Increasing the volume using COMAND
X To select Options Options: slide 005200C5and press
the controller.
X To select Volume
Volume: turn and press the con-
troller.
A menu appears. The 003Bdot indicates the
current setting.
X Select Standard
Standard orBoost Boost.
Information on sound settings
(Y page 200). Information on audio AUX mode
(Y
page 189). Operation with the Media Interface
Prerequisite
Media Interface is a universal interface for the
connection of mobile audio and video devi-
ces. Media Interface in COMAND has two
USB connections.
The USB connection sockets are located in
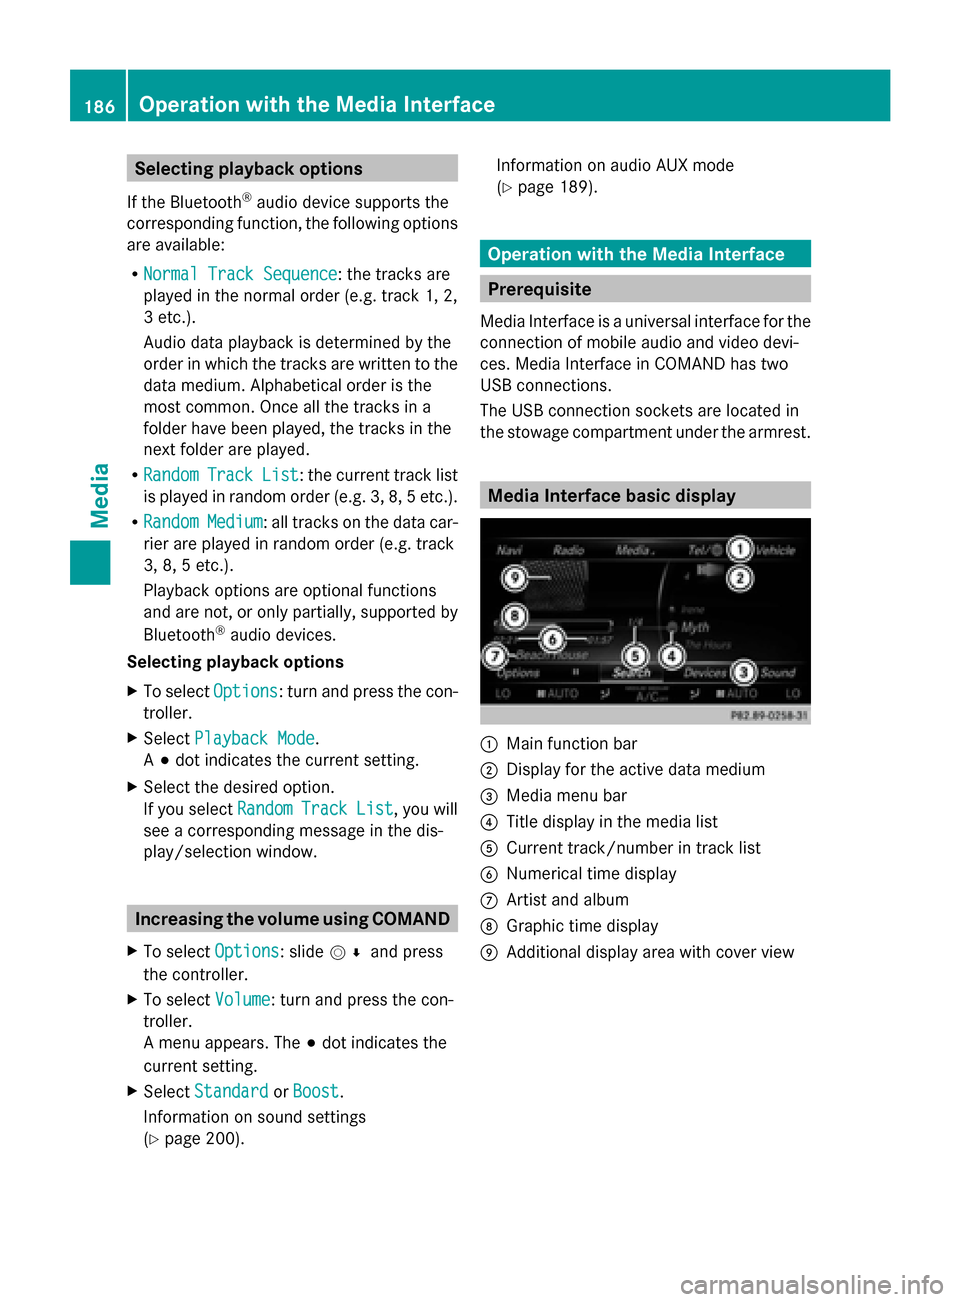
the stowage compartment under the armrest. Media Interface basic display
0043
Main function bar
0044 Display for the active data medium
0087 Media menu bar
0085 Title display in the media list
0083 Current track/number in track list
0084 Numerical time display
006B Artist and album
006C Graphic time display
006D Additional display area with cover view 186
Operation with the Media InterfaceMedia
Page 189 of 214
Switching to Media Interface
Switching on automatically X
Connect a data medium to USB port 1 or
USB port 2.
X Make sure that the Media Interface 1 or
Media Interface 2 basic menu is activated.
If playable media files are found, they will
be played by COMAND.
If you remove a device, the No Device
No Device
Connected Connected message appears.
Further options for switching on R
Using the number keypad: (Y page 165)
R Using the main function bar: (Y page 165)
R Using the device list: (Y page 165)
R Using the 00FDbutton: (Y page 164) Supported devices
The following data media can be connected
to COMAND via the Media Interface:
R iPod ®
R iPhone ®
R iPad ®
R MP3
R USB devices
i It is not possible to run two Apple devices
simultaneously. Therefore the device last
connected is loaded.
i iPod ®
, iPhone ®
and iPad ®
are registered
trademarks of Apple Inc., Cupertino, Cali-
fornia, USA.
i Audio files, photos and video files can be
played back.
For details and a list of supported devices,
visit http://www.mbusa-mobile.com. Or
call the Mercedes-Benz Customer Assistance
Center at 1-800-FOR-MERCedes
(1-800-367-6372) (for the USA) or Customer
Relations at 1-800-387-0100 (for Canada). Supported data formats
Music mp3, wma, aac
Video mpeg, wmv, mov,
avi, mp4
Images jpg, jpeg, bmp, png
Selecting a music file
Selecting with the controller X
To display the current track list: press
the controller in the basic display.
The track list for the active data medium
appears.
X To select a track: turn the controller and
press to confirm.
X To skip forwards or backwards to a
track: turn the controller in the basic dis-
play.
The selected track is played.
Fast forward/rewind X
With the media source active in the basic
display, slide 009500520096the controller and hold
it until the desired position has been
reached. Search function
Selecting Search using media menu bar X
Slide 00520064the controller.
The media menu bar appears.
X To select Search Search: turn and press the con-
troller.
The category list appears.
Overview The following categories are listed:
R
Current Tracklist Current Tracklist;
R Folders:
Folders:;
R Select By Cover
Select By Cover; Operation with the Media Interface
187Media Z
Page 198 of 214
It is possible to navigate in the DVD's
control menu when the arrows in the upper
menu bar are activated.
X To select the 0095009700C50096arrow to navigate in the
menu: turn the controller.
The active arrow is highlighted.
X To select a menu entry: press the control-
ler.
The next menu entry in the direction of the
arrow is highlighted.
X To call up a highlighted menu entry: turn
the controller until ok
ok is highlighted.
X Press the controller.
The selected DVD scene is played.
X To hide DVD functions: select 0039using the
controller.
X Press the controller.
The DVD functions are hidden.
If there are functions such as Display cam-
era perspectives on the DVD, these are
shown in the DVD functions menu.
X To call up Display camera perspectives:
turn and press the controller
Stop function X
Show the DVD functions (Y page 195).
X Interrupting playback
To select 00DBfrom the DVD functions
menu: turn and press the controller.
The 00CF display changes to 00D0. The
video image is hidden.
X To continue playback: select00D0.
Playback continues from the point where it
was interrupted.
X To stop playback: select00DBagain while
playback is interrupted.
X To start playback again: select00D0.
Playback restarts from the beginning.
Pause function X
Show the DVD functions (Y page 195).
X Pausing playback To select
00CF: turn and press the control-
ler.
The 00CF display changes to 00D0.
X To continue playback: select00D0. Selecting a scene/chapter
If the film is divided into scenes or chapters,
these can be selected directly while the film
is running, or skipped forwards step by step.
This is not possible at certain points for some
DVDs (e.g. during the opening credits).
It may also be possible to select the scene/
chapter from the functions stored on the
DVD.
X To skip forwards or back: in the video
menu, turn the controller.
The next or previous scene in the film is
skipped to.
i The DVD functions can also be used to
make selections (Y page 195) Picture viewer
General notes
If there are pictures on the active data
medium, you can view them on the COMAND
display.
The following data media and picture formats
are supported:
R Data medium: MEDIA REGISTER, CD,
DVD, USB devices, SD memory cards
R Picture formats: jpeg, jpg, bmp, png
The maximum image resolution is 20 mega-
pixels
It is not possible to view a picture from the
driver's side while the vehicle is in motion. 196
Picture viewerMedia