2015 MERCEDES-BENZ B-Class ELECTRIC light
[x] Cancel search: lightPage 196 of 338
R
COLLISION PREVENTION ASSIST PLUS
(Y page 64)
R ATTENTION ASSIST (Y page 176)
R Rear window wiper (Y page 111)
X Press :to display the ATTEN-
TION ASSIST assessment.
Deactivating/activating ESP ®Observe the important safety notes on ESP
®
(Y page 66). G
WARNING
If you deactivate ESP ®
, ESP ®
no longer sta-
bilizes the vehicle. There is an increased risk
of skidding and an accident.
Only deactivate ESP ®
in the situations descri-
bed in the following.
It may be best to deactivate ESP ®
in the fol-
lowing situations:
R when using snow chains
R in deep snow
R on sand or gravel
For further information about ESP ®
, see
(Y page 66).
X Start the drive system.
X Press the =or; button on the steer-
ing wheel to select the DriveAssist DriveAssistmenu.
X Press 9or: to select ESP
ESP.
X Press the abutton.
The current selection is displayed.
X To activate/deactivate: press thea
button again.
ESP ®
is deactivated if the åwarning
lamp in the instrument cluster lights up
continuously when the drive system is run- ning.
If the ÷ andå warning lamps light up
continuously, ESP ®
is not available due to a
malfunction.
Observe the information on warning lamps
(Y page 233). Observe the information on display messages
(Y page 201).
Activating/deactivating COLLISION
PREVENTION ASSIST PLUS X
Press the =or; button on the steer-
ing wheel to select the DriveAssist
DriveAssist menu.
X Press the 9or: button to select
Collision Prevent. Assist Collision Prevent. Assist .
X Press the abutton.
The current selection is displayed.
X To activate/deactivate: press thea
button again.
When COLLISION PREVENTION ASSIST
PLUS is deactivated, the æsymbol
appears in the multifunction display in the
assistance graphic display.
For further information about COLLISION
PREVENTION ASSIST PLUS, see (Y page 64).
Activating/deactivating ATTENTION
ASSIST X
Press the =or; button on the steer-
ing wheel to select the DriveAssist DriveAssistmenu.
X Press the 9or: button to select
Attention Assist
Attention Assist .
X Press the abutton.
The current selection is displayed.
X Press ato confirm.
X Press the :or9 button to set Off
Off,
Standard
Standard orSensitive
Sensitive .
X Press the abutton to save the setting.
When ATTENTION ASSIST is deactivated,
the é symbol appears in the multifunc-
tion display in the assistance graphics dis-
play.
For further information about ATTENTION
ASSIST, see (Y page 176).194
Menus and submenusOn-board computer and displays
Page 197 of 338
Activating/deactivating Blind Spot
Assist X
Press the =or; button on the steer-
ing wheel to select the DriveAssist
DriveAssist menu.
X Press the 9or: button to select
Blind Spot Assist
Blind Spot Assist .
X Press the abutton.
The current selection is displayed.
X To activate/deactivate: press thea
button again.
For further information about Blind Spot
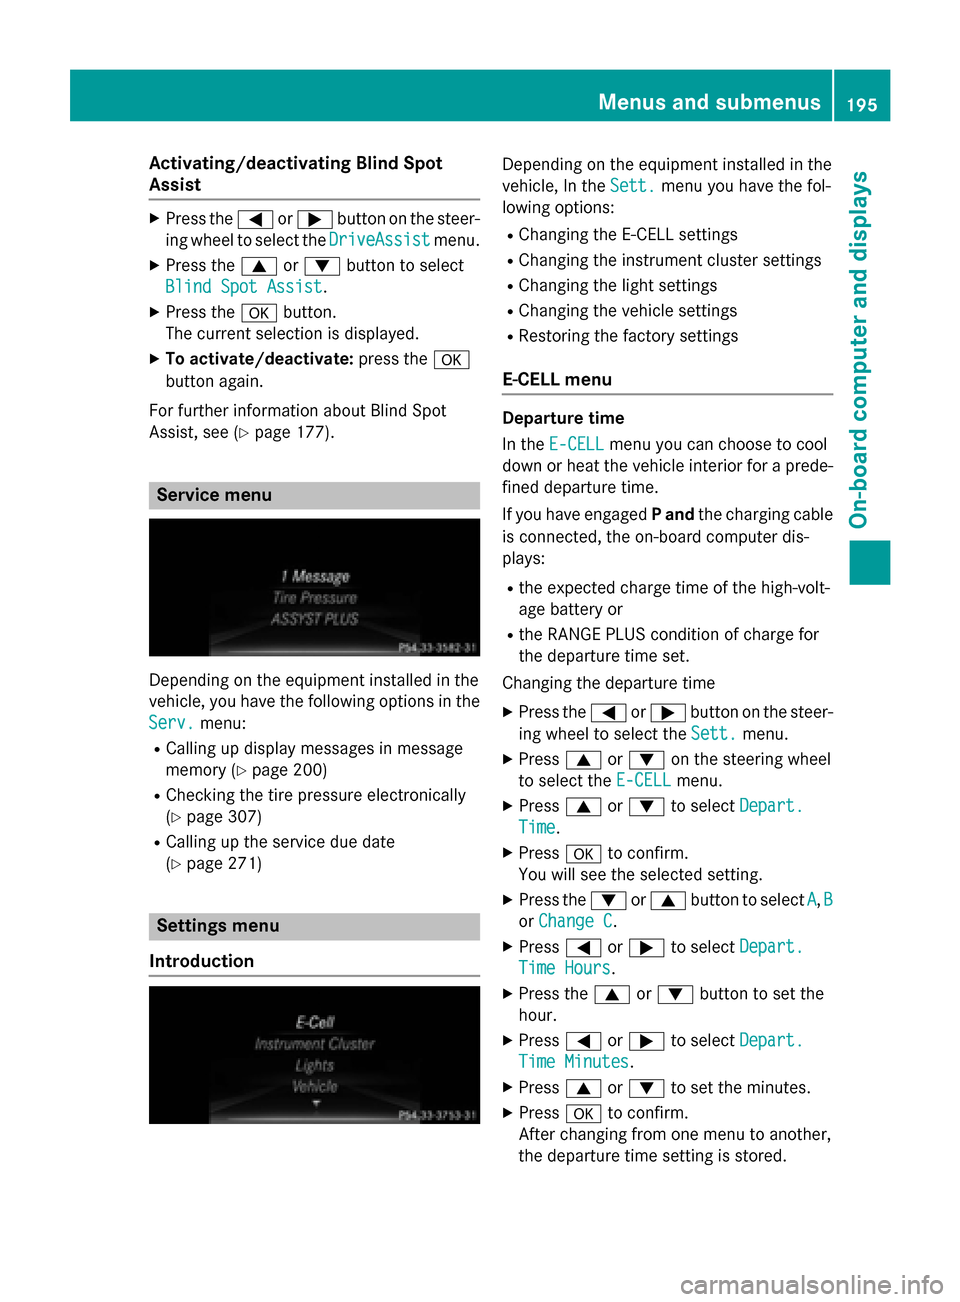
Assist, see (Y page 177). Service menu
Depending on the equipment installed in the
vehicle, you have the following options in the
Serv. Serv. menu:
R Calling up display messages in message
memory (Y page 200)
R Checking the tire pressure electronically
(Y page 307)
R Calling up the service due date
(Y page 271) Settings menu
Introduction Depending on the equipment installed in the
vehicle, In the
Sett. Sett.menu you have the fol-
lowing options:
R Changing the E-CELL settings
R Changing the instrument cluster settings
R Changing the light settings
R Changing the vehicle settings
R Restoring the factory settings
E ‑CELL menu Departure time
In the
E-CELL E-CELL menu you can choose to cool
down or heat the vehicle interior for a prede- fined departure time.
If you have engaged Pand the charging cable
is connected, the on-board computer dis-
plays:
R the expected charge time of the high-volt-
age battery or
R the RANGE PLUS condition of charge for
the departure time set.
Changing the departure time
X Press the =or; button on the steer-
ing wheel to select the Sett.
Sett. menu.
X Press 9or: on the steering wheel
to select the E‑CELL E‑CELLmenu.
X Press 9or: to select Depart.
Depart.
Time
Time.
X Press ato confirm.
You will see the selected setting.
X Press the :or9 button to select A
A, B
B
or Change C
Change C.
X Press =or; to select Depart.
Depart.
Time Hours
Time Hours.
X Press the 9or: button to set the
hour.
X Press =or; to select Depart.
Depart.
Time Minutes
Time Minutes.
X Press 9or: to set the minutes.
X Press ato confirm.
After changing from one menu to another,
the departure time setting is stored. Menus and submenus
195On-board computer and displays Z
Page 198 of 338
Selecting the departure time
X Press the =or; button on the steer-
ing wheel to select the Sett.
Sett.menu.
X Press 9or: on the steering wheel
to select the E‑CELL
E‑CELL menu.
X Press 9or: to select Depart.
Depart.
Time
Time.
X Press ato confirm.
X Press the :or9 button to select
one of the three departure times or Timer
Timer
Off
Off (no timer active).
X Press ato confirm.
Charging with RANGE PLUS
If you have engaged Pand the charging cable
is connected, the on-board computer dis-
plays:
R the expected charge time of the high-volt-
age battery or
R the RANGE PLUS condition of charge for
the departure time set
RANGE PLUS charges when:
R you have activated RANGE PLUS via the
center console prior to charging and
R the high-voltage battery is fully charged
If charging is not complete by departure time,
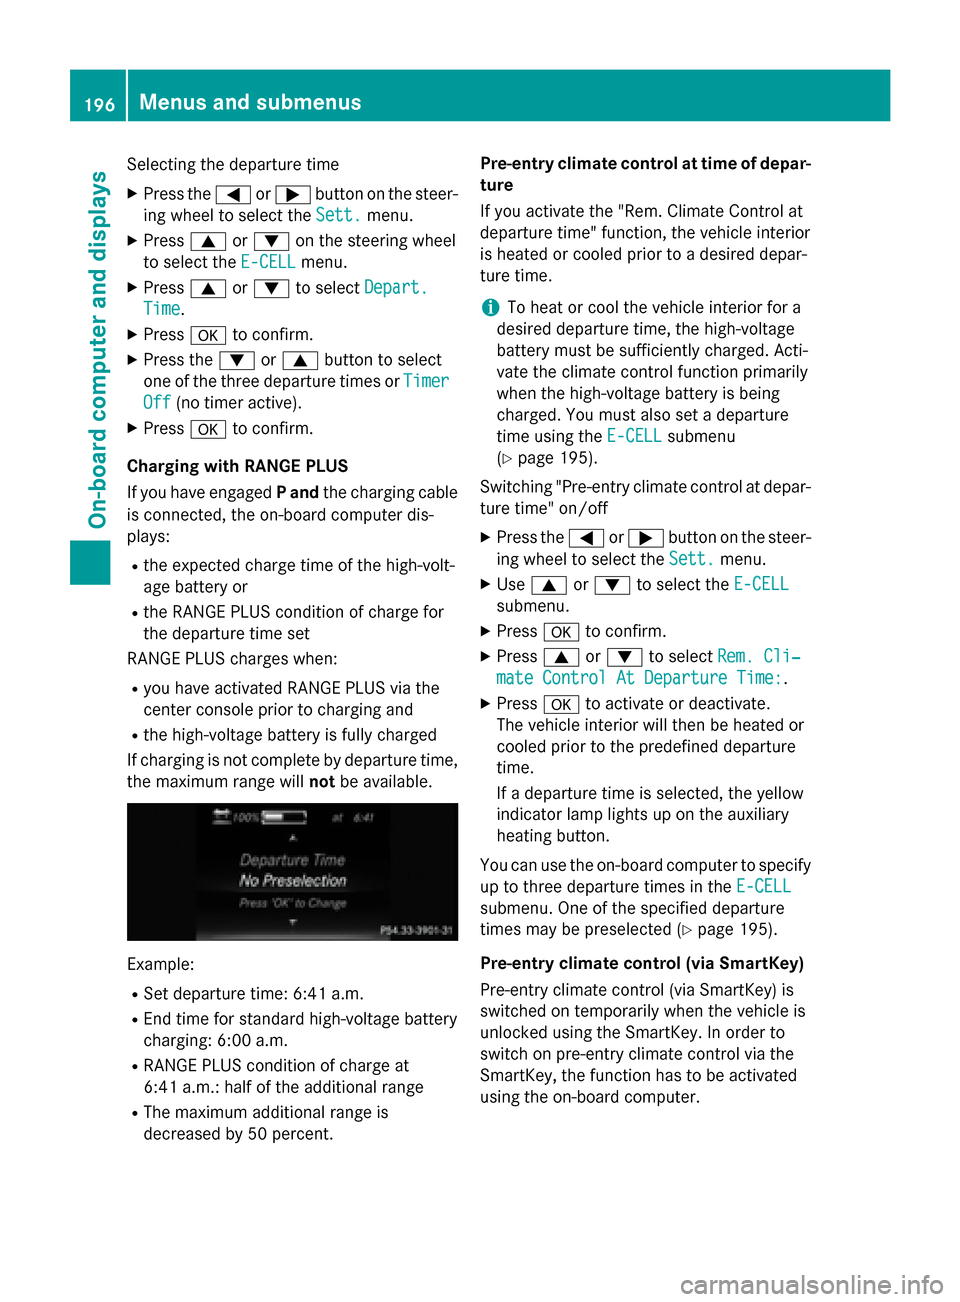
the maximum range will notbe available. Example:
R Set departure time: 6:41 a.m.
R End time for standard high-voltage battery
charging: 6:00 a.m.
R RANGE PLUS condition of charge at
6:41 a.m.: half of the additional range
R The maximum additional range is
decreased by 50 percent. Pre-entry climate control at time of depar-
ture
If you activate the "Rem. Climate Control at
departure time" function, the vehicle interior
is heated or cooled prior to a desired depar-
ture time.
i To heat or cool the vehicle interior for a
desired departure time, the high-voltage
battery must be sufficiently charged. Acti-
vate the climate control function primarily
when the high-voltage battery is being
charged. You must also set a departure
time using the E-CELL
E-CELL submenu
(Y page 195).
Switching "Pre-entry climate control at depar-
ture time" on/off
X Press the =or; button on the steer-
ing wheel to select the Sett. Sett.menu.
X Use 9 or: to select the E-CELL
E-CELL
submenu.
X Press ato confirm.
X Press 9or: to select Rem. Cli‐
Rem. Cli‐
mate Control At Departure Time:
mate Control At Departure Time:.
X Press ato activate or deactivate.
The vehicle interior will then be heated or
cooled prior to the predefined departure
time.
If a departure time is selected, the yellow
indicator lamp lights up on the auxiliary
heating button.
You can use the on-board computer to specify up to three departure times in the E-CELL E-CELL
submenu. One of the specified departure
times may be preselected (Y page 195).
Pre-entry climate control (via SmartKey)
Pre-entry climate control (via SmartKey) is
switched on temporarily when the vehicle is
unlocked using the SmartKey. In order to
switch on pre-entry climate control via the
SmartKey, the function has to be activated
using the on-board computer. 196
Menus and submenusOn-board computer and displays
Page 200 of 338
![MERCEDES-BENZ B-Class ELECTRIC 2015 W246 Owners Manual Switching the additional speedometer
on/off
The
Speedometer [km/h] Speedometer [km/h] orSpeedometer
Speedometer
[mph]
[mph] function allows you to choose whether
the multifunction display in the statu MERCEDES-BENZ B-Class ELECTRIC 2015 W246 Owners Manual Switching the additional speedometer
on/off
The
Speedometer [km/h] Speedometer [km/h] orSpeedometer
Speedometer
[mph]
[mph] function allows you to choose whether
the multifunction display in the statu](/manual-img/4/3623/w960_3623-199.png)
Switching the additional speedometer
on/off
The
Speedometer [km/h] Speedometer [km/h] orSpeedometer
Speedometer
[mph]
[mph] function allows you to choose whether
the multifunction display in the status area
shows the speed in km/h km/hor inmph
mphinstead of
the outside temperature.
X Press the =or; button on the steer-
ing wheel to select the Sett.
Sett. menu.
X Press the :or9 button to select the
Instrument Cluster
Instrument Cluster submenu.
X Press ato confirm.
X Press the :or9 button to select the
Speedometer [km/h]
Speedometer [km/h] orSpeedometer
Speedometer
[mph]
[mph] function.
You will see the selected setting: On
OnorOff
Off.
X Press the abutton to save the setting.
Selecting the permanent display function You can determine whether the multifunction
display permanently shows the outside tem-
perature or your speed in km/h( USA) or mph
(Canada).
X Press the =or; button on the steer-
ing wheel to select the Sett. Sett.menu.
X Press the :or9 button to select the
Instrument Cluster
Instrument Cluster submenu.
X Press ato confirm.
X Press the :or9 button to select the
Permanent Display:
Permanent Display: function.
You will see the selected setting: Outside
Outside
Temperature Temperature orSpeedometer [km/h] Speedometer [km/h]/
Speedometer [mph]
Speedometer [mph].
X Press the abutton to save the setting.
i The speed is highlighted in km/h or in
mph conversely to your speedometer.
Lights Switching the daytime running lamps on/
off
X Press the =or; button on the steer-
ing wheel to select the Sett.
Sett.menu.
X Press the :or9 button to select the
Lights
Lights submenu. X
Press ato confirm.
X Press the :or9 button to select the
Daytime Running Lights
Daytime Running Lights function.
If the Daytime Running Lights
Daytime Running Lights function
has been switched on, the cone of light and
the W symbol in the multifunction dis-
play are shown in orange.
X Press the abutton to save the setting.
Further information on daytime running lights (Y page 100).
Vehicle Activating/deactivating the automatic
door locking mechanism
X Press the =or; button on the steer-
ing wheel to select the Sett. Sett.menu.
X Press the :or9 button to select the
Vehicle
Vehicle submenu.
X Press ato confirm.
X Press the :or9 button to select the
Automatic Door Lock
Automatic Door Lock function.
When the Automatic
Automatic Door
DoorLock
Lockfunction
is activated, the vehicle doors are displayed in orange in the multifunction display.
X Press the abutton to save the setting.
If you activate the Automatic Door Lock
Automatic Door Lock
function, the vehicle is centrally locked above
a speed of around 9 mph (15 km/h).
For further information on the automatic lock- ing feature, see (Y page 80).
Activating/deactivating the acoustic
locking verification signal
If you switch on the Acoustic AcousticLock Lockfunction,
an acoustic signal sounds when you lock the
vehicle.
X Press the =or; button on the steer-
ing wheel to select the Sett.
Sett.menu.
X Press the :or9 button to select the
Vehicle
Vehicle submenu.
X Press ato confirm. 198
Menus and submenusOn-board computer and displays
Page 201 of 338
X
Press the :or9 button to select the
Acoustic Lock
Acoustic Lock function.
If the Acoustic
Acoustic Lock
Lockfunction is activated,
the & symbol in the multifunction dis-
play lights up orange.
X Press the abutton to save the setting.
Restoring the factory settings X
Press the =or; button on the steer-
ing wheel to select the Sett.
Sett.menu.
X Press the :or9 button to select the
Factory Settings
Factory Settings submenu.
X Press ato confirm.
The Reset All Settings?
Reset All Settings? message
appears.
X Press the :or9 button to select No
No
or Yes
Yes.
X Press the abutton to confirm the selec-
tion.
If you have selected Yes
Yes, the multifunction
display shows a confirmation message.
For safety reasons, not all functions are reset. For safety reasons, the Daytime Running
Daytime Running
Lights Lights function in the Lights
Lightssubmenu is
only reset if the vehicle is stationary. Menus and submenus
199On-board computer and displays Z
Page 203 of 338
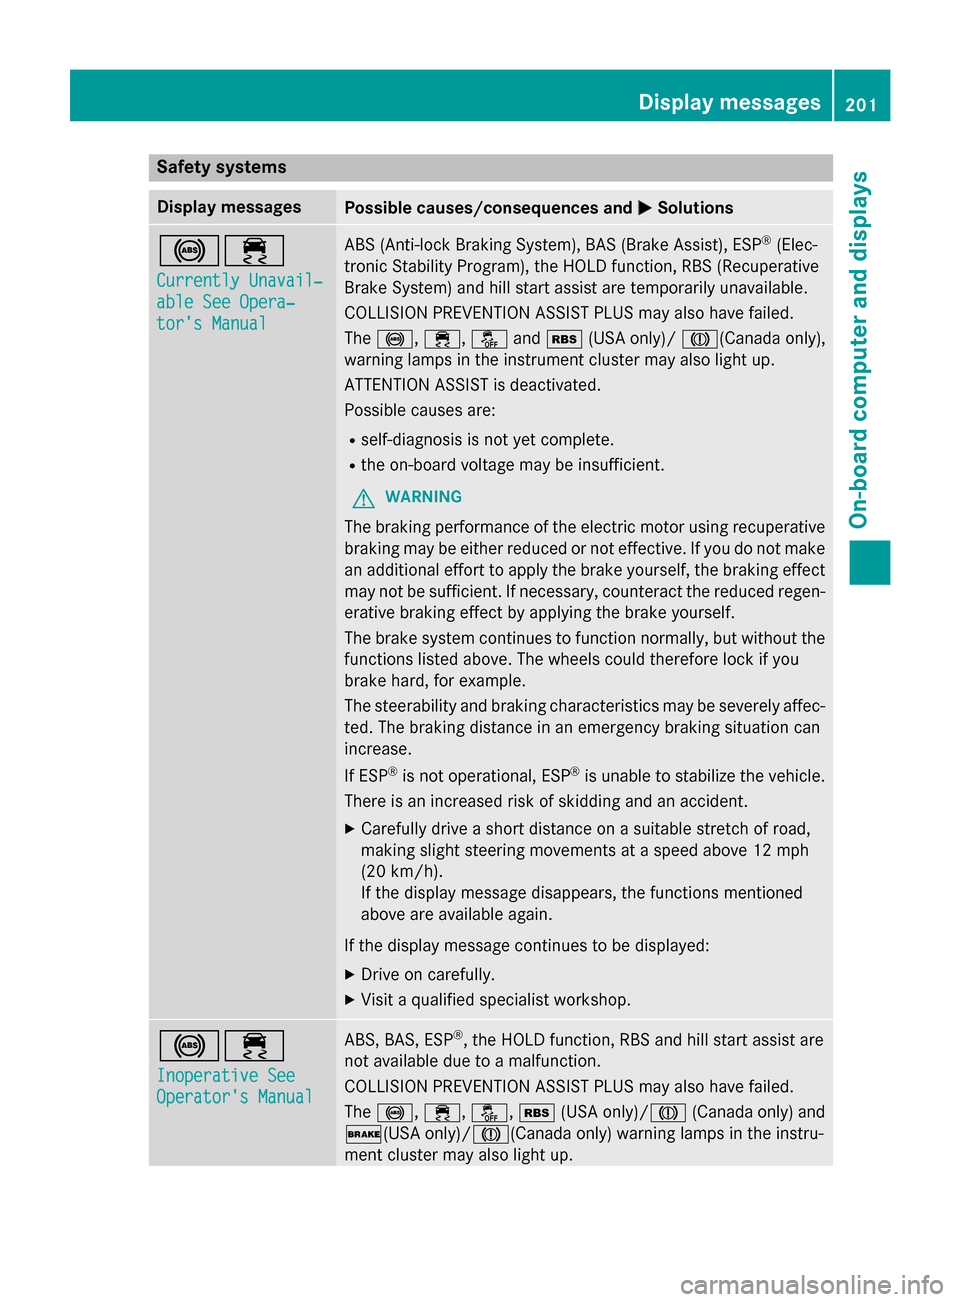
Safety systems
Display messages
Possible causes/consequences and
M
MSolutions !÷
Currently Unavail‐ Currently Unavail‐
able See Opera‐ able See Opera‐
tor's Manual tor's Manual ABS (Anti-lock Braking System), BAS (Brake Assist), ESP
®
(Elec-
tronic Stability Program), the HOLD function, RBS (Recuperative
Brake System) and hill start assist are temporarily unavailable.
COLLISION PREVENTION ASSIST PLUS may also have failed.
The !, ÷, åandé (USA only)/ J(Canada only),
warning lamps in the instrument cluster may also light up.
ATTENTION ASSIST is deactivated.
Possible causes are:
R self-diagnosis is not yet complete.
R the on-board voltage may be insufficient.
G WARNING
The braking performance of the electric motor using recuperative braking may be either reduced or not effective. If you do not make
an additional effort to apply the brake yourself, the braking effect may not be sufficient. If necessary, counteract the reduced regen-erative braking effect by applying the brake yourself.
The brake system continues to function normally, but without the functions listed above. The wheels could therefore lock if you
brake hard, for example.
The steerability and braking characteristics may be severely affec-
ted. The braking distance in an emergency braking situation can
increase.
If ESP ®
is not operational, ESP ®
is unable to stabilize the vehicle.
There is an increased risk of skidding and an accident.
X Carefully drive a short distance on a suitable stretch of road,
making slight steering movements at a speed above 12 mph
(20 km/h).
If the display message disappears, the functions mentioned
above are available again.
If the display message continues to be displayed: X Drive on carefully.
X Visit a qualified specialist workshop. !÷
Inoperative See Inoperative See
Operator's Manual Operator's Manual ABS, BAS, ESP
®
, the HOLD function, RBS and hill start assist are
not available due to a malfunction.
COLLISION PREVENTION ASSIST PLUS may also have failed.
The !, ÷, å,é(USA only)/ J(Canada only) and
$(USA only)/J(Canada only) warning lamps in the instru-
ment cluster may also light up. Display messages
201On-board computer and displays Z
Page 205 of 338
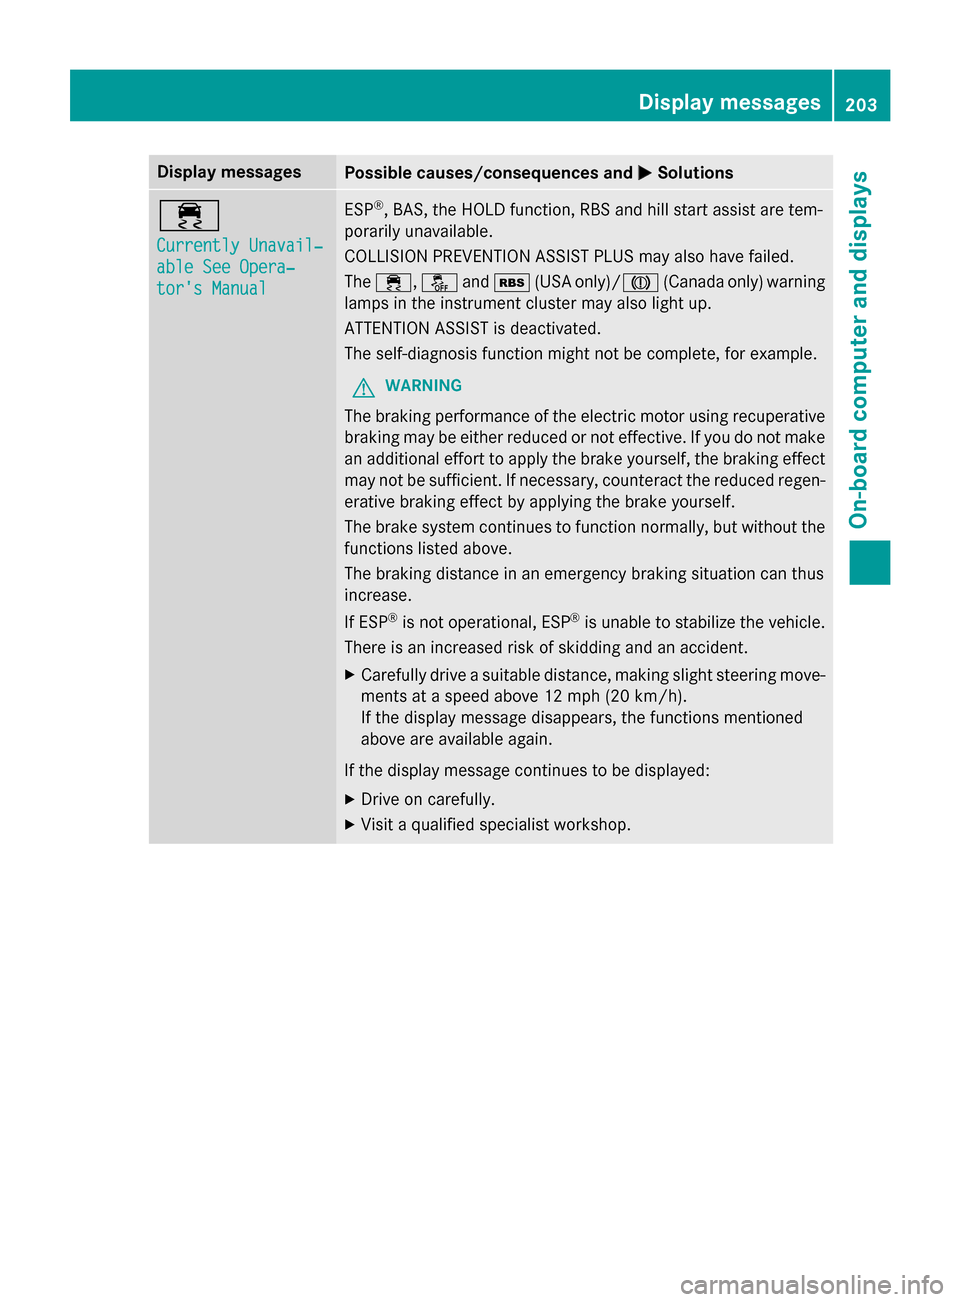
Display messages
Possible causes/consequences and
M
MSolutions ÷
Currently Unavail‐ Currently Unavail‐
able See Opera‐ able See Opera‐
tor's Manual tor's Manual ESP
®
, BAS, the HOLD function, RBS and hill start assist are tem-
porarily unavailable.
COLLISION PREVENTION ASSIST PLUS may also have failed.
The ÷, åandé (USA only)/ J(Canada only) warning
lamps in the instrument cluster may also light up.
ATTENTION ASSIST is deactivated.
The self-diagnosis function might not be complete, for example.
G WARNING
The braking performance of the electric motor using recuperative braking may be either reduced or not effective. If you do not make
an additional effort to apply the brake yourself, the braking effect may not be sufficient. If necessary, counteract the reduced regen-erative braking effect by applying the brake yourself.
The brake system continues to function normally, but without the functions listed above.
The braking distance in an emergency braking situation can thus
increase.
If ESP ®
is not operational, ESP ®
is unable to stabilize the vehicle.
There is an increased risk of skidding and an accident.
X Carefully drive a suitable distance, making slight steering move-
ments at a speed above 12 mph (20 km/h).
If the display message disappears, the functions mentioned
above are available again.
If the display message continues to be displayed: X Drive on carefully.
X Visit a qualified specialist workshop. Display
messages
203On-board computer and displays Z
Page 206 of 338
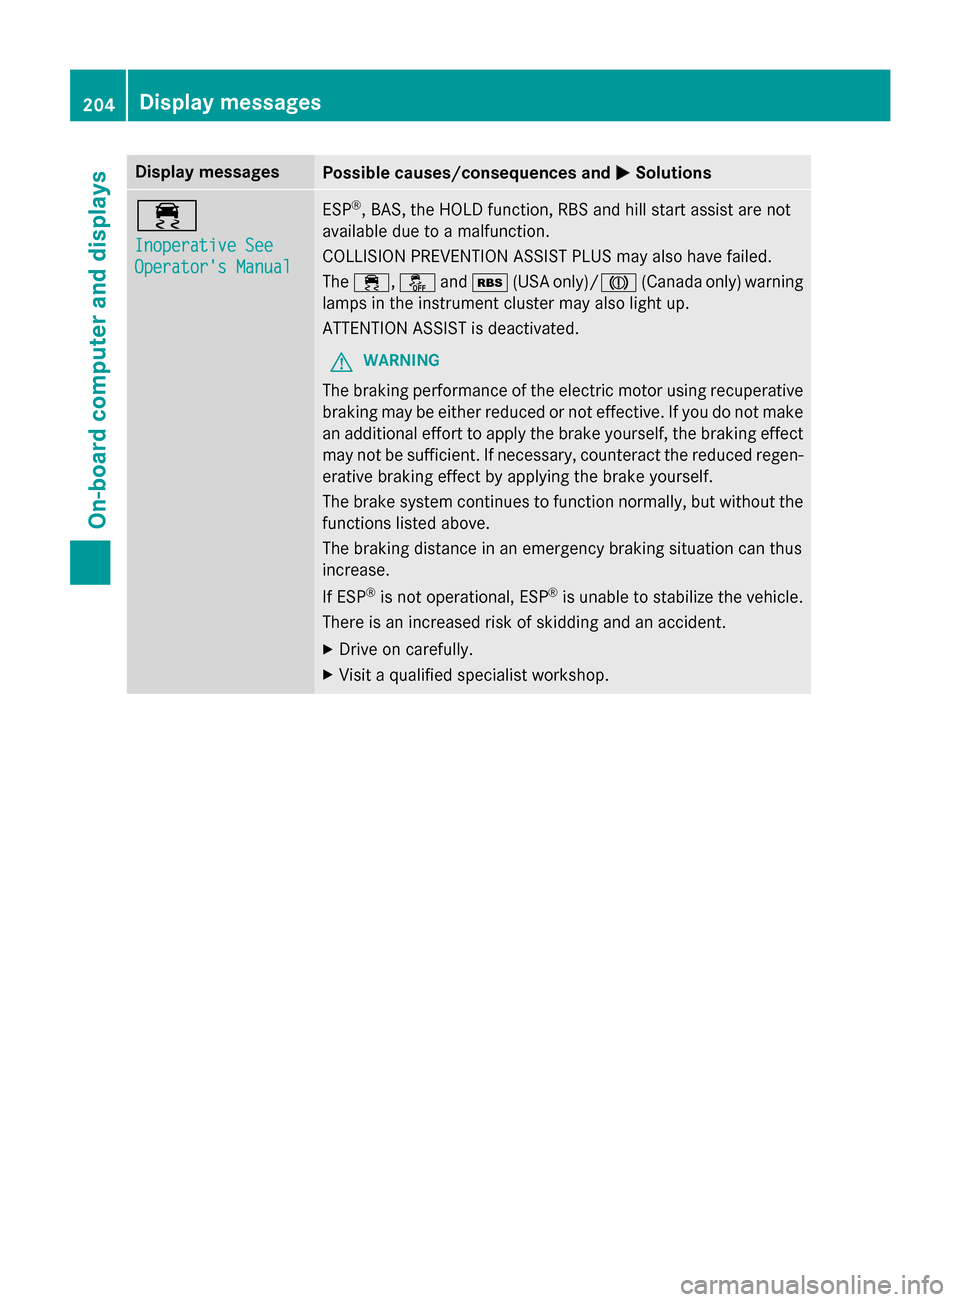
Display messages
Possible causes/consequences and
M
MSolutions ÷
Inoperative See Inoperative See
Operator's Manual Operator's Manual ESP
®
, BAS, the HOLD function, RBS and hill start assist are not
available due to a malfunction.
COLLISION PREVENTION ASSIST PLUS may also have failed.
The ÷, åandé (USA only)/ J(Canada only) warning
lamps in the instrument cluster may also light up.
ATTENTION ASSIST is deactivated.
G WARNING
The braking performance of the electric motor using recuperative braking may be either reduced or not effective. If you do not make
an additional effort to apply the brake yourself, the braking effect may not be sufficient. If necessary, counteract the reduced regen-erative braking effect by applying the brake yourself.
The brake system continues to function normally, but without the functions listed above.
The braking distance in an emergency braking situation can thus
increase.
If ESP ®
is not operational, ESP ®
is unable to stabilize the vehicle.
There is an increased risk of skidding and an accident.
X Drive on carefully.
X Visit a qualified specialist workshop. 204
Display
messagesOn-board computer and displays