2015 LEXUS LS600H ECO mode
[x] Cancel search: ECO modePage 112 of 620

1102. Instrument cluster
LS600hL_U(OM50E41U)
Press and hold the “DISP” button
after selecting the “EXIT” by
pressing the “DISP” button.
The display goes back to step .
■System check display
After turning the power switch to ON mode, “SYSTEM CHECK” is displayed while
system operation is checked.
■Tire inflation pressure
●It may take a few minutes to display the tire inflation pressure after the power switch
is turned to ON mode. It may also take a few minutes to display the tire inflation
pressure after inflation pr essure has been adjusted.
●“---” may be displayed if the tire position information cannot be determined due to
unfavorable radio wave conditions.
●Tire inflation pressure changes with temperature. The displayed values may also be
different from the values measured using a tire pressure gauge.
■When disconnecting and reconnecting 12-volt battery terminals
The following information data will be reset:
●Driving range
●Average fuel consumption
●Average fuel consumption after refueling
●Distance after refueling
●Elapsed time
●Average vehicle speed
■Liquid crystal display
Small spots or light spots may appear on th e display. This phenomenon is character-
istic of liquid crystal displays, and there is no problem continuing to use the display.
■Customization
Setting of available languages can be changed. (Custo mizable features P. 565)
5
1
Page 118 of 620

1162. Instrument cluster
LS600hL_U(OM50E41U)
■Trip information
If the “Energy Monitor” or “Past Record” screen is displayed, select
“Trip Information”.
Resetting the consumption
data
Fuel consumption in the past
15 minutes
Current fuel consumption
Regenerated energy in the
past 15 minutes
One symbol indicates 30 Wh. Up
to 5 symbols are shown.
Displays the average vehicle
speed since the hybrid system
was started.
Displays the elapsed time
since the hybrid system was
started.
Cruising range ( P. 117)
Average fuel consumption for the
past 15 minutes is divided by color
into past averages and averages
attained since the power switch
was last turned to ON mode. Use
the displayed average fuel con-
sumption as a reference.
The image is an example only, and
may vary slightly from actual condi-
tions.
1
2
3
4
5
6
7
Page 132 of 620

1303-2. Opening, closing and locking the doors and trunk
LS600hL_U(OM50E41U)
■Alarms and warning indicators
A combination of exterior and interior alar ms as well as warnings displayed on the
multi-information display is used to prev ent theft of the vehicle and unforeseeable
accidents resulting from erroneous operat ion. Perform the appropriate correction
procedure described in the following table:
AlarmSituationCorrection procedure
Exterior alarm sounds
once for 2 seconds.
An attempt was made to
lock the doors using the
entry function while the
electronic key was still
inside the passenger
compartment.
Retrieve the electronic
key from the passenger
compartment and lock
the doors again.
The trunk was closed with
the electronic key inside
and all doors were
locked.Retrieve the electronic
key from the trunk and
close the trunk lid.
Exterior alarm sounds
once for 60 seconds.
An attempt was made to
exit the vehicle and lock
the doors while carrying
the electronic key without
first turning the power
switch off.
Turn the power switch off
and lock the doors again.
Exterior alarm sounds
once for 5 seconds.An attempt was made to
lock the vehicle while a
door was open.Close all of the doors and
lock the doors again.
Interior alarm pings con-
tinuously.
The power switch was
turned to ACCESSORY
mode while the driver’s
door was open (or the
driver’s door was opened
while the power switch
was in ACCESSORY
mode).
Turn the power switch off
and close the driver’s
door.
The power switch was
turned off while the
driver’s door was open.
Close the driver’s door.
Page 137 of 620

1353-2. Opening, closing and locking the doors and trunk
3
Operation of each component
LS600hL_U(OM50E41U)
■Note for the entry function
●Even when the electronic key is within the effective range (detection areas), the
system may not operate properly in the following cases:
• The electronic key is too close to the window or outside door handle, near the
ground, or in a high place when the doors are locked or unlocked.
• The electronic key is near the ground or in a high place, or too close to the rear bumper center when the trunk is opened.
• The electronic key is on the instrument pa nel, rear package tray or floor, or in the
door pockets or glove box when the hybrid system is started or power switch
modes are changed.
●Do not leave the electronic key on top of the instrument panel or near the door
pockets when exiting the vehicle. Depending on the radio wave reception condi-
tions, it may be detected by the ante nna outside the cabin and the door will
become lockable from the outside, possibly trapping the electronic key inside the
vehicle.
●As long as the electronic key is within the effective range, the doors may be locked
or unlocked by anyone. However, only th e doors detecting the electronic key can
be used to unlock the vehicle.
●Even if the electronic key is not inside the vehicle, it may be possible to start the
hybrid system if the electronic key is near the window.
●The doors may unlock if a large amount of water splashes on the door handle, such
as in the rain or in a car wash when the electronic key is within the effective range.
(The doors will automatically be locked after approximately 60 seconds if the
doors are not opened and closed.)
●Gripping the door handle when wearing a glove may not unlock the door.
●If the wireless remote control is used to lock the doors when the electronic key is
near the vehicle, there is a possibility that the door may not be unlocked by the
entry function. (Use the wireless re mote control to unlock the doors.)
●A sudden approach to the effective rang e or door handle may prevent the doors
from being unlocked. In this case, return the door handle to the original position
and check that the doors unlock befo re pulling the door handle again.
Page 156 of 620

1543-2. Opening, closing and locking the doors and trunk
LS600hL_U(OM50E41U)
CAUTION
■Trunk easy closer
■Power trunk opener and closer
Observe the following precautions when operating the power trunk opener and
closer.
Failure to do so may cause serious injury.
●Check the safety of the surrounding area to make sure there are no obstacles or
anything that could cause any of your belongings to get caught.
●If anyone is in the vicinity, make sure they are safe and let them know that the
trunk is about to open or close.
●If the trunk closer switch is pressed whil e the trunk lid is opening during automatic
operation, the trunk lid stops opening. Take extra care when on an incline, as the
trunk lid may open or close suddenly.
●On an incline, the trunk lid may suddenly shut after it opens automatically. Make
sure the trunk lid is fully open and secure before using the trunk.
●In the following situations, the power trunk opener and closer may detect an
abnormality and automatic operation may be stopped. In this case, the trunk lid
has to be operated manually. Take extra care in this situation, as the stopped trunk
lid may suddenly shut, causing an accident.
• When the trunk lid contacts an obstacle
• When the 12-volt battery voltage suddenly drops, such as when the power switch is turned to ON mode or the hybrid system is started during automatic
operation
●Do not attach any accessories other than genuine Lexus parts to the trunk lid. The
power trunk opener and closer may not op erate, causing itself to malfunction, or
the trunk lid may suddenly shut again after it is opened.
In the event that the trunk lid is left slightly
open, the trunk easy closer will automatically
close it to the fully closed position. It takes
several seconds before the trunk easy closer
begins to operate. Be careful not to catch fin-
gers or anything else in the trunk lid, as this
may cause bone fractures or other serious
injuries.
Page 170 of 620

1683-3. Adjusting the seats
LS600hL_U(OM50E41U)
■Seat return function linked to the door opening operation
●Operating conditions
The power switch is in ON mode.
●Canceling operation partway through
During the seat return operation, performing either of the following actions cancels
the operation:
• Pressing the “SET”, “M” or “C” button ( P. 1 7 7 )
• Pressing any of the seat adjustment switches
●Seat return operation after turning the power switch off
The seat will automatically return to the neutral position if the door is opened within
approximately 45 seconds of the power switch being turned off.
■Relaxation mode (relaxation seat)
●Operating conditions
Relaxation mode can be entered when the power switch is in ON mode. However,
in the following situations, relaxation mode cannot be entered even when the
switch is operated:
• The weight of an occupant or heavy obje ct etc. is detected on the front passen-
ger's seat.
• The front passenger's se at belt is fastened.
• The front passenger's door is open. (The front seat will not move forward.)
●Operation after turning the power switch off
The rear seat can be returned to the neutra l position as long as the relaxation mode
switch is operated within approximately 45 seconds of the power switch being
turned off.
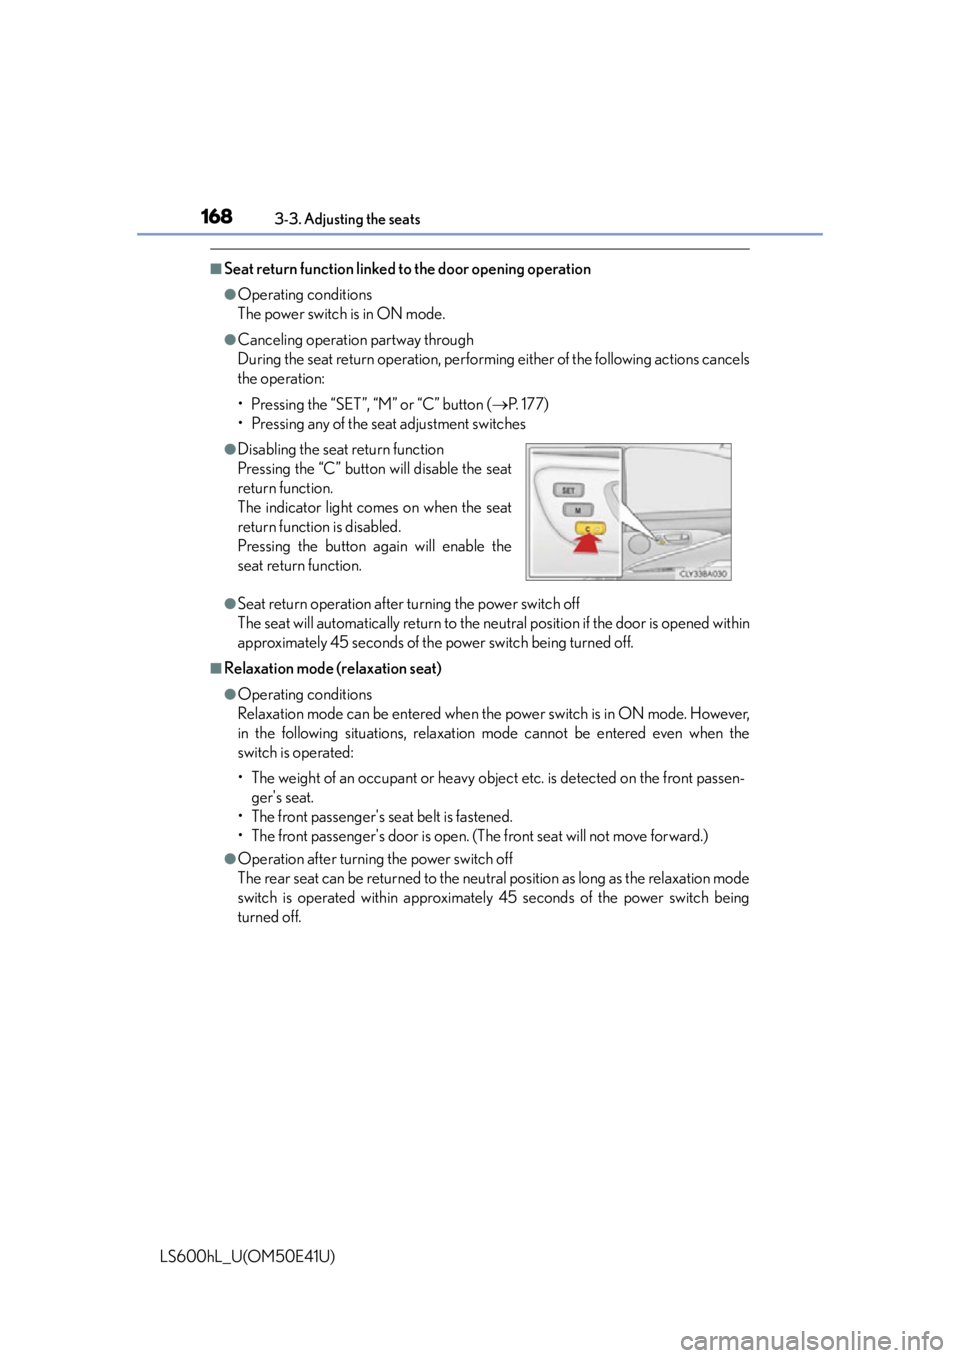
●Disabling the seat return function
Pressing the “C” button will disable the seat
return function.
The indicator light comes on when the seat
return function is disabled.
Pressing the button again will enable the
seat return function.
Page 174 of 620

1723-3. Adjusting the seats
LS600hL_U(OM50E41U)
Your preferred driving position (the position of the driver's seat, steering
wheel, outside rear view mirrors and height of seat belt shoulder anchor)
can be recorded and recalled by pressing a switch.
Three different driving positions can be recorded into memory.
■Recording procedure
Check that the shift lever is in P.
Turn the power switch to ON mode.
Adjust the driver’s seat, steering wheel, outside rear view mirrors and
seat belt shoulder anchor height to the desired positions.
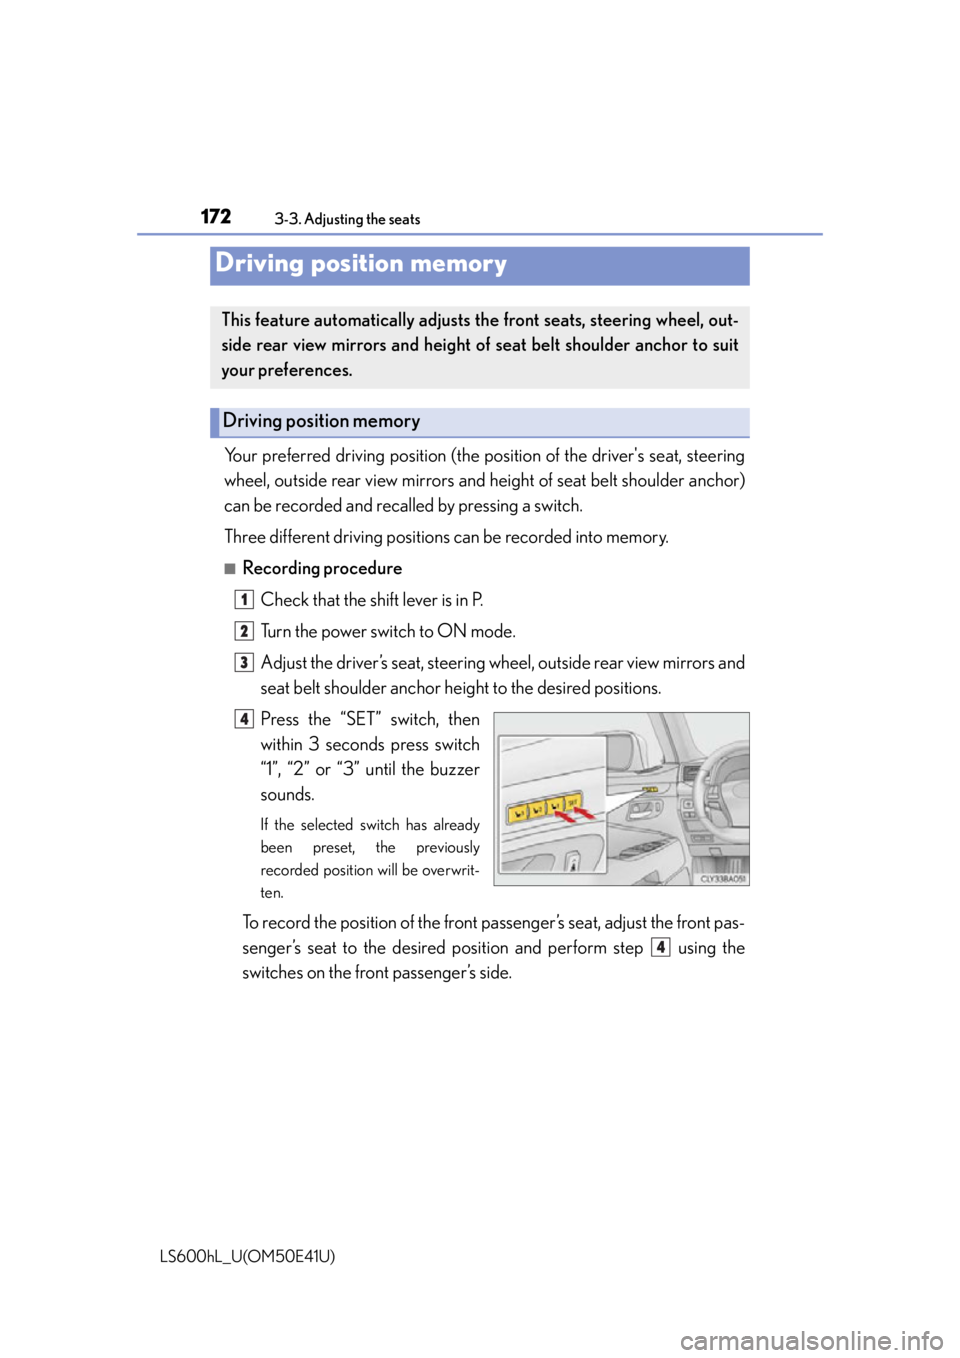
Press the “SET” switch, then
within 3 seconds press switch
“1”, “2” or “3” until the buzzer
sounds.
If the selected switch has already
been preset, the previously
recorded position will be overwrit-
ten.
To record the position of the front pa ssenger’s seat, adjust the front pas-
senger’s seat to the desired posi tion and perform step using the
switches on the front passenger’s side.
Driving position memory
This feature automatically adjusts the front seats, steering wheel, out-
side rear view mirrors and height of seat belt shoulder anchor to suit
your preferences.
Driving position memory
1
2
3
4
4
Page 175 of 620

1733-3. Adjusting the seats
3
Operation of each component
LS600hL_U(OM50E41U)
■Recall procedureCheck that the shift lever is in P.
Turn the power switch to ON mode.
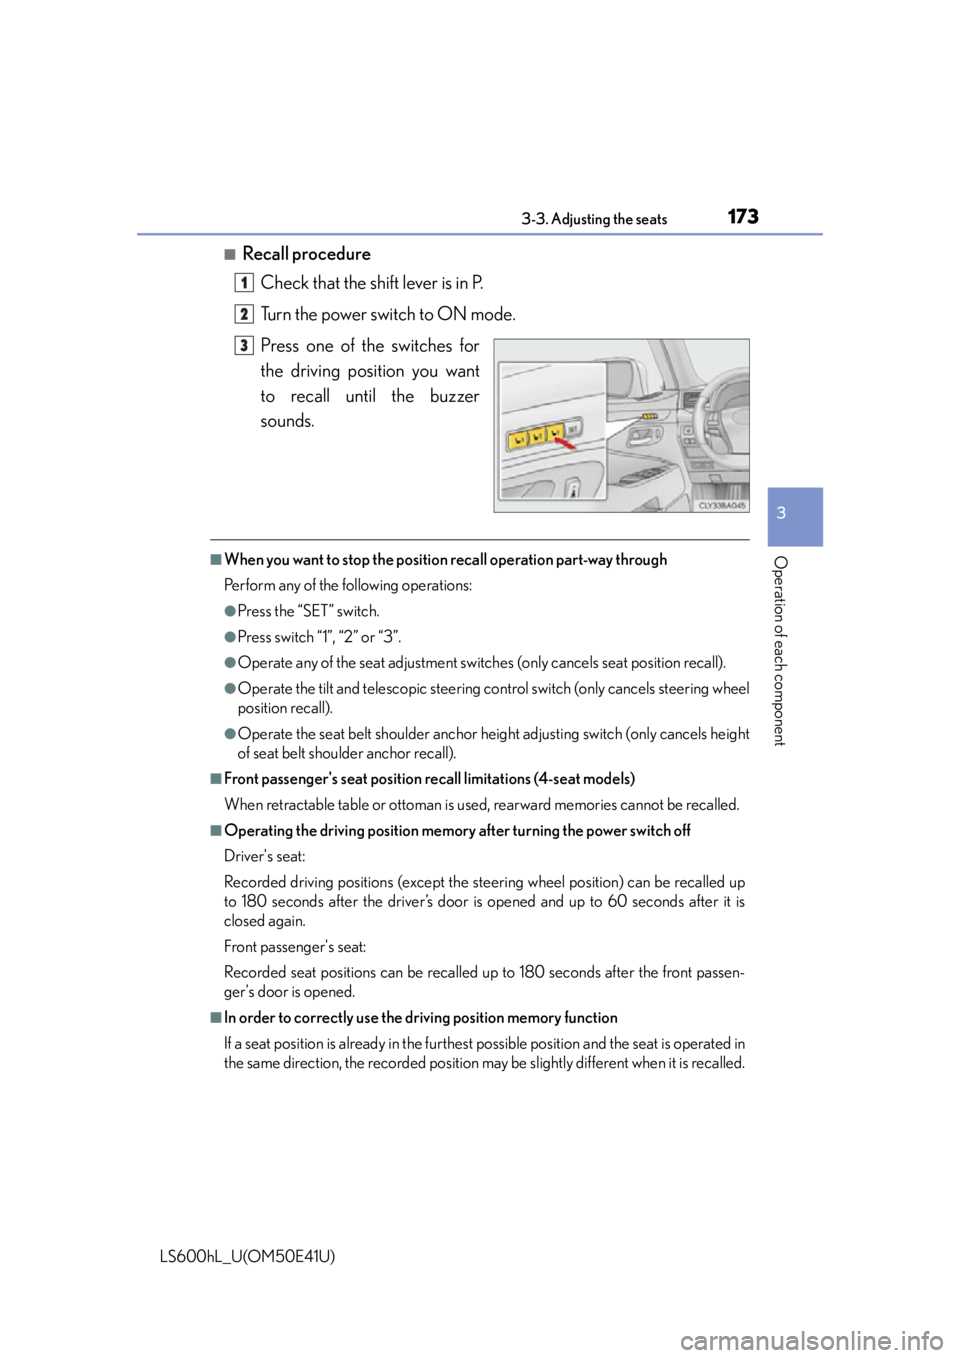
Press one of the switches for
the driving position you want
to recall until the buzzer
sounds.
■When you want to stop the position recall operation part-way through
Perform any of the following operations:
●Press the “SET” switch.
●Press switch “1”, “2” or “3”.
●Operate any of the seat adju stment switches (only cancels seat position recall).
●Operate the tilt and telescopic steering co ntrol switch (only cancels steering wheel
position recall).
●Operate the seat belt shoulder anchor he ight adjusting switch (only cancels height
of seat belt shoulder anchor recall).
■Front passenger's seat position recall limitations (4-seat models)
When retractable table or ottoman is used, rearward memories cannot be recalled.
■Operating the driving position memory after turning the power switch off
Driver's seat:
Recorded driving positions (except the steering wheel position) can be recalled up
to 180 seconds after the driver’s door is opened and up to 60 seconds after it is
closed again.
Front passenger's seat:
Recorded seat positions can be recalled up to 180 seconds after the front passen-
ger's door is opened.
■In order to correctly use the dr iving position memory function
If a seat position is already in the furthest possible position and the seat is operated in
the same direction, the recorded position ma y be slightly different when it is recalled.
1
2
3