Page 113 of 220

• SiriusXM services require subscriptions, sold separately after the 12-month trial
included with the new vehicle purchase.If you decide to continue your service at the
end of your trial subscription, the plan you choose will automatically renew and bill at
then-current rates until you call SiriusXM at 1-866-635-2349 for U.S. residents and
1-888-539-7474 for Canadian residents to cancel. See SiriusXM Customer Agreement
for complete terms at www.siriusxm.com for U.S. residents and www.siriusxm.ca for
Canadian residents.All fees and programming subject to change. Our satellite
service is available only to those at least 18 and older in the 48 contiguous USA
and D.C. Our Sirius satellite service is also available in PR (with coverage
limitations). Our Internet radio service is available throughout our satellite service
area and in AK and HI. © 2014 Sirius XM Radio Inc. Sirius, XM and all related
marks and logos are trademarks of Sirius XM Radio Inc.
MEDIA HUB – PLAYING iPod®/USB/MP3 DEVICES
There are many ways to play music from iPod®/MP3 players or USB devices through
your vehicle's sound system.
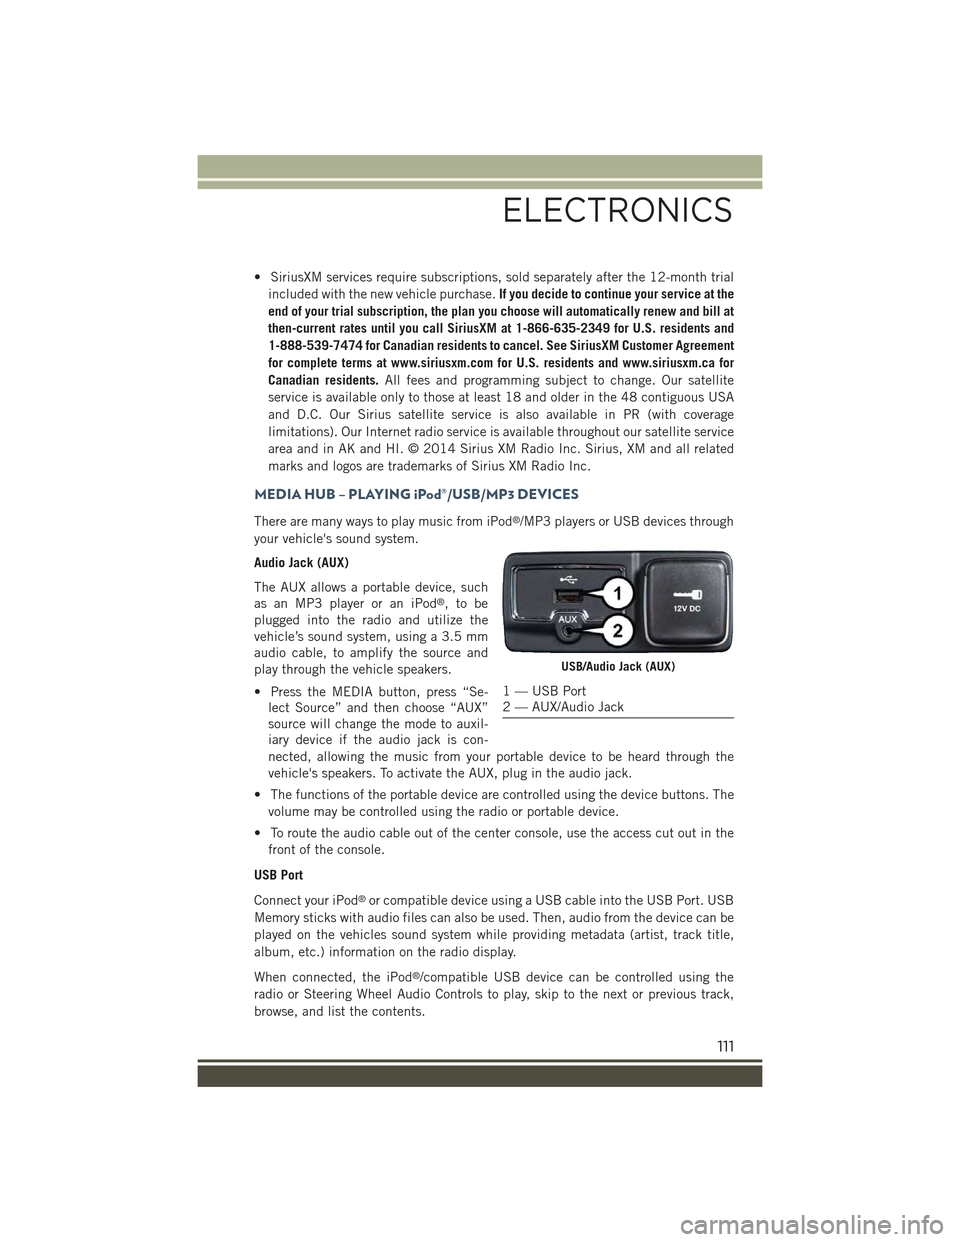
Audio Jack (AUX)
The AUX allows a portable device, such
as an MP3 player or an iPod®,tobe
plugged into the radio and utilize the
vehicle’s sound system, using a 3.5 mm
audio cable, to amplify the source and
play through the vehicle speakers.
• Press the MEDIA button, press “Se-
lect Source” and then choose “AUX”
source will change the mode to auxil-
iary device if the audio jack is con-
nected, allowing the music from your portable device to be heard through the
vehicle's speakers. To activate the AUX, plug in the audio jack.
• The functions of the portable device are controlled using the device buttons. The
volume may be controlled using the radio or portable device.
• To route the audio cable out of the center console, use the access cut out in the
front of the console.
USB Port
Connect your iPod®or compatible device using a USB cable into the USB Port. USB
Memory sticks with audio files can also be used. Then, audio from the device can be
played on the vehicles sound system while providing metadata (artist, track title,
album, etc.) information on the radio display.
When connected, the iPod®/compatible USB device can be controlled using the
radio or Steering Wheel Audio Controls to play, skip to the next or previous track,
browse, and list the contents.
USB/Audio Jack (AUX)
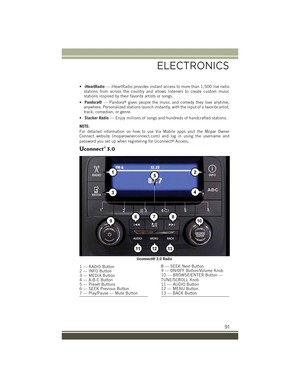
1 — USB Port2 — AUX/Audio Jack
ELECTRONICS
111
Page 114 of 220

The USB device battery charges when plugged into the USB port (if supported by the
specific device).
• To route the USB/iPod®cable out of the center console, use the access cut out.
NOTE:
• When connecting your iPod®device for the first time, the system may take several
minutes to read your music, depending on the number of files. For example, the
system will take approximately five minutes for every 1,000 songs loaded on the
device. Also during the reading process, the Shuffle and Browse functions will be
disabled. This process ensures the full use of your iPod®features and only
happens the first time it is connected. After the first time, the reading process of
your iPod®will take considerably less time unless changes are made or new songs
are added to the play list.
• The USB port supports certain Mini, Classic, Nano, Touch, and iPhone®devices.
The USB port also supports playing music from compatible external USB Mass
Storage Class memory devices. Some iPod®software versions may not fully
support the USB port features. Please visit Apple’s website for iPod®software
updates.
Bluetooth® Streaming Audio
If equipped with Uconnect®Voice Command, your Bluetooth®-equipped iPod®
devices, cell phones or other media players, may also be able to stream music to your
vehicle's sound system. Your connected device must be Bluetooth®-compatible, and
paired with your system (see Uconnect®Phone for pairing instructions). You can
access the music from your connected Bluetooth®device by pressing the
“Bluetooth®” button on the touchscreen while in Media mode.
Uconnect®6.5AN Media Hub (USB,AUX Ports)Media Hub (SD,USB, AUX Ports)Remote USB Port(Fully Functional)
S- O
S = Standard Equipment
O = Optional Equipment
ELECTRONICS
112
Page 115 of 220
• The iPod®/CD/AUX controls are accessed by pressing the desired button on the
touchscreen displayed on the side of the screen and choosing between AUX, iPod®
or Bluetooth®.
NOTE:
Uconnect®will usually automatically switch to the appropriate mode when some-
thing is first connected or inserted into the system.
iPod®/CD/AUX Controls
1 — Repeat Music Track2 — Shuffle Music Tracks3 — Music Track Information
4 — Currently Queue5 — Browse Music6 — Music Source
ELECTRONICS
113
Page 116 of 220
Uconnect® 6.5AN NAVIGATION
• Press the NAV button to access the Navigation feature.
Changing The Navigation Voice Prompt Volume
1. Press the "Settings" button on the touchscreen from the Nav Main Menu.
2. In the Settings menu, press the “Guidance” button on the touchscreen.
3. In the Guidance menu, adjust the Nav Volume by pressing the “+” or “–” buttons
on the touchscreen.
Finding Points Of Interest
• From the main Navigation menu, press the “Where To?” button on the touch-
screen, then press the “Point of Interest” button on the touchscreen.
• Select a Category and then a subcategory, if necessary.
• Select your destination and press the “Yes” button on the touchscreen.
Uconnect® 6.5AN Navigation
1 — Find A Destination2 — View Map3 — View Information4 — Emergency Assistance
5 — Repeat Route Guidance Prompt6 — Detour Route7 — Stop Route8 — Navigation Settings
ELECTRONICS
114
Page 117 of 220

Finding A Place By Spelling The Name
• From the Main Navigation Menu press the “Where to?” button on the touchscreen,
press the “Points of Interest” button on the touchscreen and then press the “Spell
Name” button on the touchscreen.
• Enter the name of your destination.
• Press the “List” button on the touchscreen.
• Select your destination and press the “Yes” button on the touchscreen.
Entering A Destination Address
• From the main Navigation menu press the “Where To?” button on the touch-
screen, then press the “Address” button on the touchscreen.
• Follow the on-screen prompts (country, state/province, city, street) to enter the
address and press the “Yes” button on the touchscreen.
• Destination entry is not available while your vehicle is in motion. However, you can
also use Voice Command to enter an address while moving. See Voice Command
Tips for more information.
Setting Your Home Location
• Press the NAV button to access the Navigation system and the Main Navigation
menu.
• Press the “Where To?” button on the touchscreen, then press the “Go Home”
button on the touchscreen.
• You may enter your address directly, use your current location as your home
address, or choose from recently found locations.
• To delete your Home location (or other saved locations) so you can save a new
Home location, press the “Where To?” button on the touchscreen from the Main
Navigation menu, then press the “Go Home” button on the touchscreen, and in the
Yes screen press the “Options” button on the touchscreen. In the Options menu
press Clear Home. Set a new Home location by following the previous instructions.
Go Home
A Home location must be saved in the system.
• From the Main Navigation menu, press the “Where To?” button on the touch-
screen, then press the “Go Home” button on the touchscreen.
• Your route is marked with a blue line on the map. If you depart from the original
route, your route is recalculated. A speed limit icon could appear as you travel on
major roadways.
ELECTRONICS
115
Page 118 of 220
Adding A Stop
To add a stop you must be navigating a route:
• Press the “Menu” button on the touchscreen to return to the Main Navigation
menu.
• Press the “Where To?” button on the touchscreen, then search for the extra stop.
When another location has been selected, you can choose to cancel your previous
route, add as the first destination or add as the last destination.
• Press the desired selection and press the “Yes” button on the touchscreen.
Taking A Detour
To take a detour you must be navigating a route:
• Press the “Detour” button on the touchscreen.
NOTE:
If the route you are currently taking is the only reasonable option, the device might
not calculate a detour.
• For more information, see your Uconnect®6.5AN Owner’s Manual Supplement.
Navigation Map
1 — Distance To Next Turn2 — Next Turn Street3 — Estimated Time Of Arrival4 — Your Location
5 — Navigation Routing Options6 — Current Street Location7 — Navigation Main Menu8 — Zoom In/Out
ELECTRONICS
116
Page 119 of 220
Uconnect® 6.5A/6.5AN VOICE RECOGNITION QUICK TIPS
Introducing Uconnect®
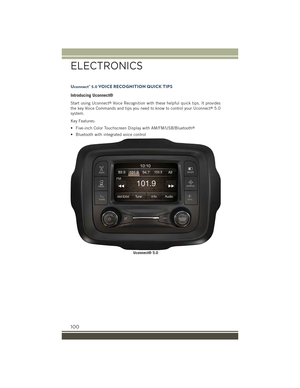
Start using Uconnect®Voice Recognition with these helpful quick tips. It provides
the key Voice Commands and tips you need to know to control your Uconnect®6.5AN
system.
Get Started
1. VisitUconnectPhone.comto check mobile device and feature compatibility and to
find phone pairing instructions.
2. Reduce background noise. Wind and passenger conversations are examples of
noise that may impact recognition.
3. Speak clearly at a normal pace and volume while facing straight ahead. The
microphone is positioned on the rearview mirror and aimed at the driver.
Uconnect® 6.5AN
ELECTRONICS
117
Page 120 of 220
4. Each time you give a Voice Command, you must first press either the VR or Phone
button, wait untilafterthe beep, then say your Voice Command.
5. You can interrupt the help message or system prompts by pressing the VR or
Phone button and saying a Voice Command from current category.
All you need to control your Uconnect®system with your voice are the buttons on your
steering wheel.
Uconnect® VR/Phone Buttons
1 — Push To Initiate Or To Answer A Phone Call, Send Or Receive A Text2 — Push For Voice Recognition (VR)3 — Push To End Call
ELECTRONICS
118