Page 65 of 220

WARNING!
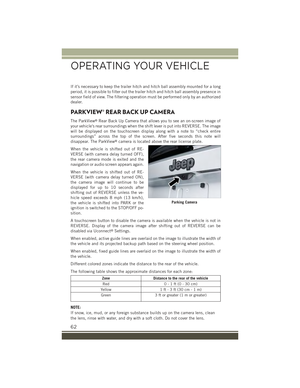
Drivers must be careful when backing up even when using the ParkView®Rear
Back Up Camera. Always check carefully behind your vehicle, and be sure to
check for pedestrians, animals, other vehicles, obstructions, or blind spots before
backing up. You are responsible for the safety of your surroundings and must
continue to pay attention while backing up. Failure to do so can result in serious
injury or death.
CAUTION!
• To avoid vehicle damage, ParkView®should only be used as a parking aid. The
ParkView®camera is unable to view every obstacle or object in your drive path.
• To avoid vehicle damage, the vehicle must be driven slowly when using
ParkView®to be able to stop in time when an obstacle is seen. It is
recommended that the driver look frequently over his/her shoulder when using
ParkView®.
RETRACTABLE ROOF (MY SKY)
Retractable Roof
The roof consists of front and rear panels that can be removed independently.
On some vehicles the front panel can be power operated refer to “Power My Sky” in
this section.
CAUTION!
The panels are able to withstand the snow. However, it is recommended that you
remove excessive layers of snow that have accumulated or damage to the panels
may occur.
OPERATING YOUR VEHICLE
63
Page 66 of 220

Power My Sky — If Equipped
Open/Close The Front Panel
The power My Sky switches are located on the overhead console. The switches are
used to open and close the front panel.
To retract the front panel to the open position, push the Open/Close button.
From the fully open position, pull the Open/Close switch: the front panel will close
completely.
Venting The Front Panel
To vent the front panel push and release the vent switch.
During the vent operation any push on the Open/Close switch will stop the closing of
the panel.
NOTE:
If the My Sky is in open position, the vent switch must be held until the panel vents.
Anti-Pinch Feature
The front panel of the retractable roof is equipped with a anti-pinch safety system
that is able to detect the presence of an obstacle during the opening and closing
motion of the panel.
When this event occurs, the front panel stops and reverses immediately.
NOTE:
With both panels removed the retractable roof cannot be opened or closed.
Removing And Installing Panels
NOTE:
• Remove the panels only when the vehicle is stationary.
• The rear panel can be removed only when the front panel is completely closed or
removed.
OPERATING YOUR VEHICLE
64
Page 67 of 220
Removing Panels
1. Front panel must be in the closed position to remove panel.
2. From inside of the passenger compartment, insert the supplied key into the latch
key hole.
Supplied Key
Latch Key Hole
OPERATING YOUR VEHICLE
65
Page 68 of 220
3. Rotate and keep the key turned to the symbol to release the lock and pull thepanel handle down and away from the stowed position, unlocking the panel.
Rotating Supplied Key
Unlocking Panel Handle
OPERATING YOUR VEHICLE
66
Page 69 of 220
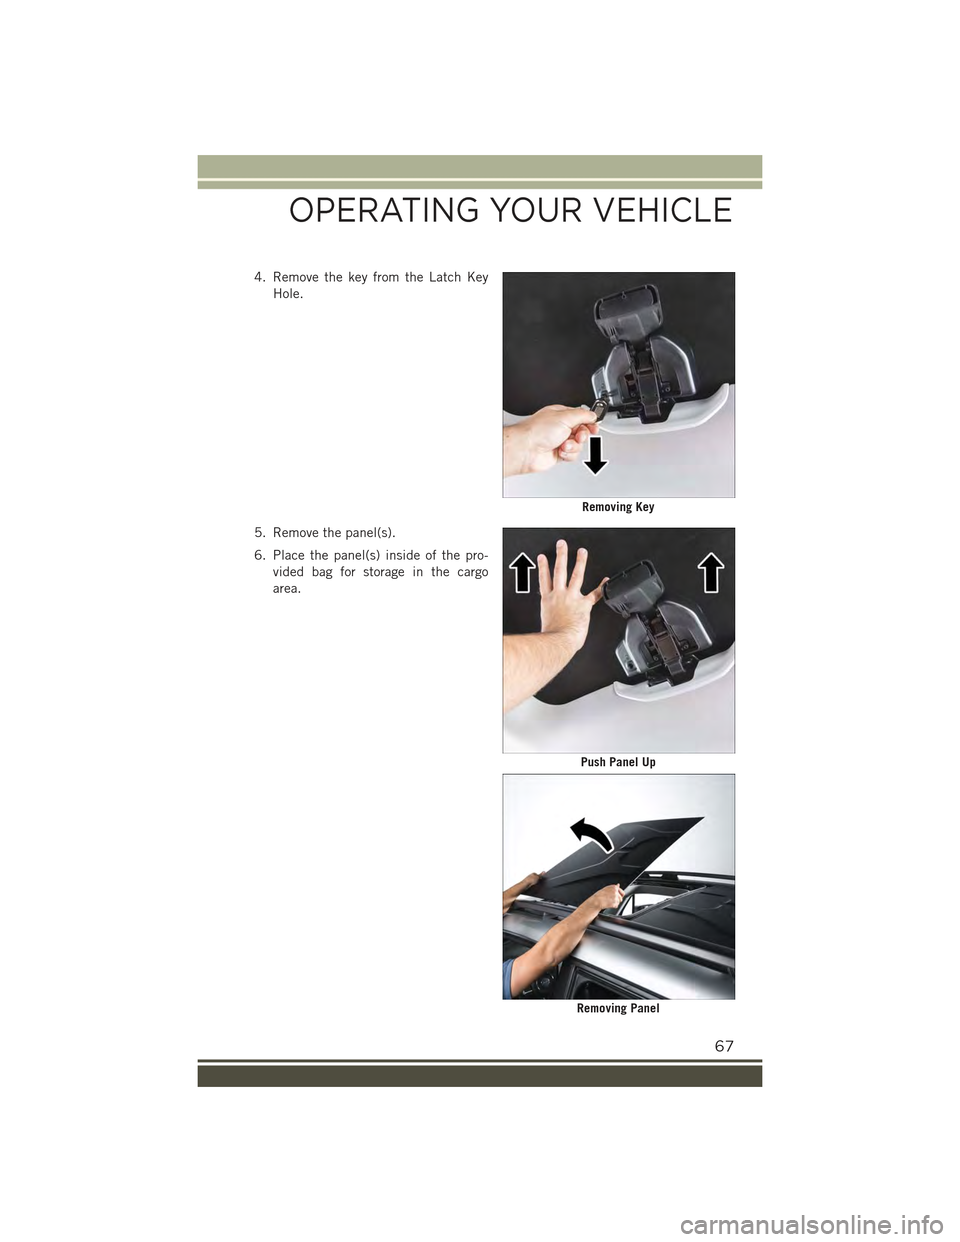
4. Remove the key from the Latch Key
Hole.
5. Remove the panel(s).
6. Place the panel(s) inside of the pro-
vided bag for storage in the cargo
area.
Removing Key
Push Panel Up
Removing Panel
OPERATING YOUR VEHICLE
67
Page 70 of 220
Installing Panel
1. From outside the vehicle, place the
panel(s) on the slides.
2. Gently slide the front panel forward,
or the rear panel backwards.
Installing Panel
Installing Panel
OPERATING YOUR VEHICLE
68
Page 71 of 220
3. Align the colored guide tabs to ensure the panel(s) close properly. Front panel is
labeled with yellow guide tabs. Rear panel is labeled with blue guide tabs.
4. From inside the vehicle, pull the handle down and toward the stowed position,
locking it into place.
Guide Tabs
Closing Panel Handle
OPERATING YOUR VEHICLE
69
Page 72 of 220

5. Make sure that the panel has been properly refitted. From inside the passenger
compartment, push upward on the panel from the bottom, in order to verify that
it is properly latched to the clamping locks.
Bag For Housing Panels — If Equipped
After the panels have been removed, store the roof panels inside of the bag located
inside the storage compartment.
NOTE:
It is recommended to do this procedure outside of the car.
For proper housing, proceed as follows:
1. Open the Roof Panel Bag and lift the panel dividers toward the outside.
2. Place the first panel into the bag, fold the panel dividers and place the second
panel into the bag.
3. Close the bag and place it on the inside the cargo area.
4. Open the clips provided in the bag. Anchor them firmly at the tie-down hooks
located in the cargo area.
NOTE:
• Do not load objects that weigh over 165 pounds (75 kg) on top of the roof panel
bag.
• The bag is washable. Refer to the documentation that is supplied with the bag.
Panel Locked
OPERATING YOUR VEHICLE
70